Multi-Item Mixed Package Batch - Print Shipping Labels
I. Definition
After a batch (wave) picking task is completed, proceed to the packaging stage to print shipping labels. Options include:
Scanning individual product labels to print labels one by one.
Scanning sorting box numbers to print labels one by one.
Batch printing shipping labels.
Important Notes: The scanning and packaging stage requires the print plugin to be installed.
Print Plugin Download: https://download.jfwms.com/print/plugin/JFPrinter.msi
A printable "Enter Code" can be downloaded to confirm label printing individually via scanning.
Enter Code Download: https://download.jfwms.com/product/temp/setting/file/1/20240305052832/b713a3f0d1e571c23ef74485a6b3288f.pdf
II. Operating Steps
Method 1: Print Labels Individually by Scanning Product Labels
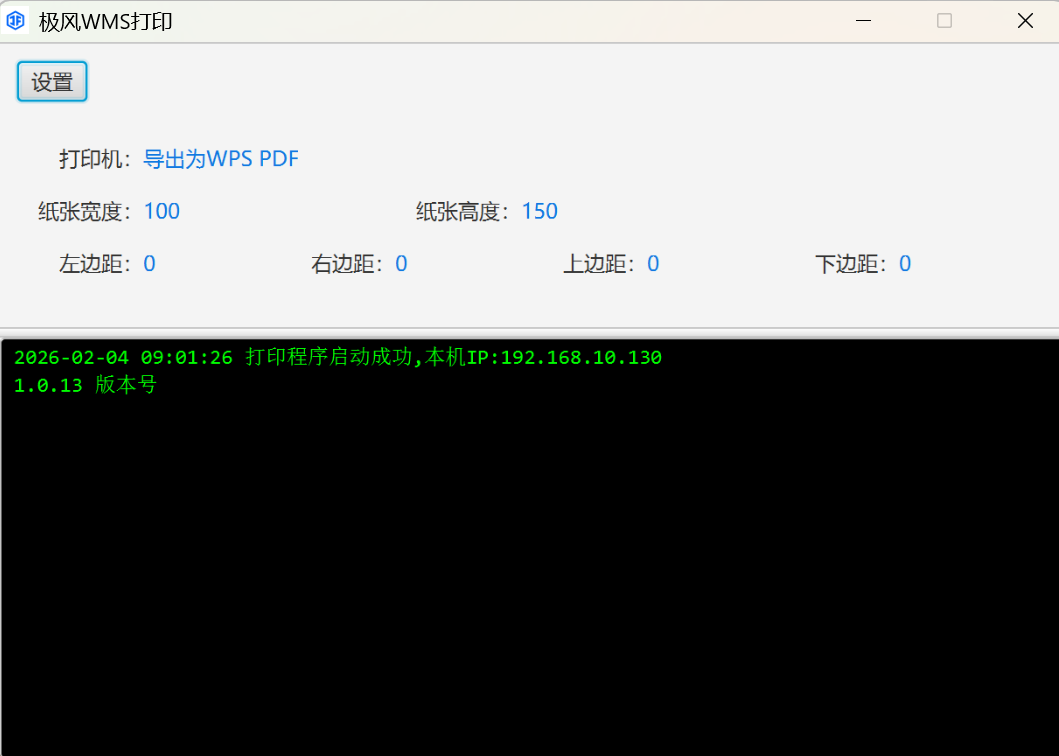
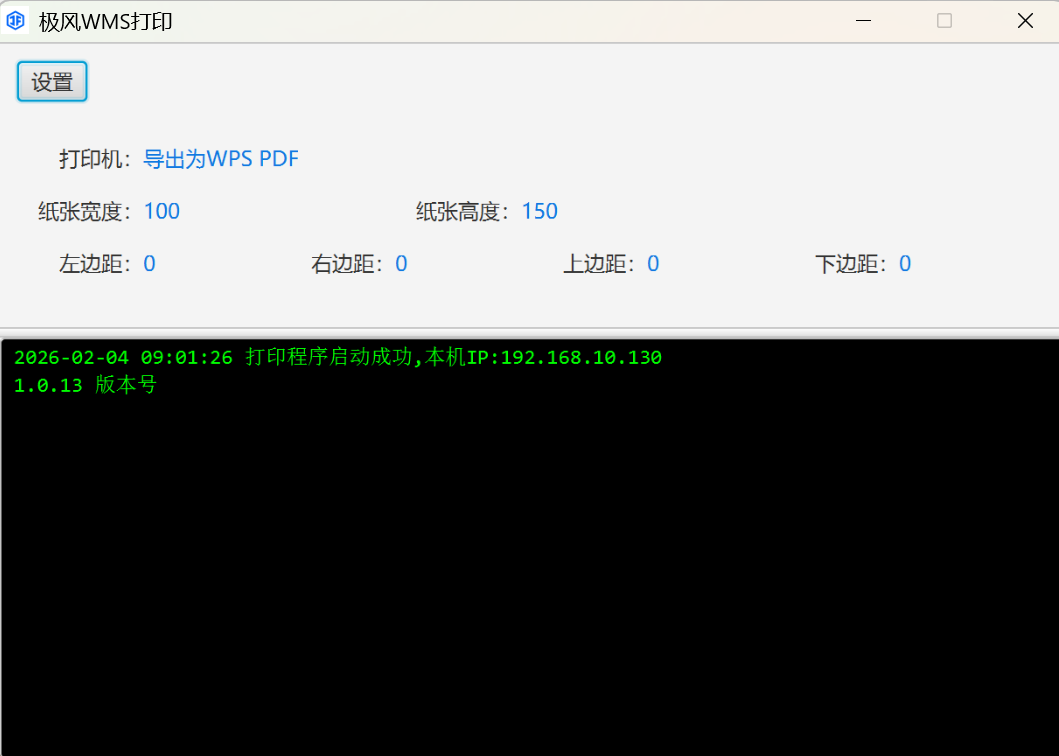
Step 1: After installing the print plugin, double-click to launch it.
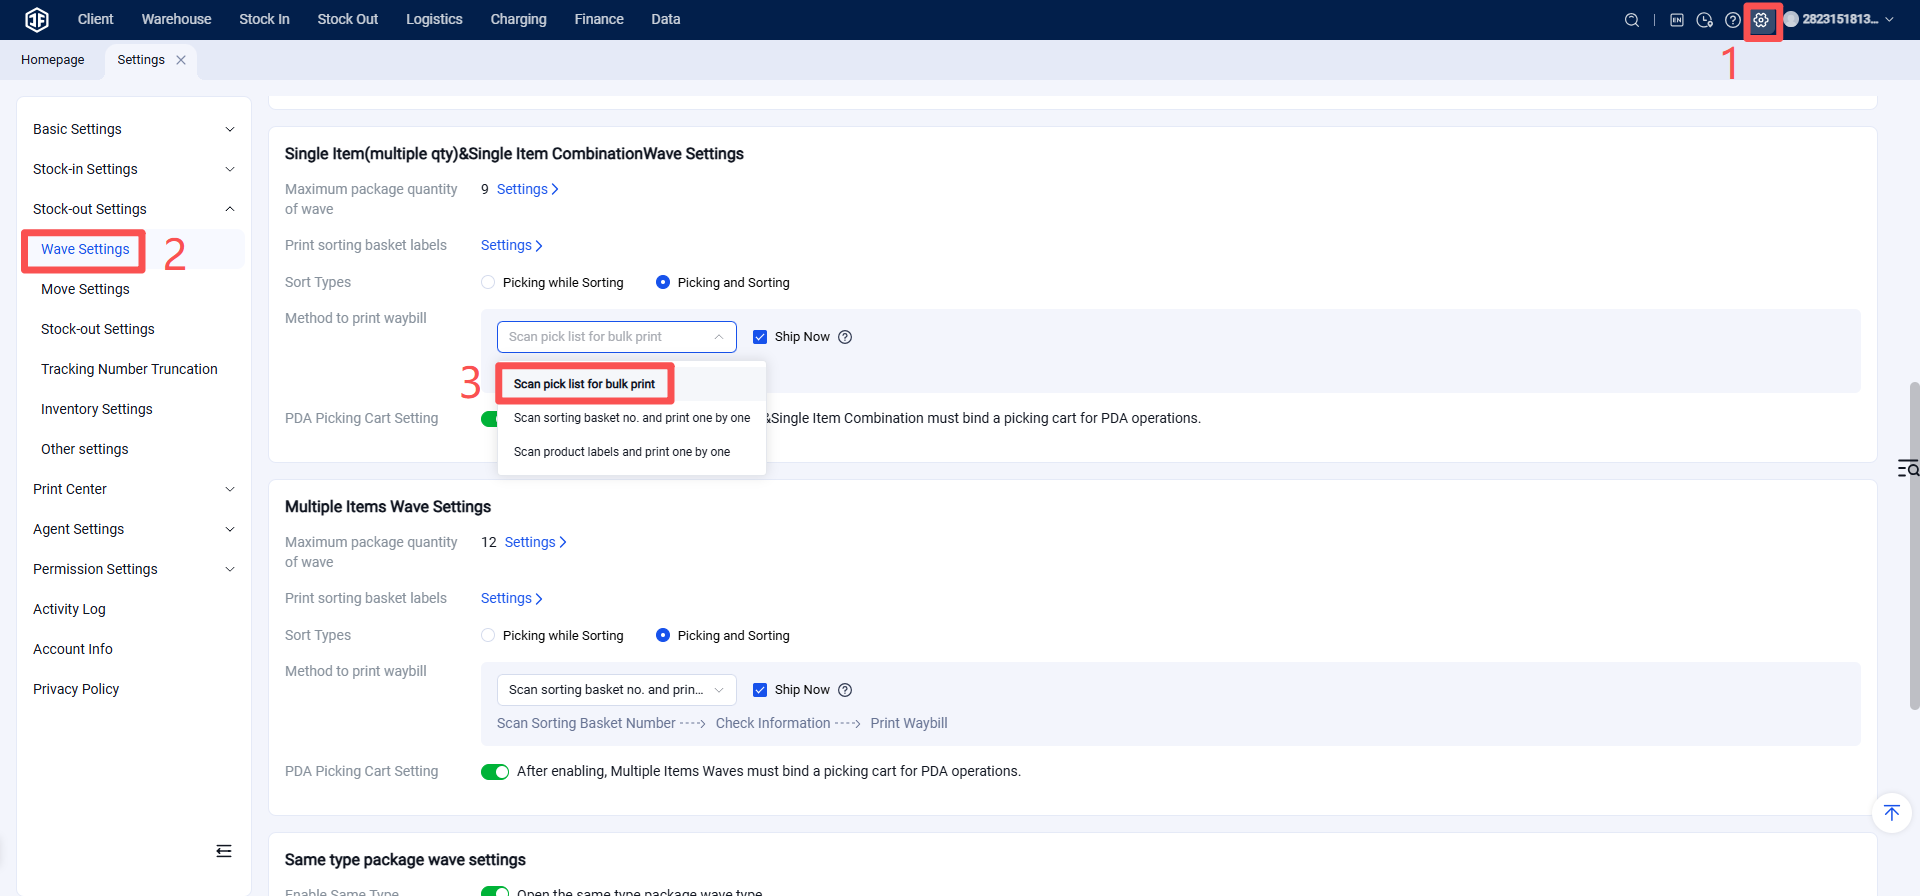
Step 2: Configure the Printing Method in Batch Settings
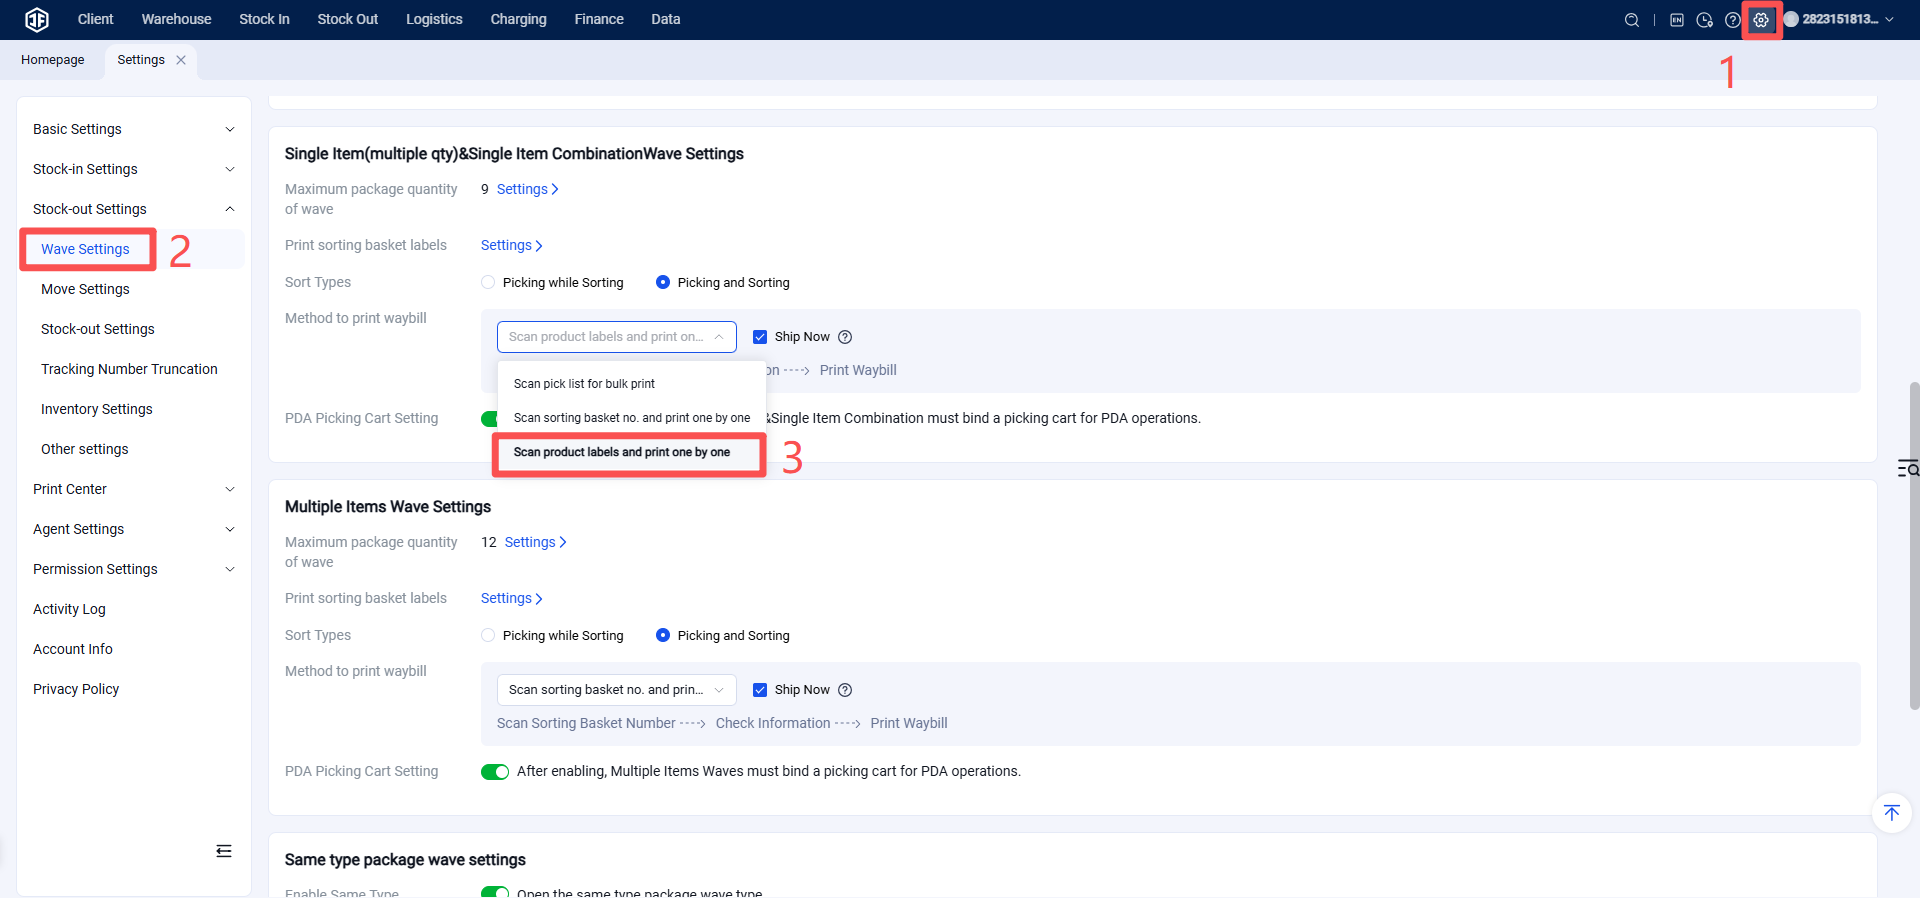
Function Entry: Settings > Business Settings > Batch Settings > Shipping Label Printing Method
Set the Multi-Item Mixed Package shipping label printing method to "Print Individually by Scanning Product Labels."
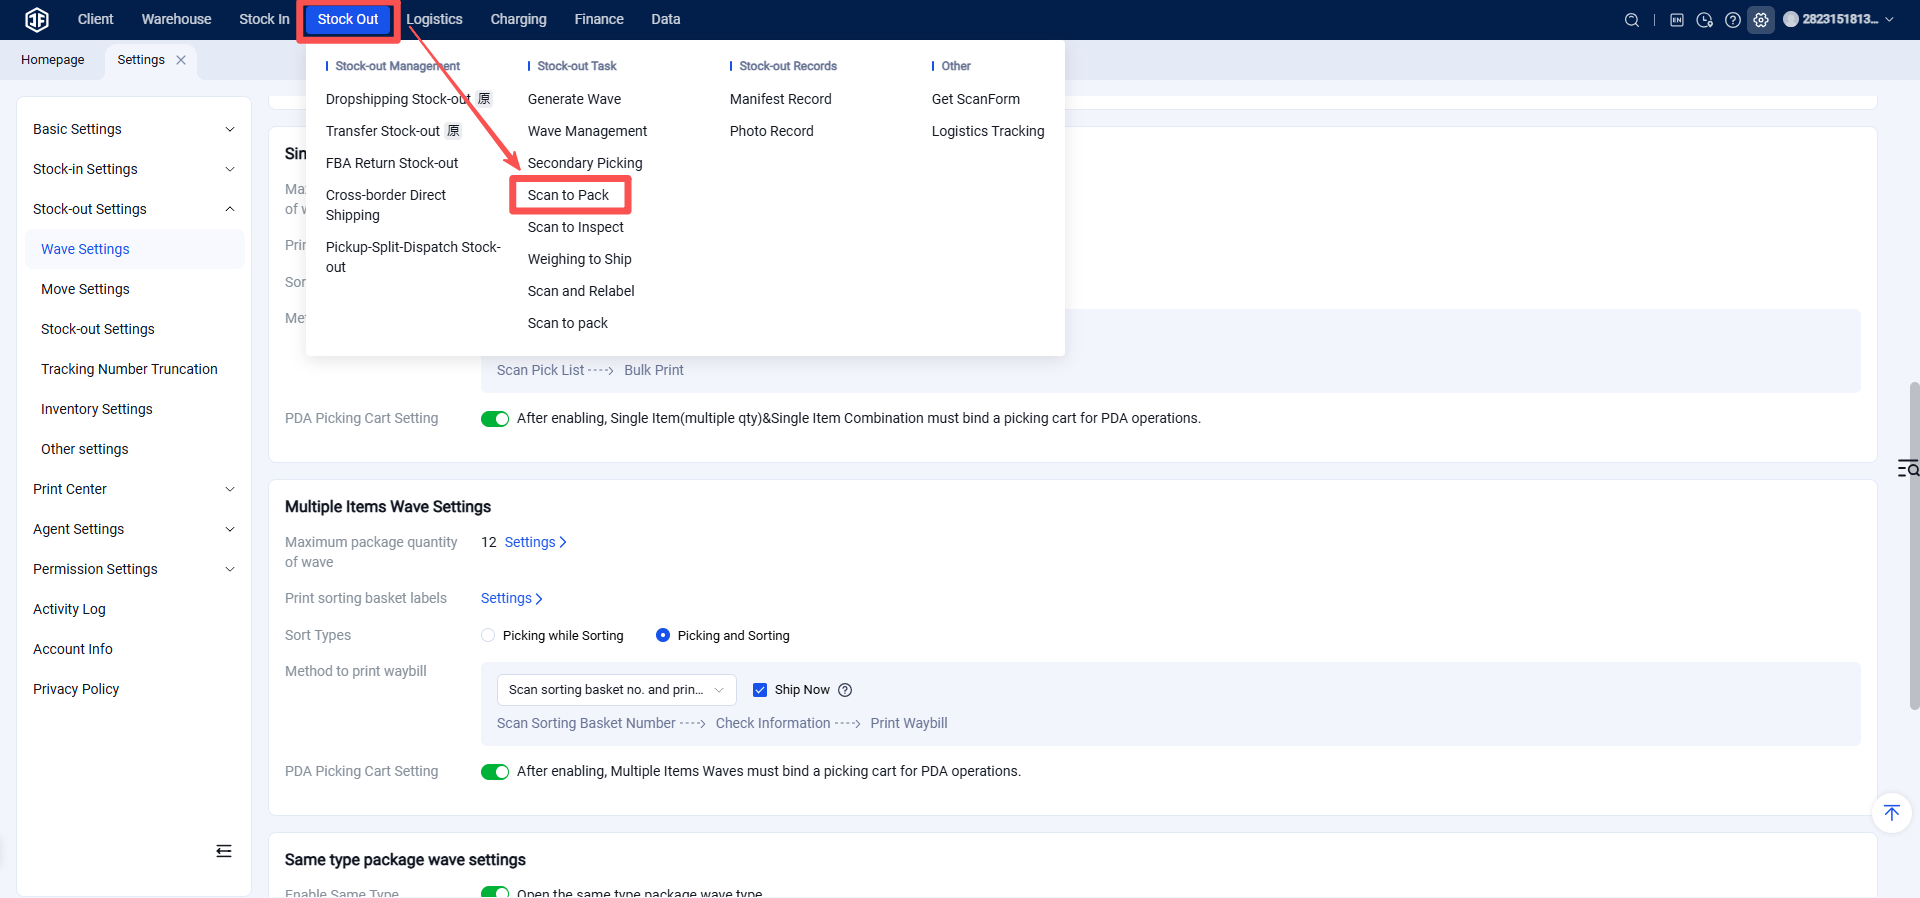
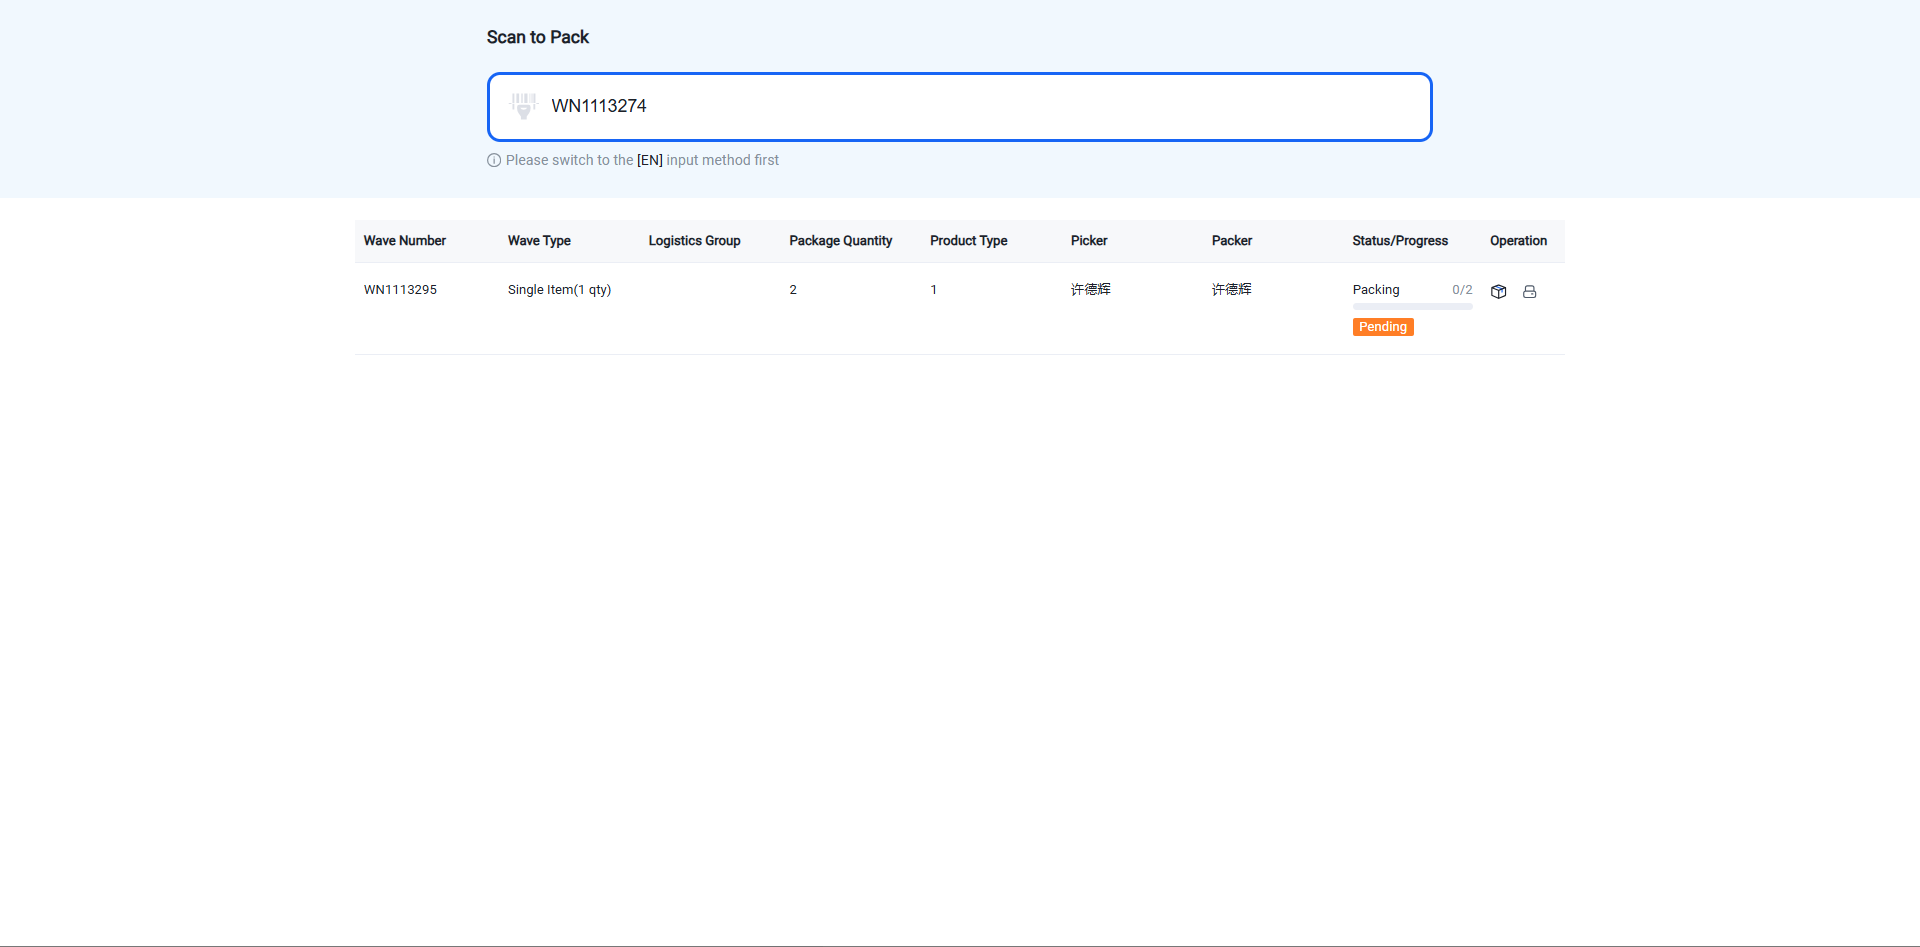
Step 3: Scan the barcode on the picking list or enter the batch (wave) number to access the batch packaging page.
Function Entry: Outbound > Scan to Pack (Note: Scan to Pack is only available for batches with a status of "Pending Packaging.")
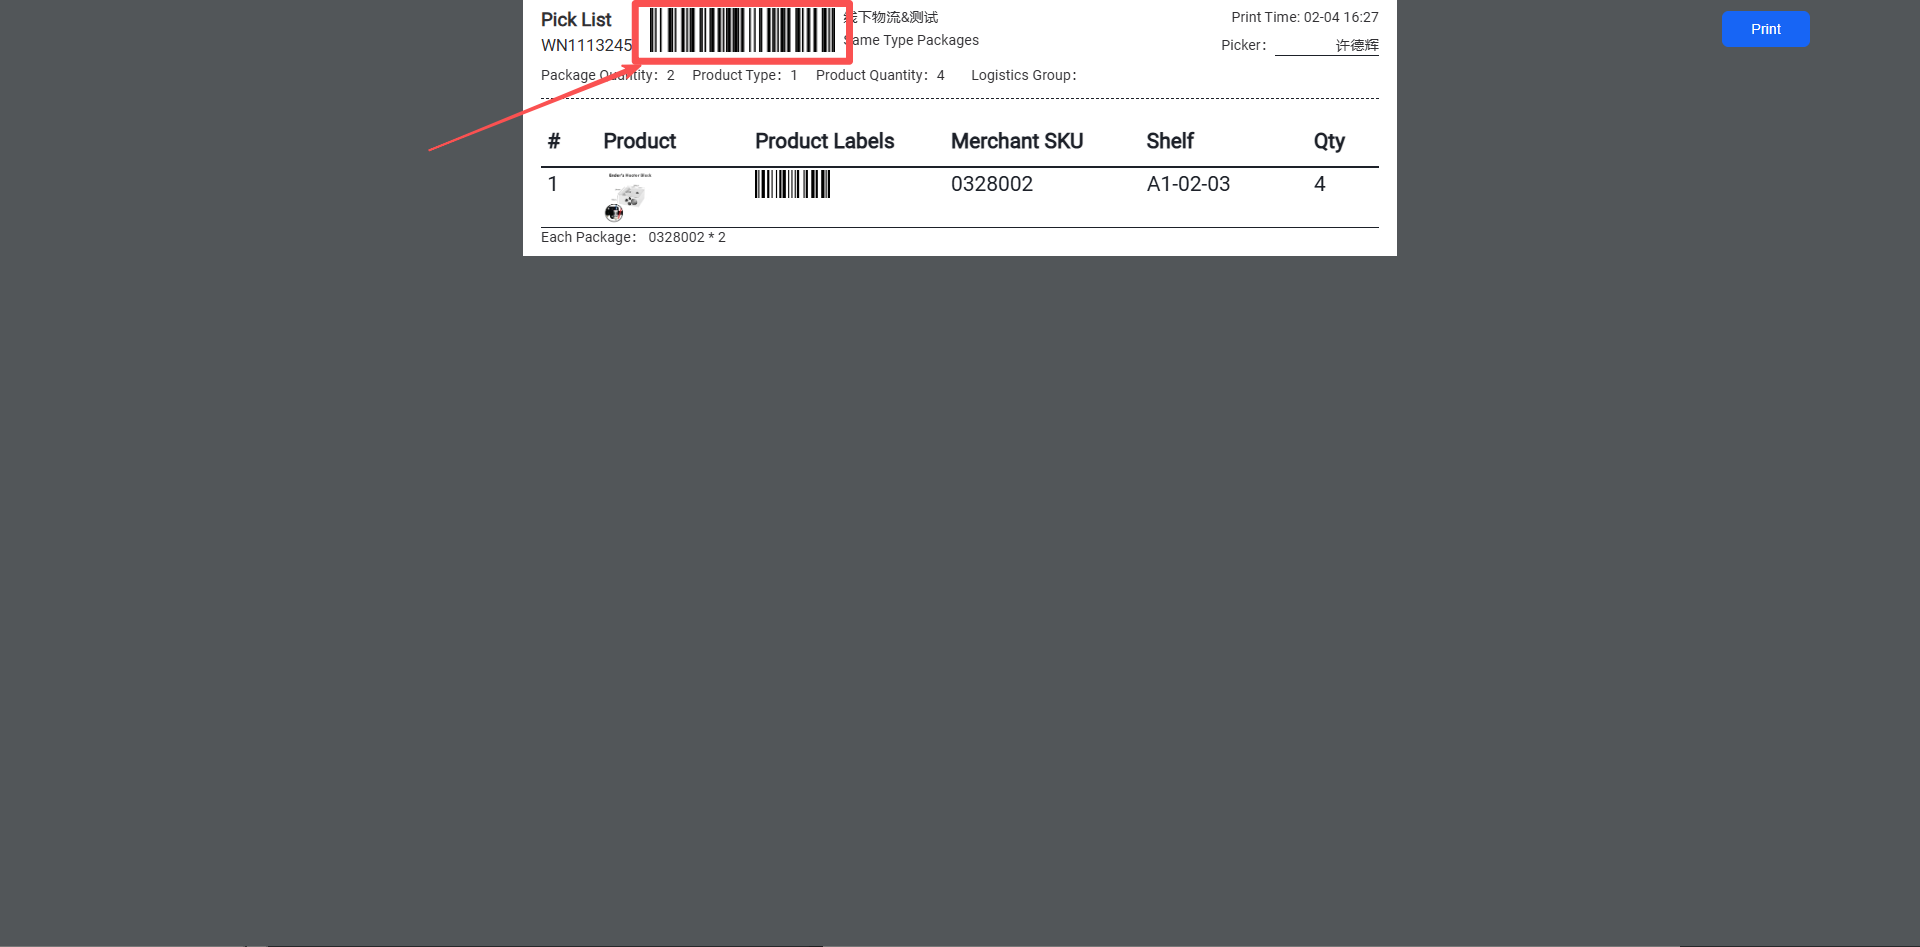
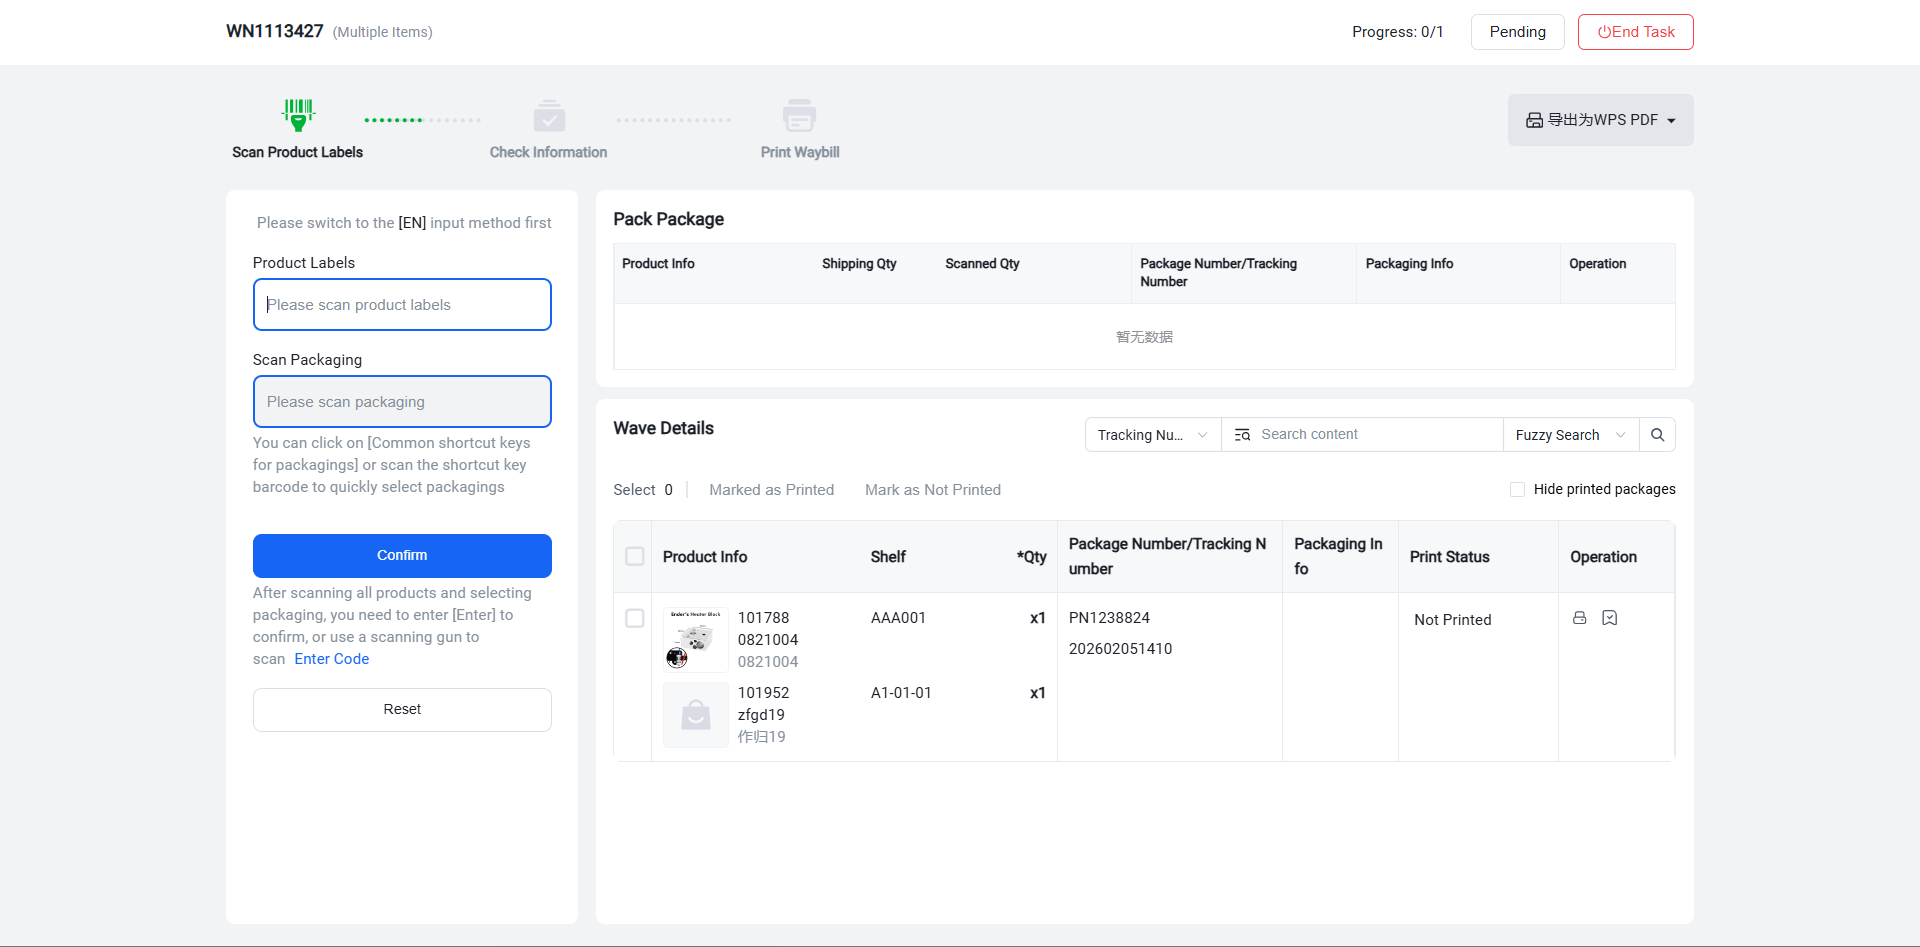
Step 4: Scan the product label or enter the product SKU, then press Enter.
Step 5: Select Packaging Material
If "Enable Packaging Material Outbound Billing" is selected in Outbound Settings, you must choose a packaging material during the scan-to-pack step (this selection is not required if packaging material billing is not enabled). This setting can be configured in Outbound Settings.
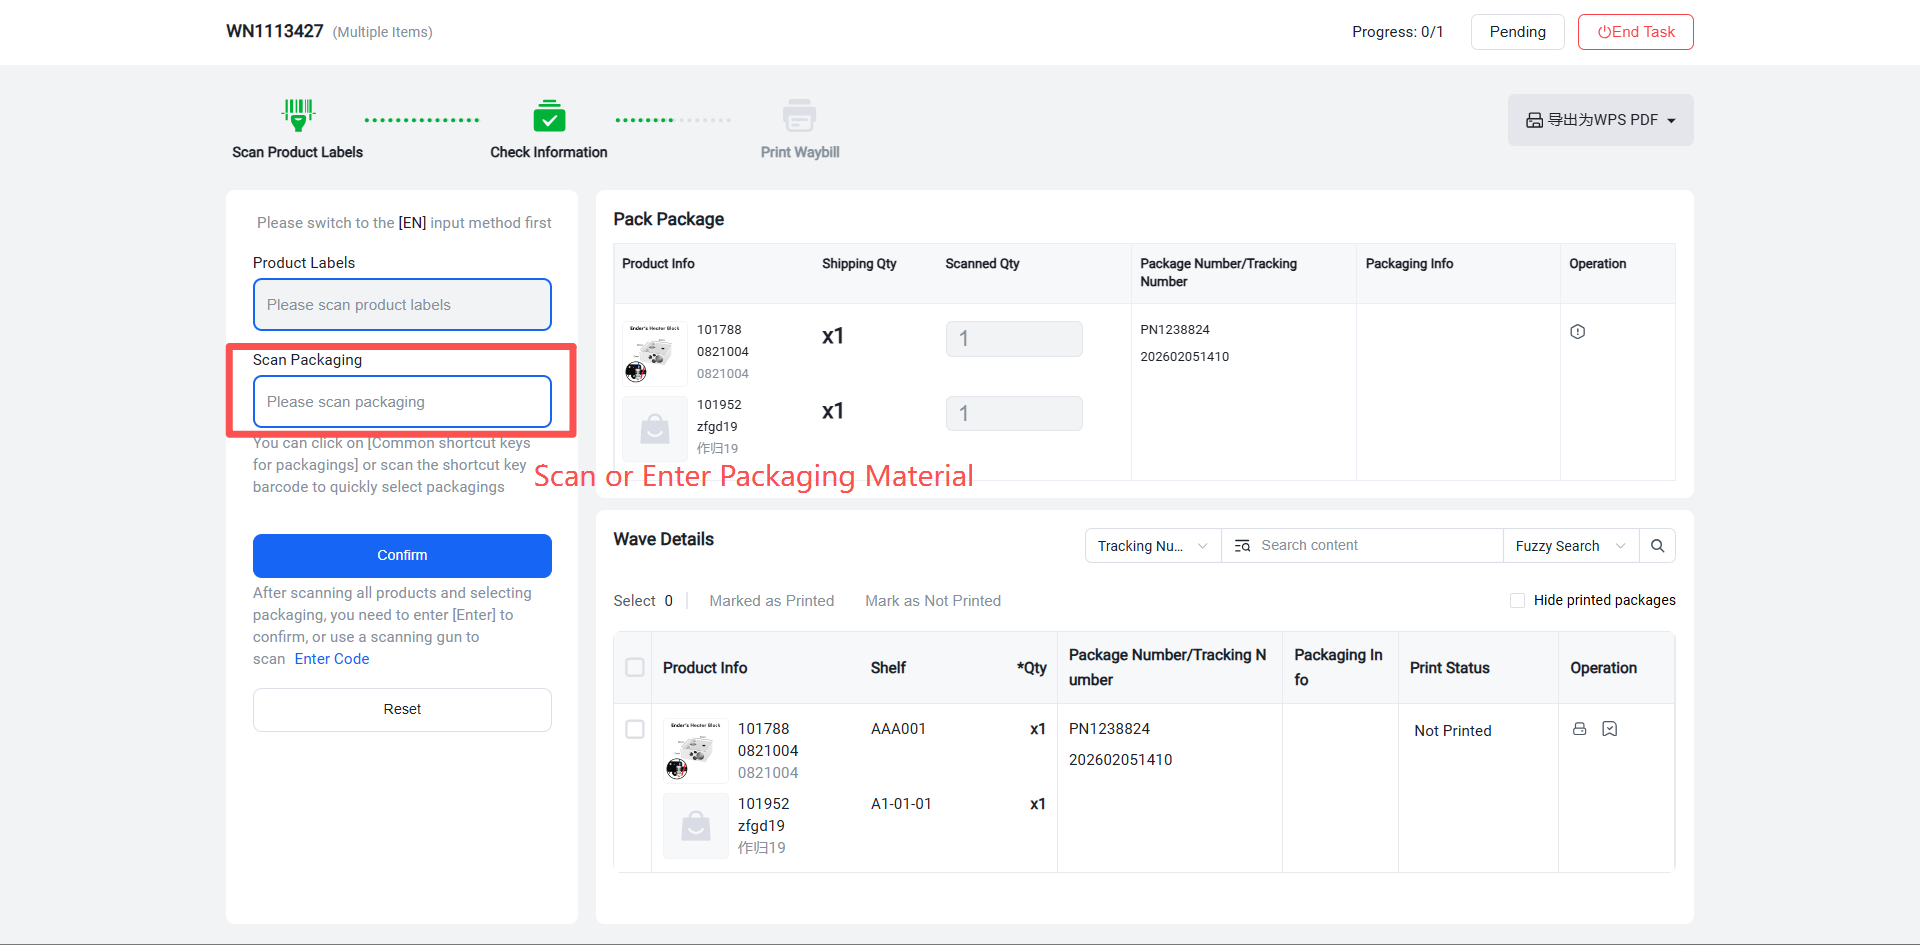
Step 6: After scanning all items in the sorting box and selecting the packaging material, click Confirm, press Enter, or scan the Enter Code to finalize the package information and print the shipping label.
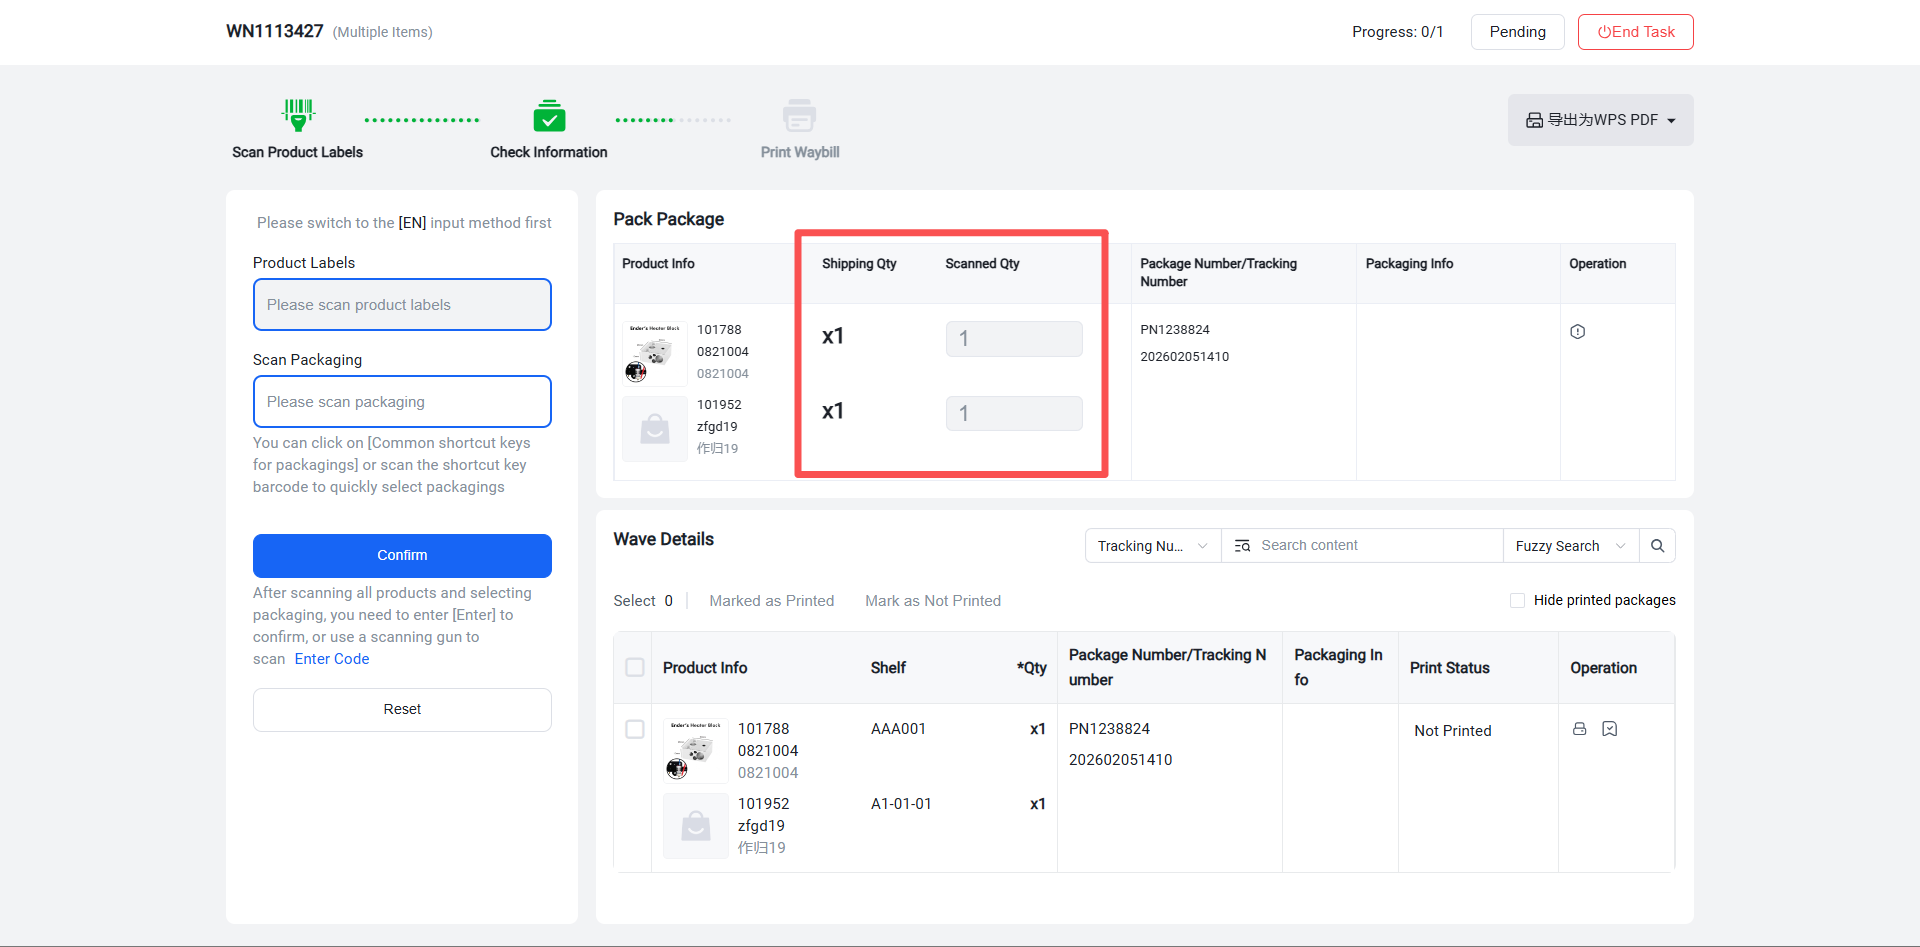
Step 7: If the package information is correct, the system will print a shipping label for that package and generate a label print record with the status set to "Printed."
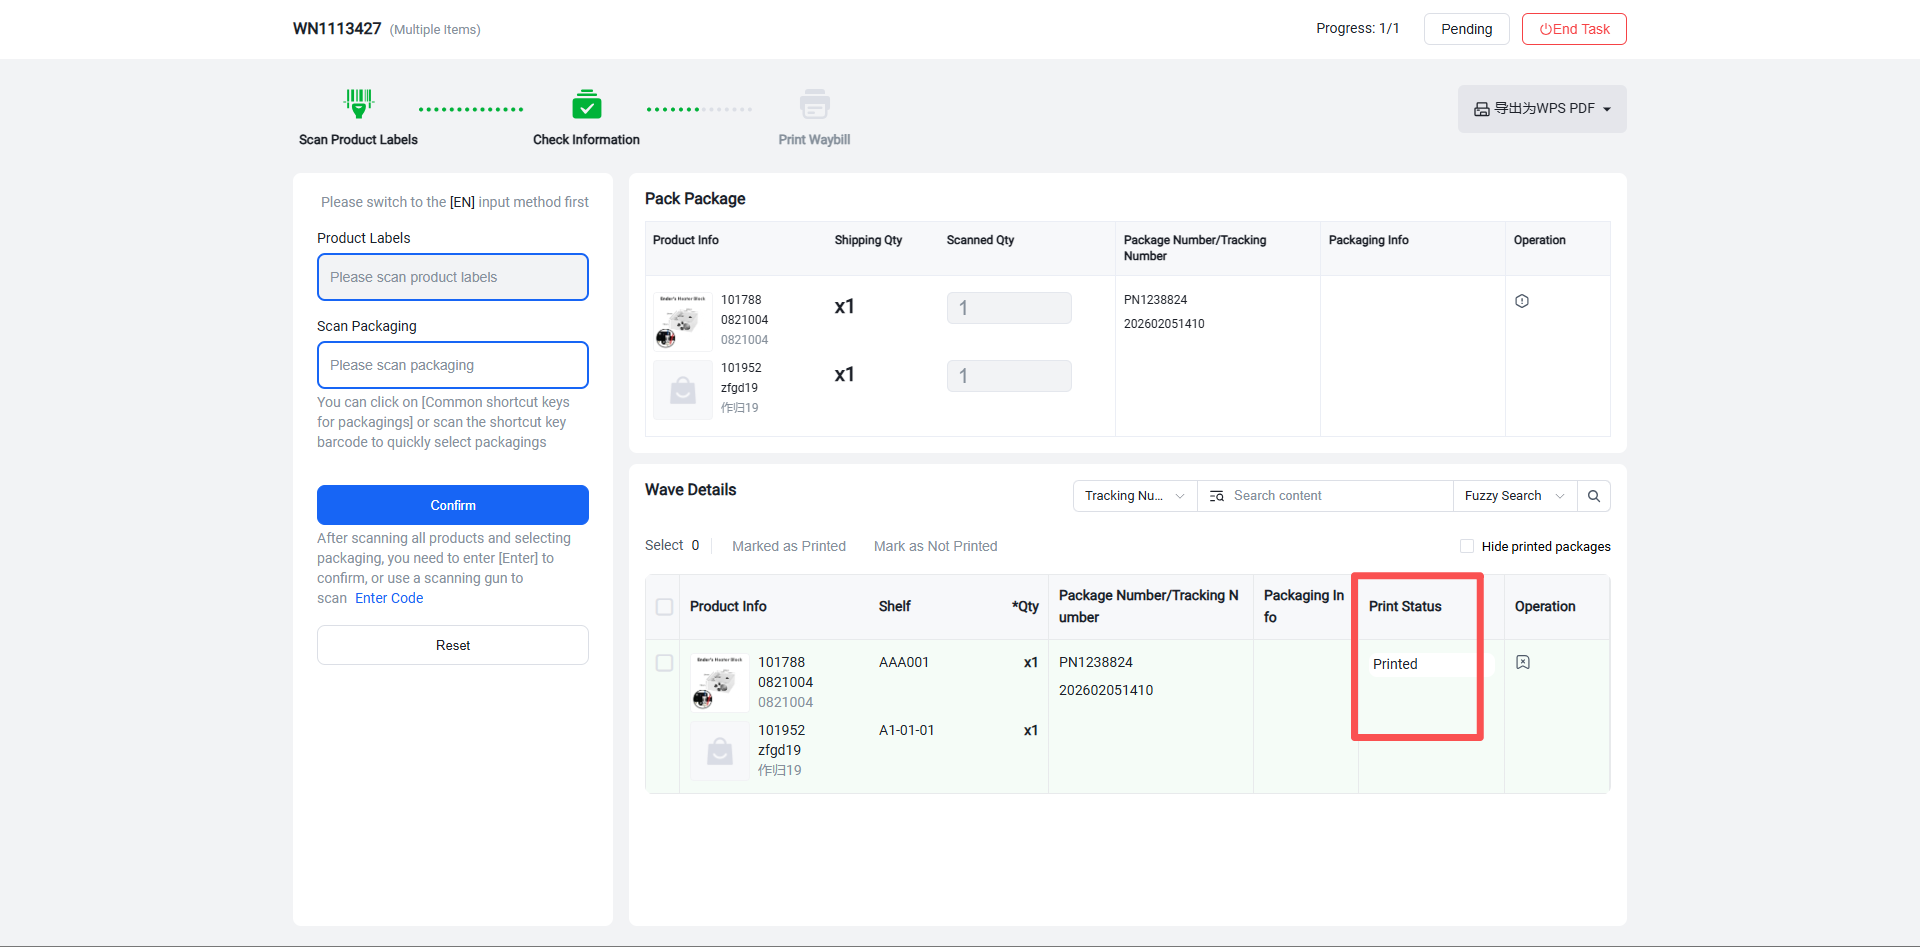
Step 8: You can proceed to scan items from the next sorting box to print the subsequent shipping label.
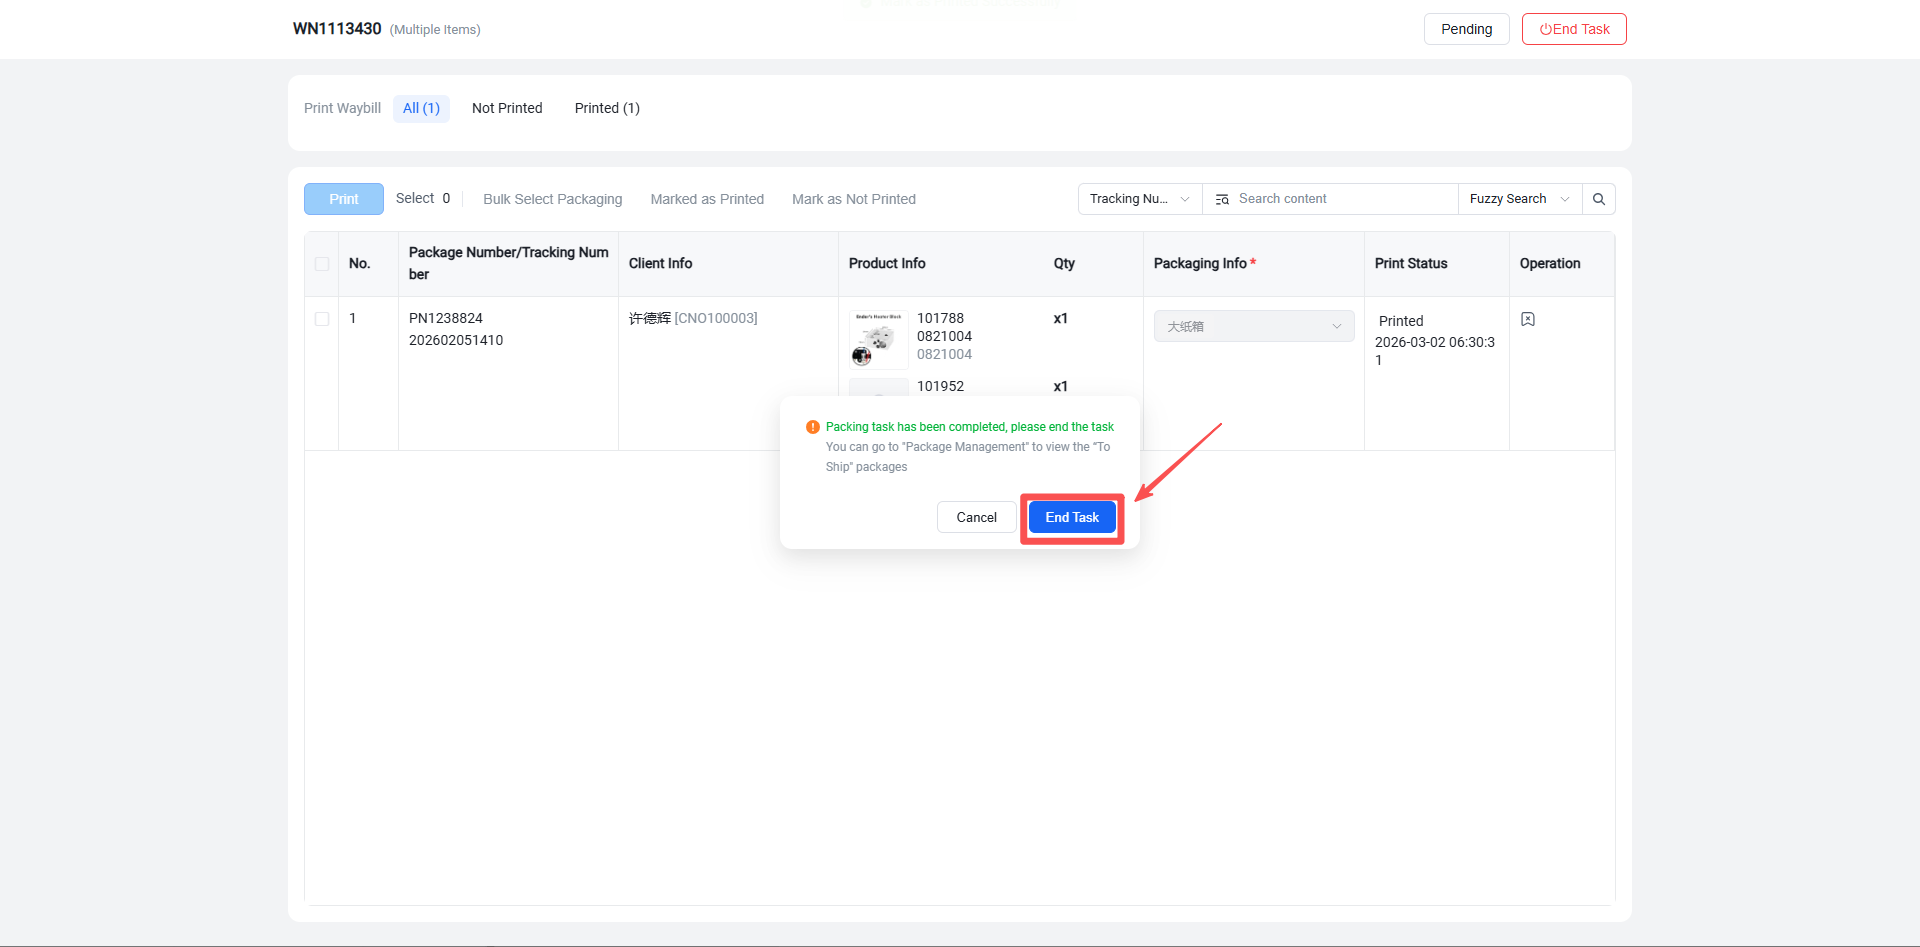
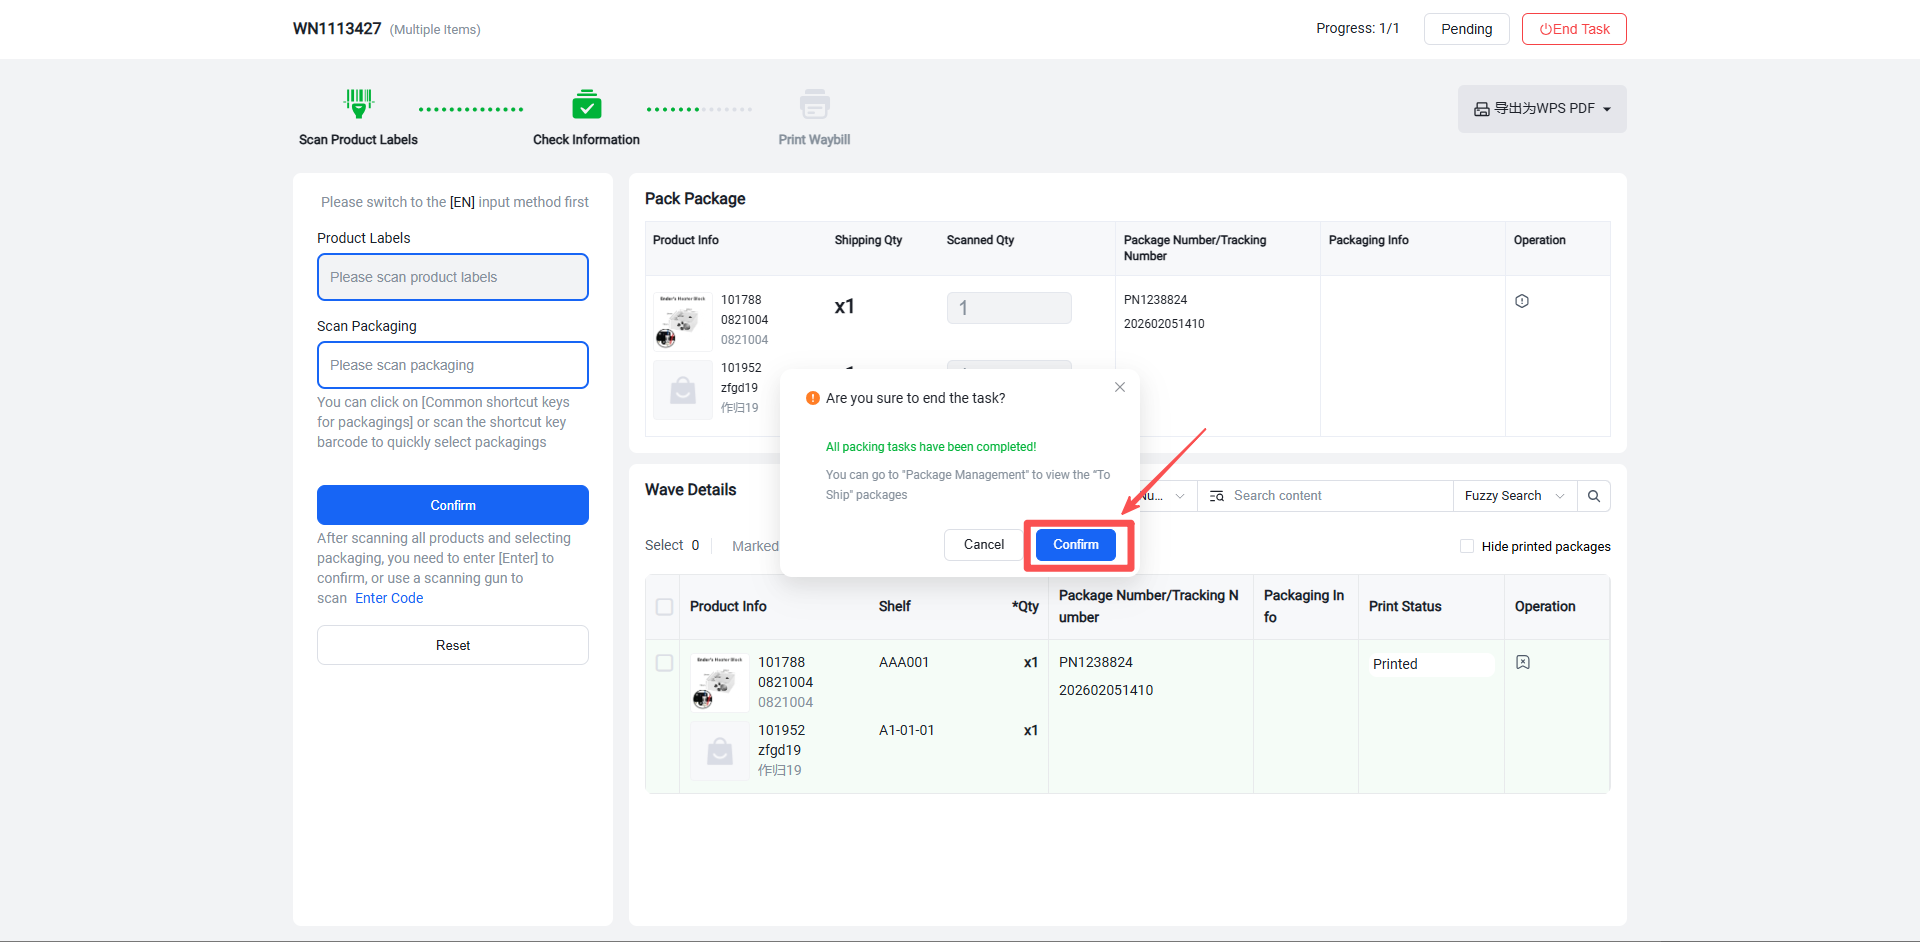
Step 9: Once shipping labels have been printed for all packages in the batch, a confirmation prompt will automatically appear. You can click "End Task," which will change the batch status to "Completed" and move the packages to the "Pending Shipment" status. You can then proceed to "Scan to Pack" for shipping operations or navigate to Package Management > Pending Shipment List to manually mark them as shipped.
Method 2: Print Labels Individually by Scanning Sorting Box Numbers
Step 1: After installing the print plugin, double-click to launch it.
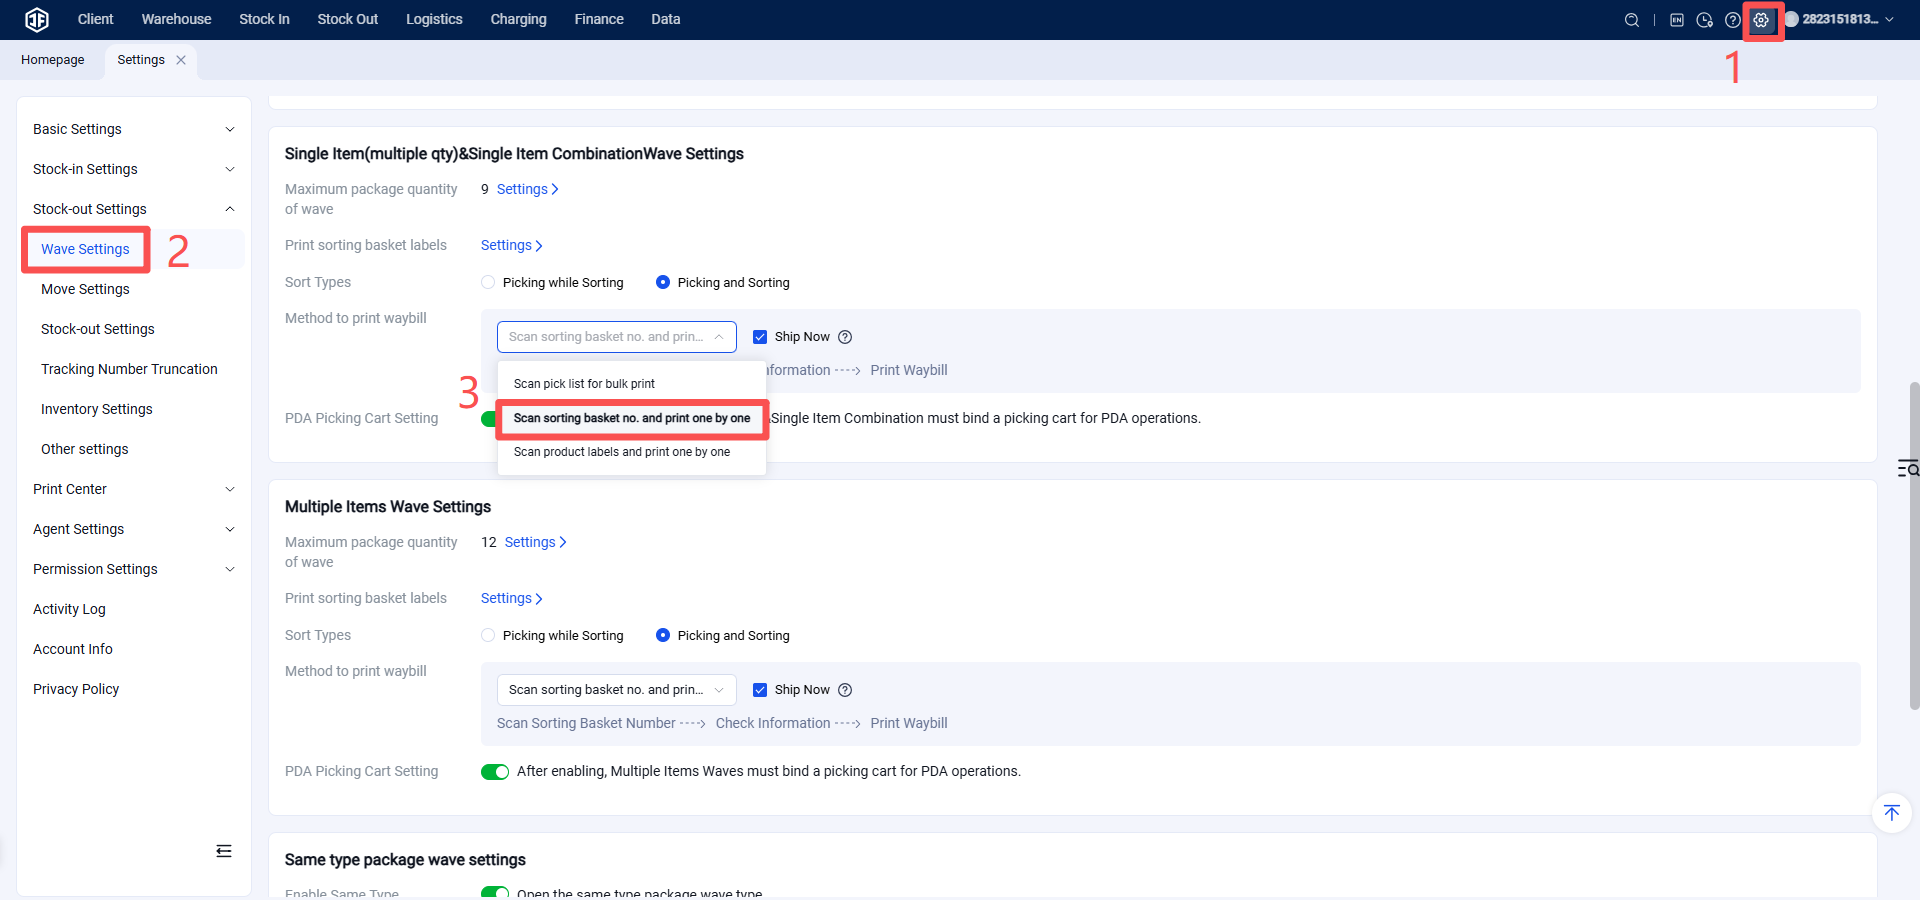
Step 2: Configure the Printing Method in Batch Settings
Function Entry: Settings > Business Settings > Batch Settings > Shipping Label Printing Method
Set the Multi-Item Mixed Package shipping label printing method to "Print Individually by Scanning Sorting Box Numbers."
Step 3: Access the Batch Packaging Page
Function Entry: Outbound > Scan to Pack (Note: This function is only available for batches with a status of "Pending Packaging.")
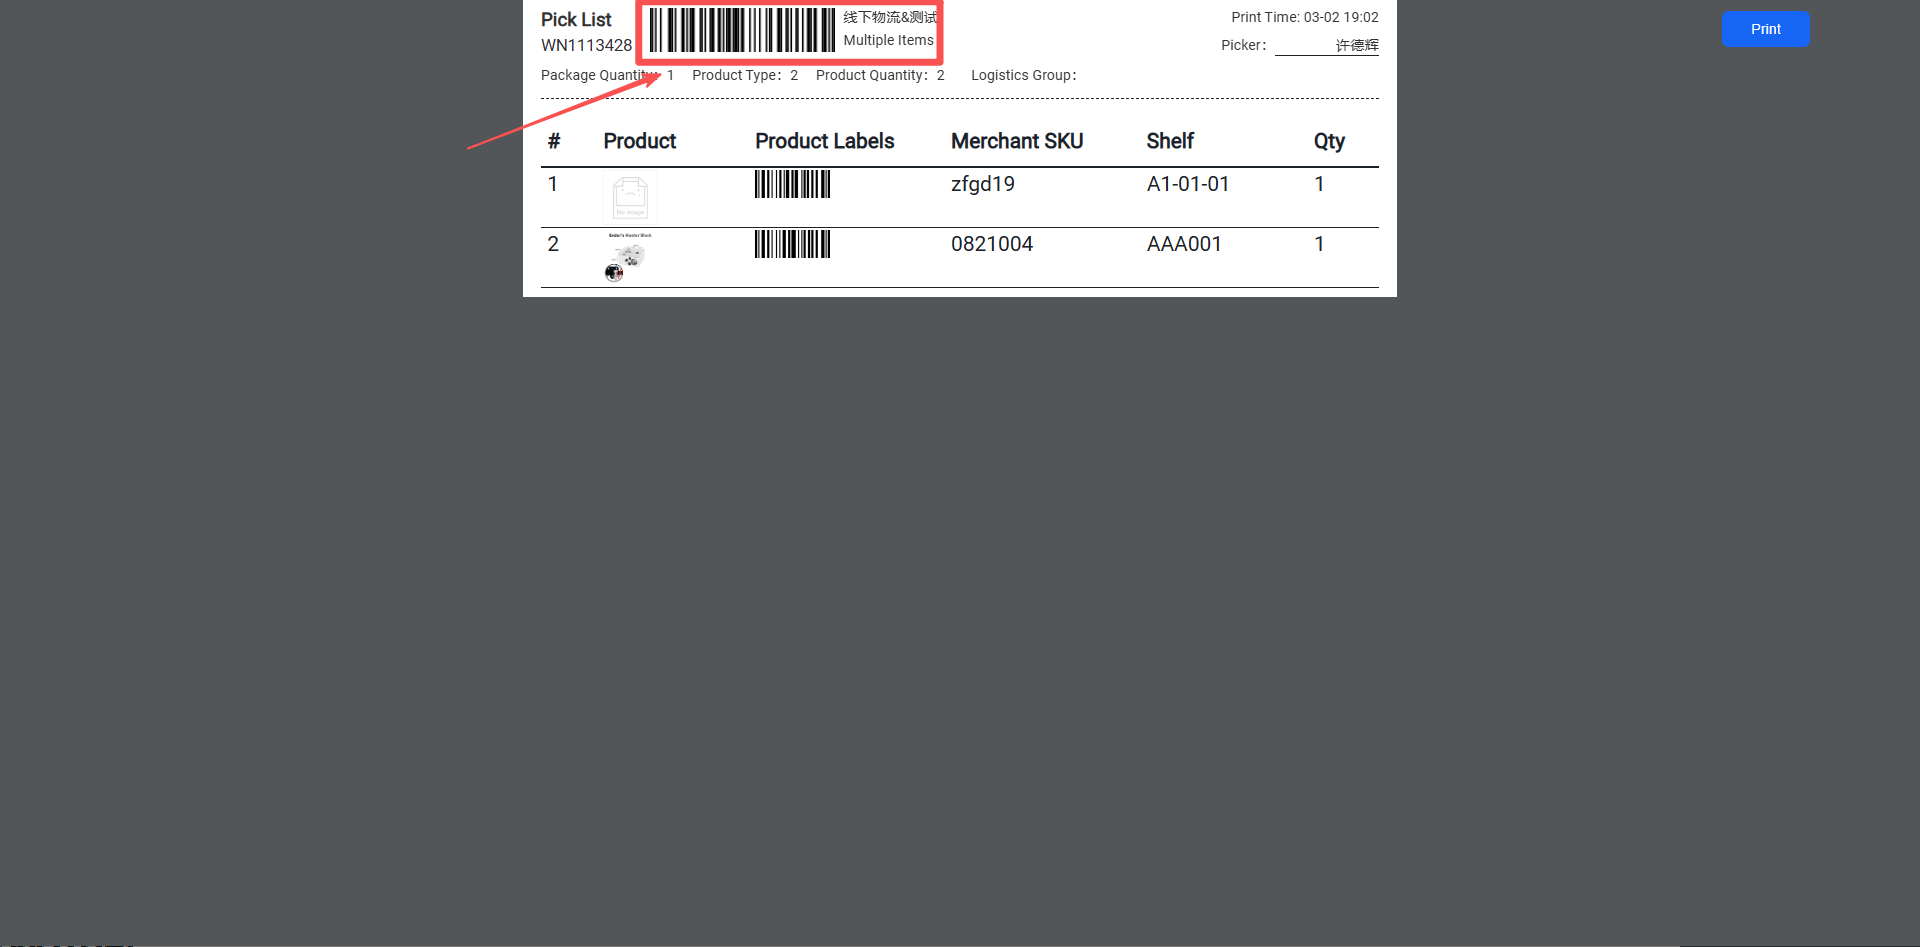
Scan the barcode on the picking list or enter the batch number, then press Enter to access the scan-to-pack page.
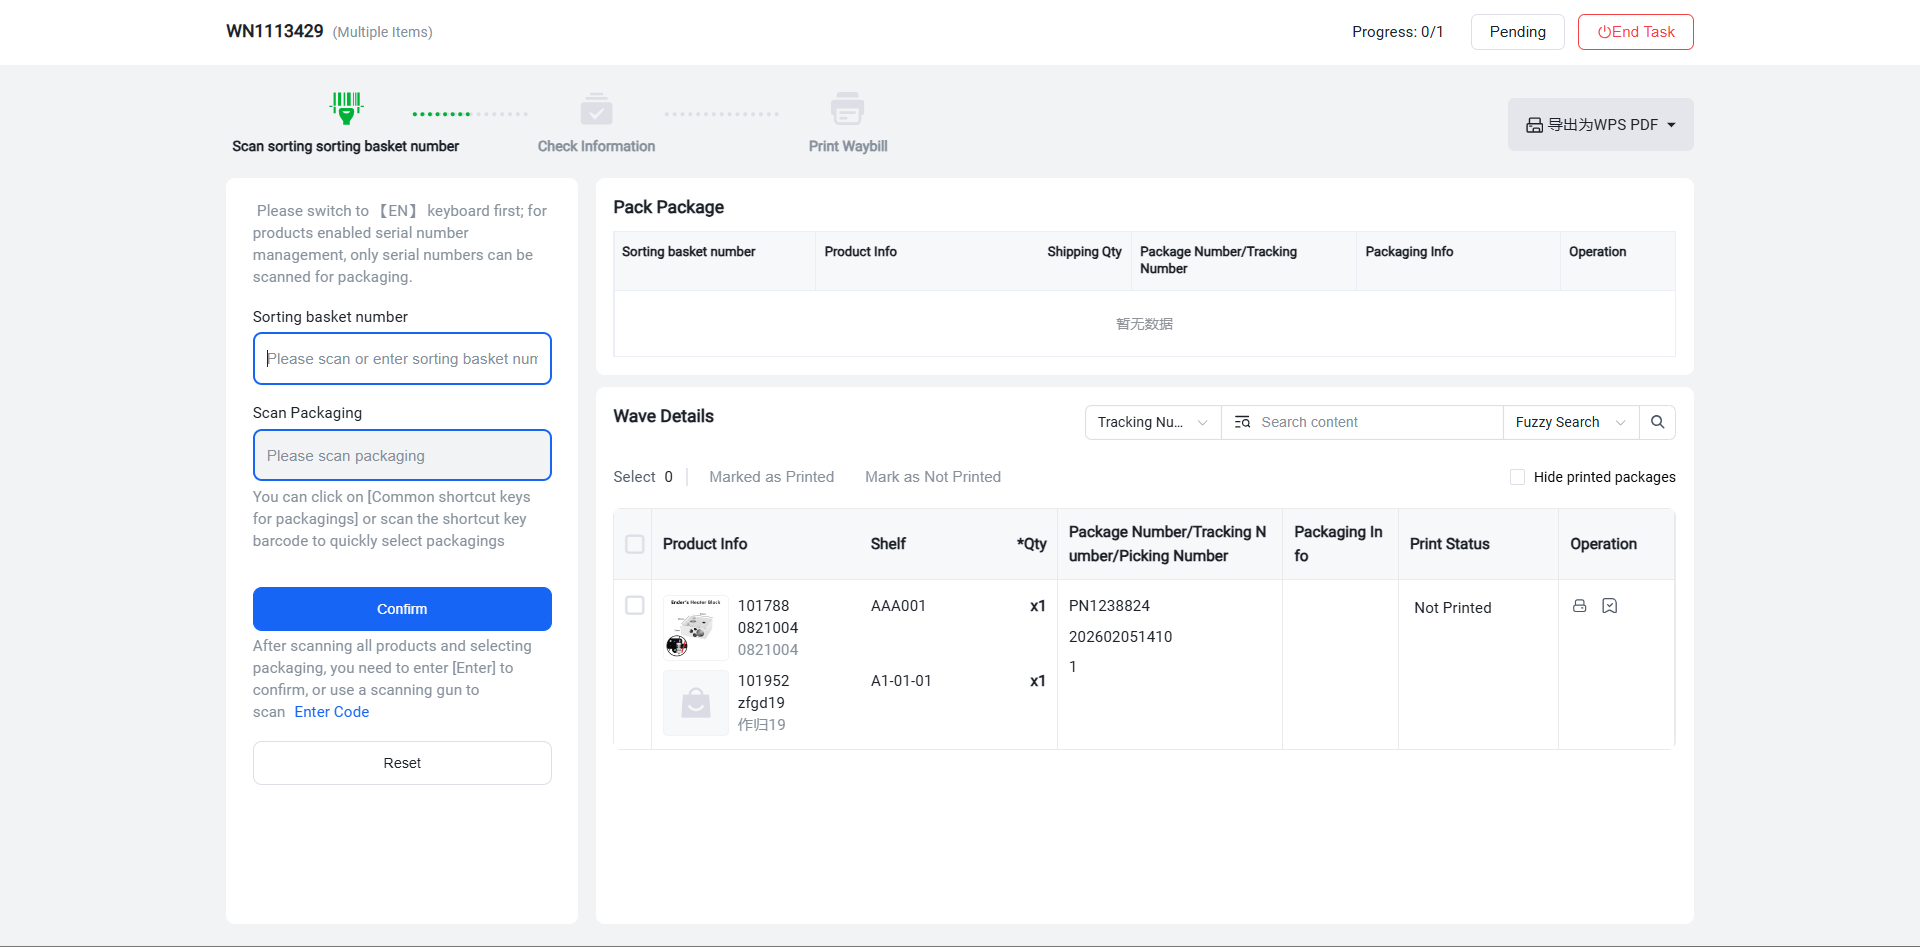
Step 4: After entering the packaging page, scan the sorting box number or manually enter the sorting box number and then click Confirm / press Enter.
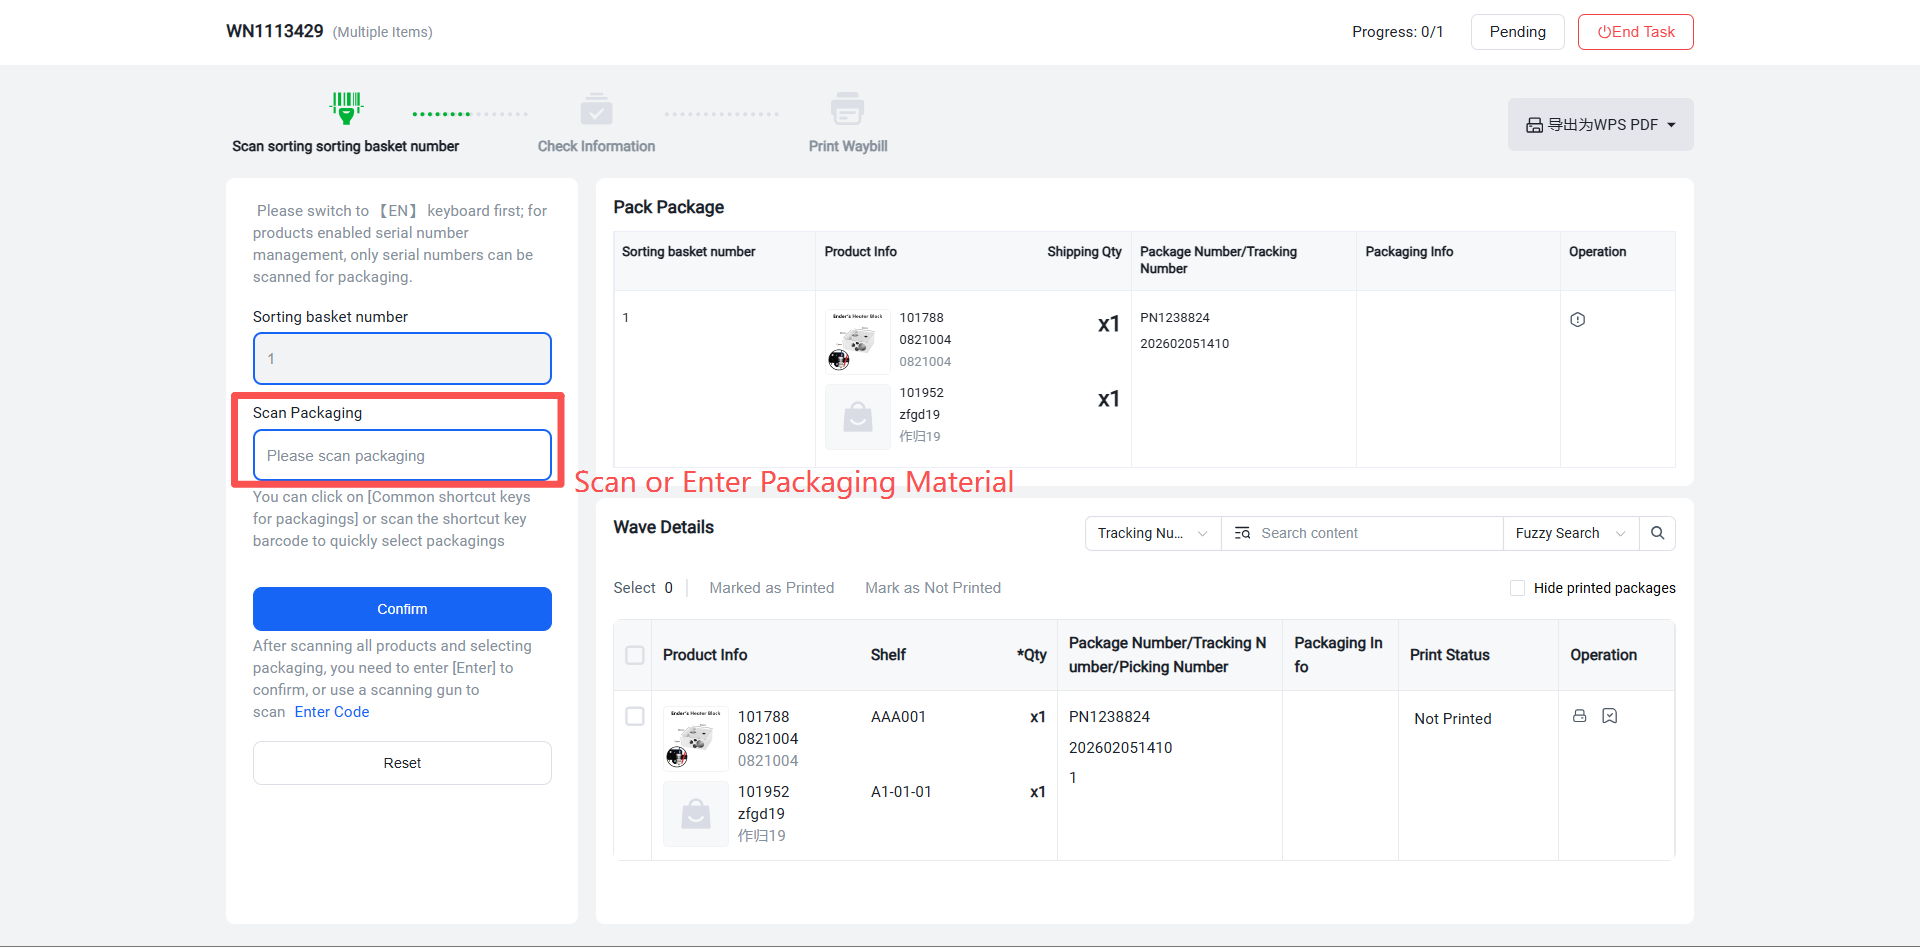
Step 5: Select Packaging Material
If "Enable Packaging Material Outbound Billing" is selected in Outbound Settings, you must choose a packaging material. (This selection is not required if packaging material billing is not enabled.)
These settings can be configured in Outbound Settings.
Step 6: After selecting the packaging material, manually verify that the item information and quantities in the sorting box are correct. Scanning individual product labels is not required. If correct, click Confirm / press Enter, or scan the Enter Code to confirm and print the shipping label.
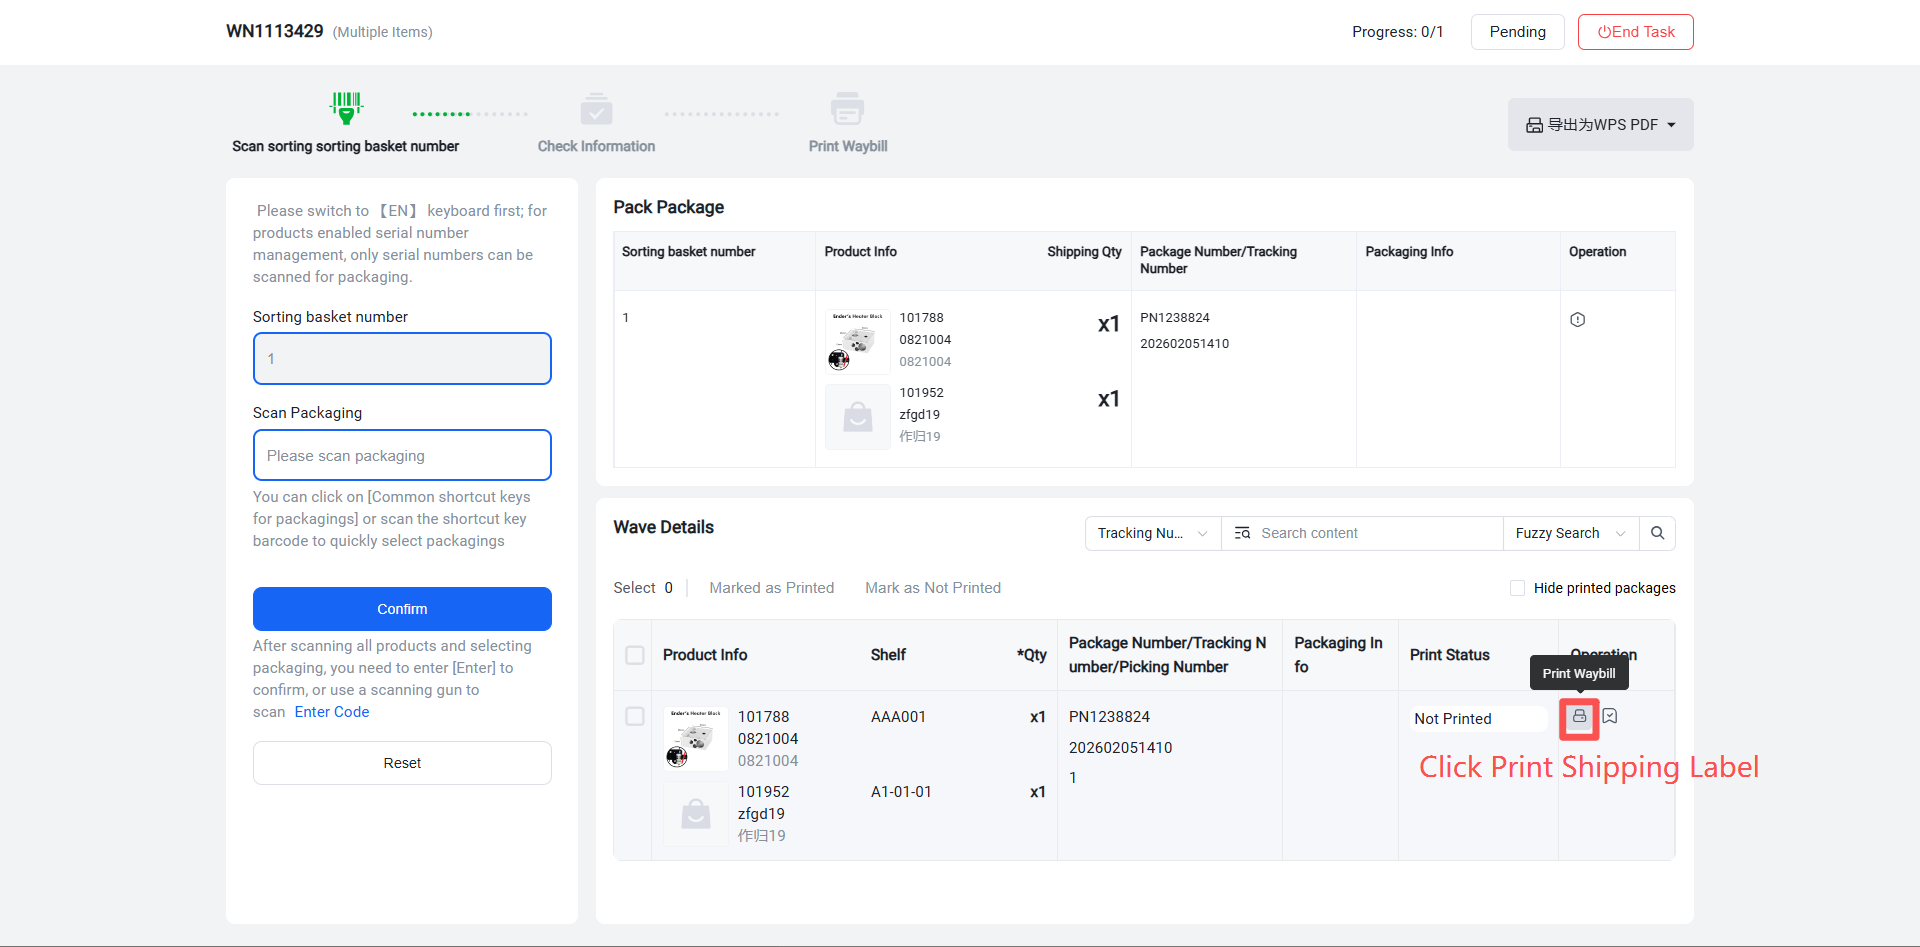
Step 7: Upon successful printing of the shipping label, a print record will be generated.
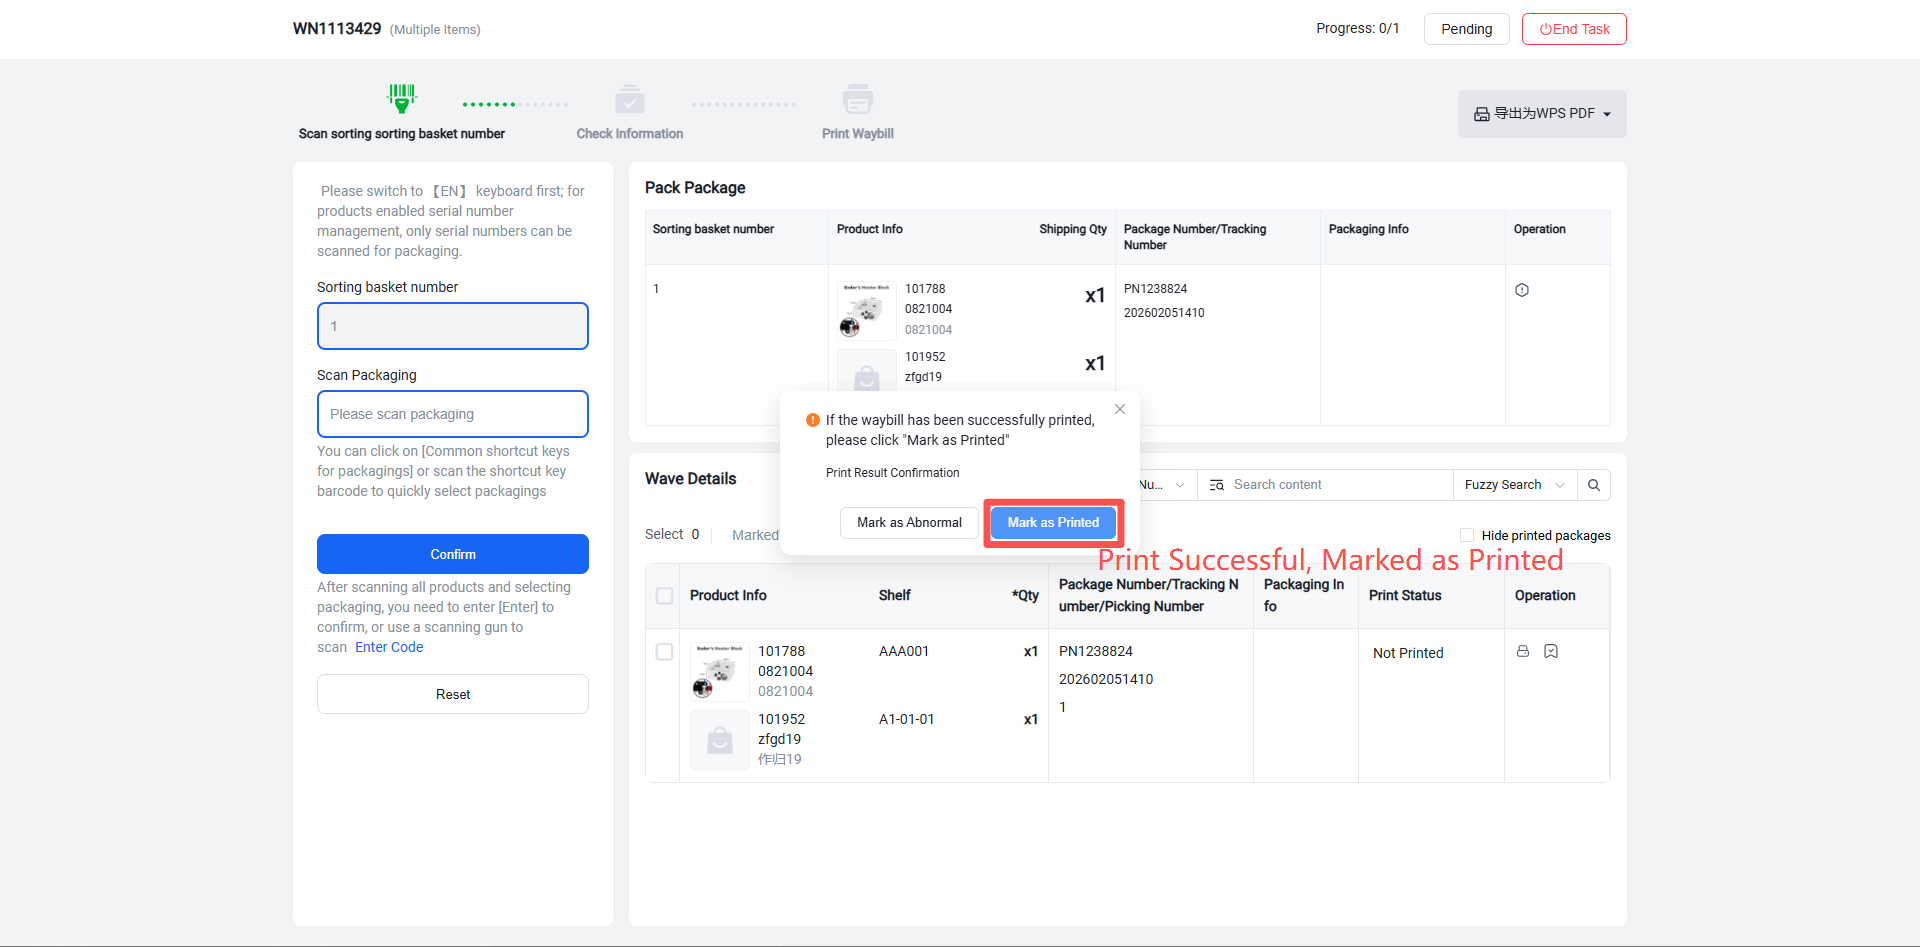
Step 8: Continue by scanning the next sorting box number to print the shipping label for the next package.
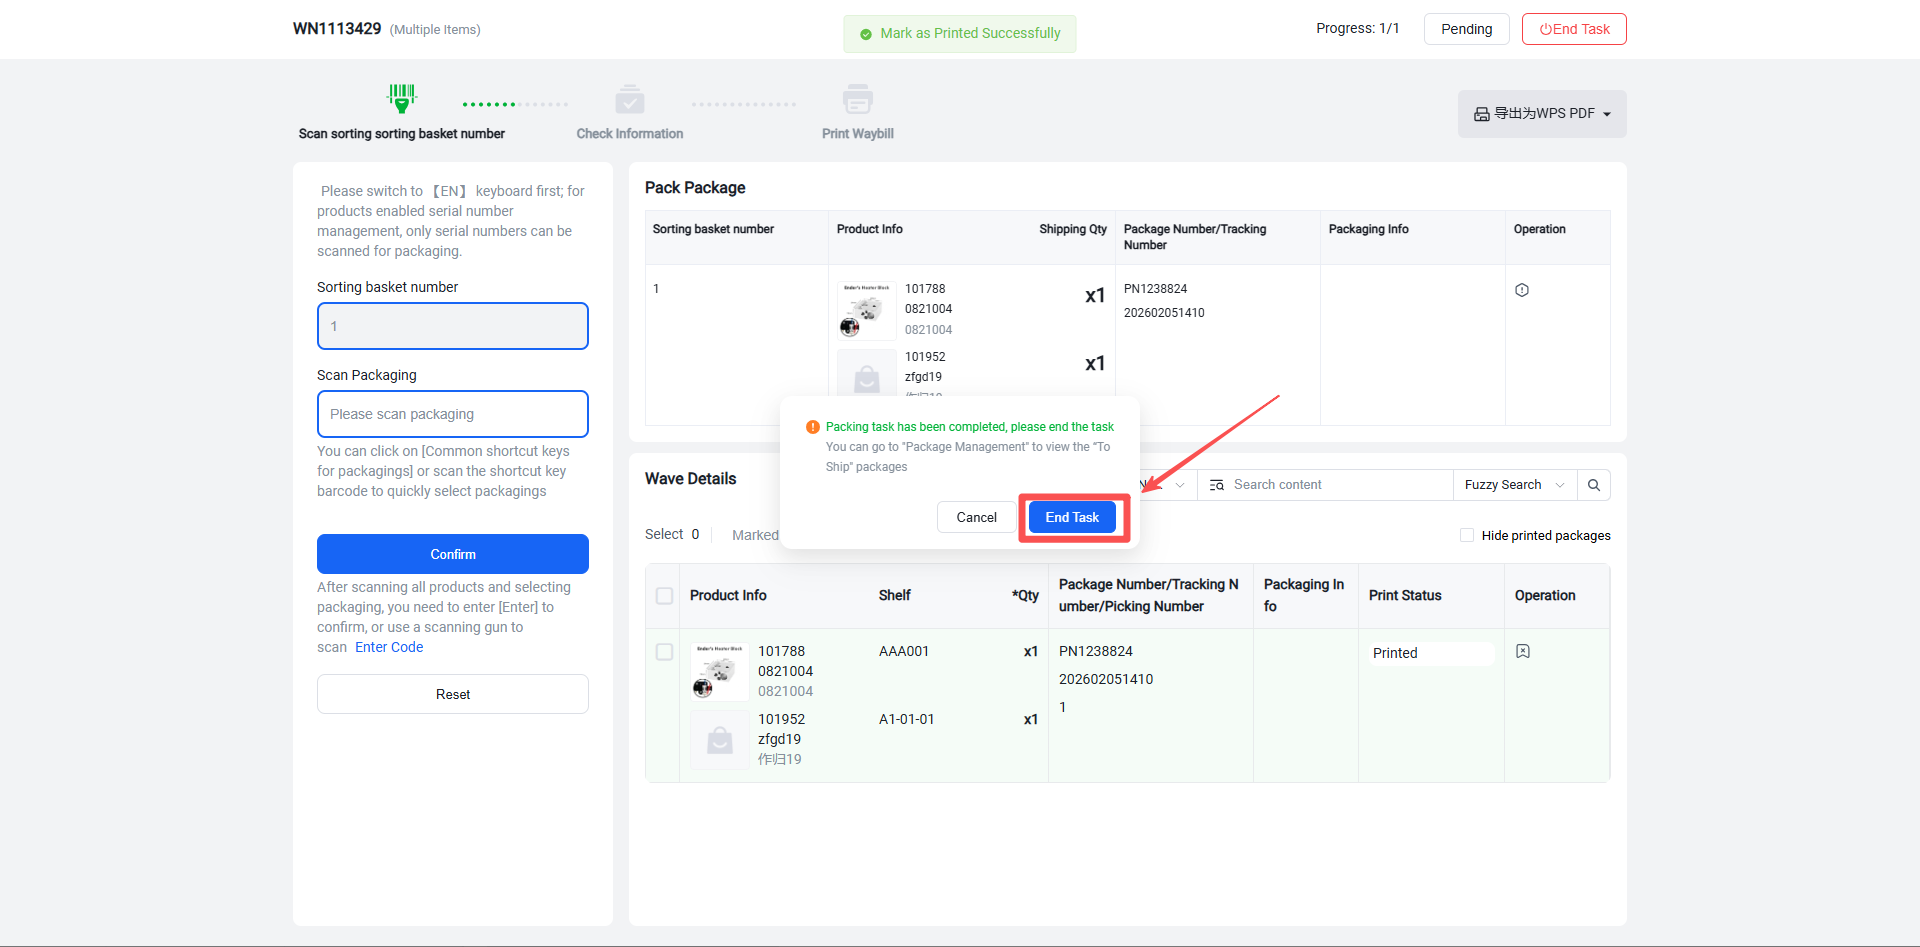
Step 9: Once shipping labels have been printed for all packages in the batch, a confirmation prompt will automatically appear. Click "End Task" to change the batch status to "Completed". The packages will then enter the "Pending Shipment" status. You can proceed to "Scan to Ship" to ship them or go to Package Management > Pending Shipment List to manually mark them as shipped.
Method 3: Batch Print Shipping Labels
Step 1: After installing the print plugin, double-click to launch it.
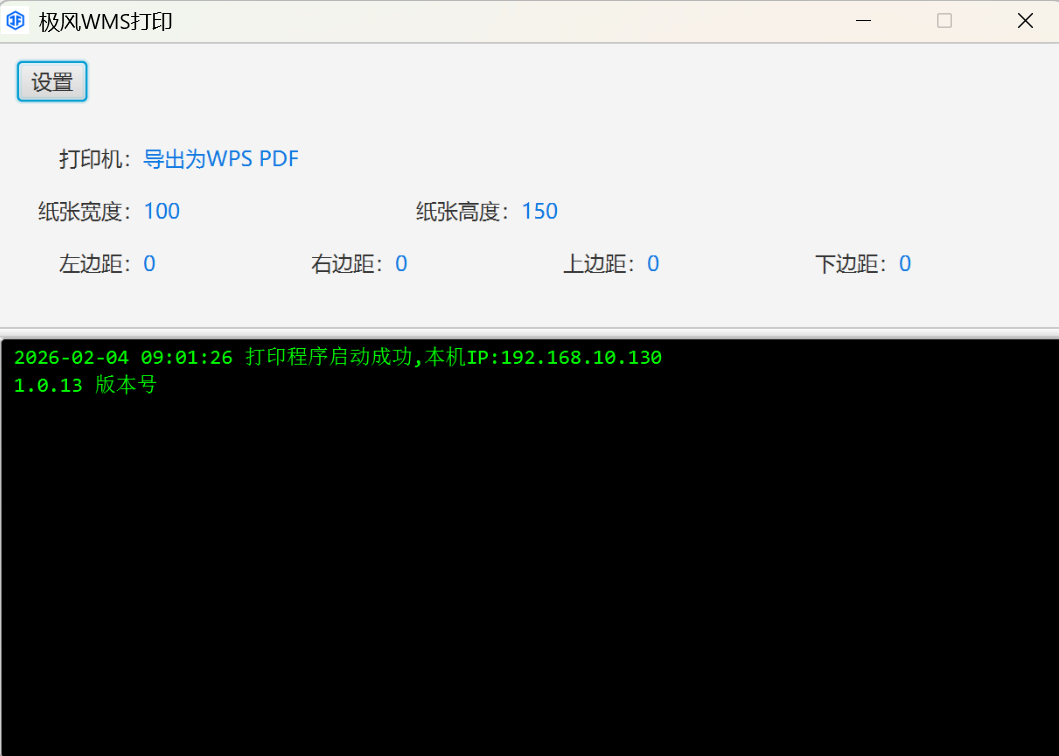
Step 2: Configure the Printing Method in Batch Settings
Function Entry: Settings > Business Settings > Batch Settings > Shipping Label Printing Method
Set the Multi-Item Mixed Package shipping label printing method to "Batch Print by Scanning Picking List."
Step 3: Access the Batch Packaging Page
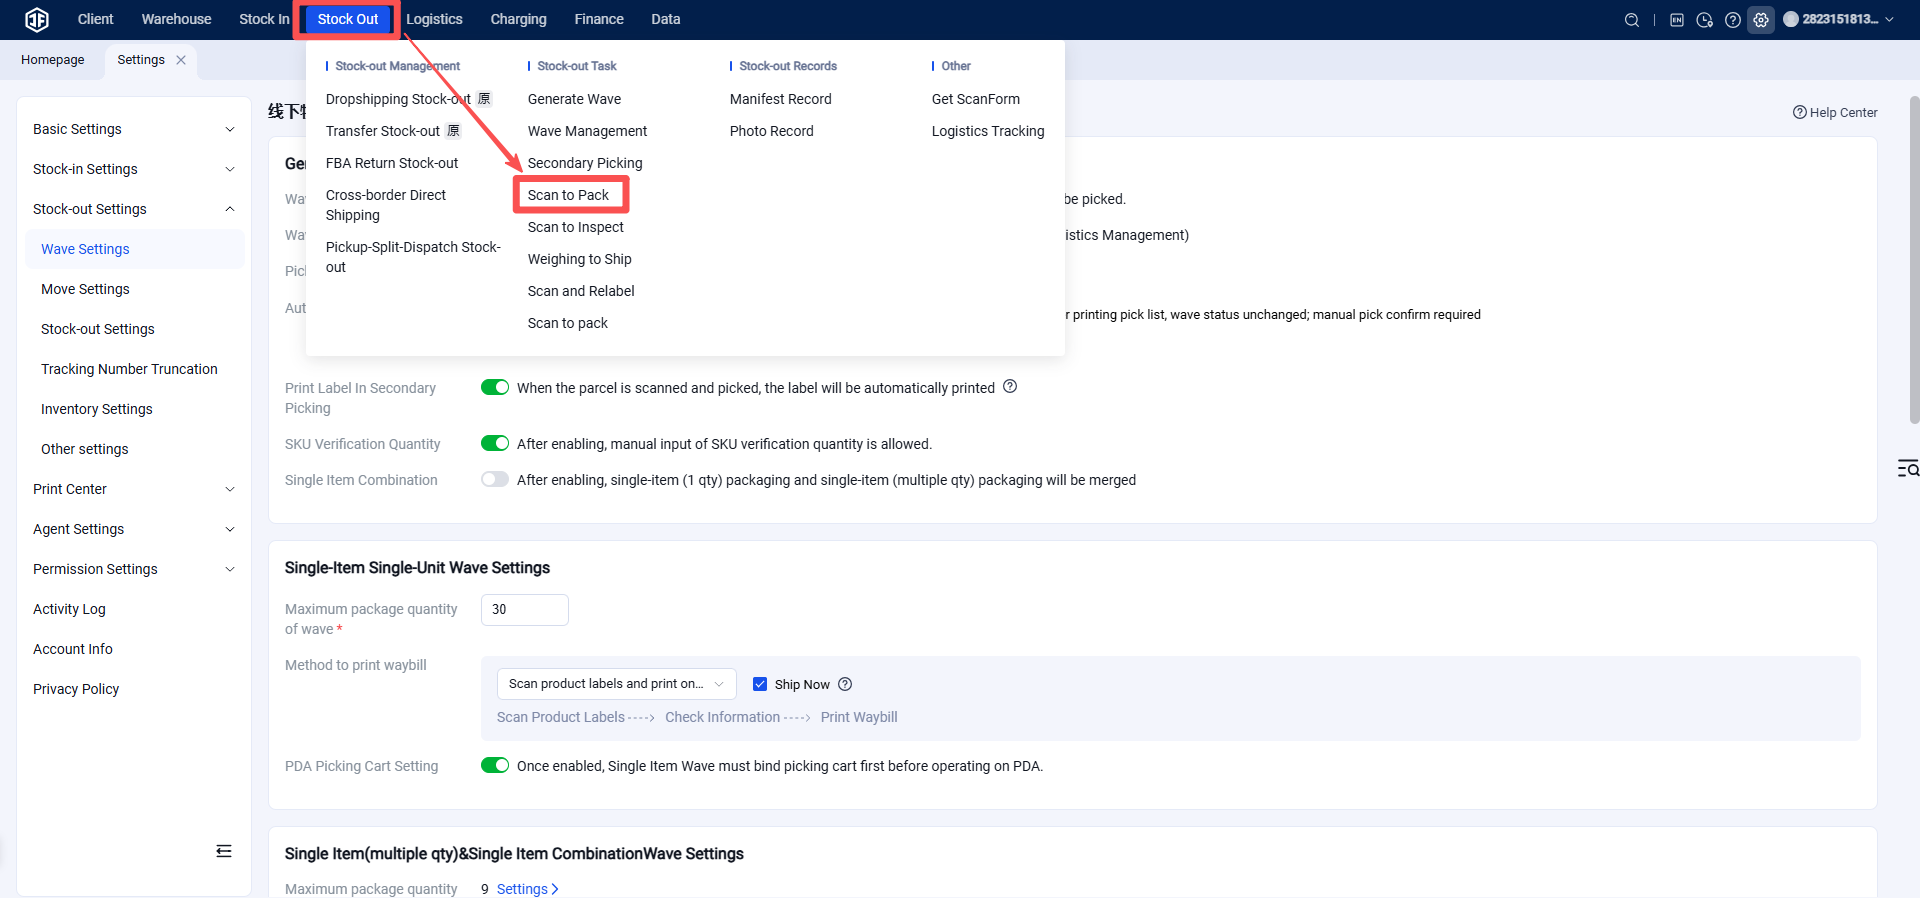
Function Entry: Outbound > Scan to Pack (Note: This operation is only available for batches with a status of "Pending Packaging.")
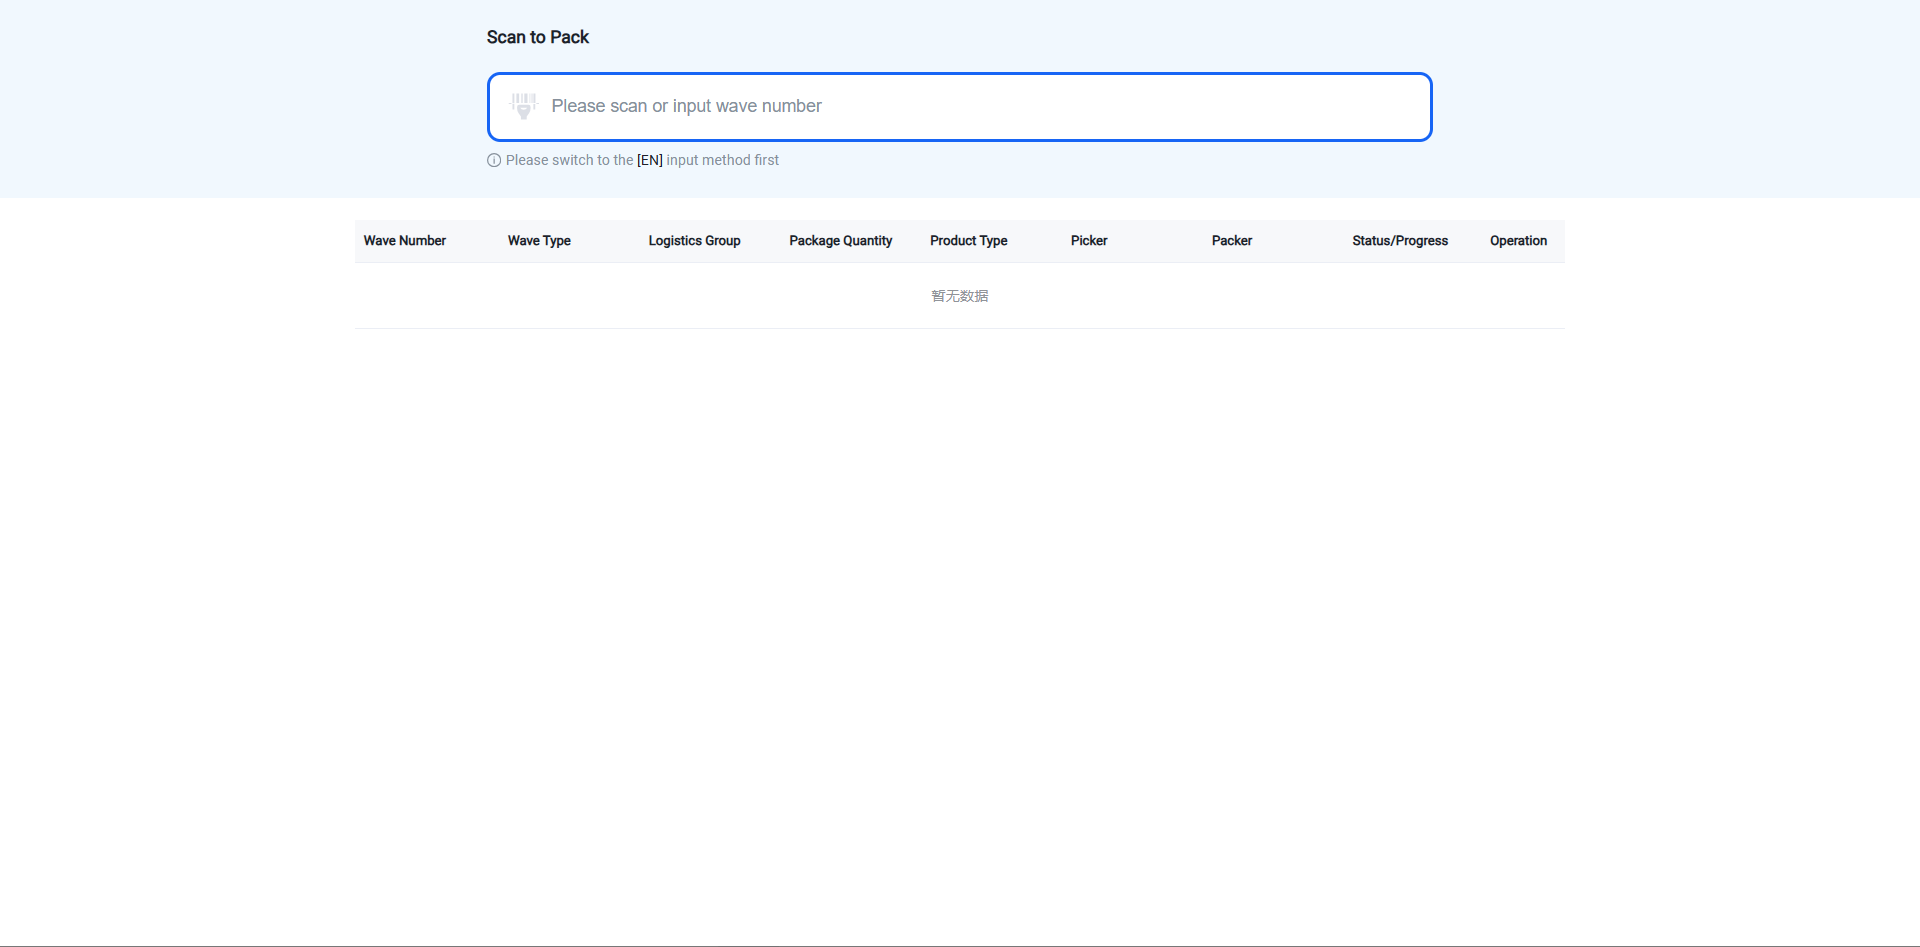
Scan the barcode on the picking list or enter the batch number, then press Enter to access the scan-to-pack page.
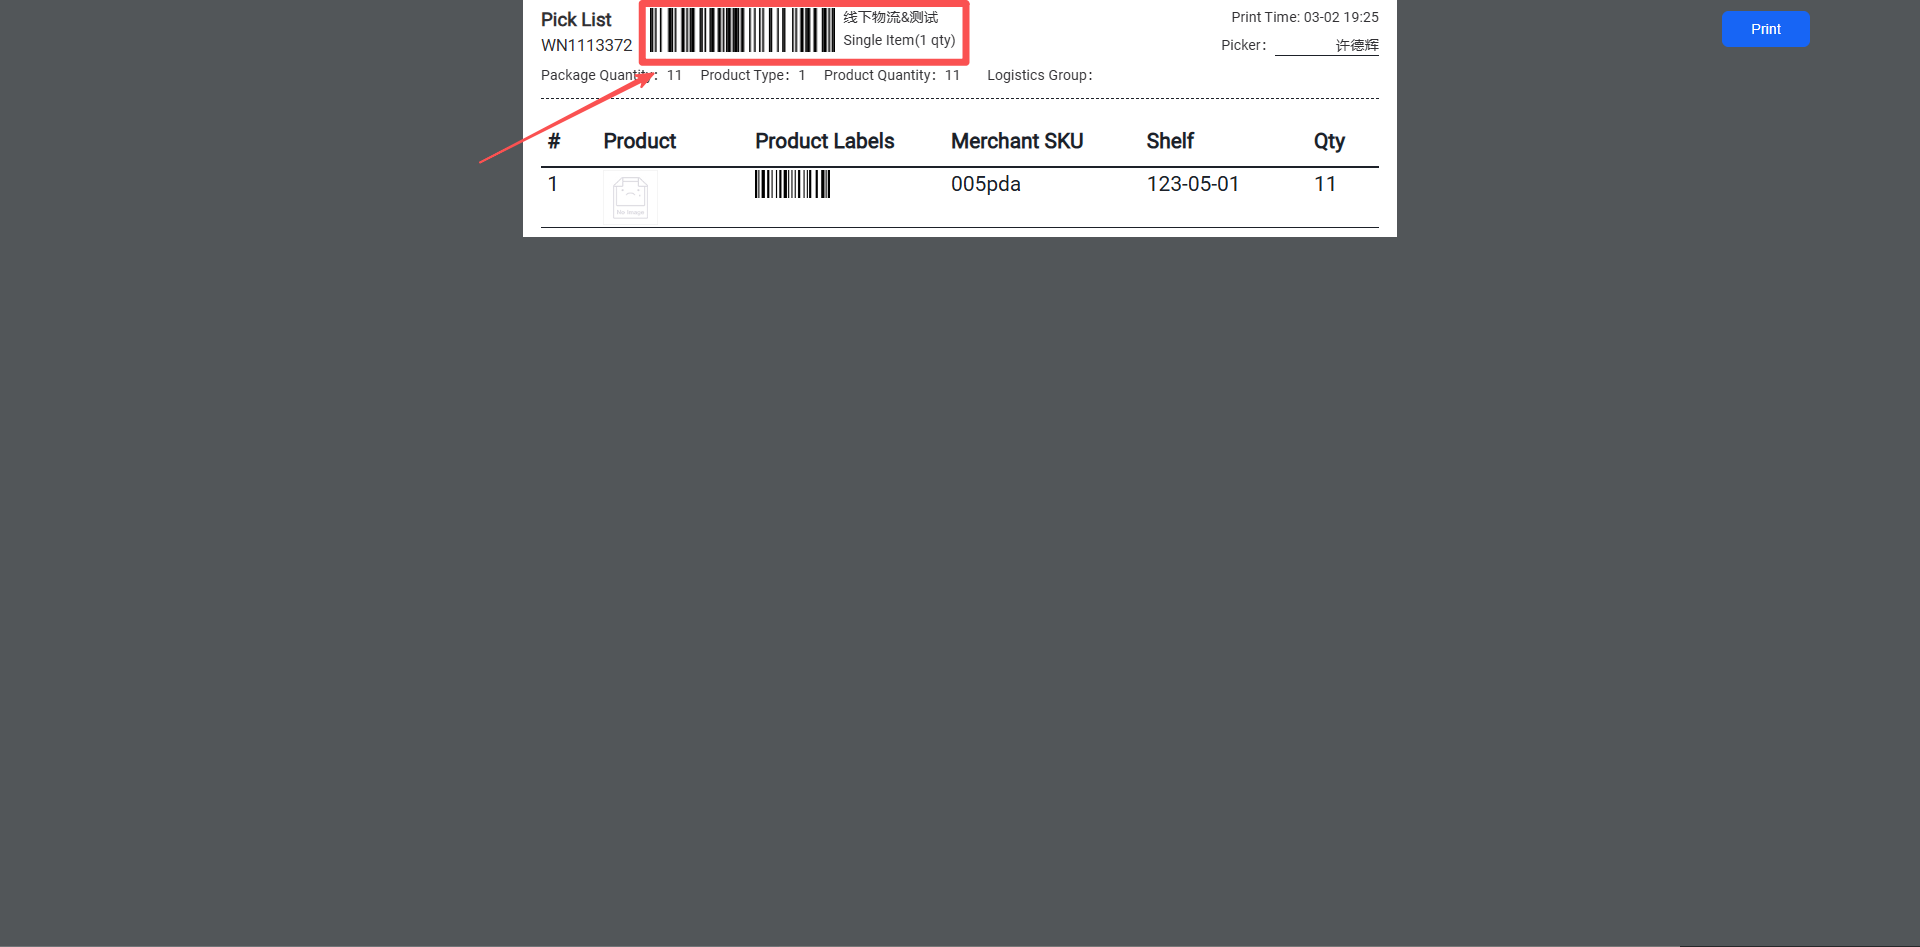
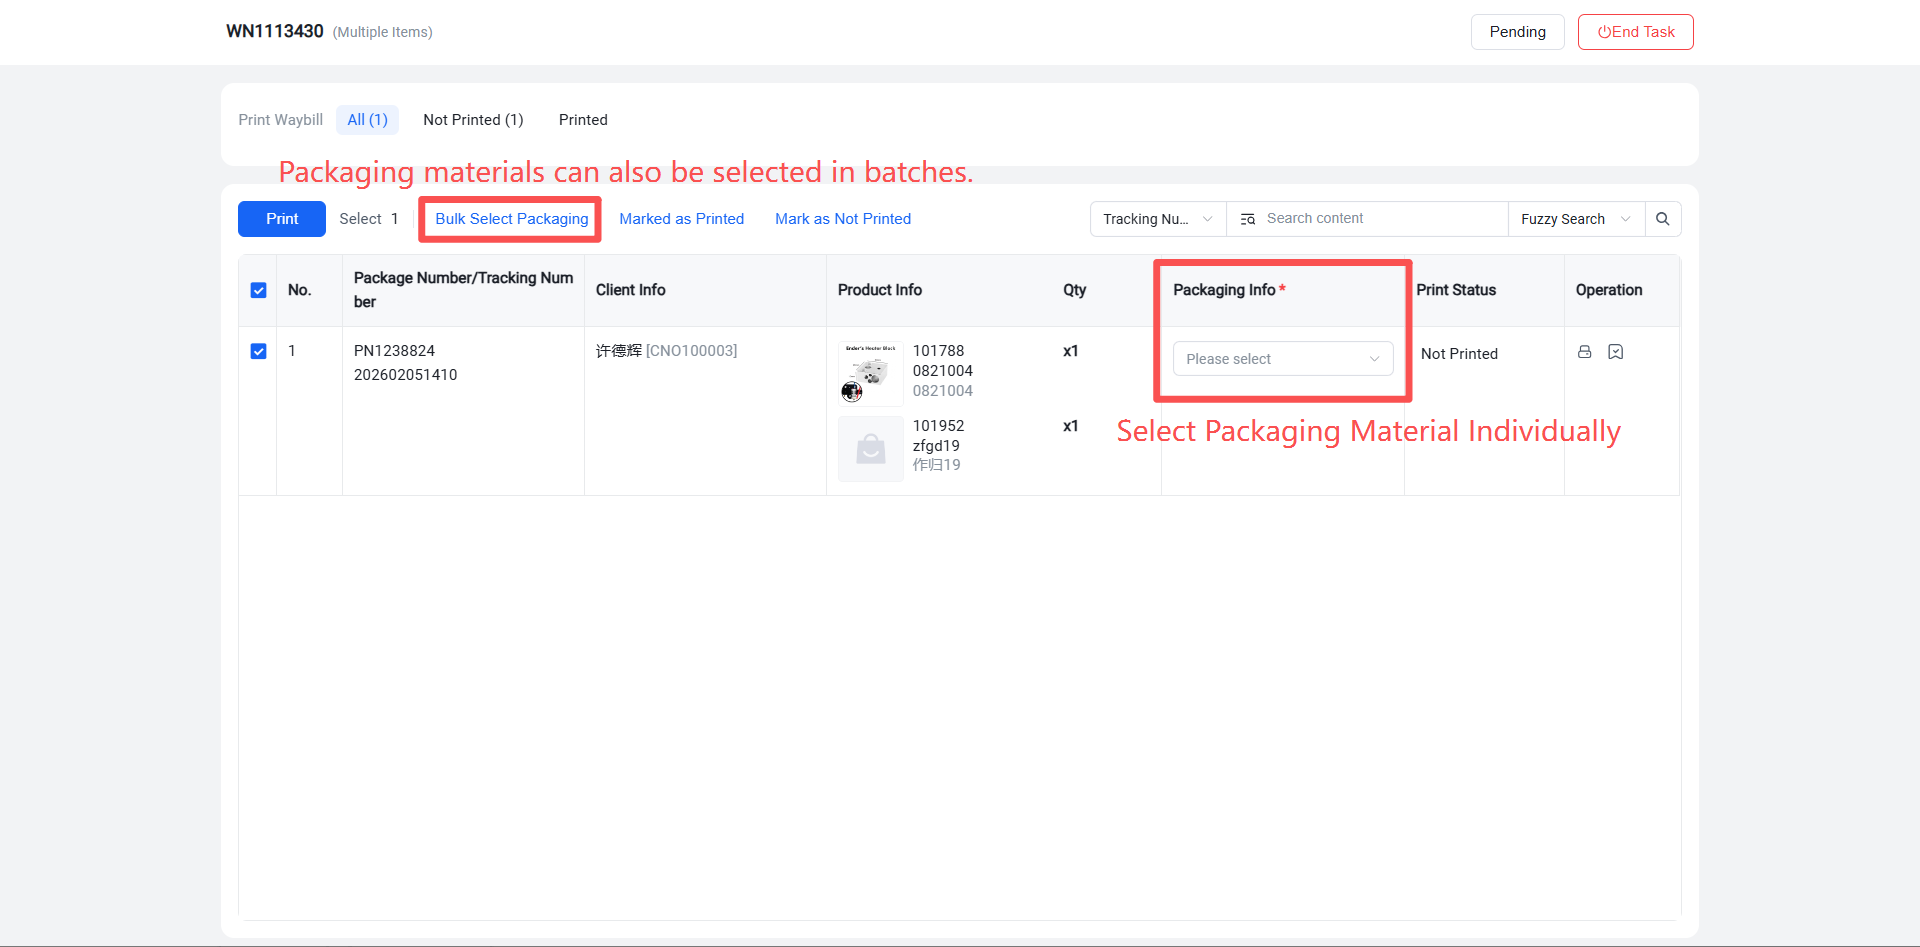
Step 4: On the Scan-to-Pack page, select the packaging material.
If "Enable Packaging Material Outbound Billing" is selected in the Outbound Settings, you must select a packaging material. (This step is not required if packaging material billing is not enabled.)
This setting can be configured in Outbound Settings.
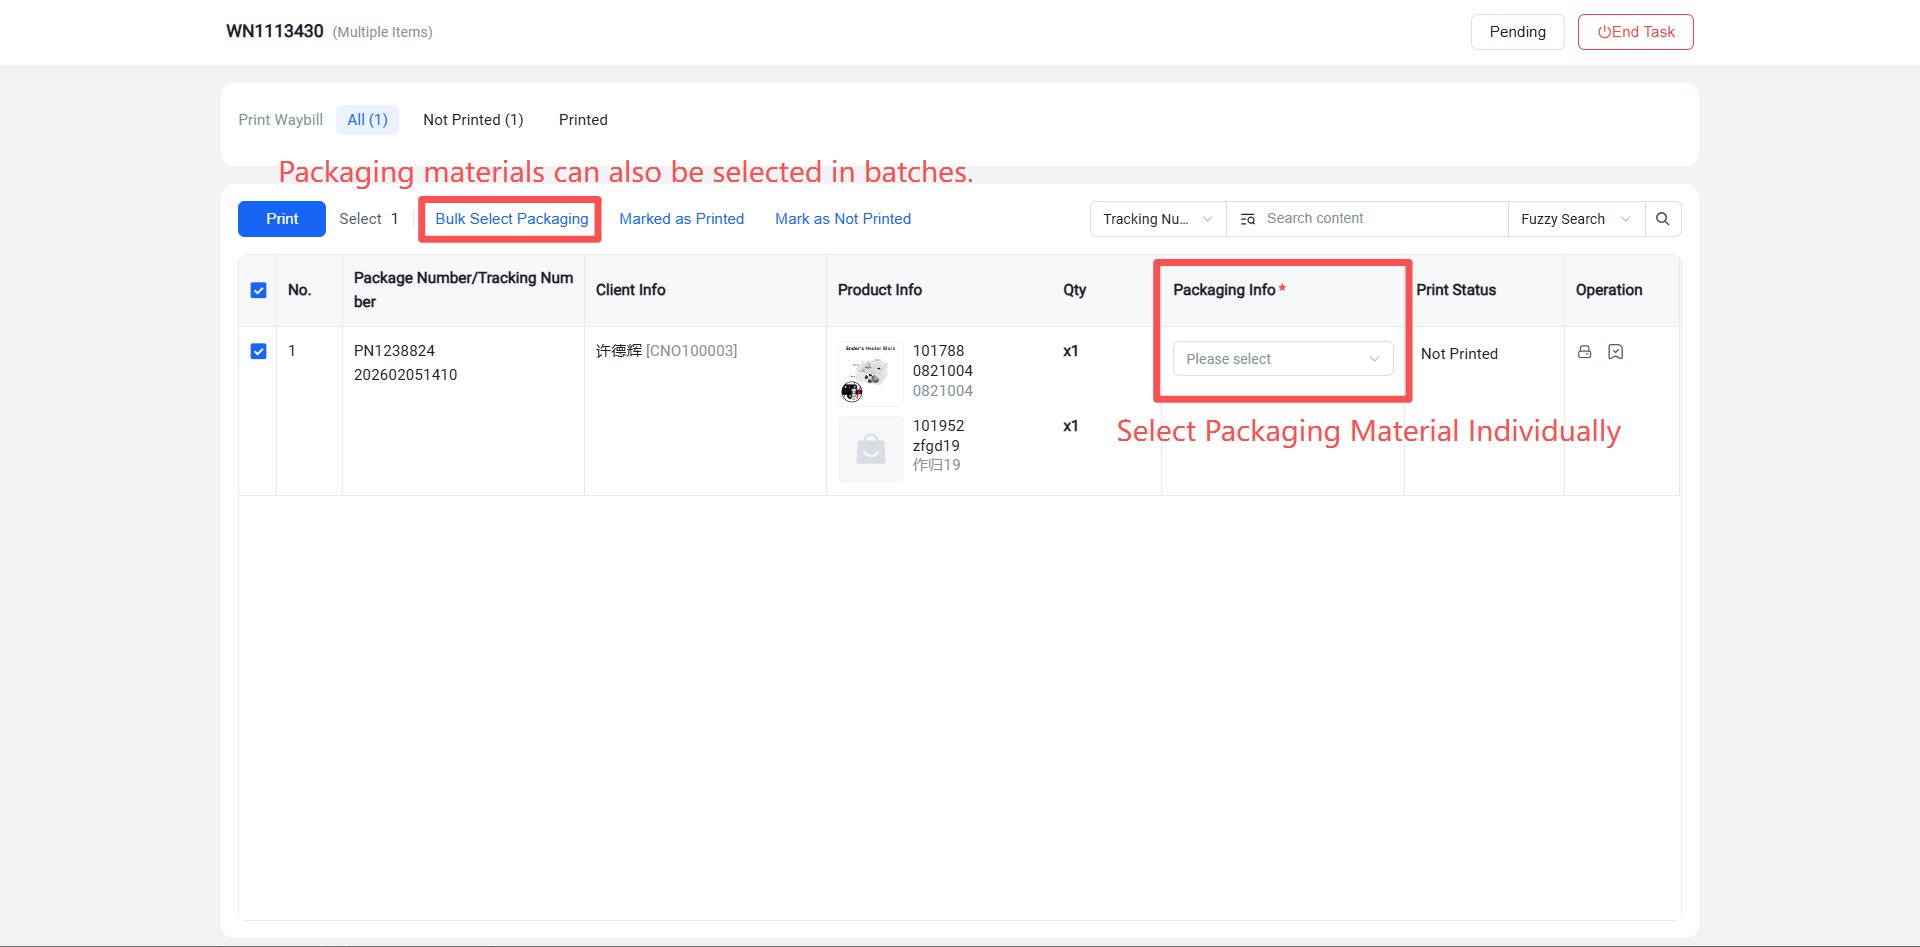
Step 5: After selecting the packaging material, you can check the packages to select them for shipping label printing.
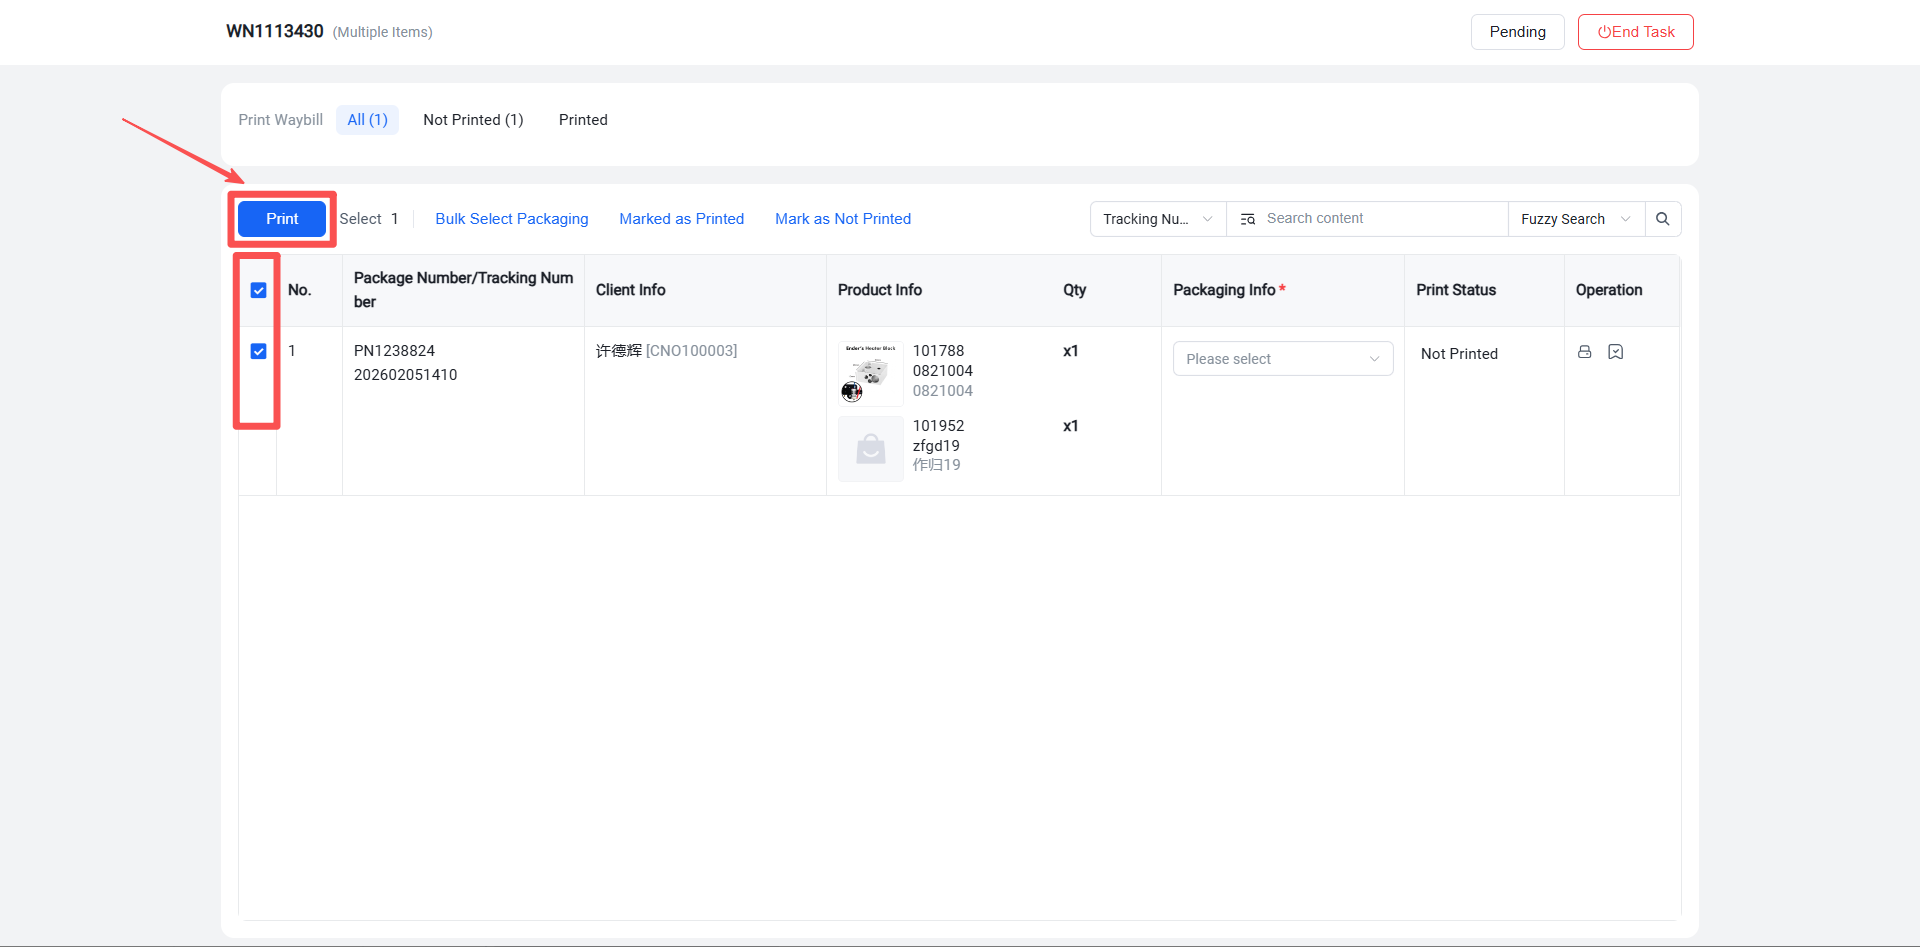
After clicking Print, the printing progress will be displayed.
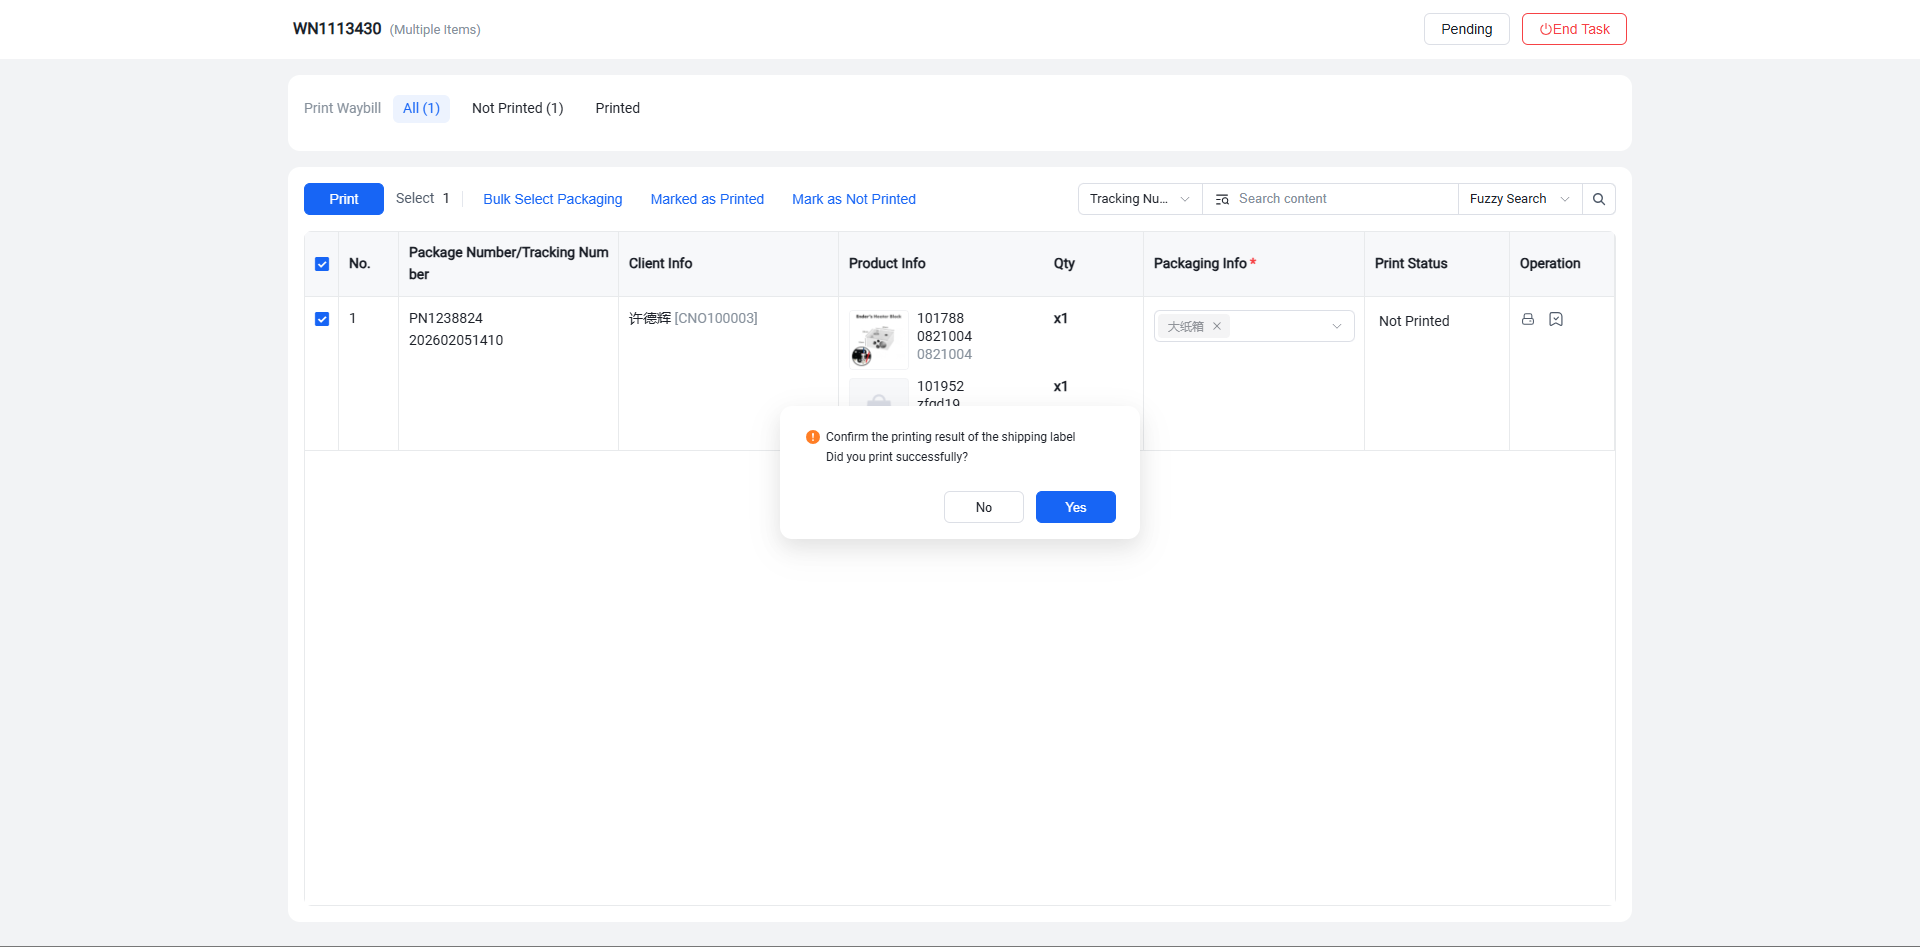
Step 6: After closing the initial pop-up window, if shipping labels have been printed for all packages in the batch, a confirmation prompt will automatically appear. You can click "End Task," which will change the batch status to "Completed" and move the packages to the "Pending Shipment" status. You can then proceed to "Scan to Ship" for shipping operations or navigate to Package Management > Pending Shipment List to manually mark them as shipped.