Configure Warehouse, Zone, and Shelf Location
In the WMS system, you can add warehouses and manage them, such as handling warehouse receiving and order acceptance. You can also manage warehouse zones by adding new zones, and manage rack locations by defining their specifications and setting picking priorities, among other functions.
Note: A maximum of 5 warehouses can be created. If you need to create more warehouses, please contact us.
1. Create Warehouse
I. Definition: The first step after registration is to create warehouse information to manage multiple warehouses.
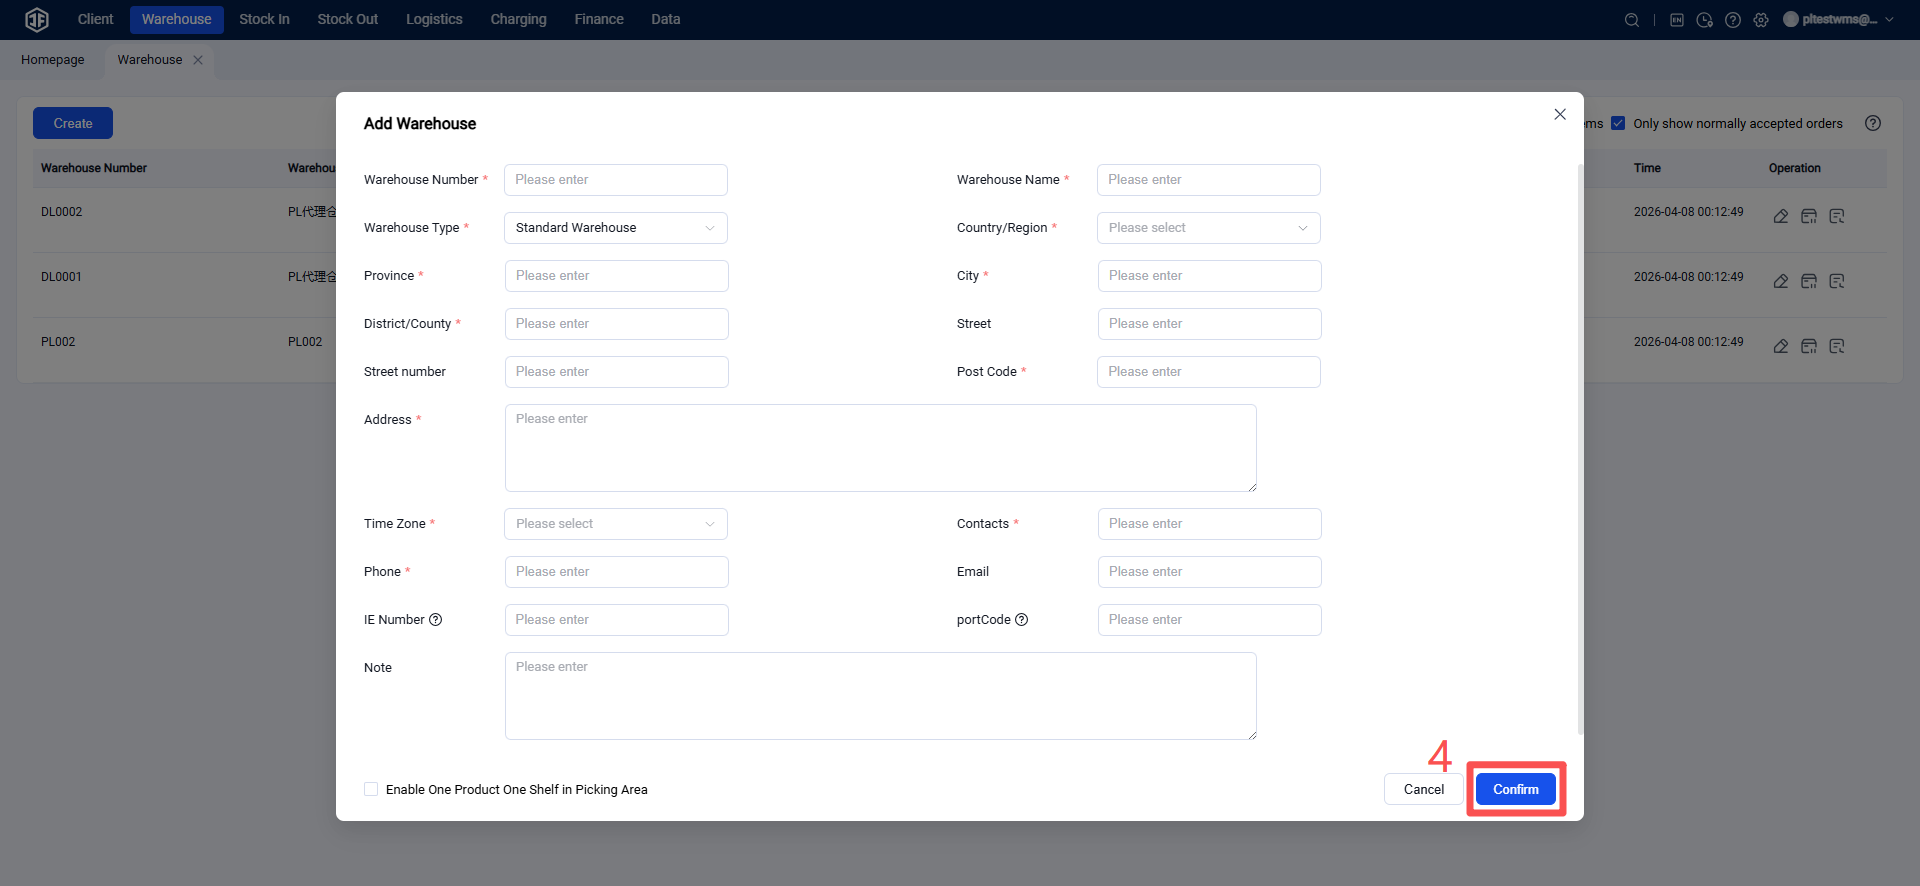
II. Operation Path: Settings > Warehouse Settings > Warehouse Management List > Create
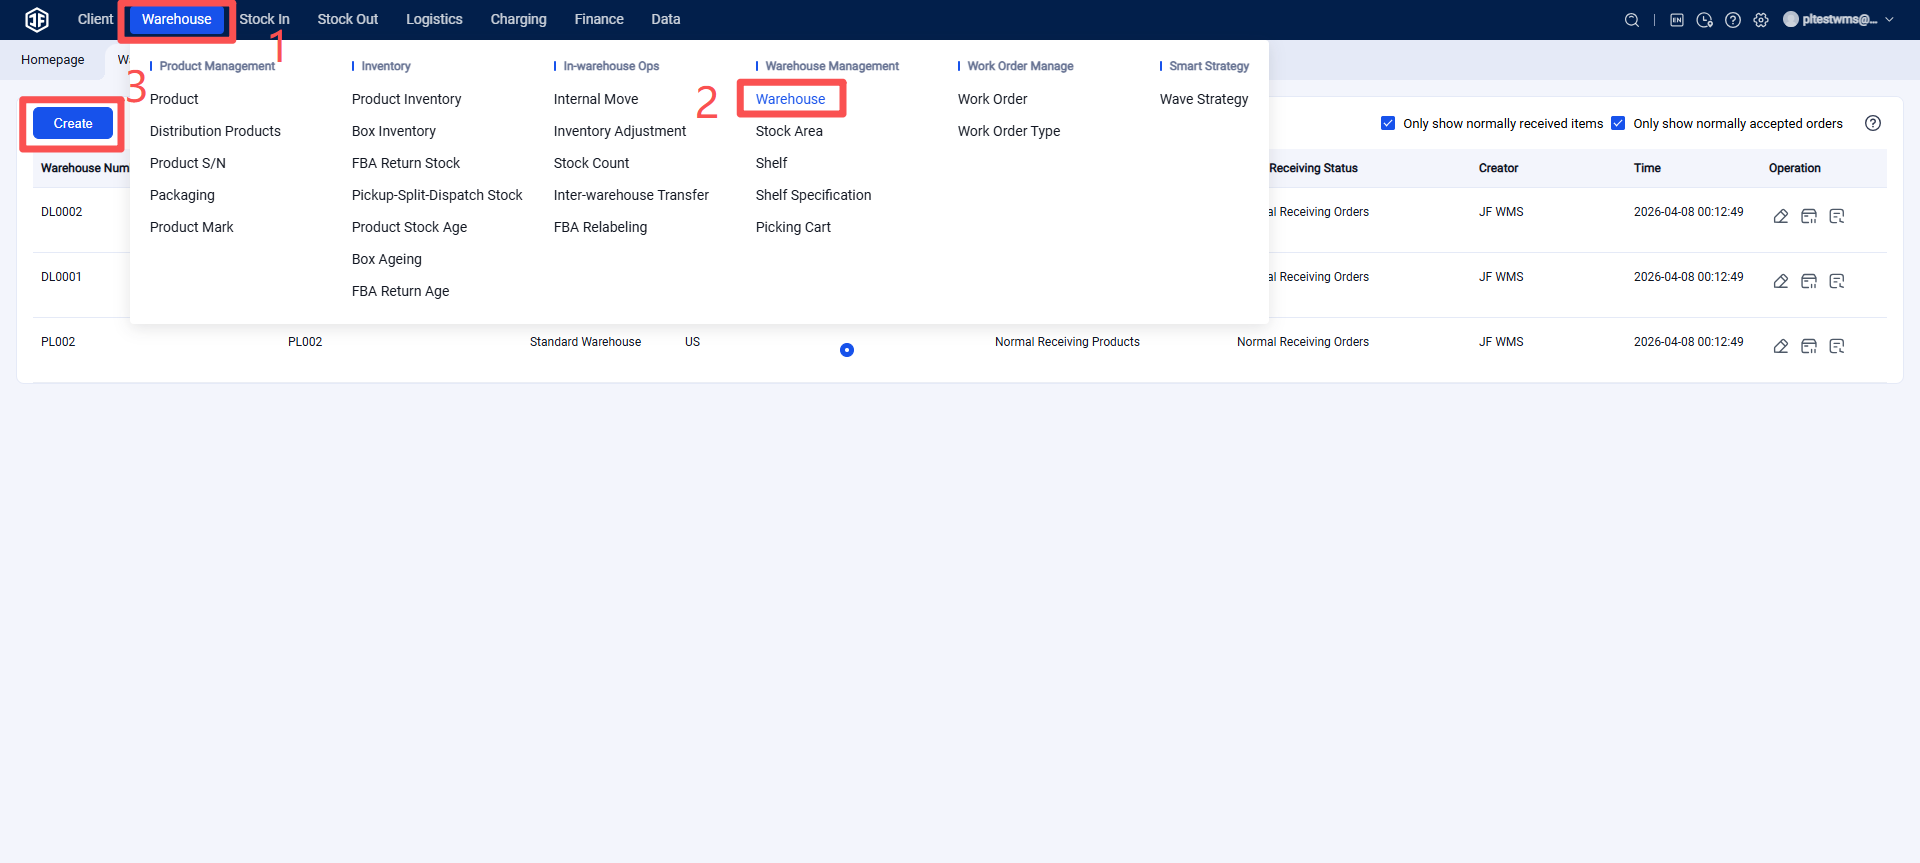
Required Information
Warehouse ID, warehouse name, warehouse type, country, province, city, district, postal code, address, time zone, warehouse contact person, and phone number, etc., must be filled in.
Default Warehouse
You can choose to set one warehouse as the default. Once set, any warehouse-related filters in the system will automatically select the default warehouse.
Warehouse Status
Pause Receiving: If the warehouse no longer accepts customer goods, you can click "Pause Receiving," and the system will prevent any inbound orders from being processed.
Pause Orders: If the warehouse no longer accepts customer orders (i.e., stops processing outbound shipments), you can click "Pause Orders," and the system will prevent any new orders from entering.
Zone List
I. Definition: After creating a warehouse, you can manage its zones. Zone types include Picking Zone, Storage Zone, and Defective Goods Zone, and can be created according to warehouse needs. Friendly Reminder: For small overseas warehouses (e.g., home-based warehouses), only a Picking Zone may be necessary.
II. Operation Path: Settings > Warehouse Settings > Zone List > Create Zone
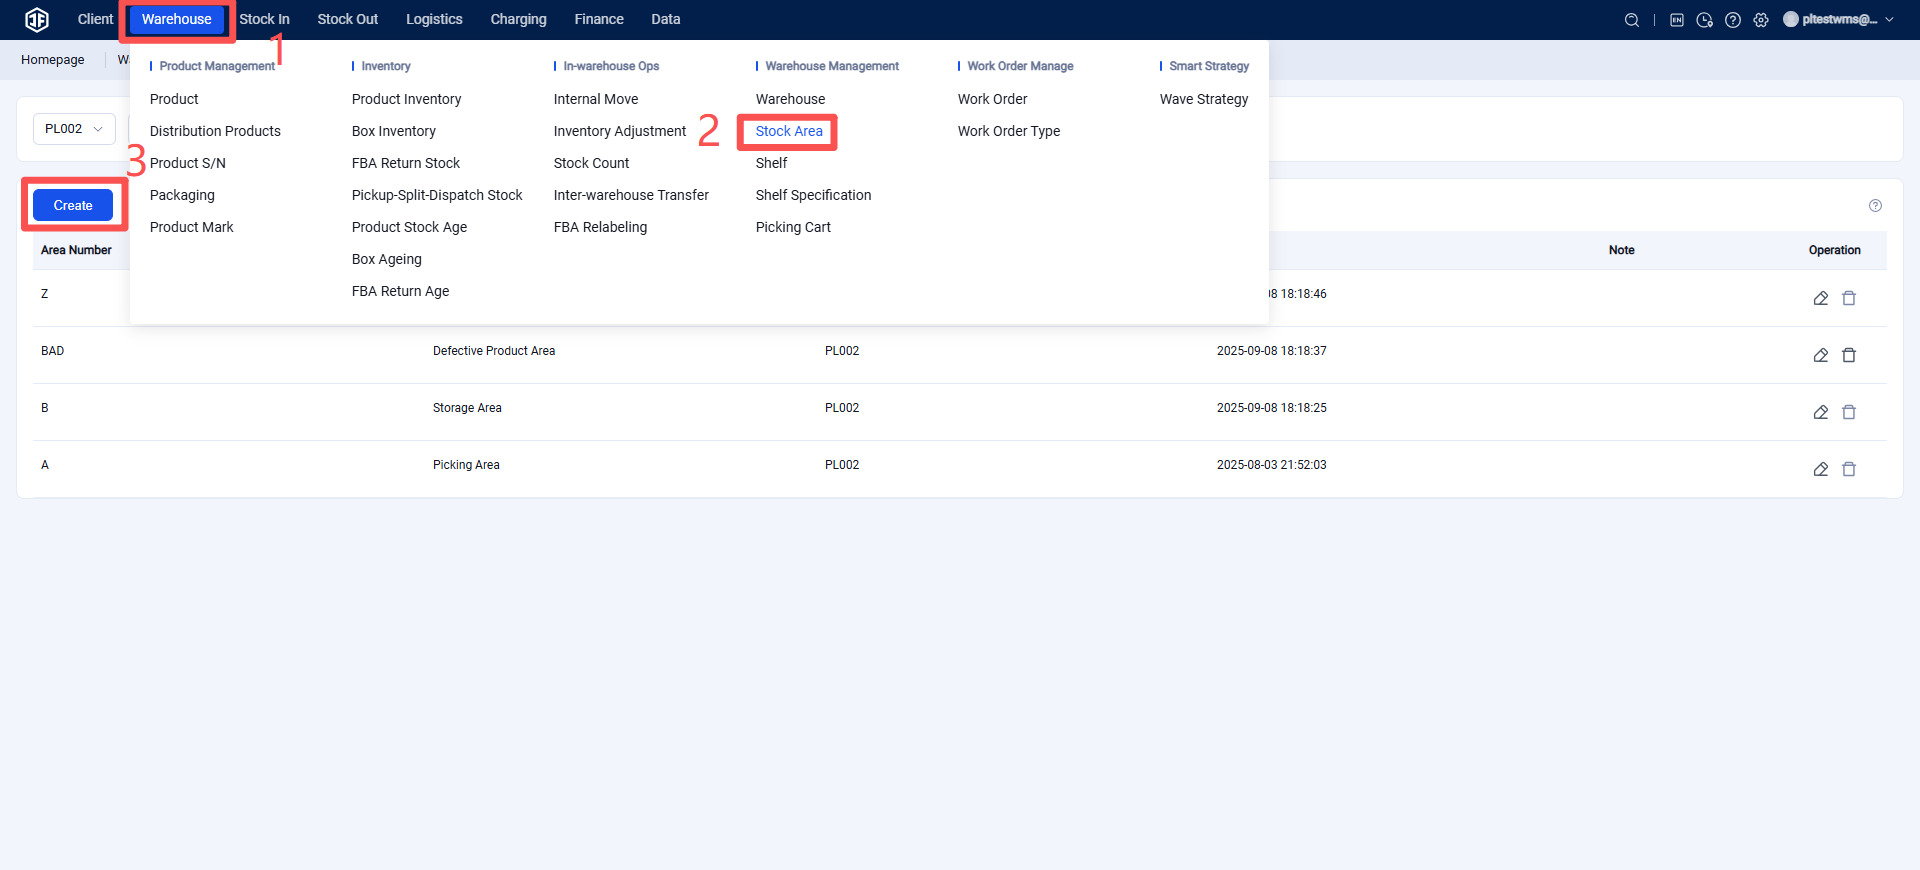
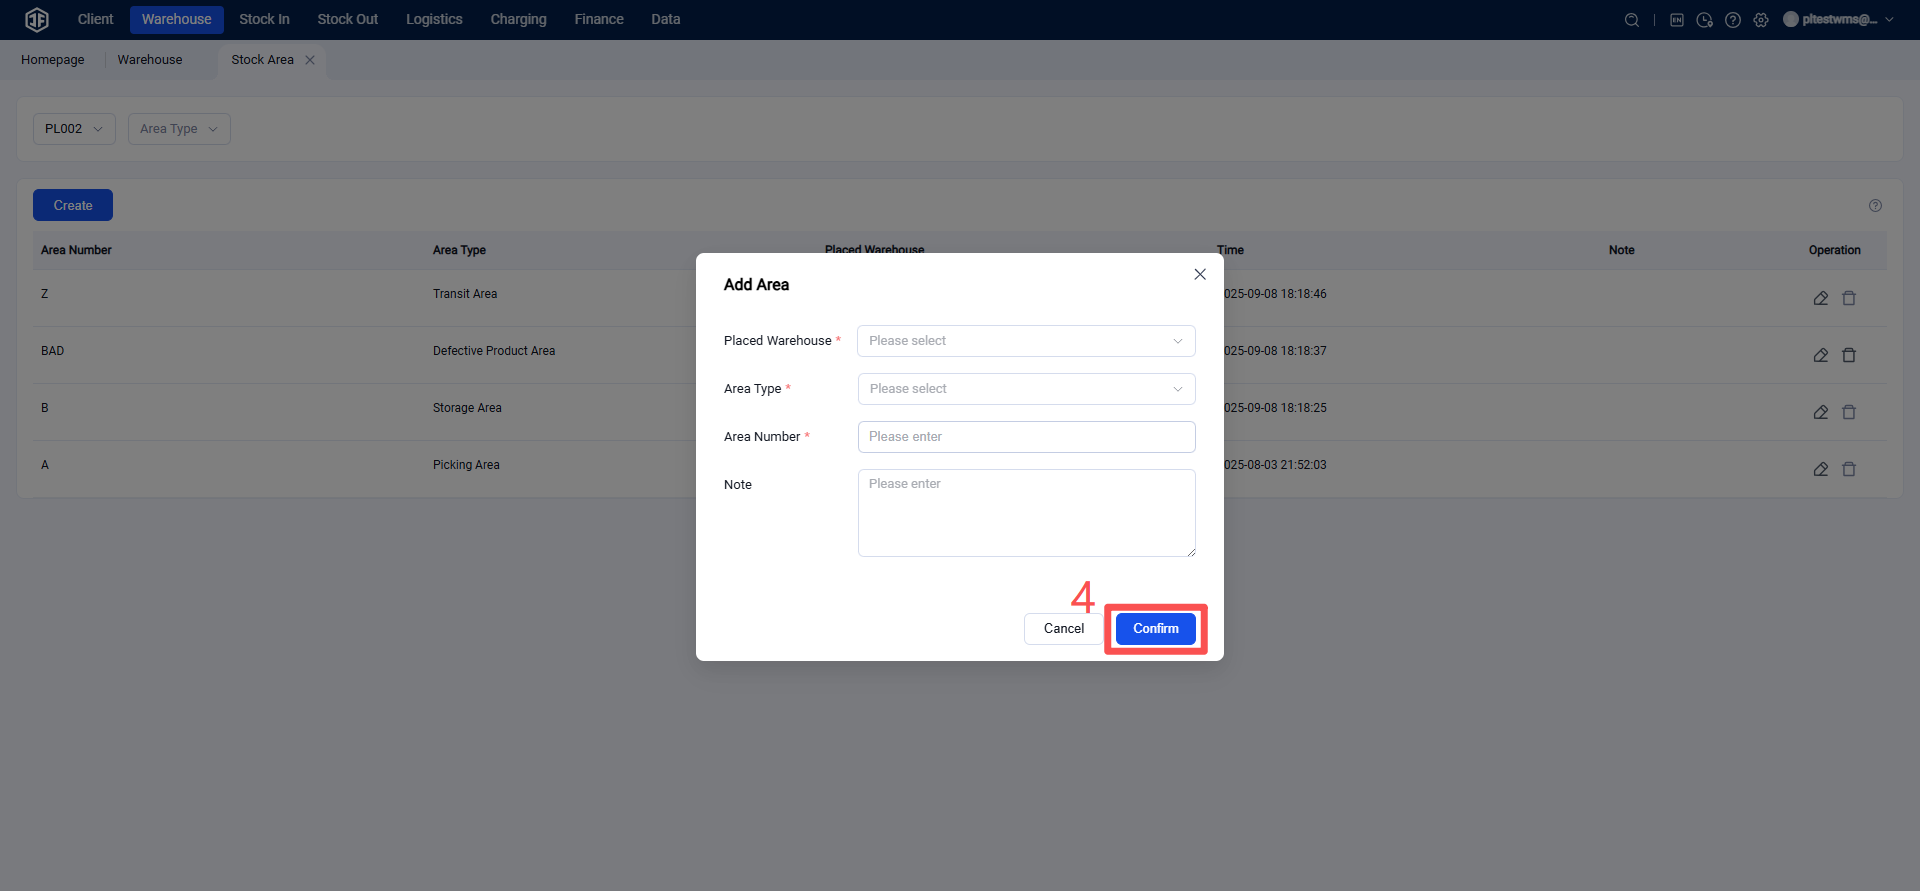
Picking Zone: The area where items are retrieved when processing orders.
Storage Zone: The area where goods are stored. When inventory in the Picking Zone is insufficient, stock can be moved from the Storage Zone to the Picking Zone.
Defective Goods Zone: The area designated for storing defective or damaged products.
Rack Location Specification Settings
I. Definition: Based on business type and seller product characteristics, specifications and dimensions for rack locations can be configured.
II. Operation Path: Settings > Warehouse Settings > Rack Location Specifications > Create New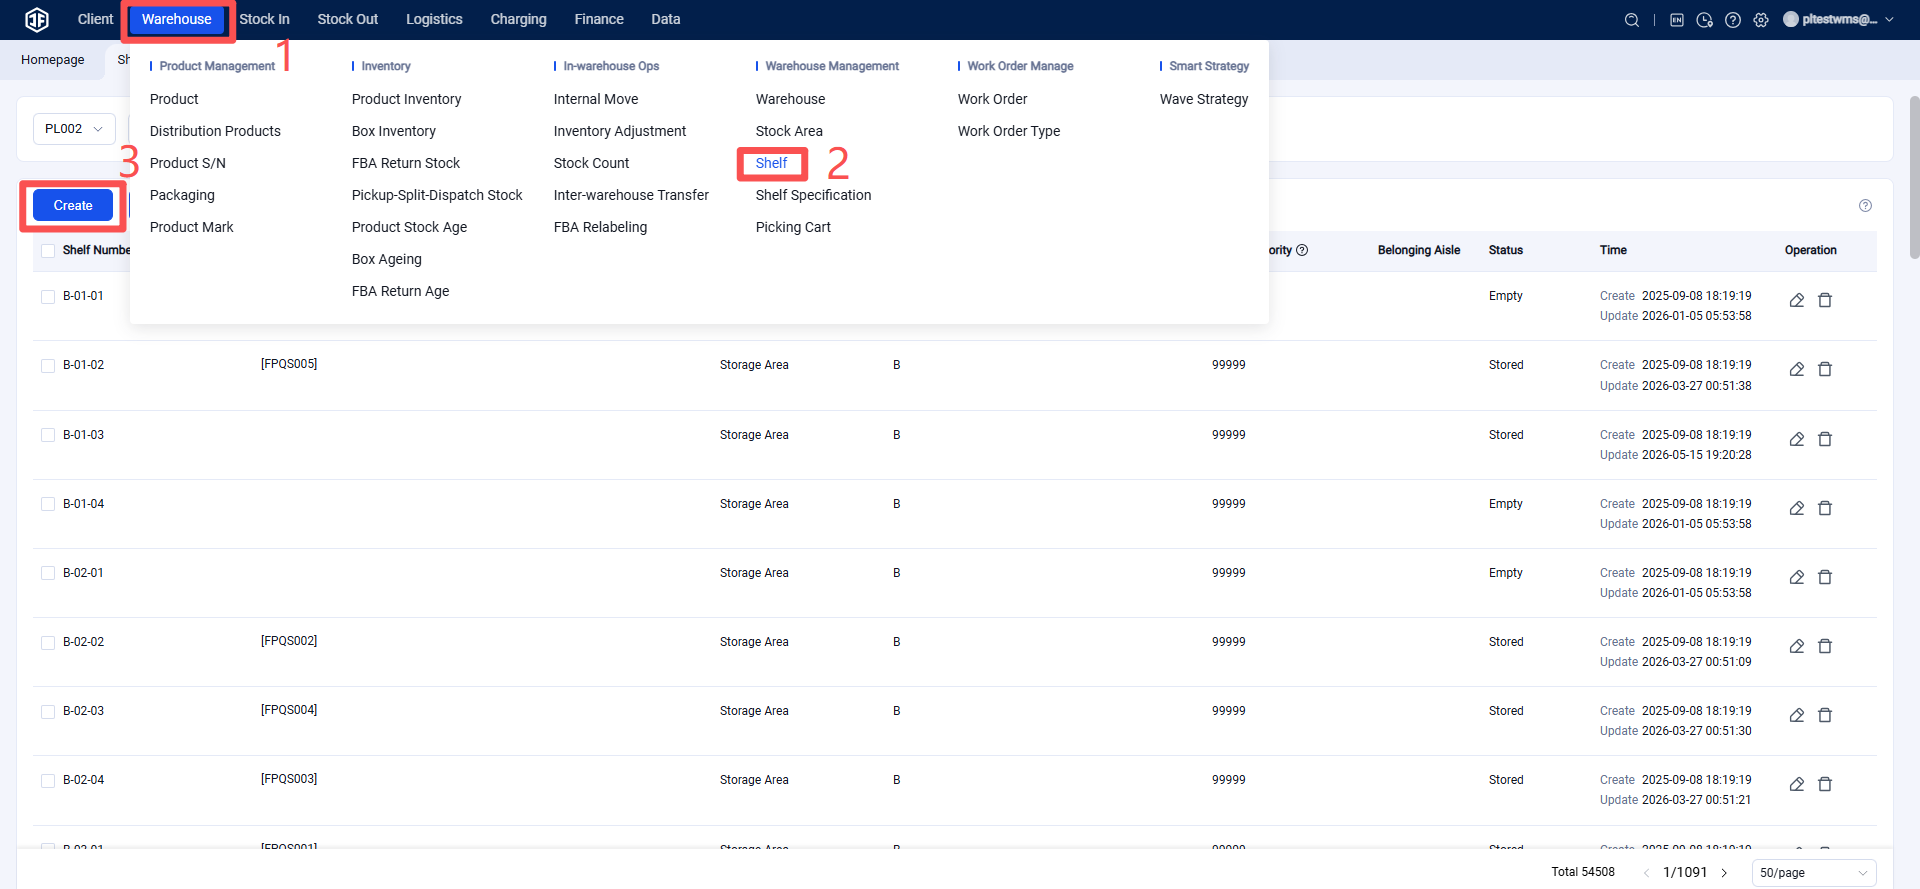
Note: Once a rack location specification template is successfully created, it can be referenced by actual rack locations. Referenced templates cannot be deleted, while unreferenced ones can be removed.
Create and Manage Rack Locations
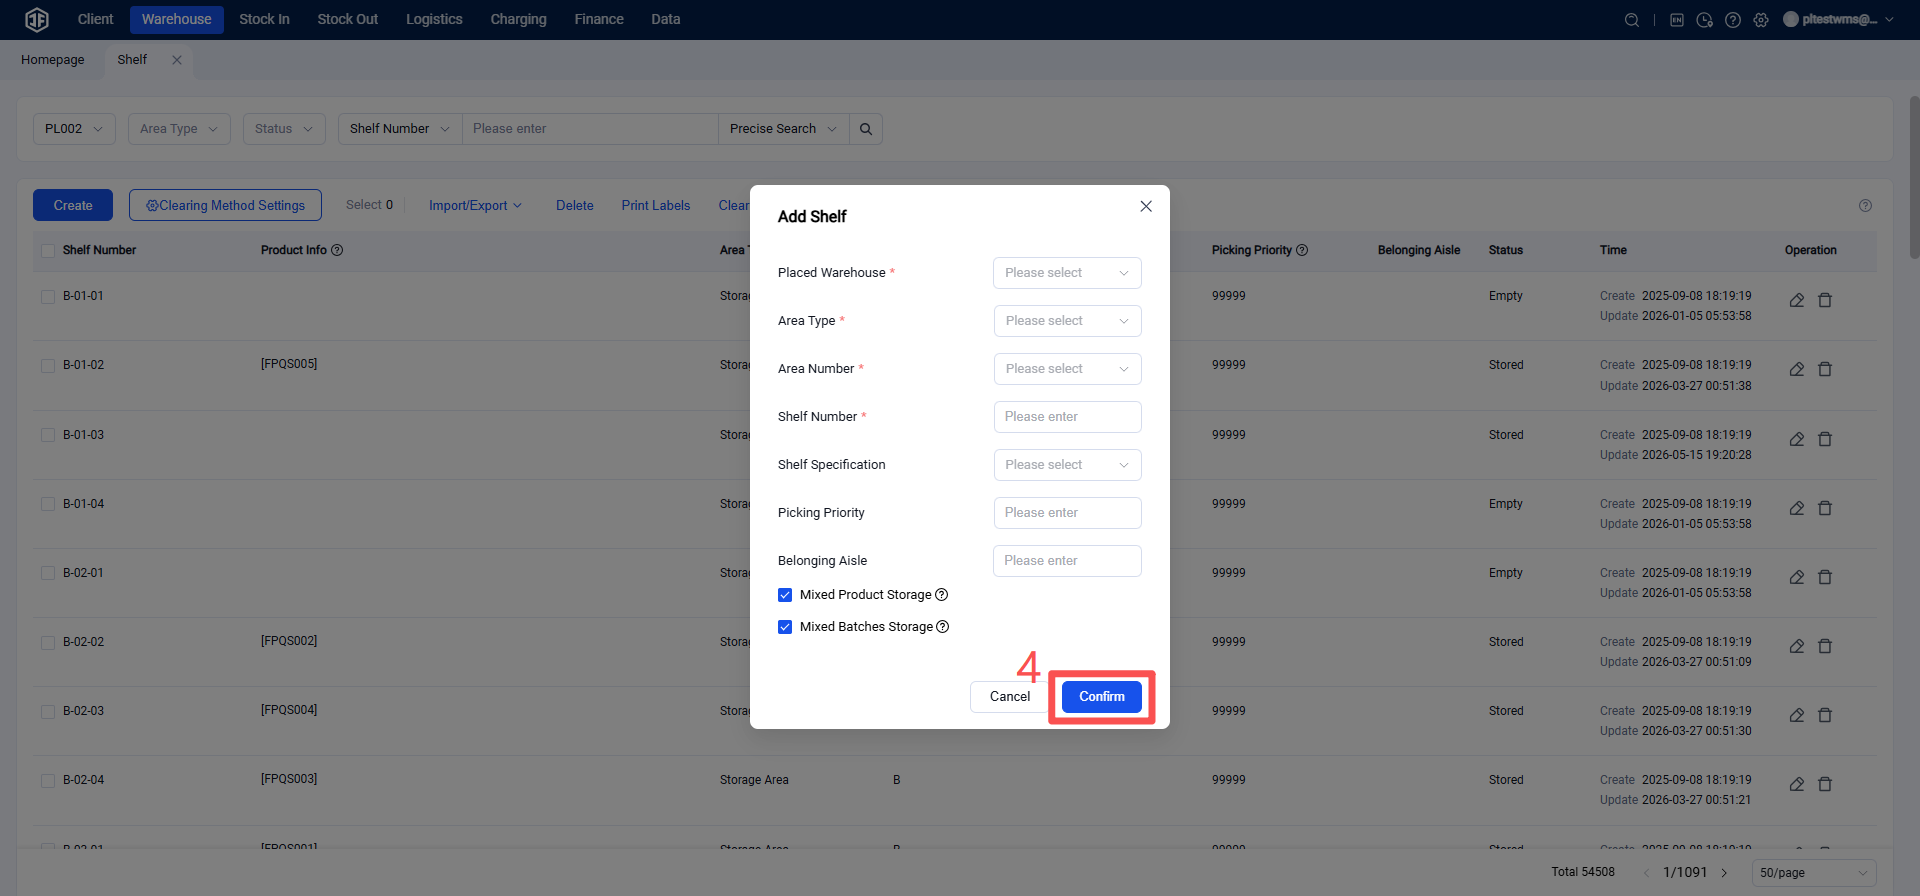
I. Definition: Based on the layout planning of the warehouse, assign identification numbers to each row and column of rack locations, and synchronize them into the overseas warehouse system. This facilitates faster picking, clearer inventory management, and real-time inventory updates for sellers.
II. Operation Path: Settings > Warehouse Settings > Rack Location List > Create New
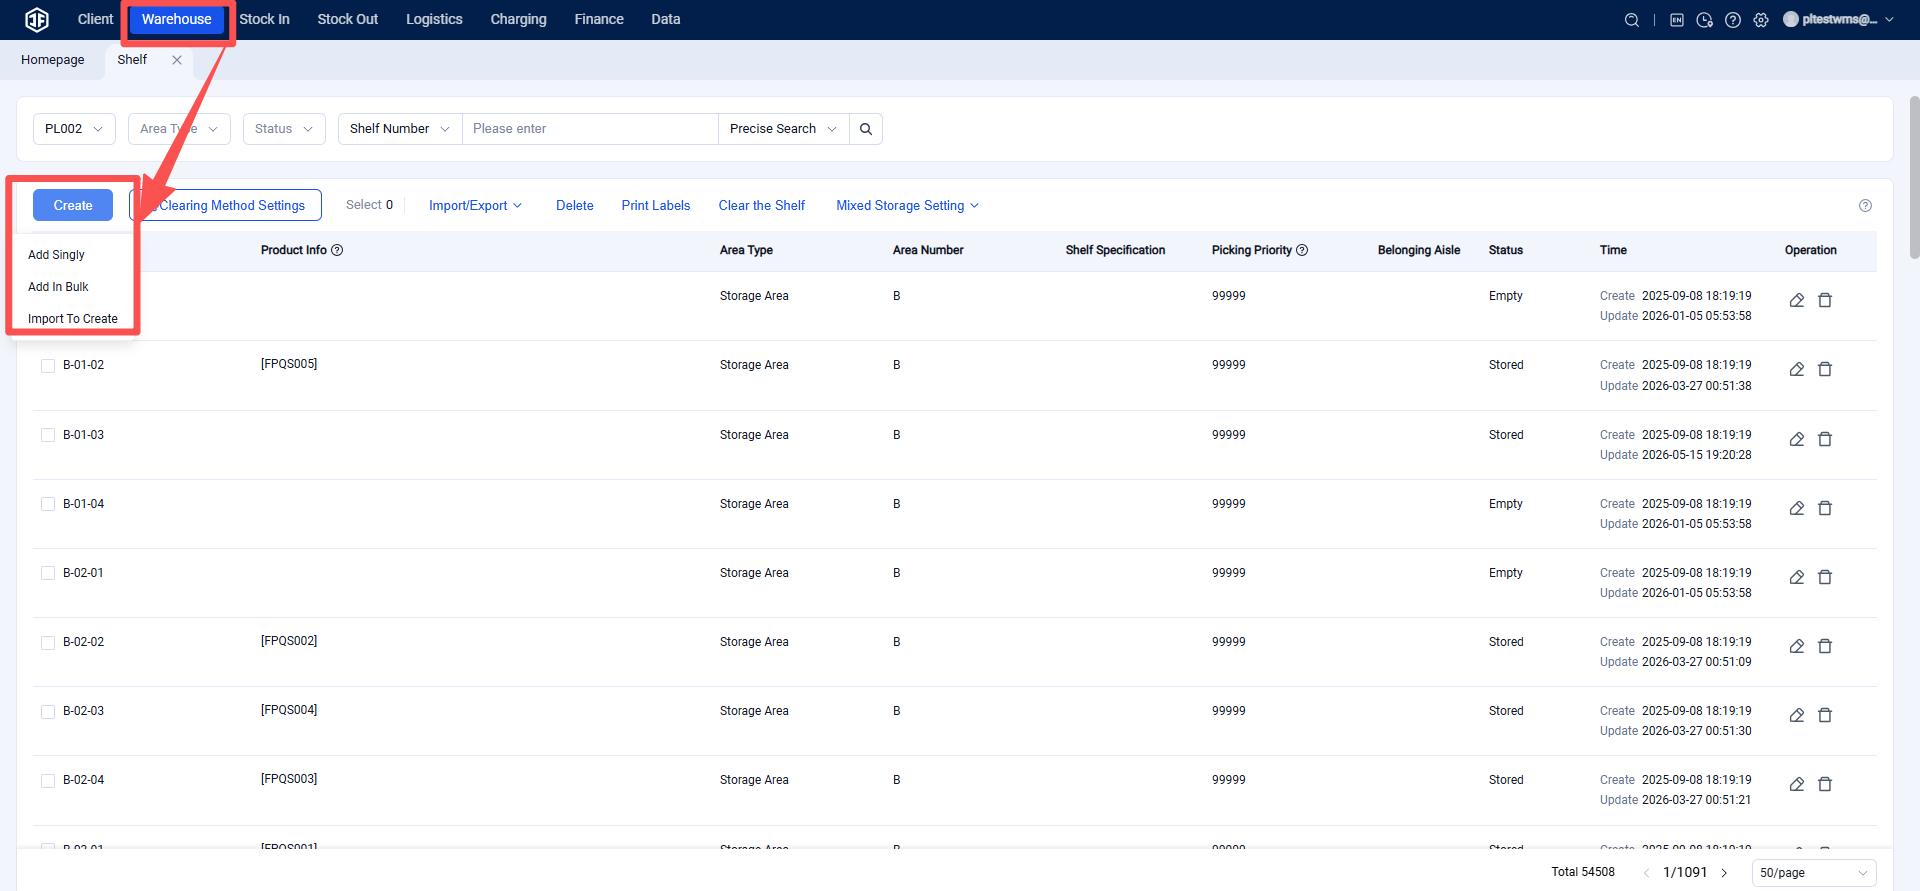
Rack locations can be created in three ways:
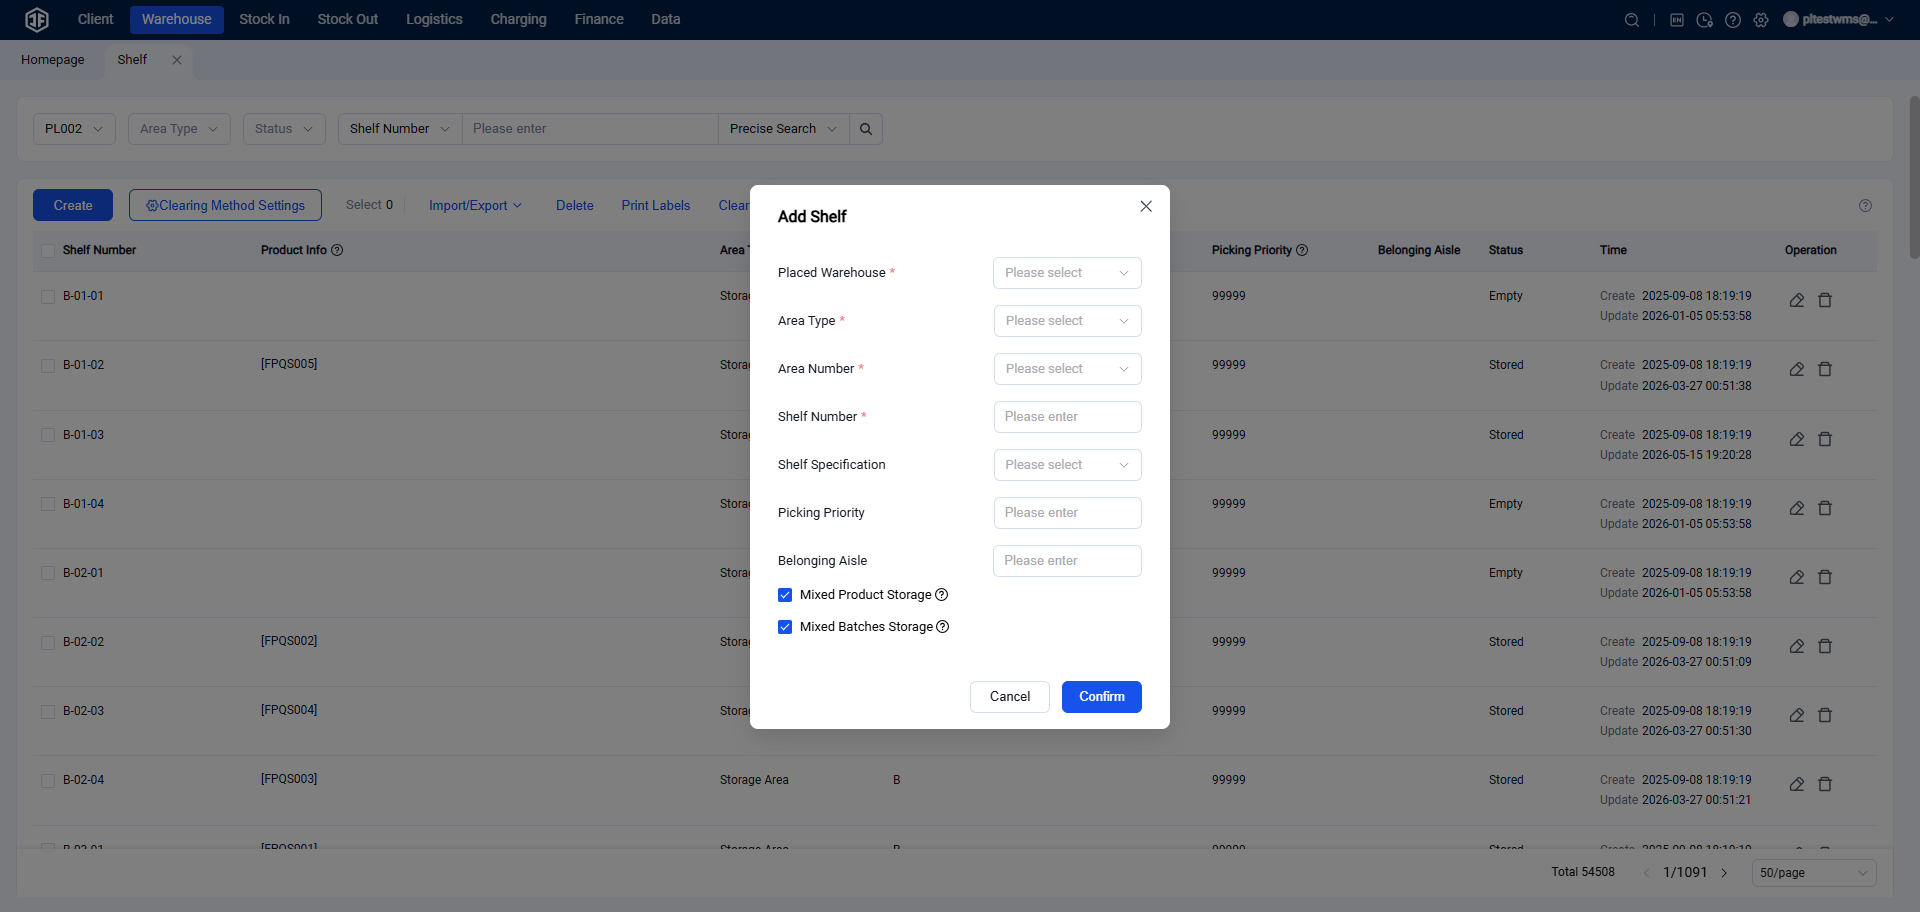
Single Creation: Fill in the information for one rack location at a time.
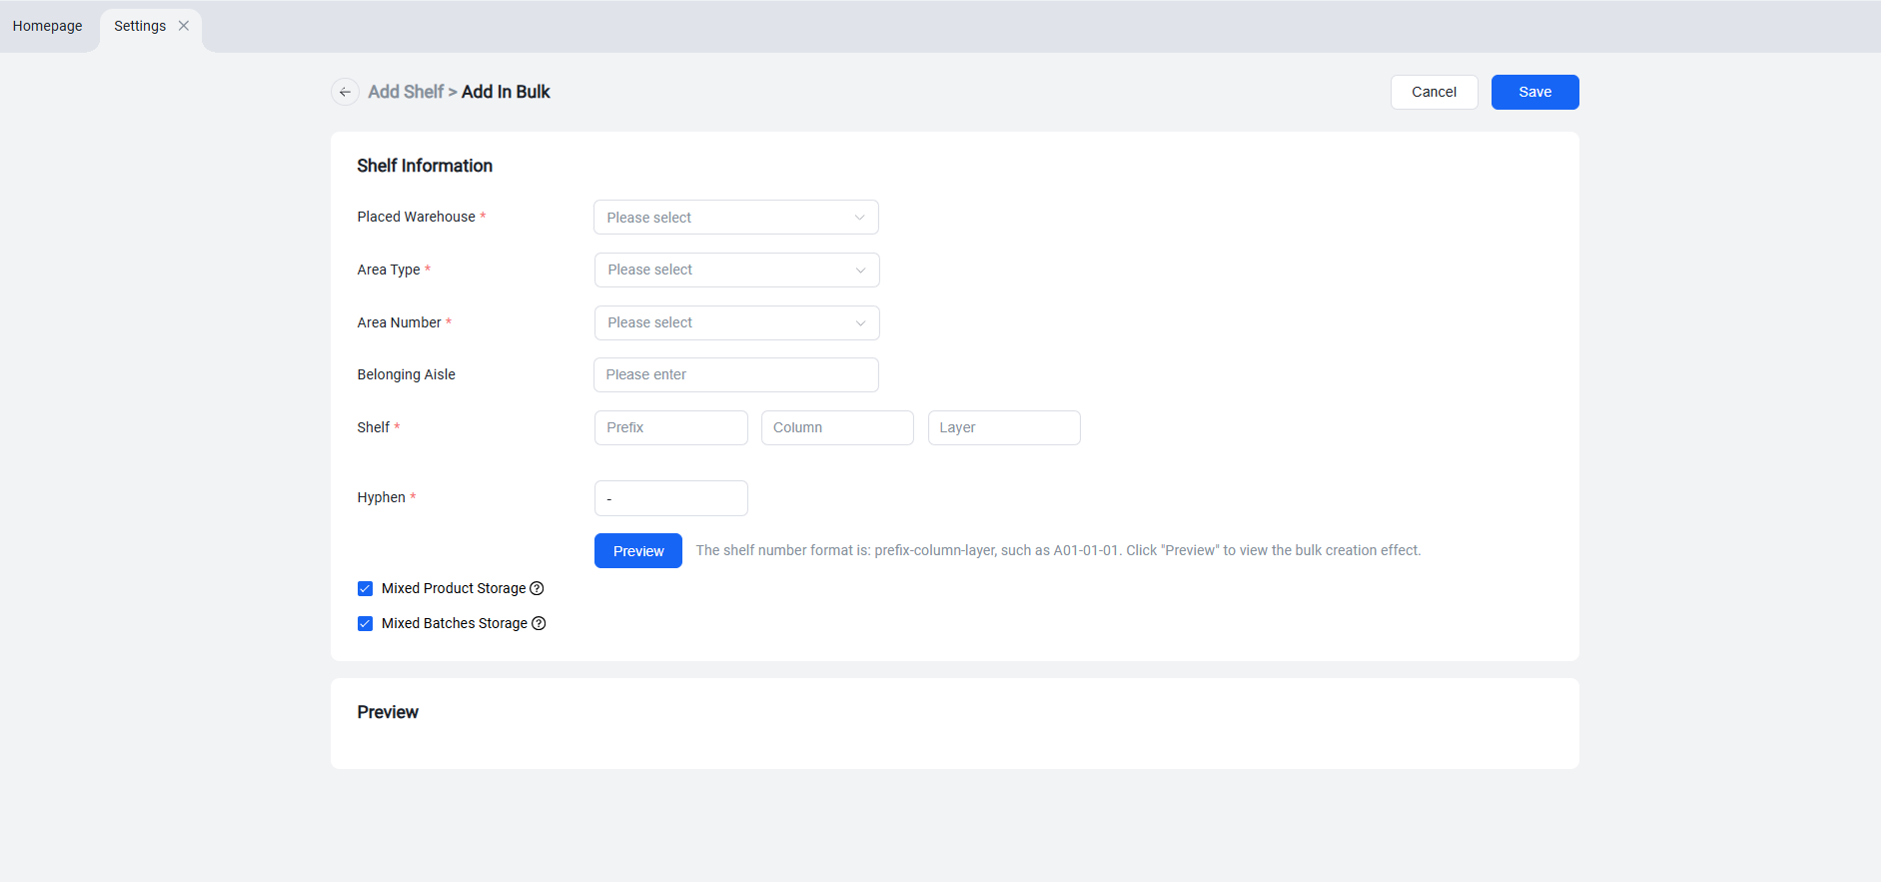
Batch Creation: Based on the rack layout plan (e.g., specifying row number, number of levels, and number of columns), generate an entire row of rack locations in bulk.
Import Creation: Based on the warehouse rack layout—including the total number of rows, and the number of levels and columns per row—import all rack locations at once using an Excel file.
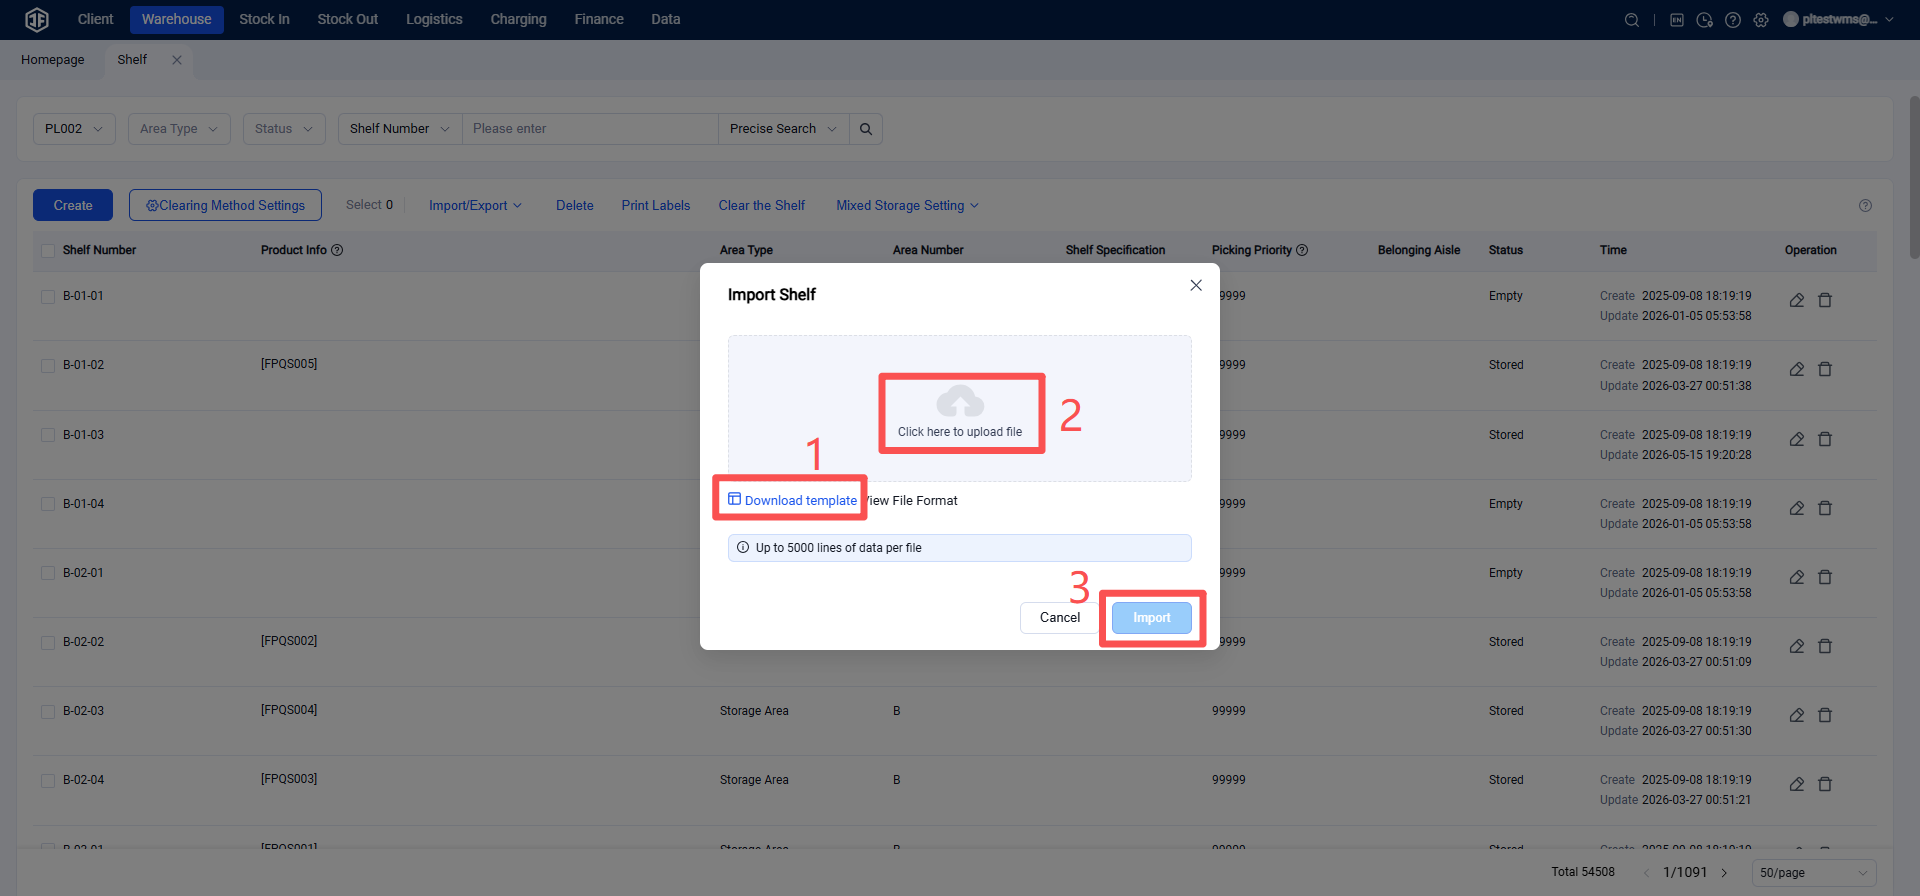
Note:
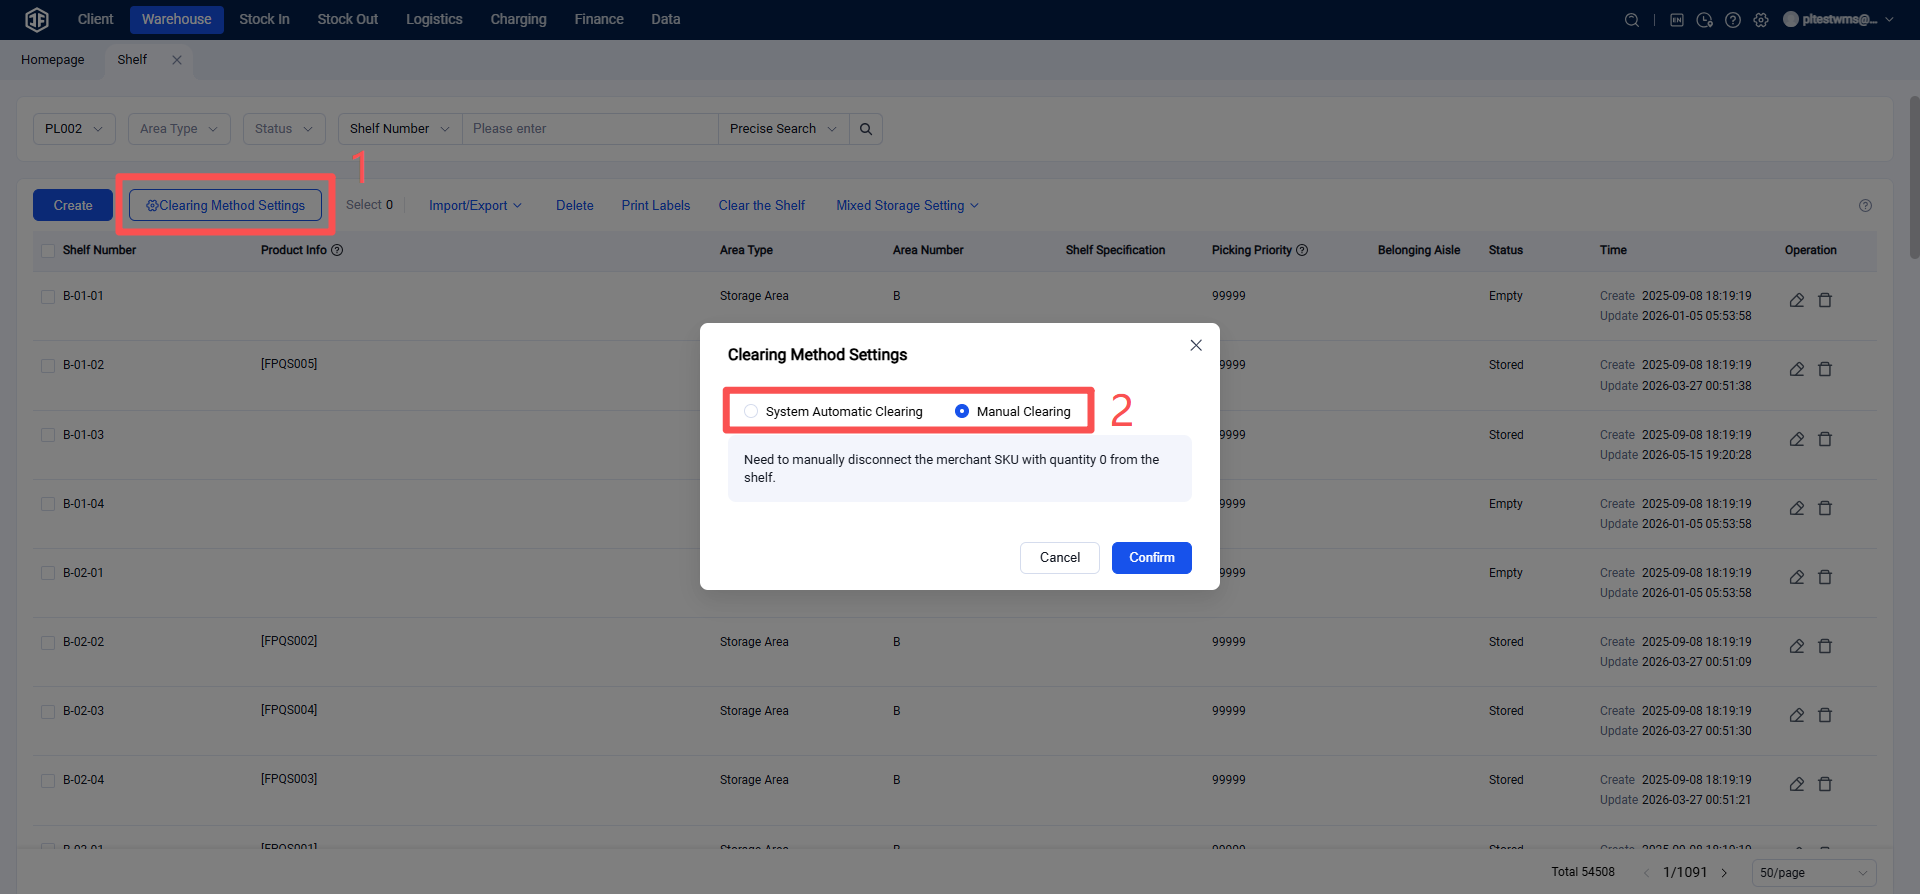
Cleanup Method Setting: You can choose between automatic or manual cleanup of items with zero inventory to prevent them from occupying rack space.
System Automatic Cleanup: When the quantity of an item SKU reaches zero, the system will automatically unbind the SKU from its assigned rack location.
Manual Cleanup: You must manually unbind the SKU from the rack location when the item quantity reaches zero.
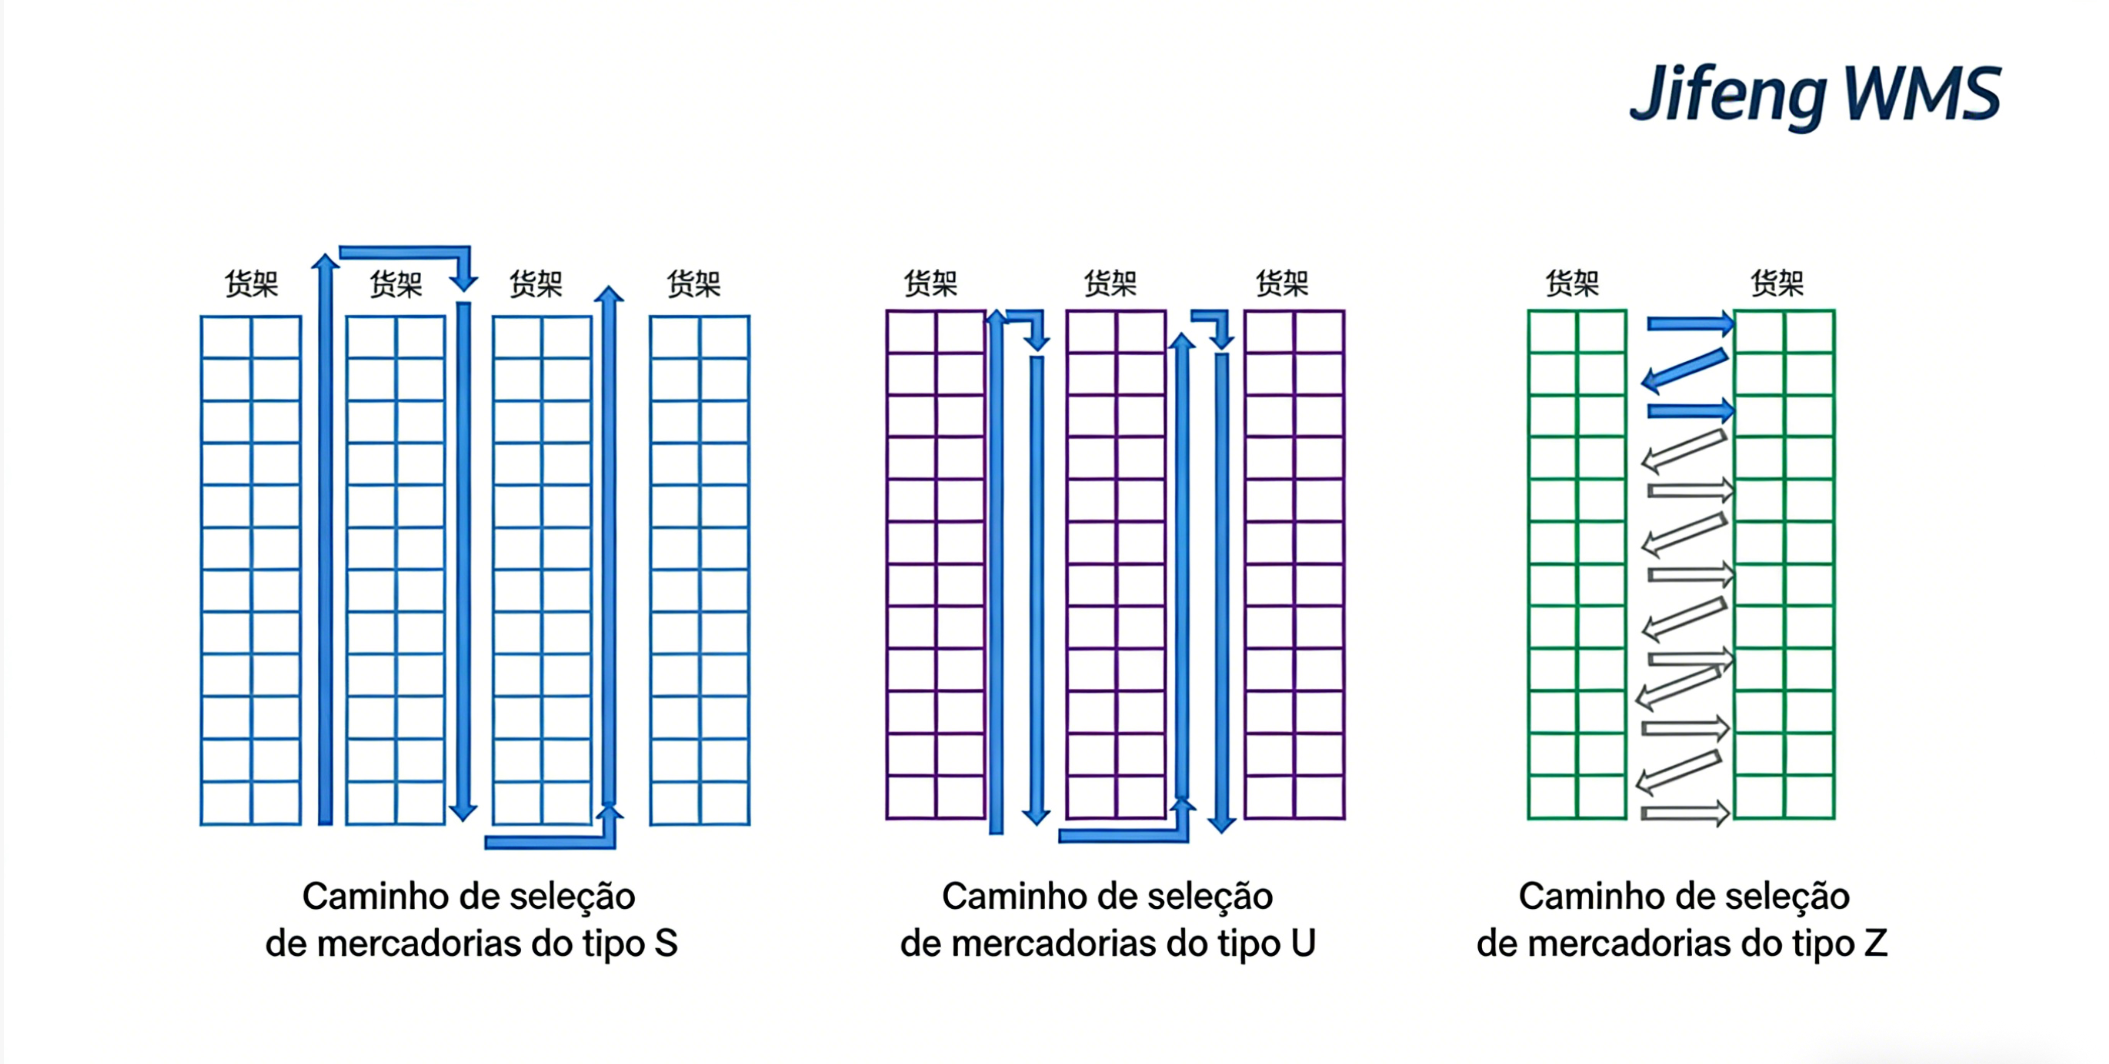
Picking Priority Setting: Here, you can configure S-shaped or Z-shaped picking paths based on rack locations, enabling rapid picking, shortening walking distances, reducing pickers' travel time, and effectively decreasing overall picking and fulfillment time.
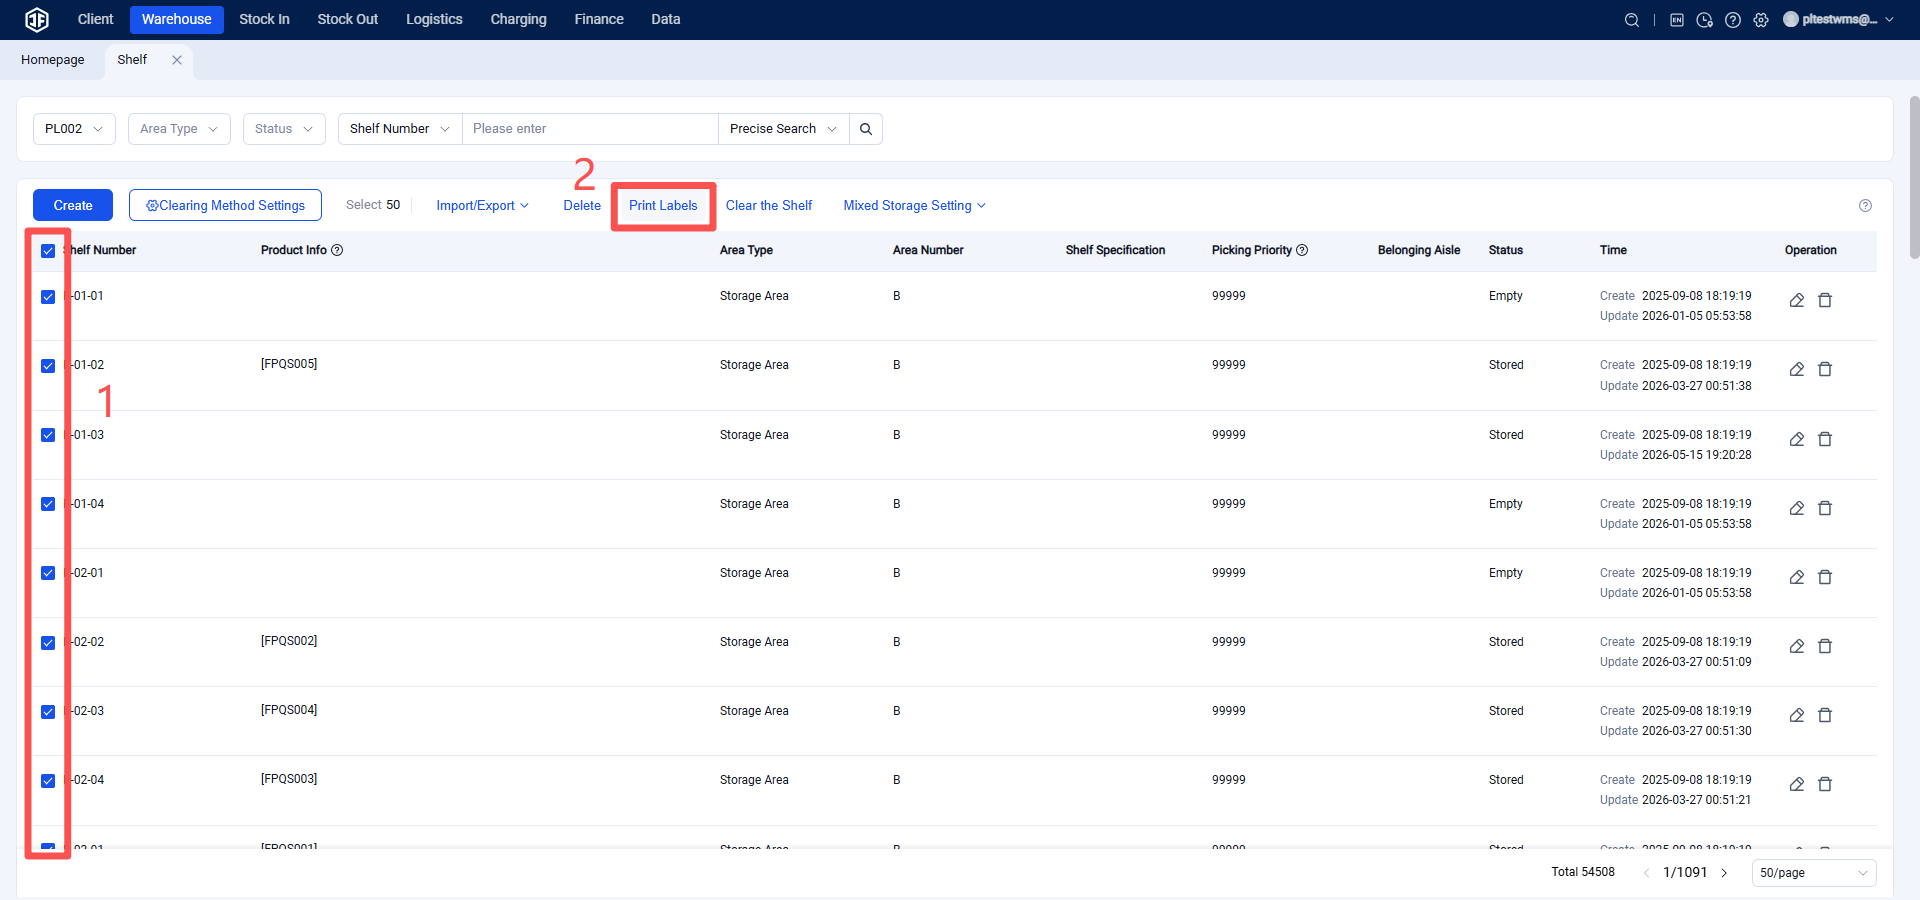
Print Rack Location Labels
Select the rack location numbers, print the corresponding labels, and attach them to the respective rack locations. This ensures a clear one-to-one correspondence between physical rack locations and the system, facilitating organized and efficient rack management.
5. Picking Cart Management
I. Definition
To clearly track the working status of picking carts and facilitate reasonable assignment of picking personnel. Pickers can use a PDA to scan cart labels, which will guide the picking route and assist in sorting and packing. The entire process is paperless, making operations more convenient and cost-effective.
II. Operation Path
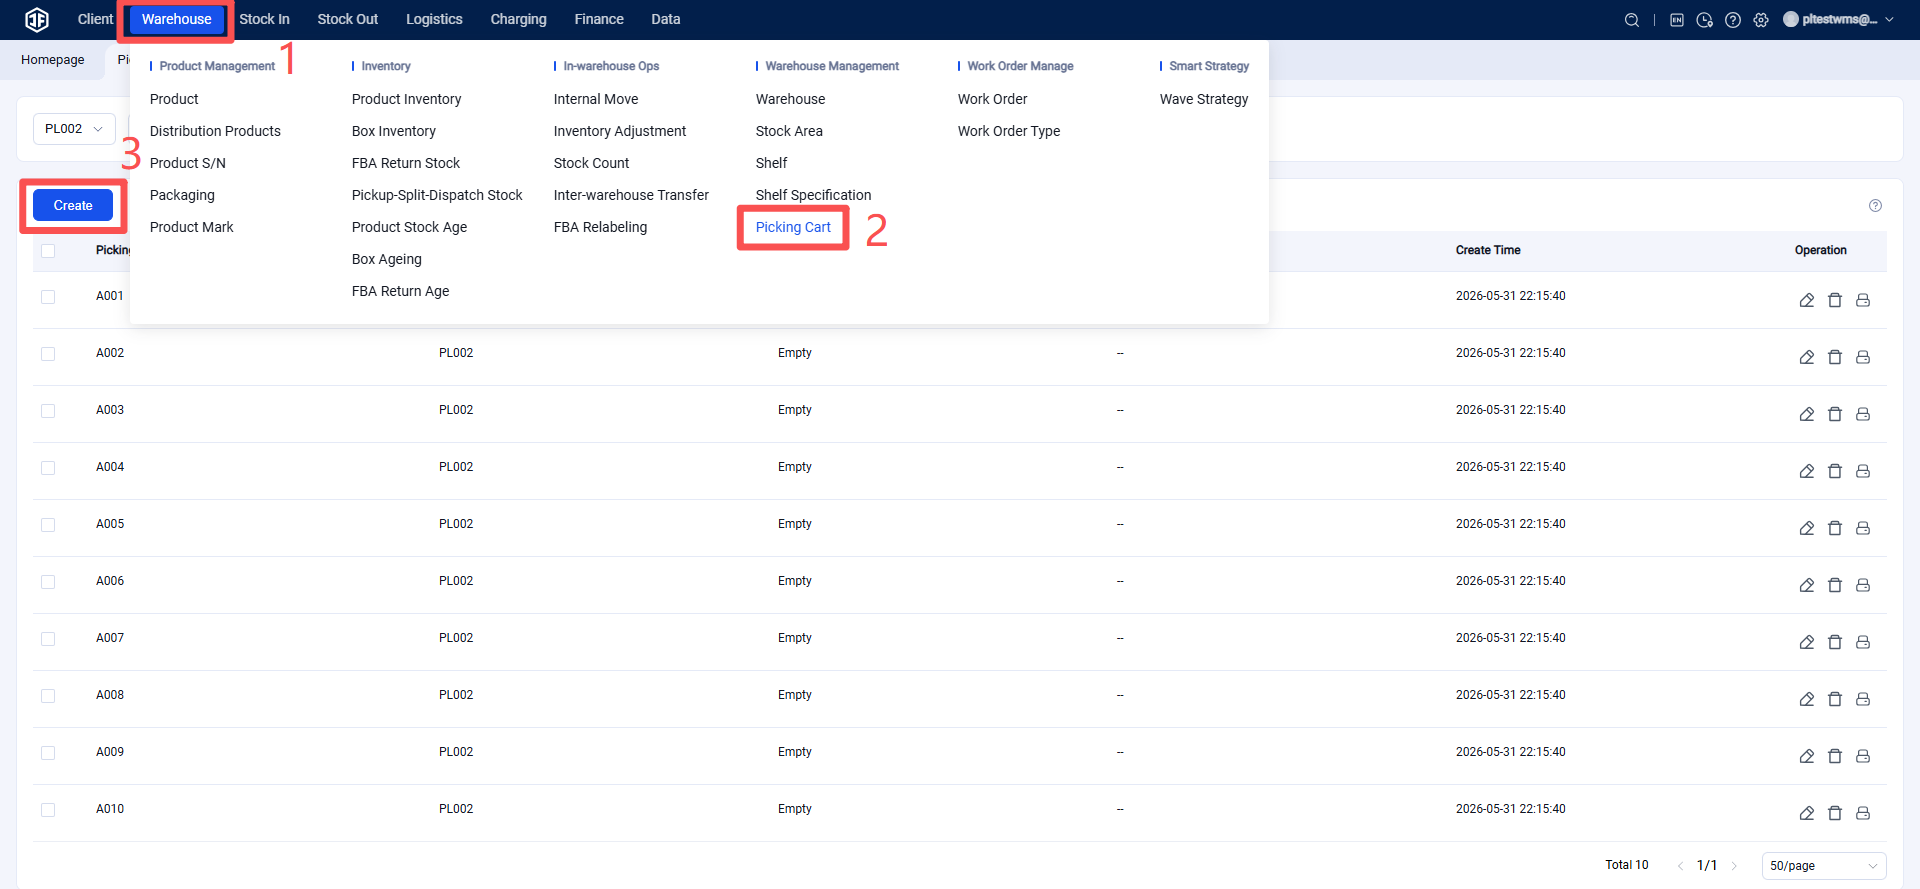
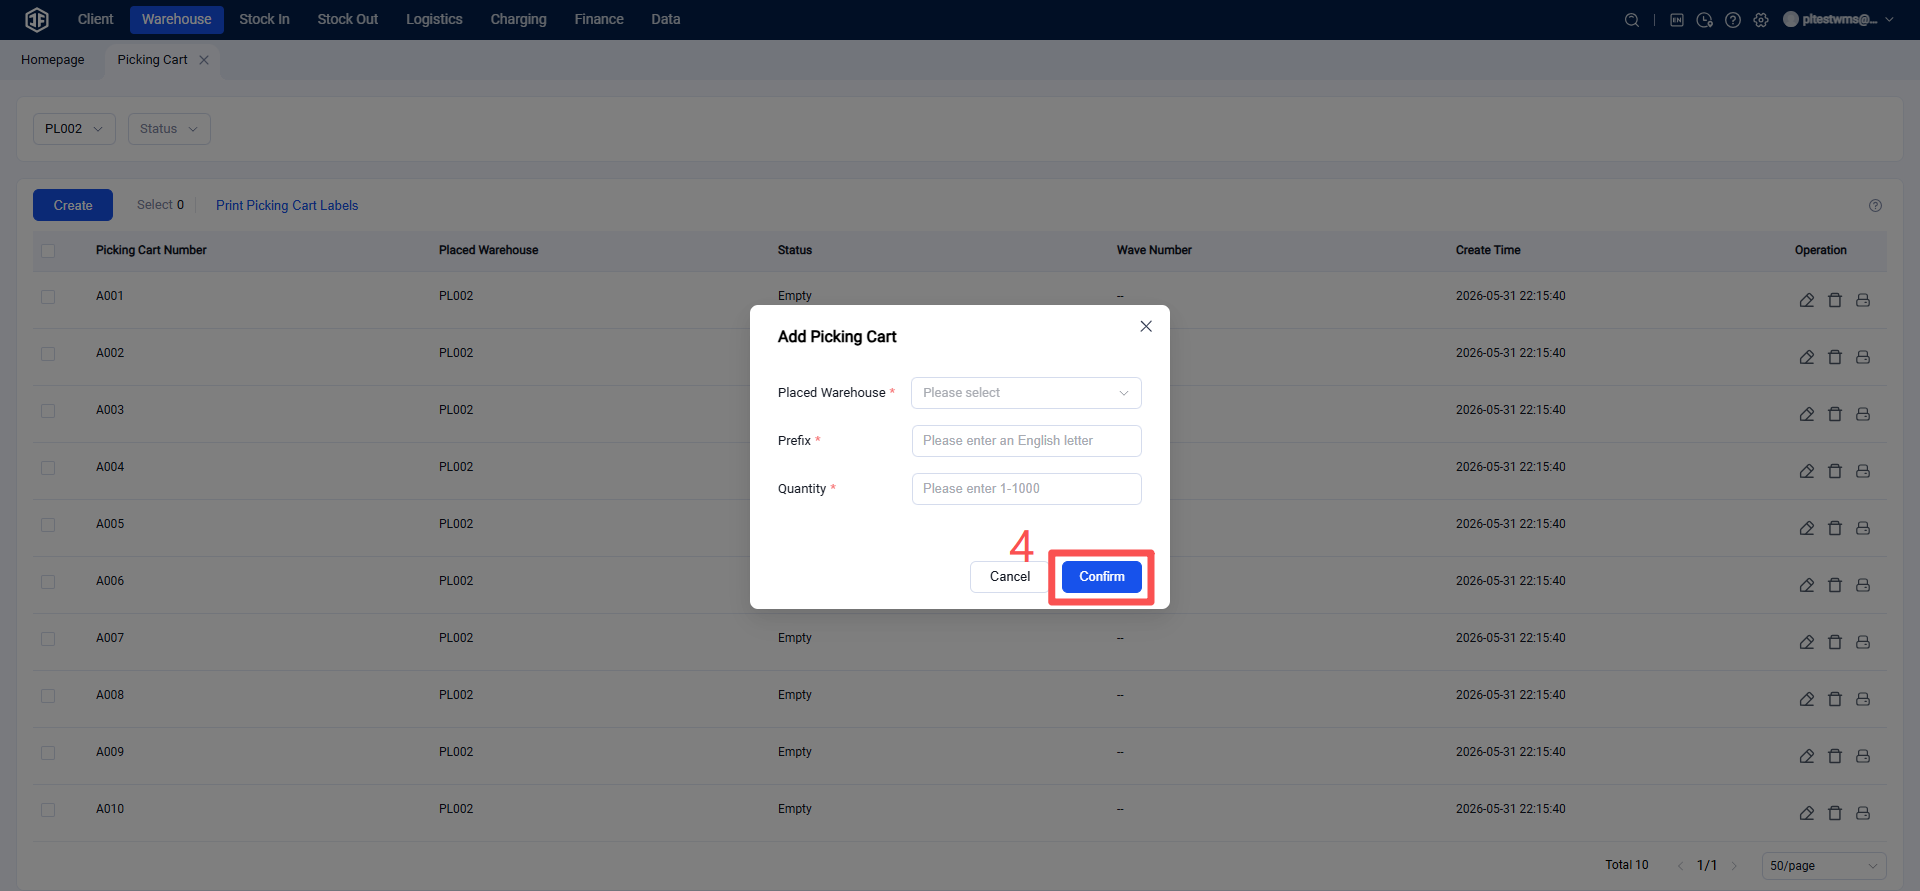
Go to Settings > Picking Cart Settings > Click Create > Select Warehouse, enter the picking cart prefix and the number of carts needed, then click Confirm to generate the picking carts.
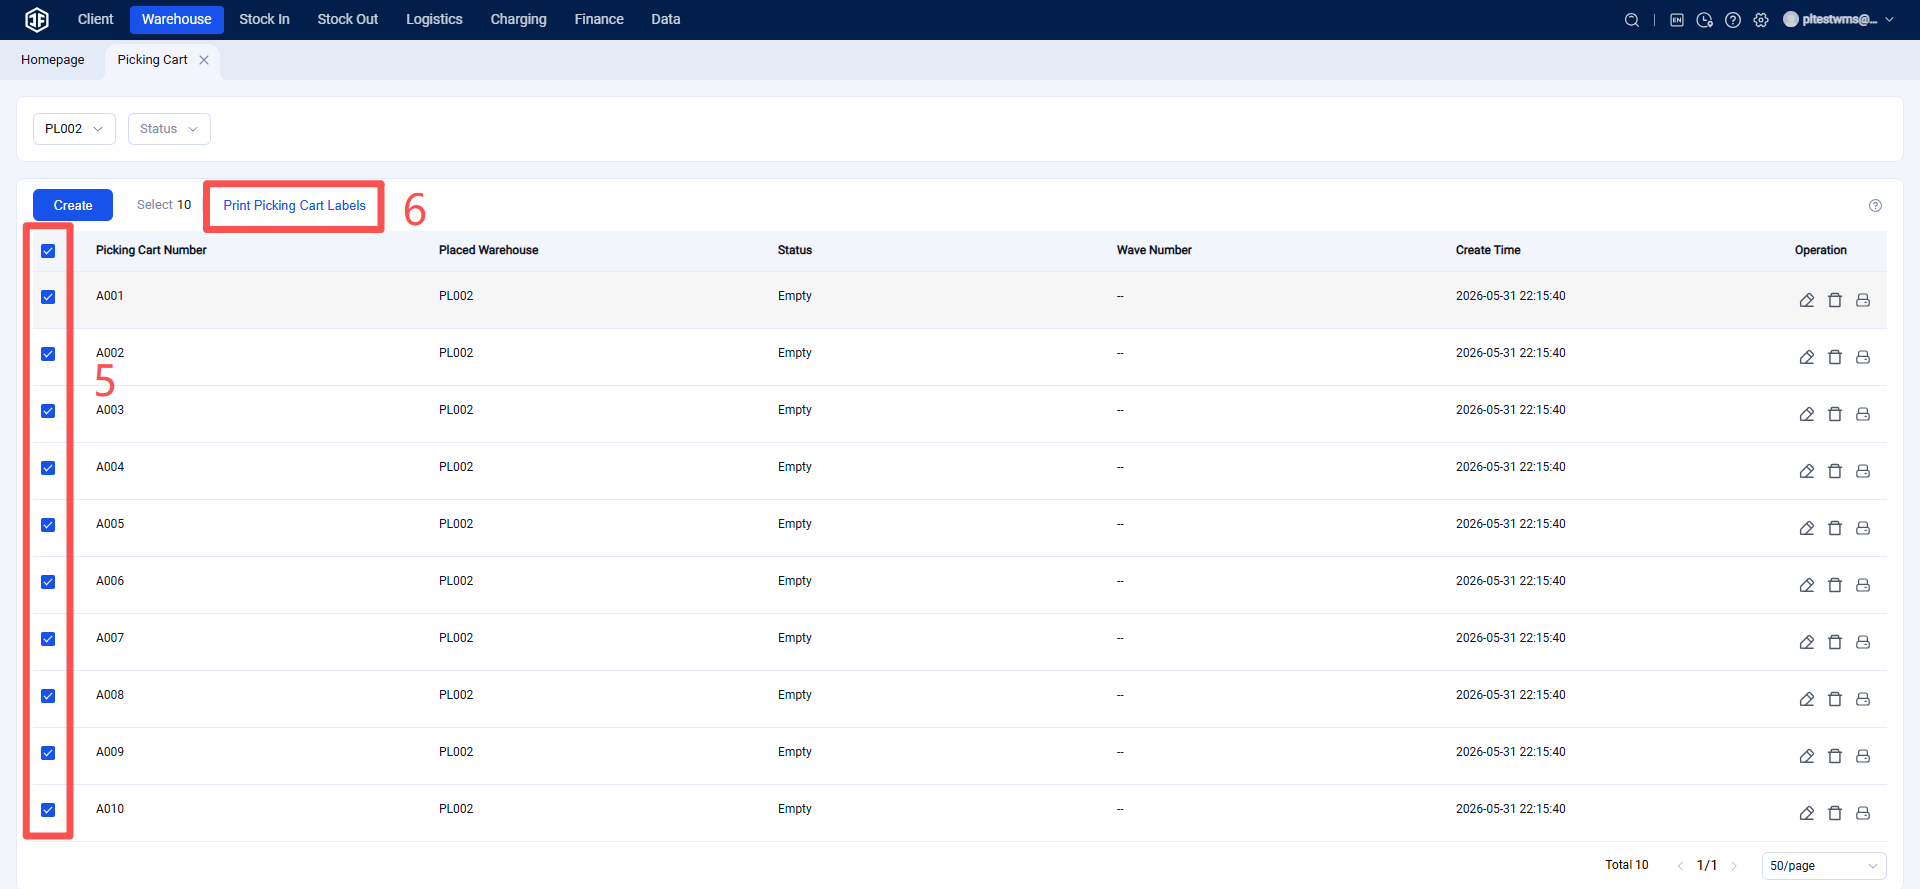
Next, select the picking cart(s), click Print Picking Cart Label, and print the label. Attach the label to the corresponding picking cart for easy identification, usage, return, and status management.