How BigSeller Users Can Integrate with OMS to Achieve the Complete Drop-shipping Workflow
I. Definition
Sellers use BigSeller ERP to authorize stores, push products, and manage the entire order processing workflow.
II. Operational Procedure
Step 1: Authorize Store
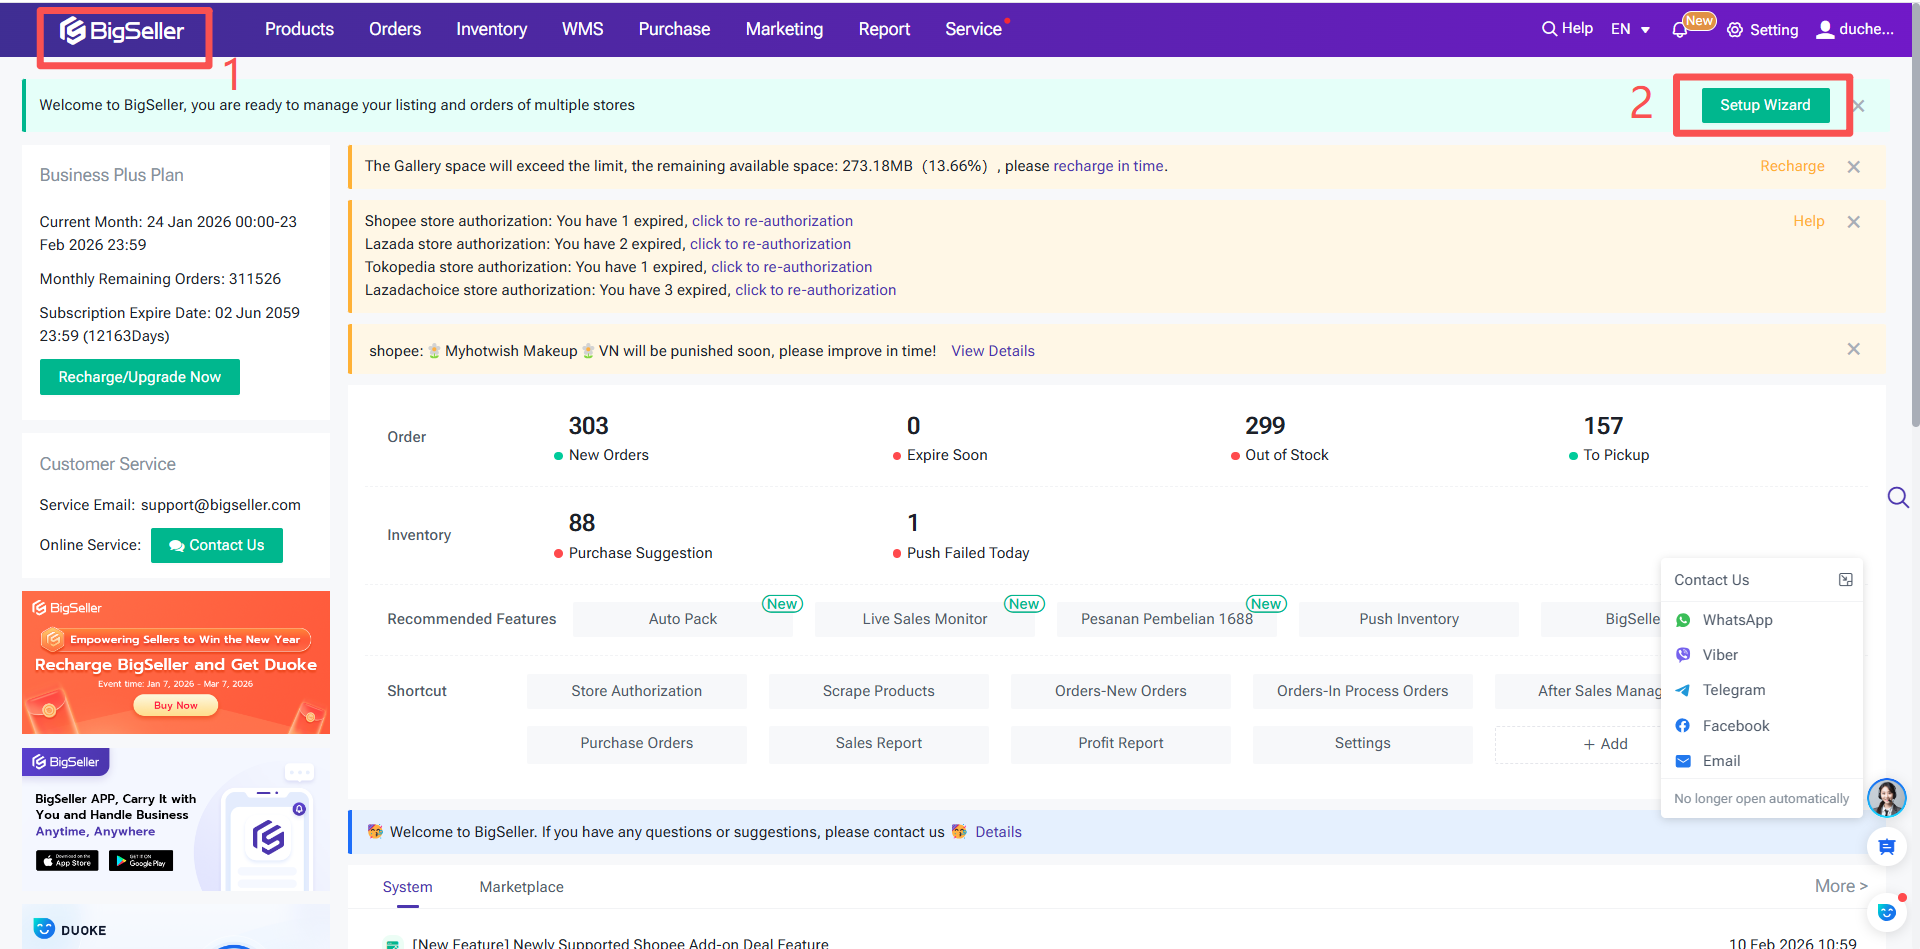
Step 1: Log in to BigSeller > Enter the homepage.
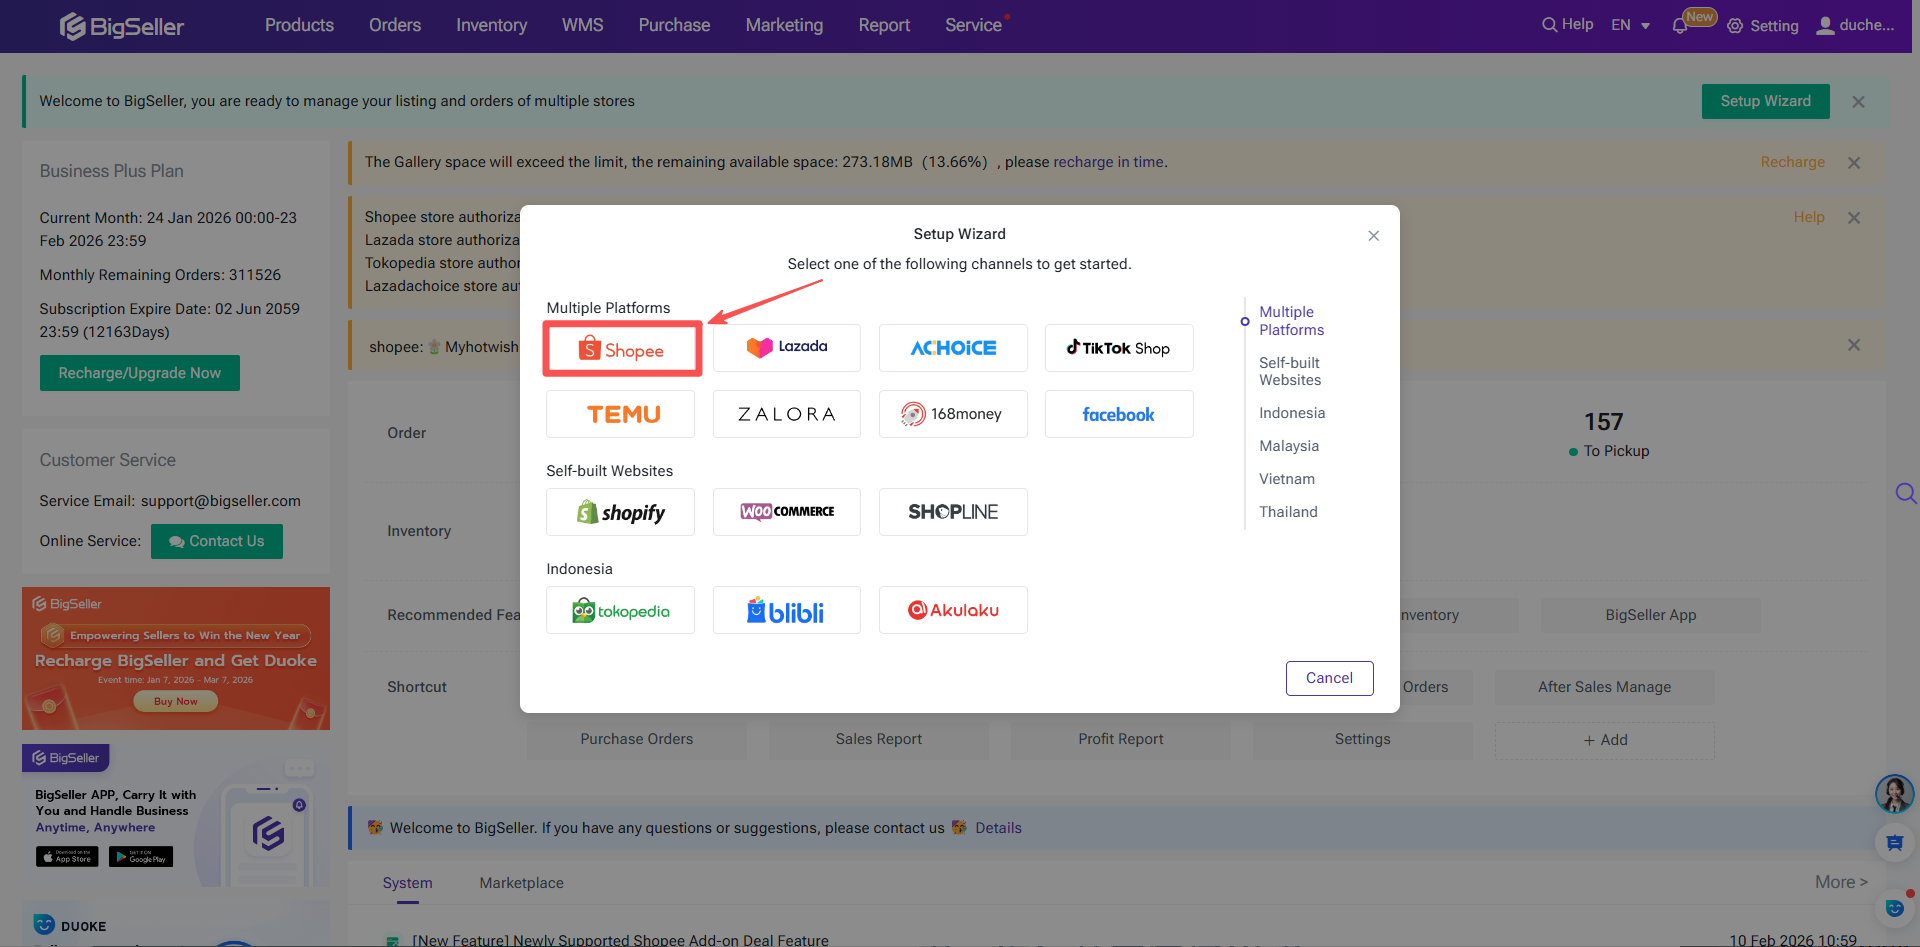
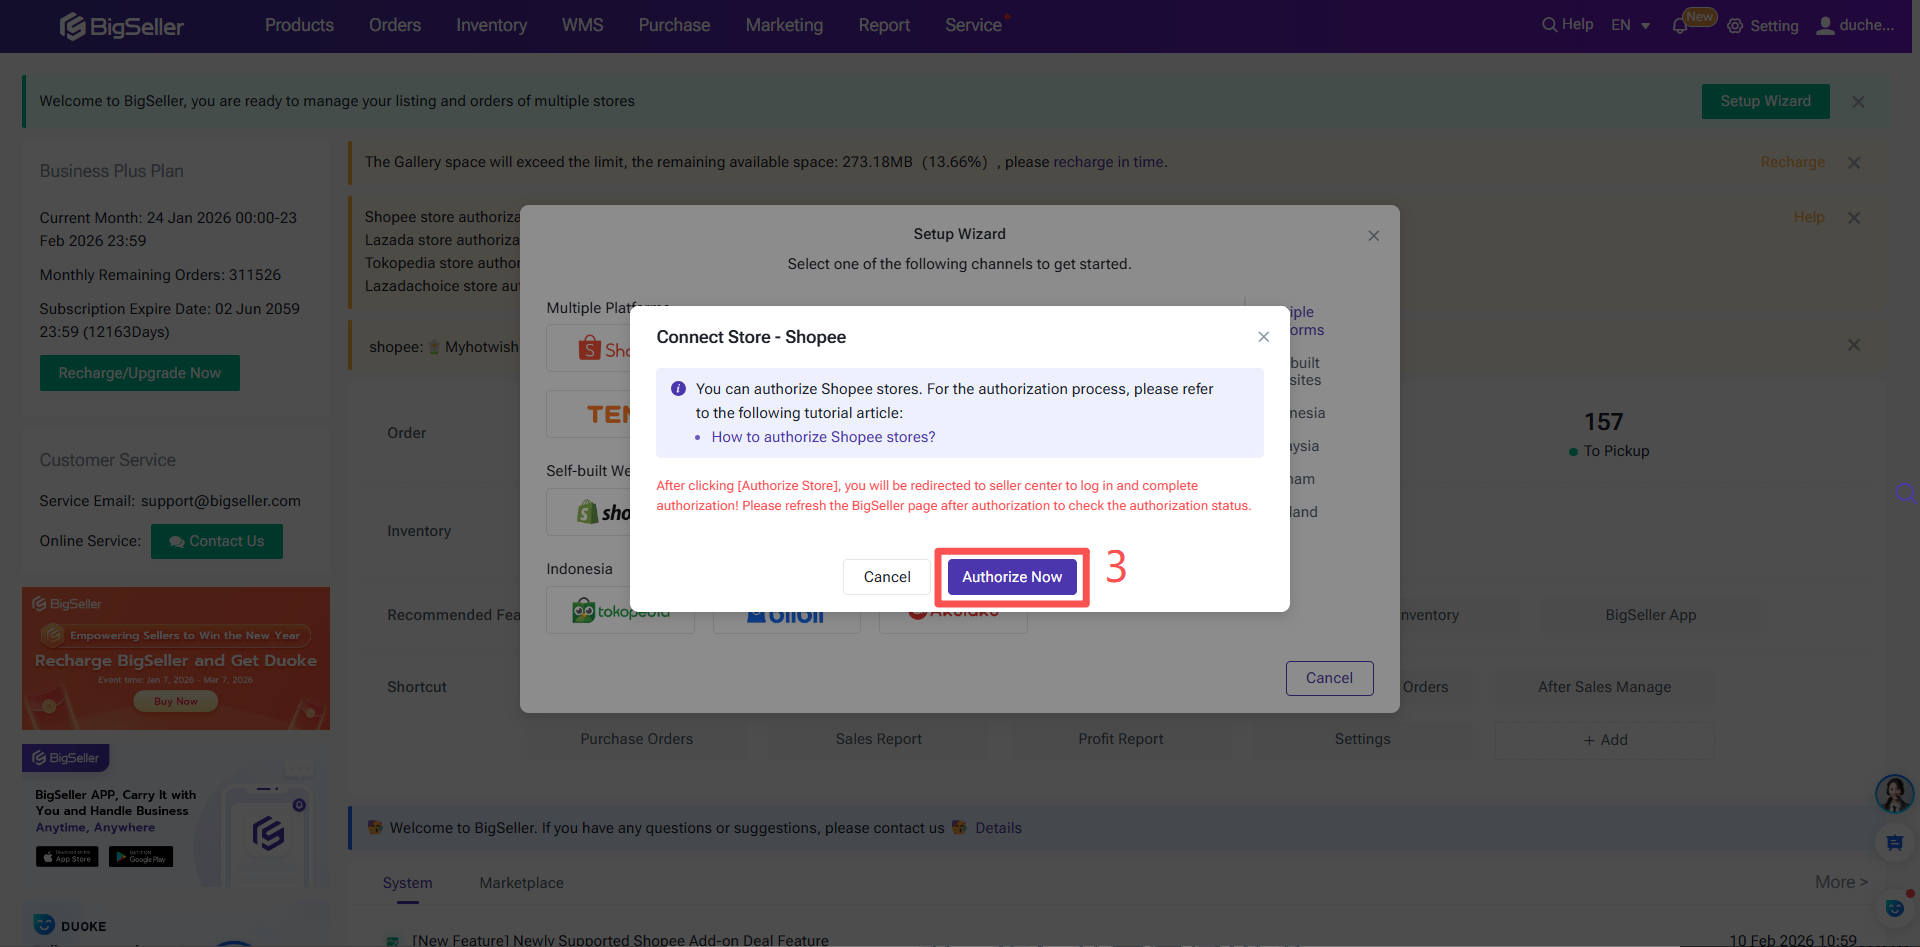
Step 2: Click Authorization Guide and select the platform (using Shopee as an example below). Enter the Store Nickname > Click Authorize Store. You will then be directed to the platform's authorization page.
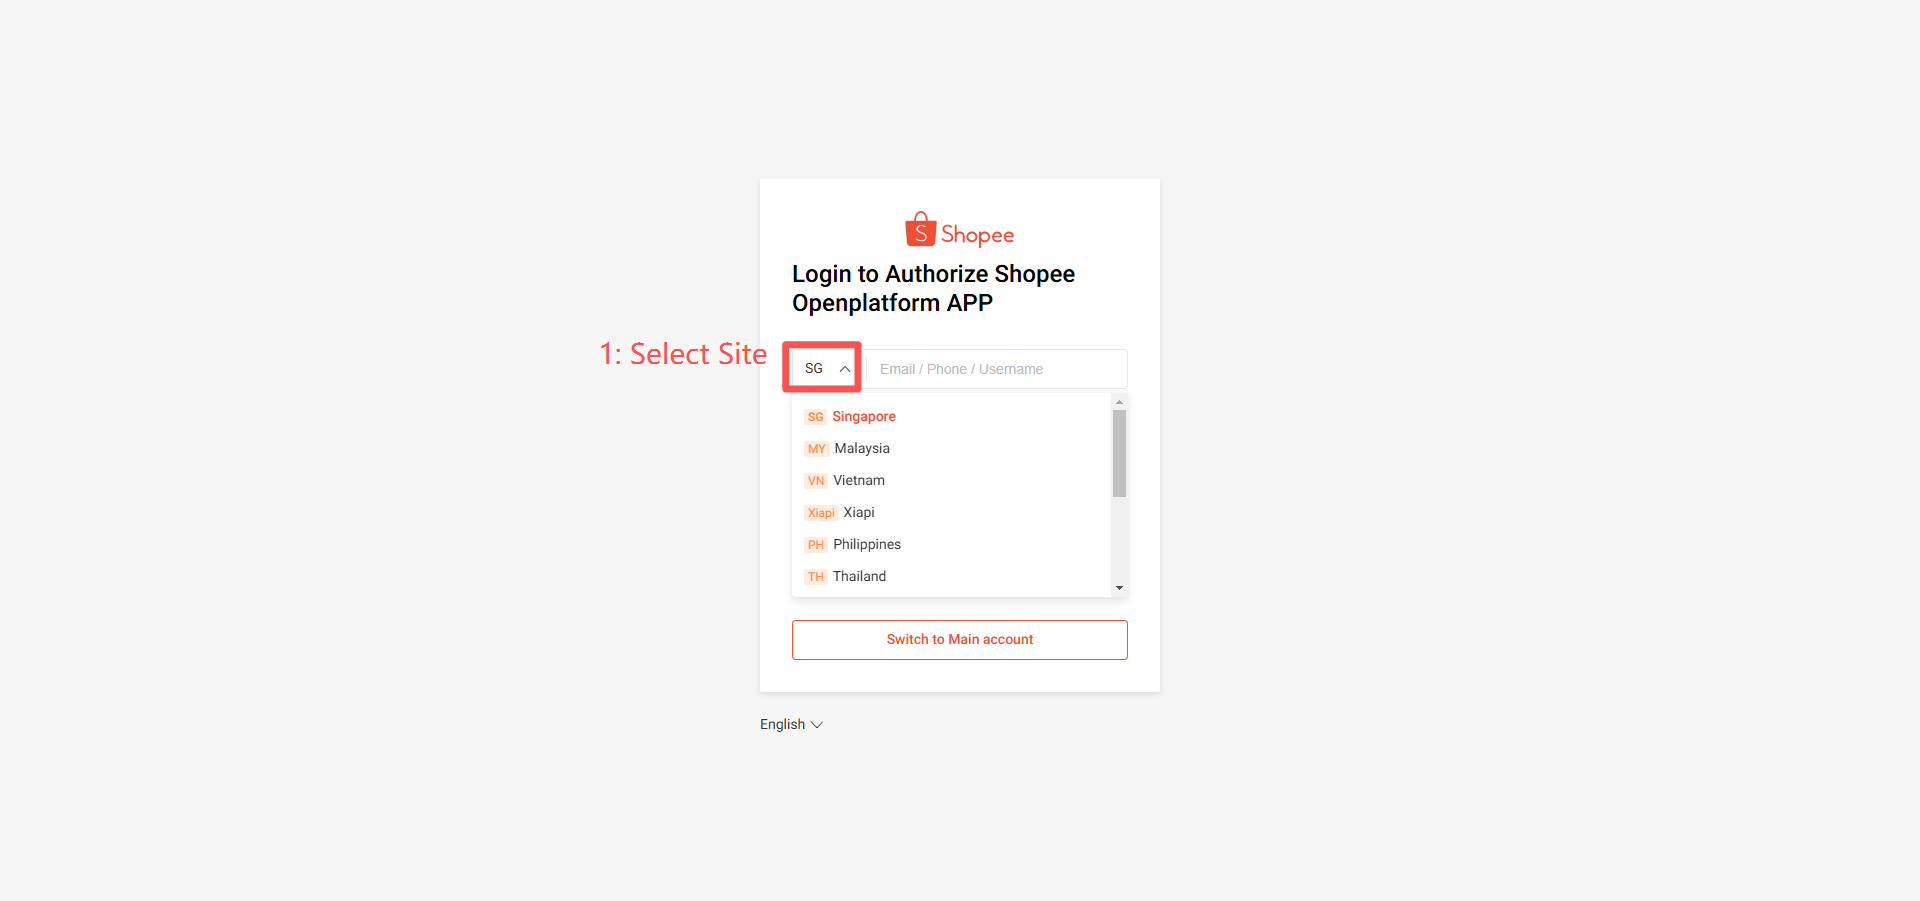
Step 3: Select the site > Enter your Shopee account and password > Click Login.
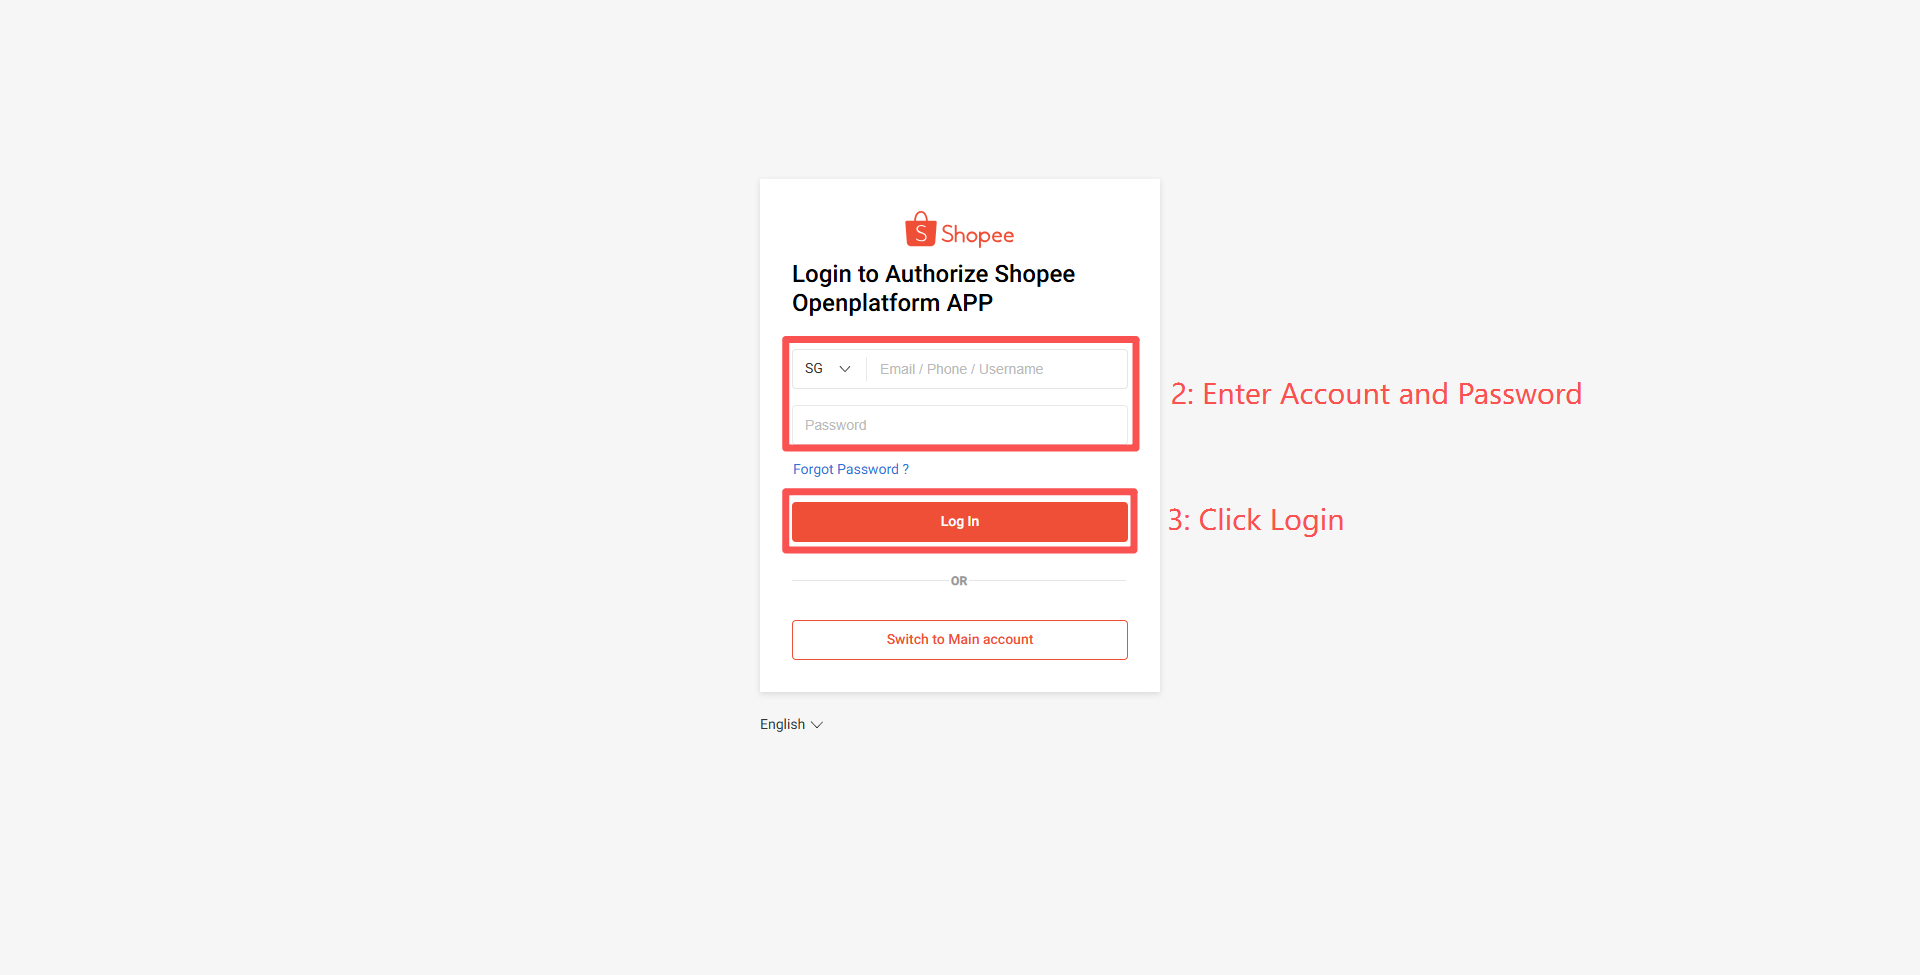
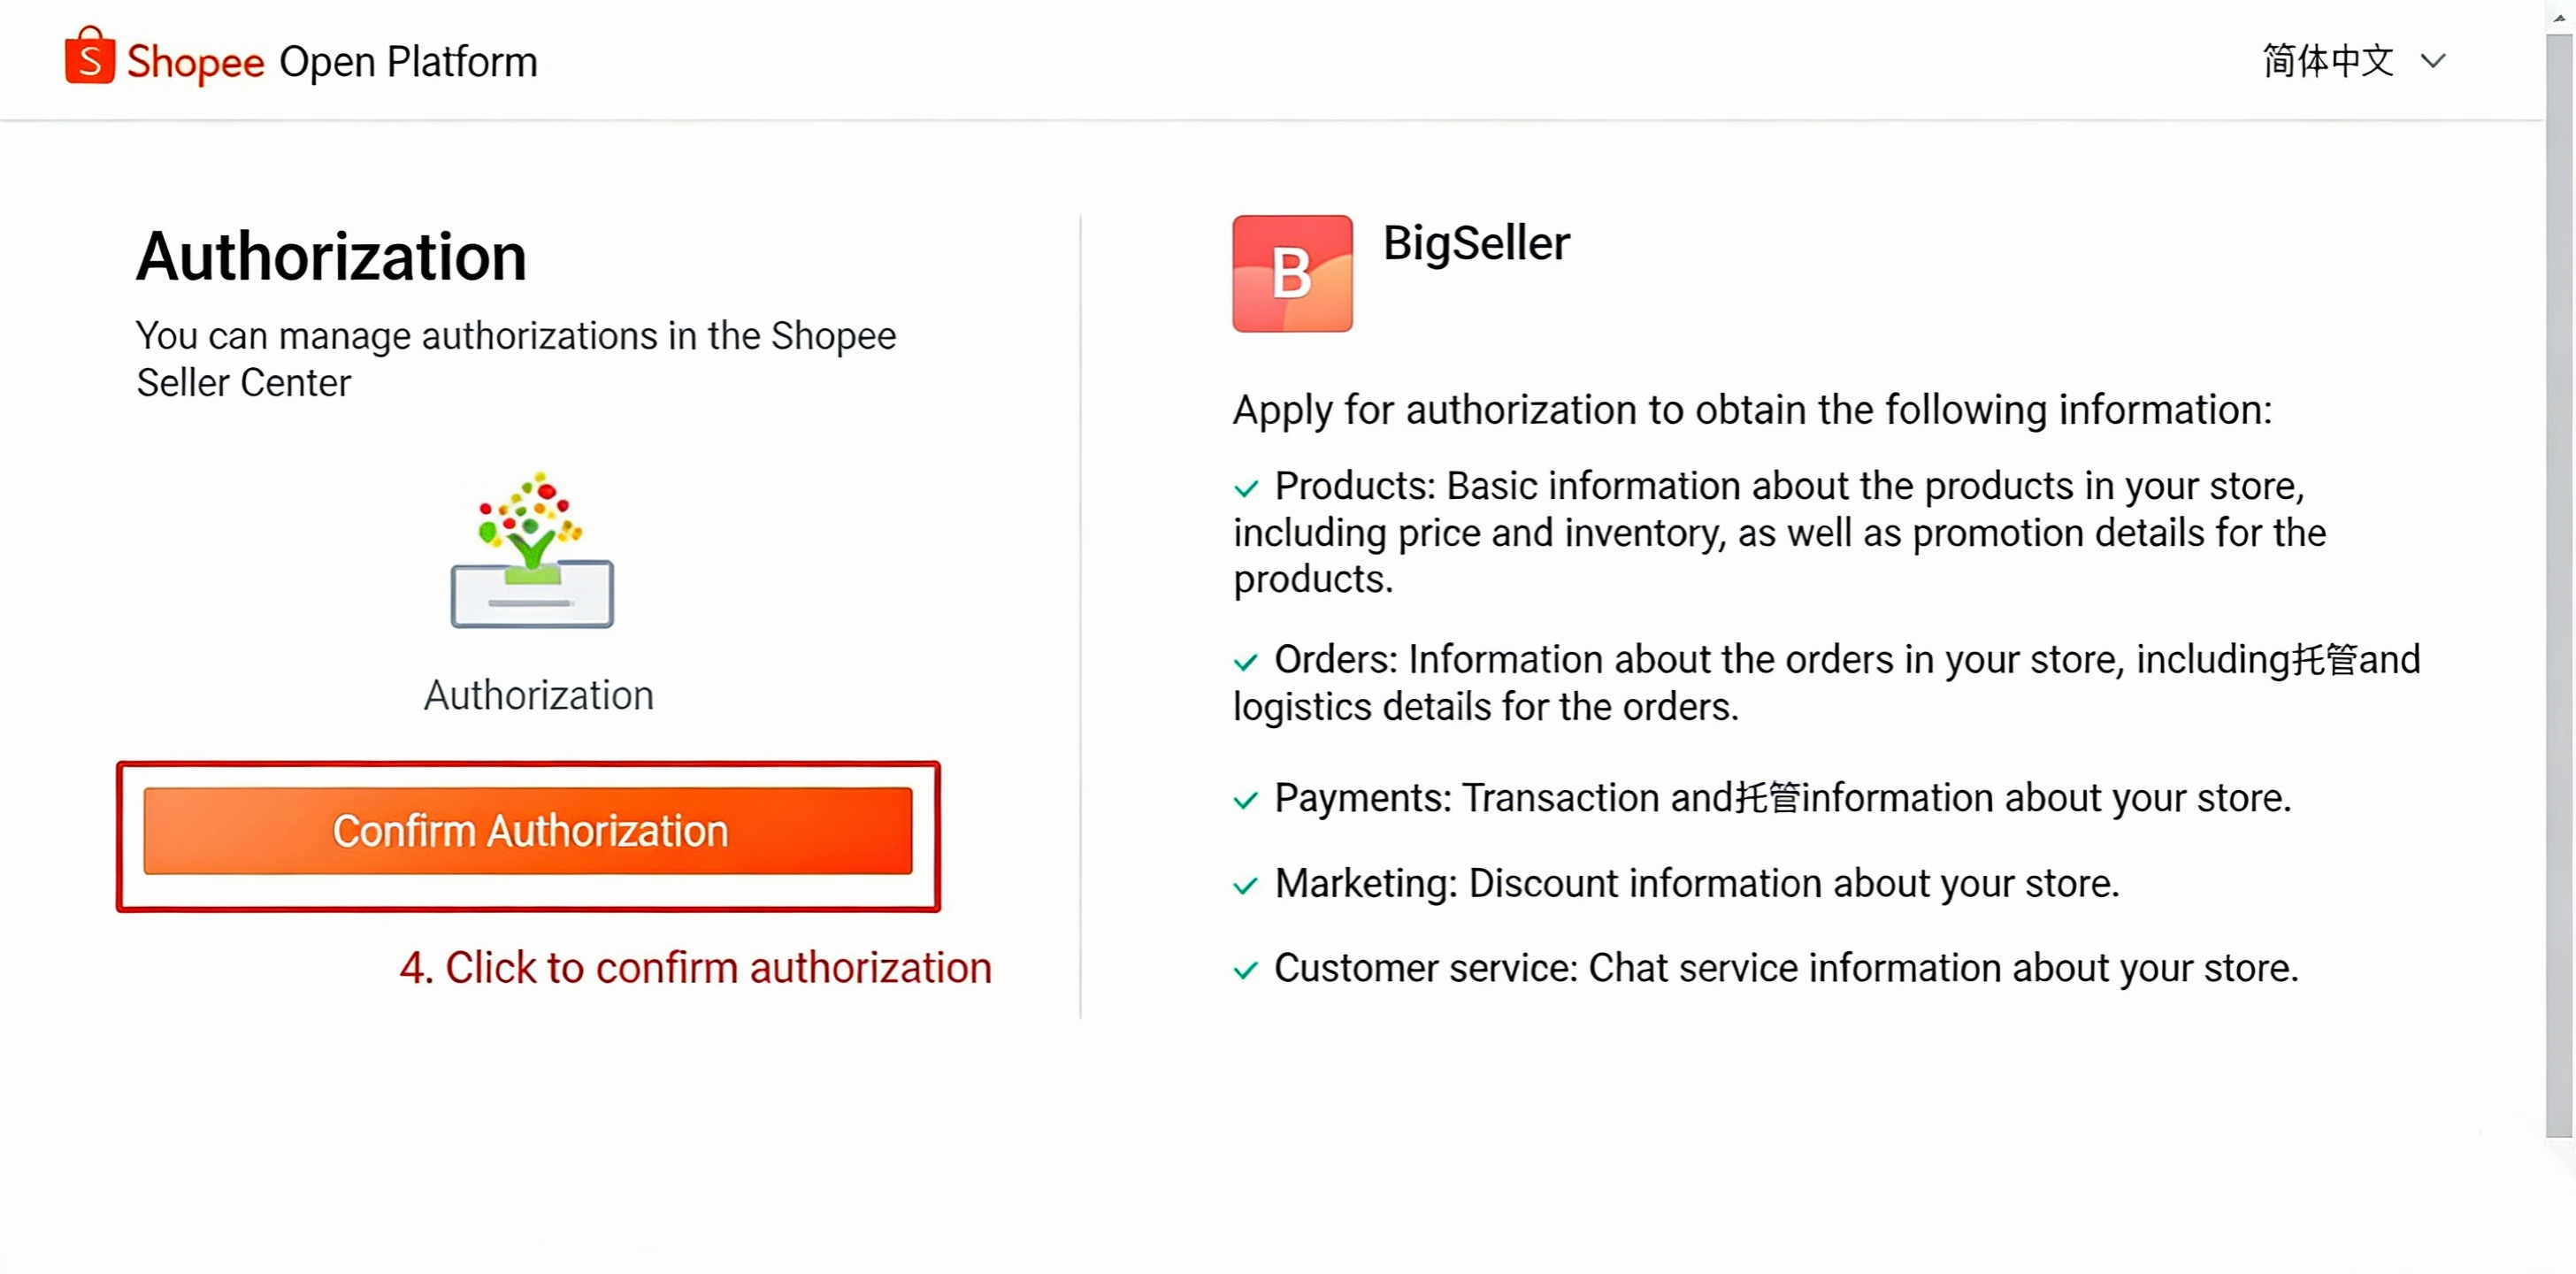
Step 4: Edit and confirm the BigSeller store nickname.
To ensure the uniqueness of the BigSeller store nickname, you cannot use a nickname that is already associated with an existing store under your current BigSeller account. If you are unsure whether a nickname is already in use, you can search for it at Settings > Authorization Center > Store Authorization page.
Step 2: Create Product SKU in BigSeller
Creation Method 1: One-click generation based on store SKU via the SKU Matching Relationship page.
Important Notes:
If the store SKU matches an existing product SKU, a matching relationship will be created. If it does not match, a new product SKU will be created and then matched.
SKU characters must be between 2 and 50 in length and may only include numbers, letters, and the following special symbols: space, ( ), _, ., -, *, +, #.
Operational Steps: [Match Product SKU > Generate Product SKU]
Navigate to SKU Matching Relationship > Click Unmatched > Click Match Product SKU > Click Generate Product SKU.
If the store SKU matches an existing product SKU, a matching relationship will be created; if it does not match, a new product SKU will be created and then matched.
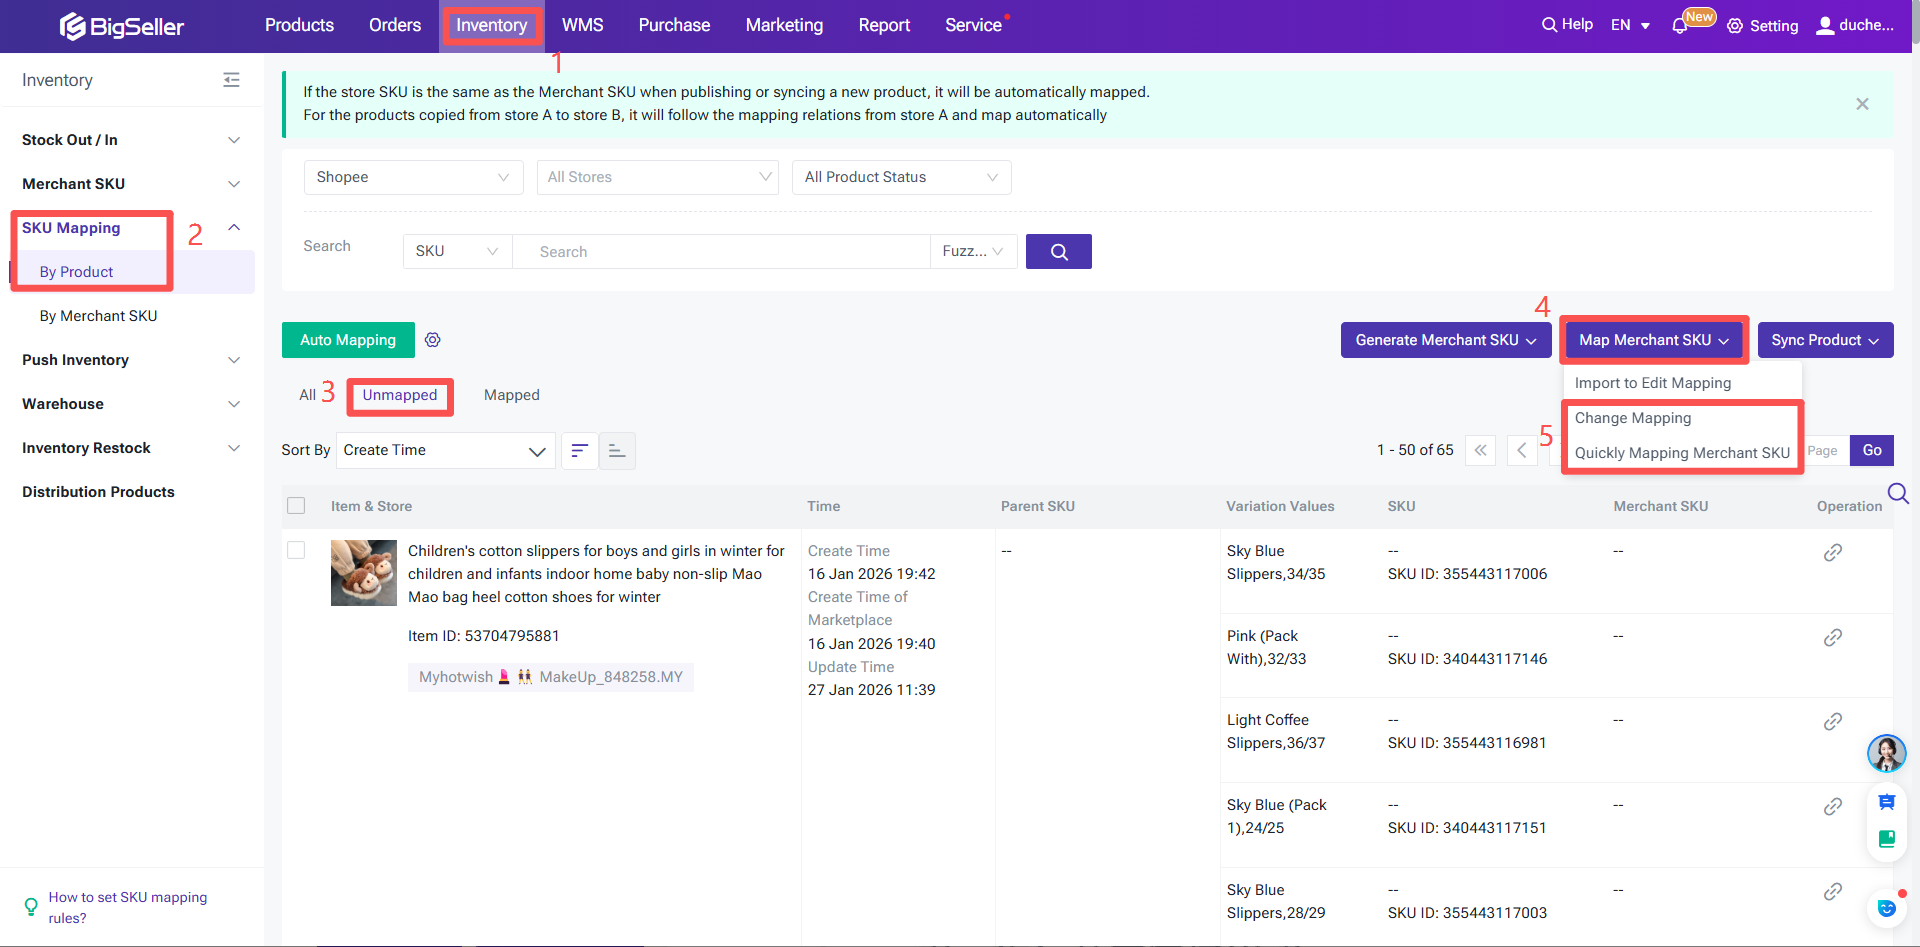
Creation Method 2: Manual Creation via Product SKU List
Step 1: Click Add Product SKU
Navigate: Inventory > Product SKU > Click + Add Product SKU > Select Add Single SKU.
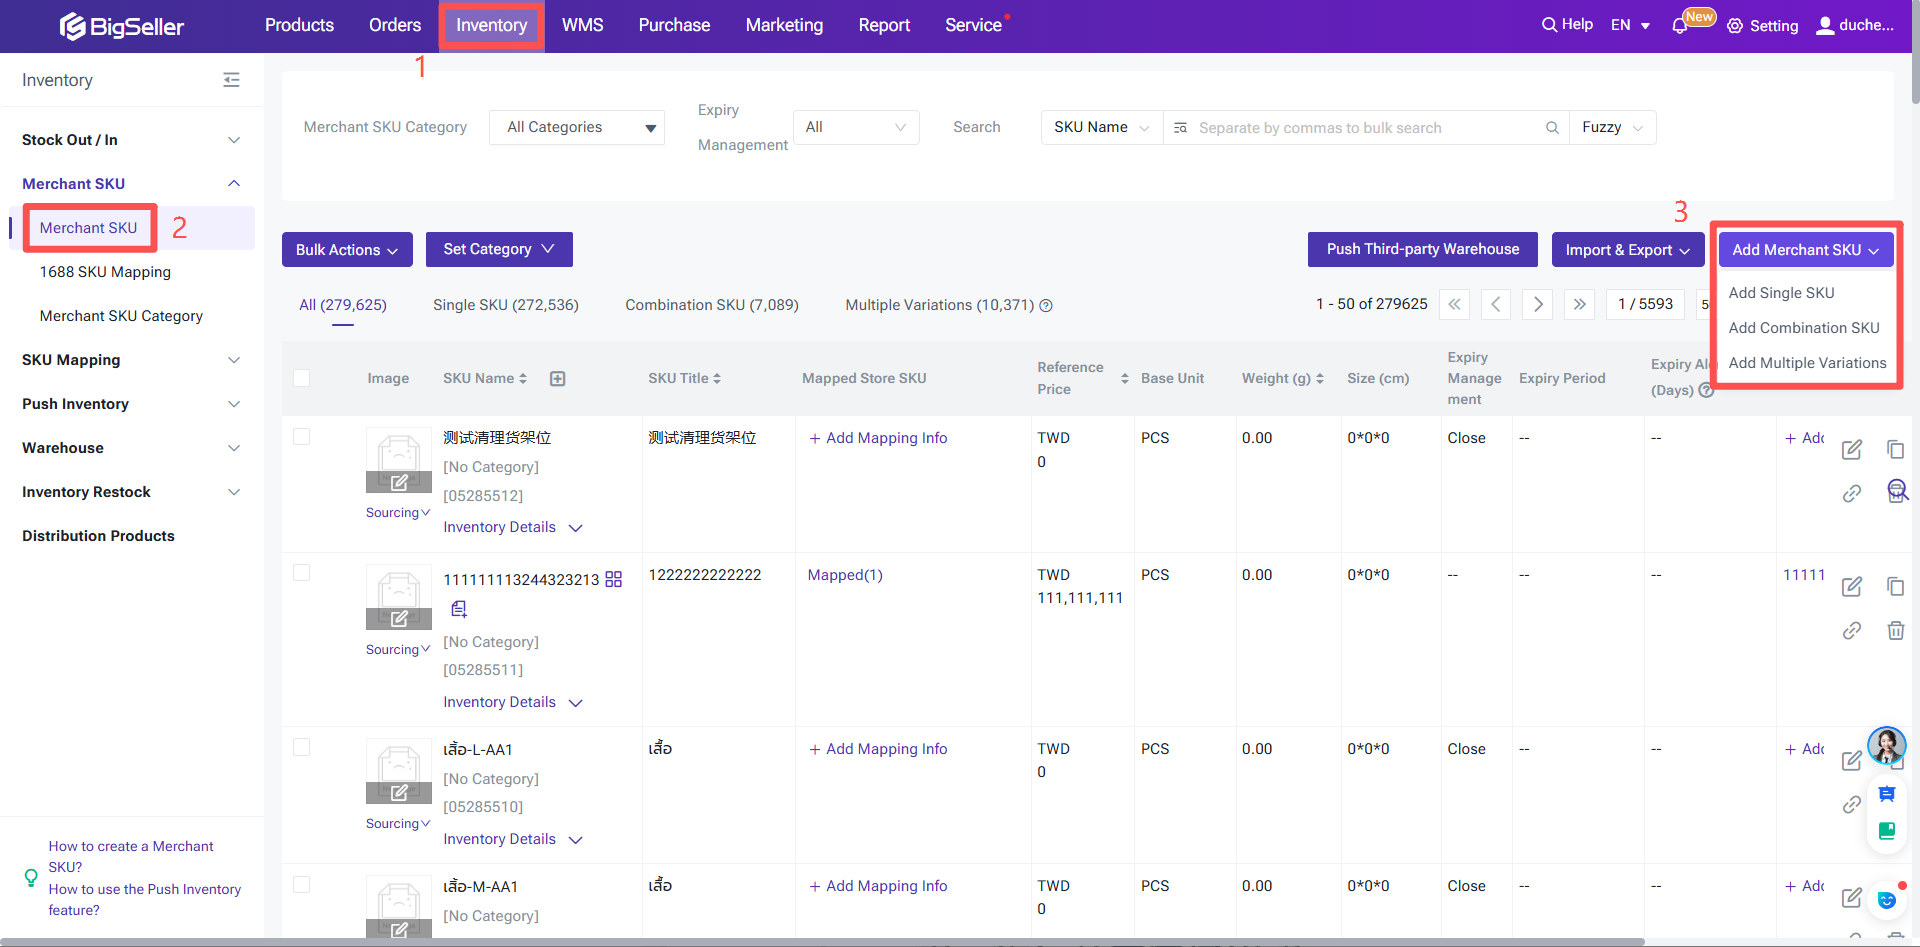
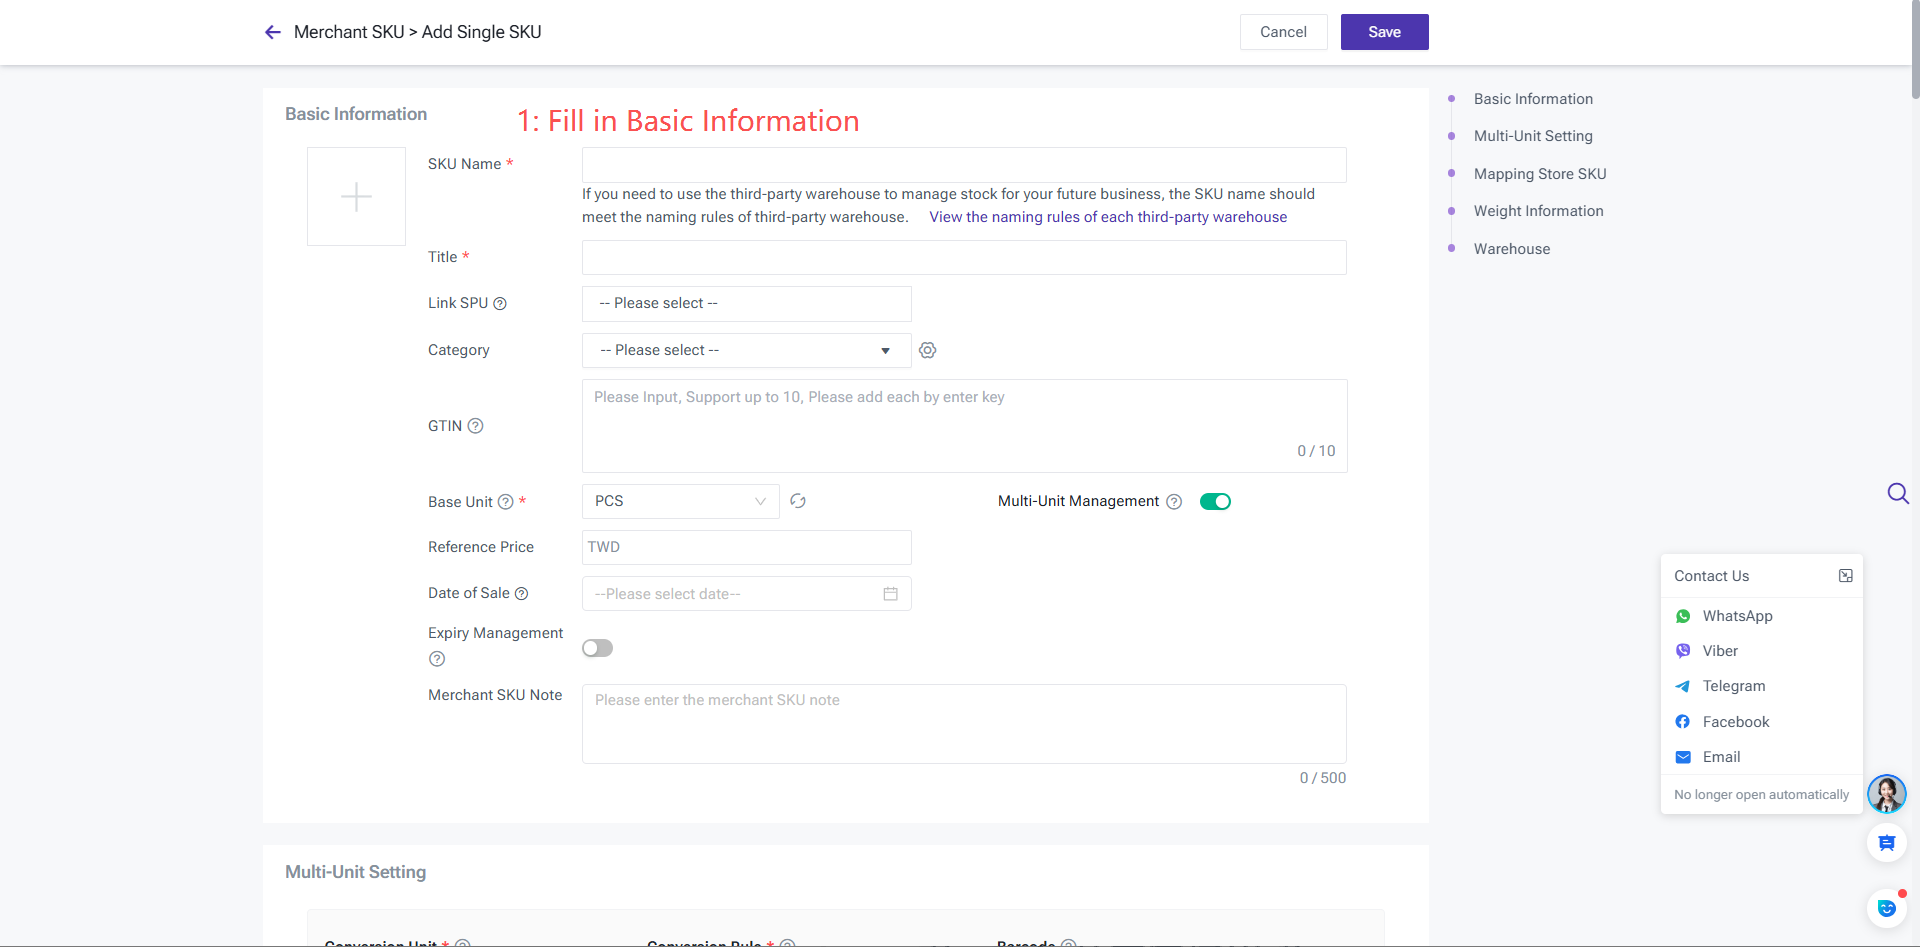
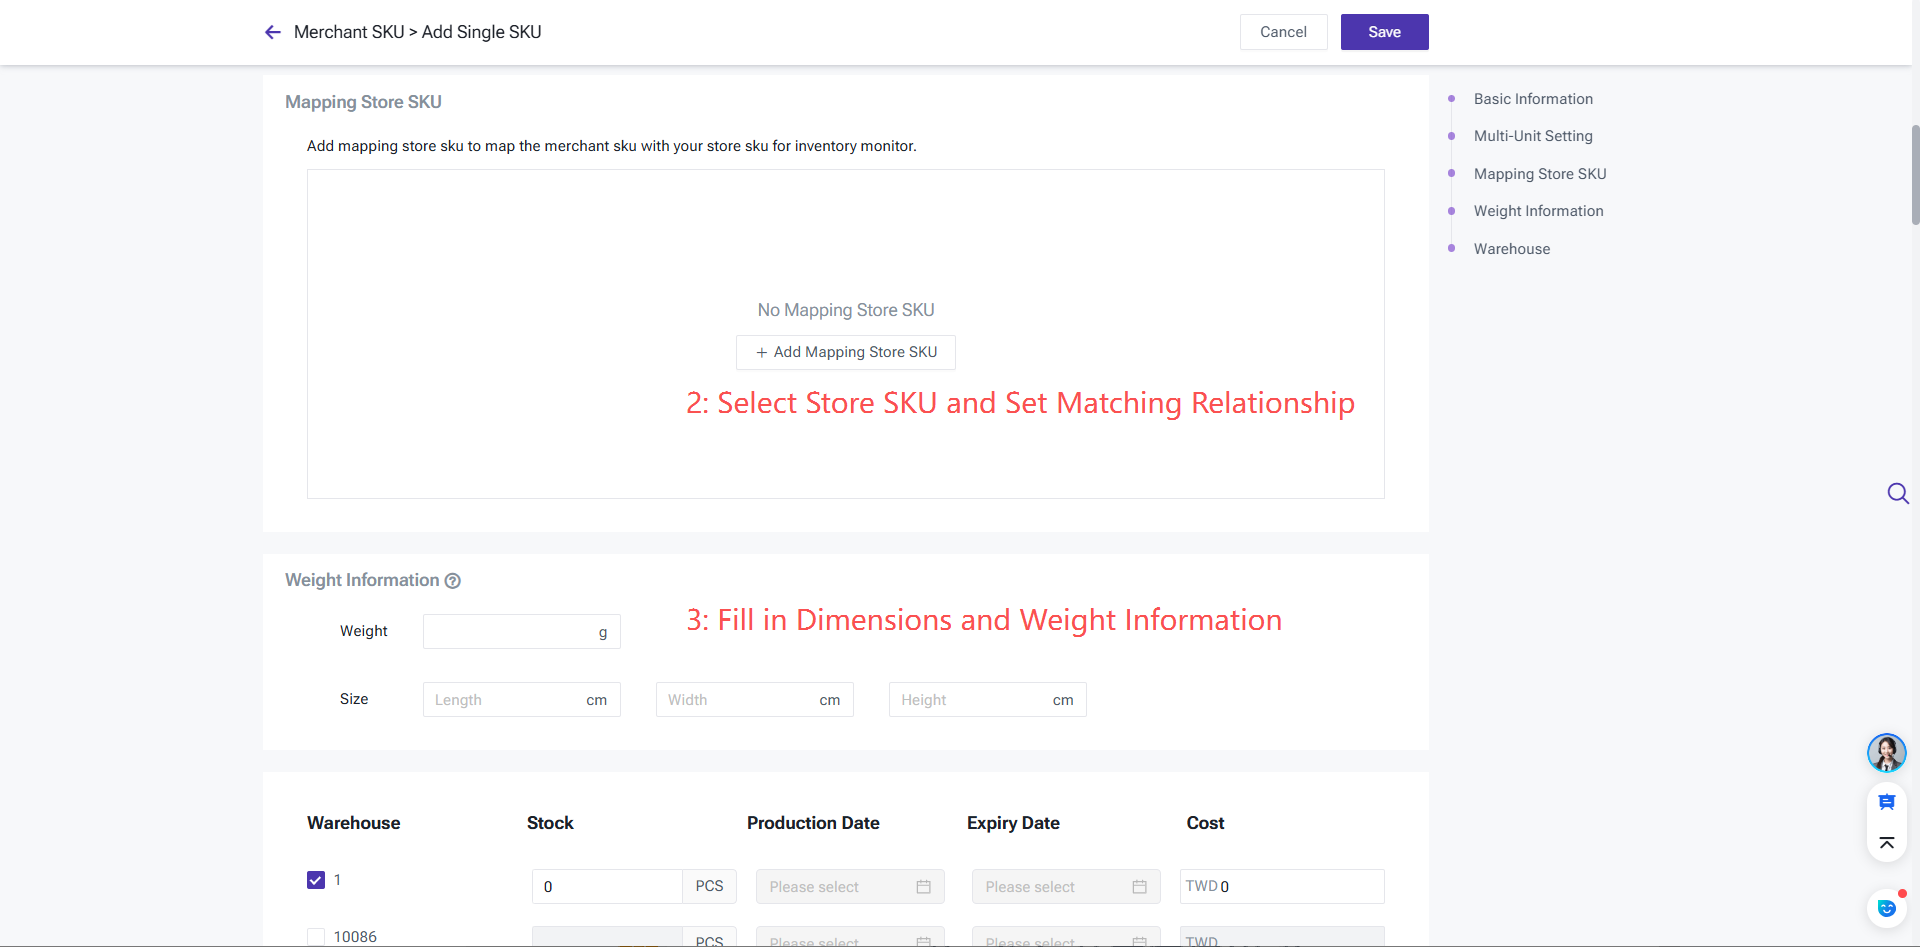
Step 2: Fill in Product SKU Information
Add basic information > Set store SKU matching relationship > Enter weight information > Select warehouse and input initial inventory value.
Note: Under the same product SKU, the SKU code and GITN can be identical.
Creation Method 3: Batch Creation via Spreadsheet Import
If you managed inventory using spreadsheets before using BigSeller, this method is recommended.
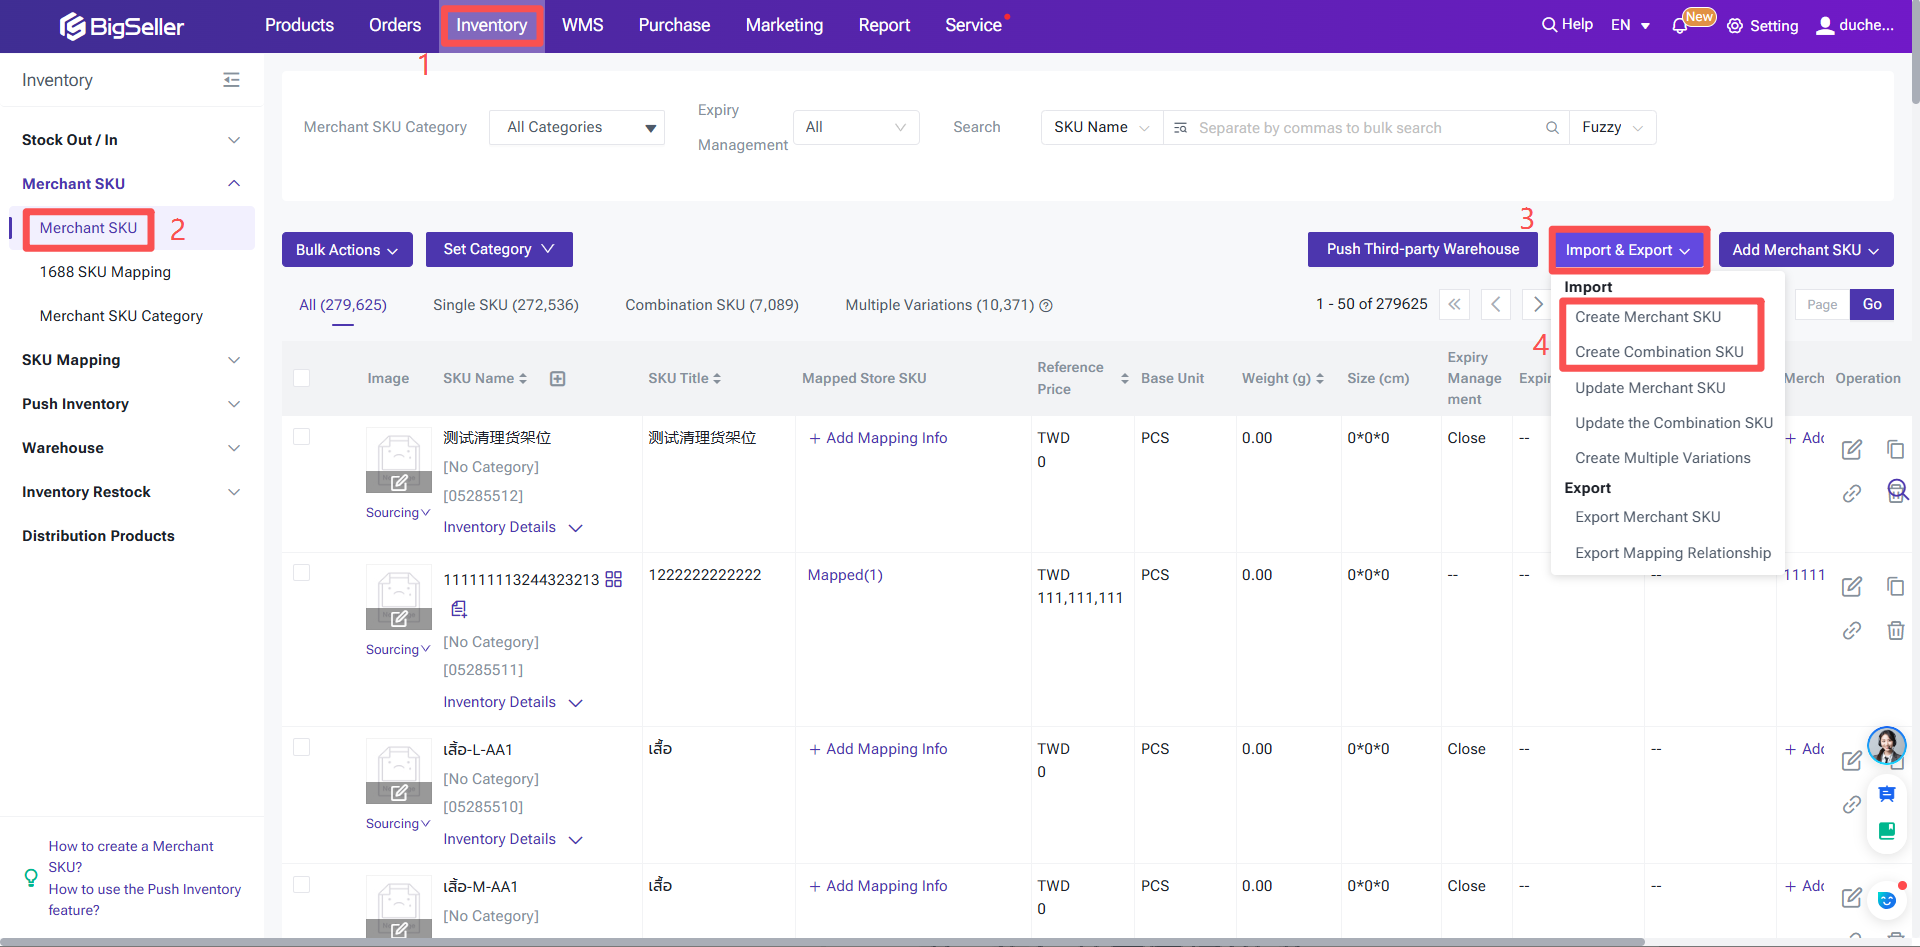
Step 1: Navigate: Inventory > Click Import & Export > Click Import Product SKU > Click Create Product SKU.
Step 2: Download the template spreadsheet > Edit the spreadsheet as required > Return to the BigSeller Product SKU page > Upload the file > Click Confirm to complete the creation.
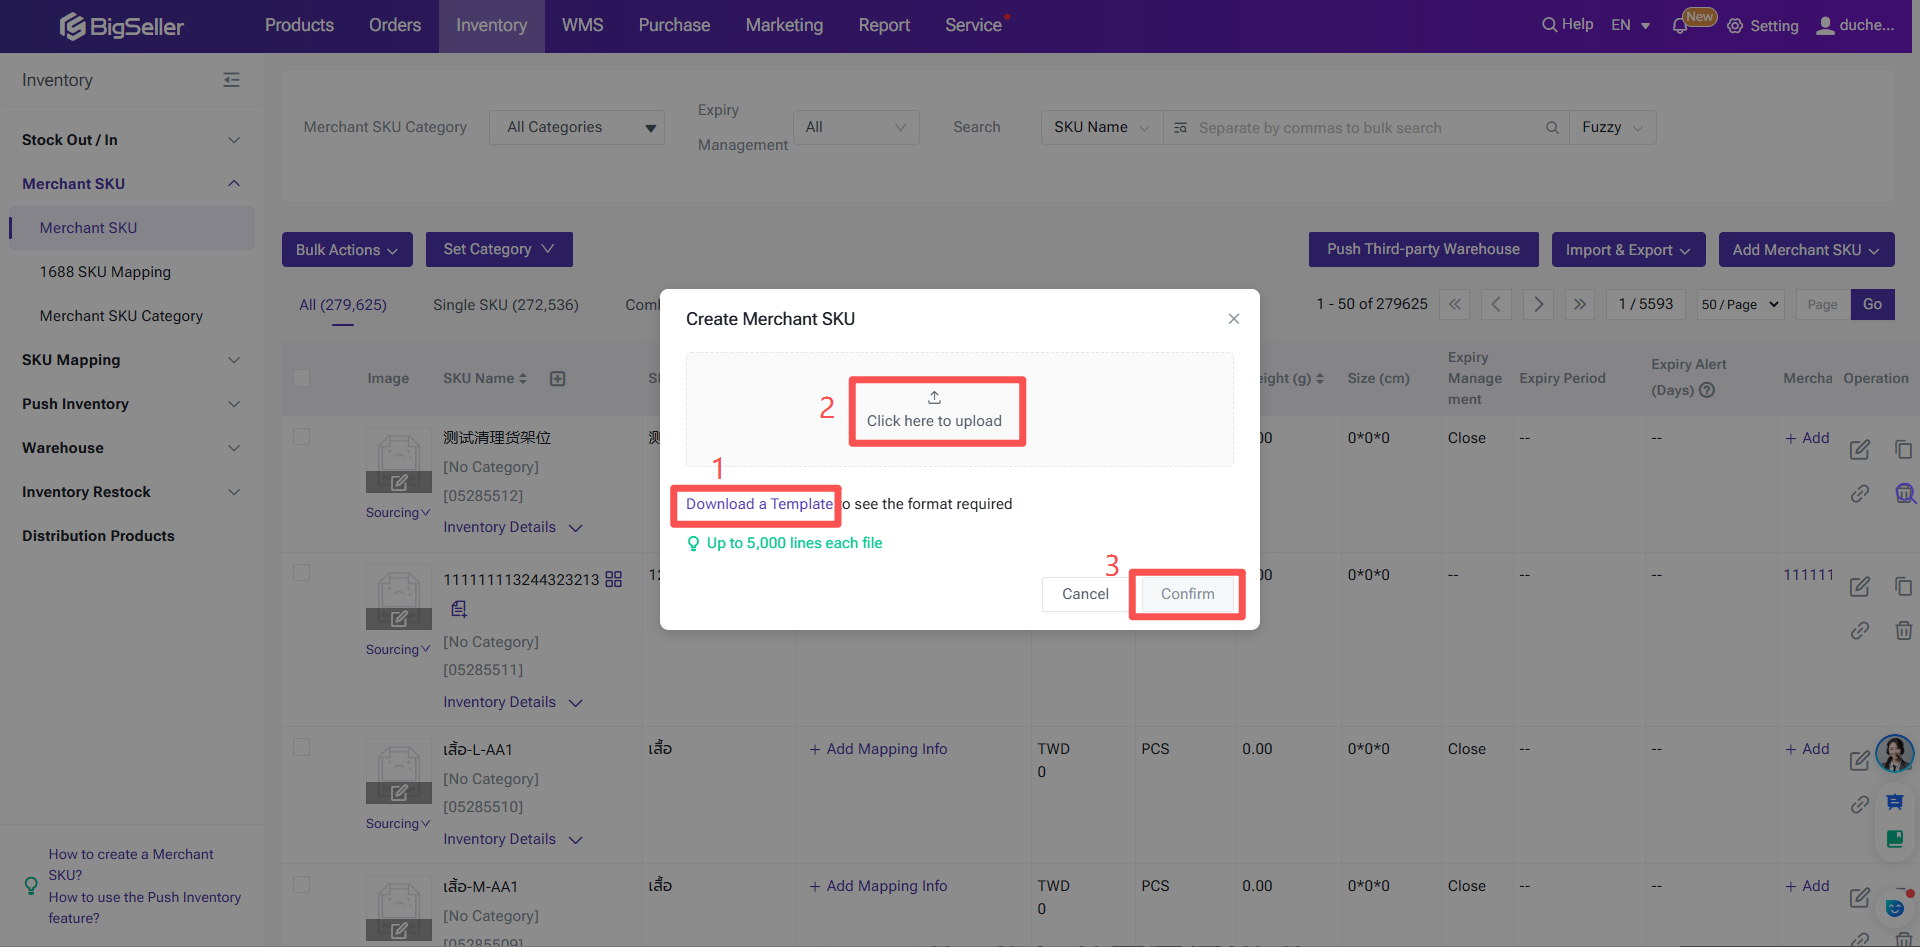
Note: If you fill in the warehouse in the spreadsheet, the product SKU will be automatically added to the inventory list of that specified warehouse when you import and create it.
Step 3: Enable Inventory Function
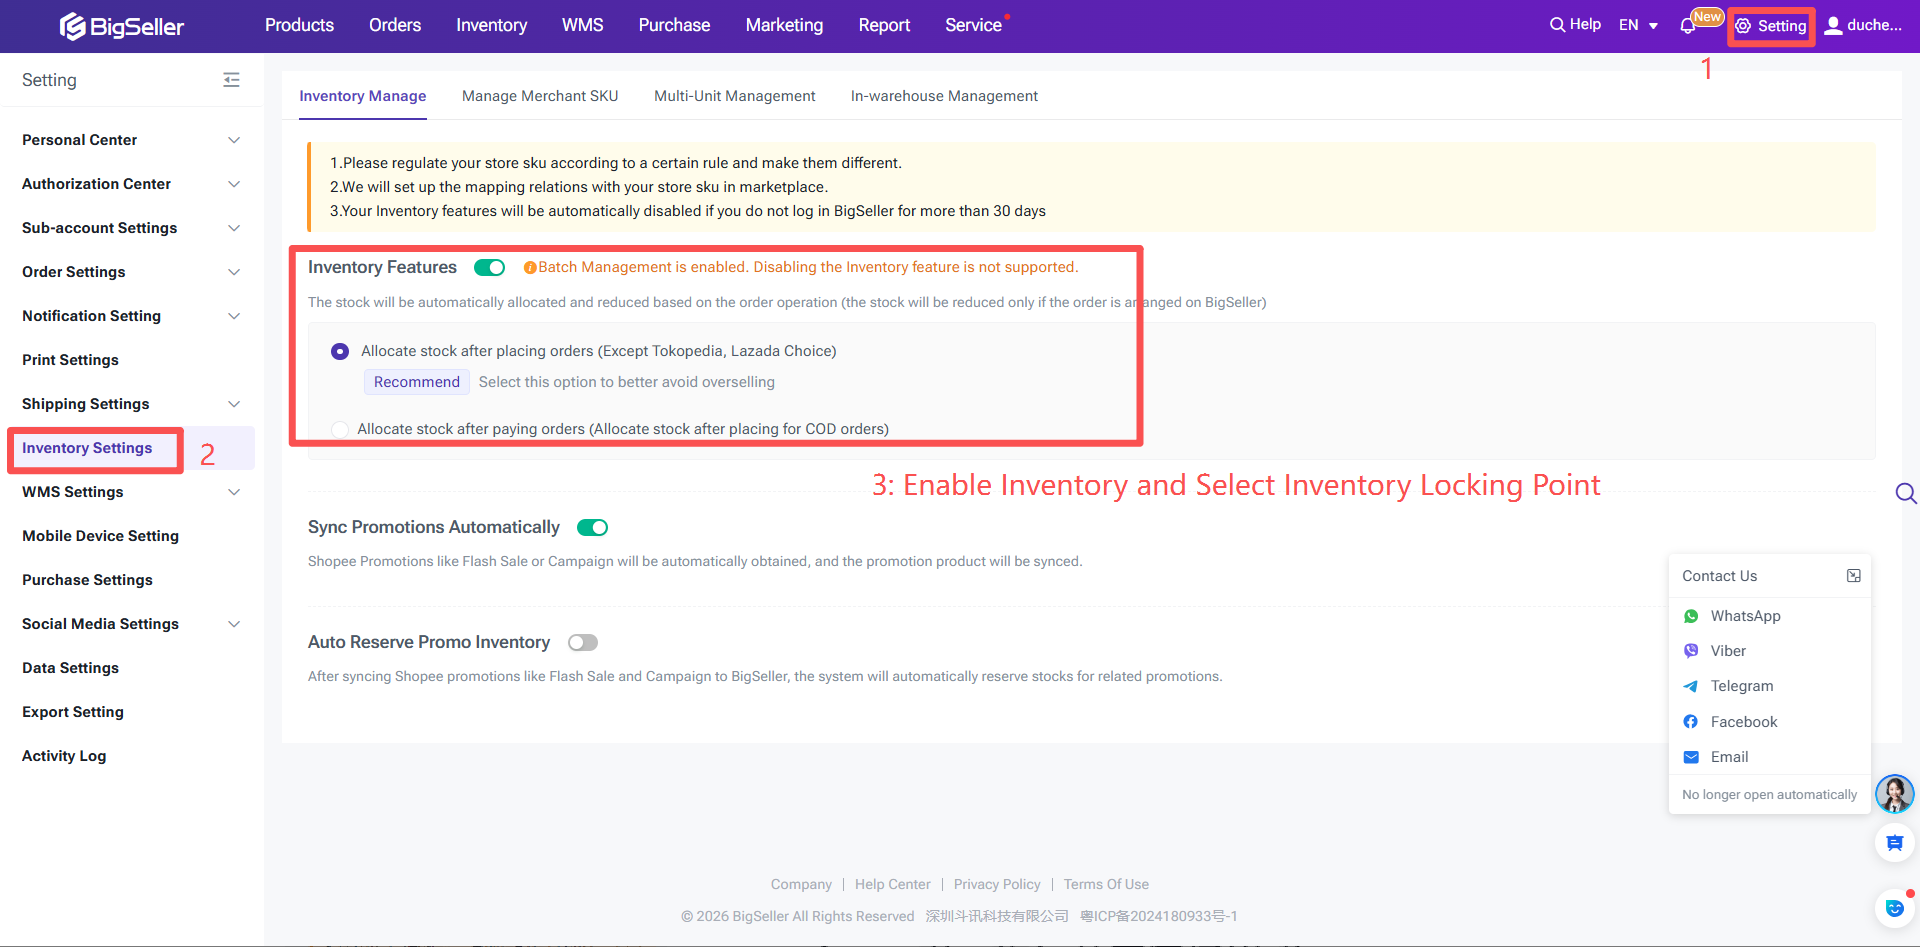
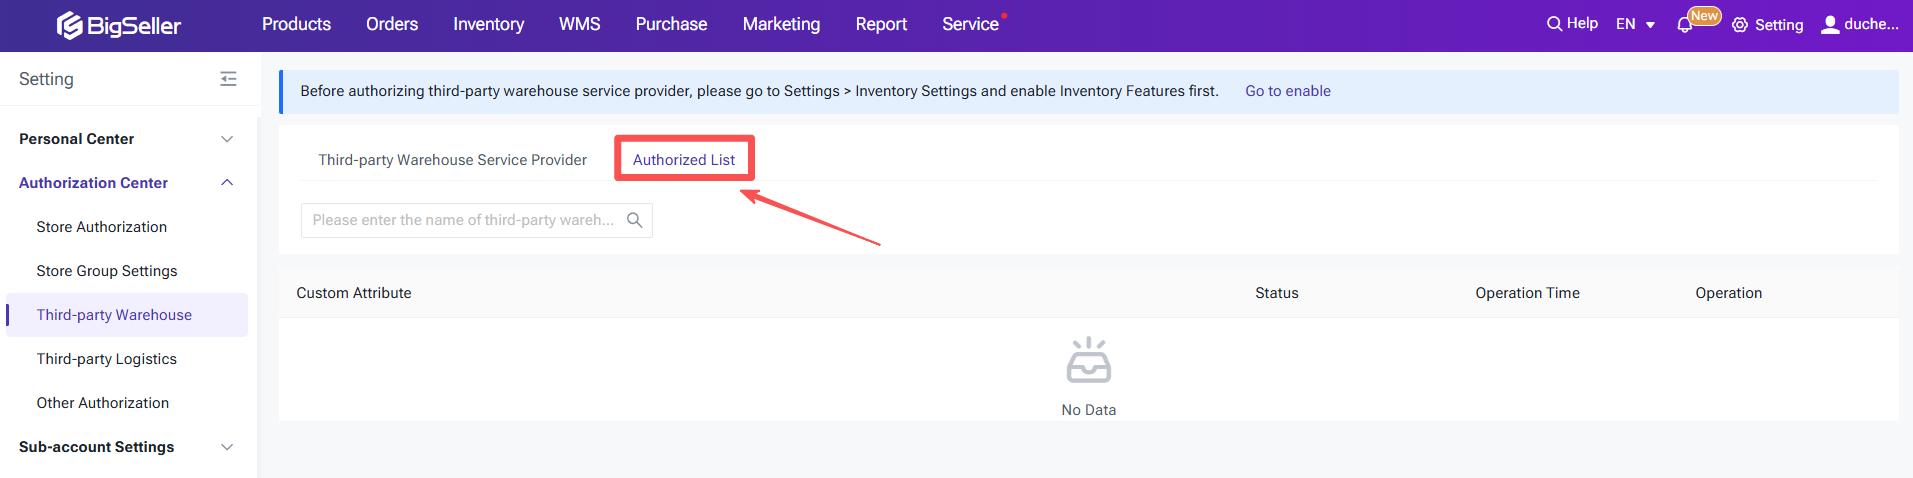
The inventory function must be enabled before authorizing a third-party warehouse. The entry point to enable this function is as follows:
Step 4: Authorize Third-Party Warehouse
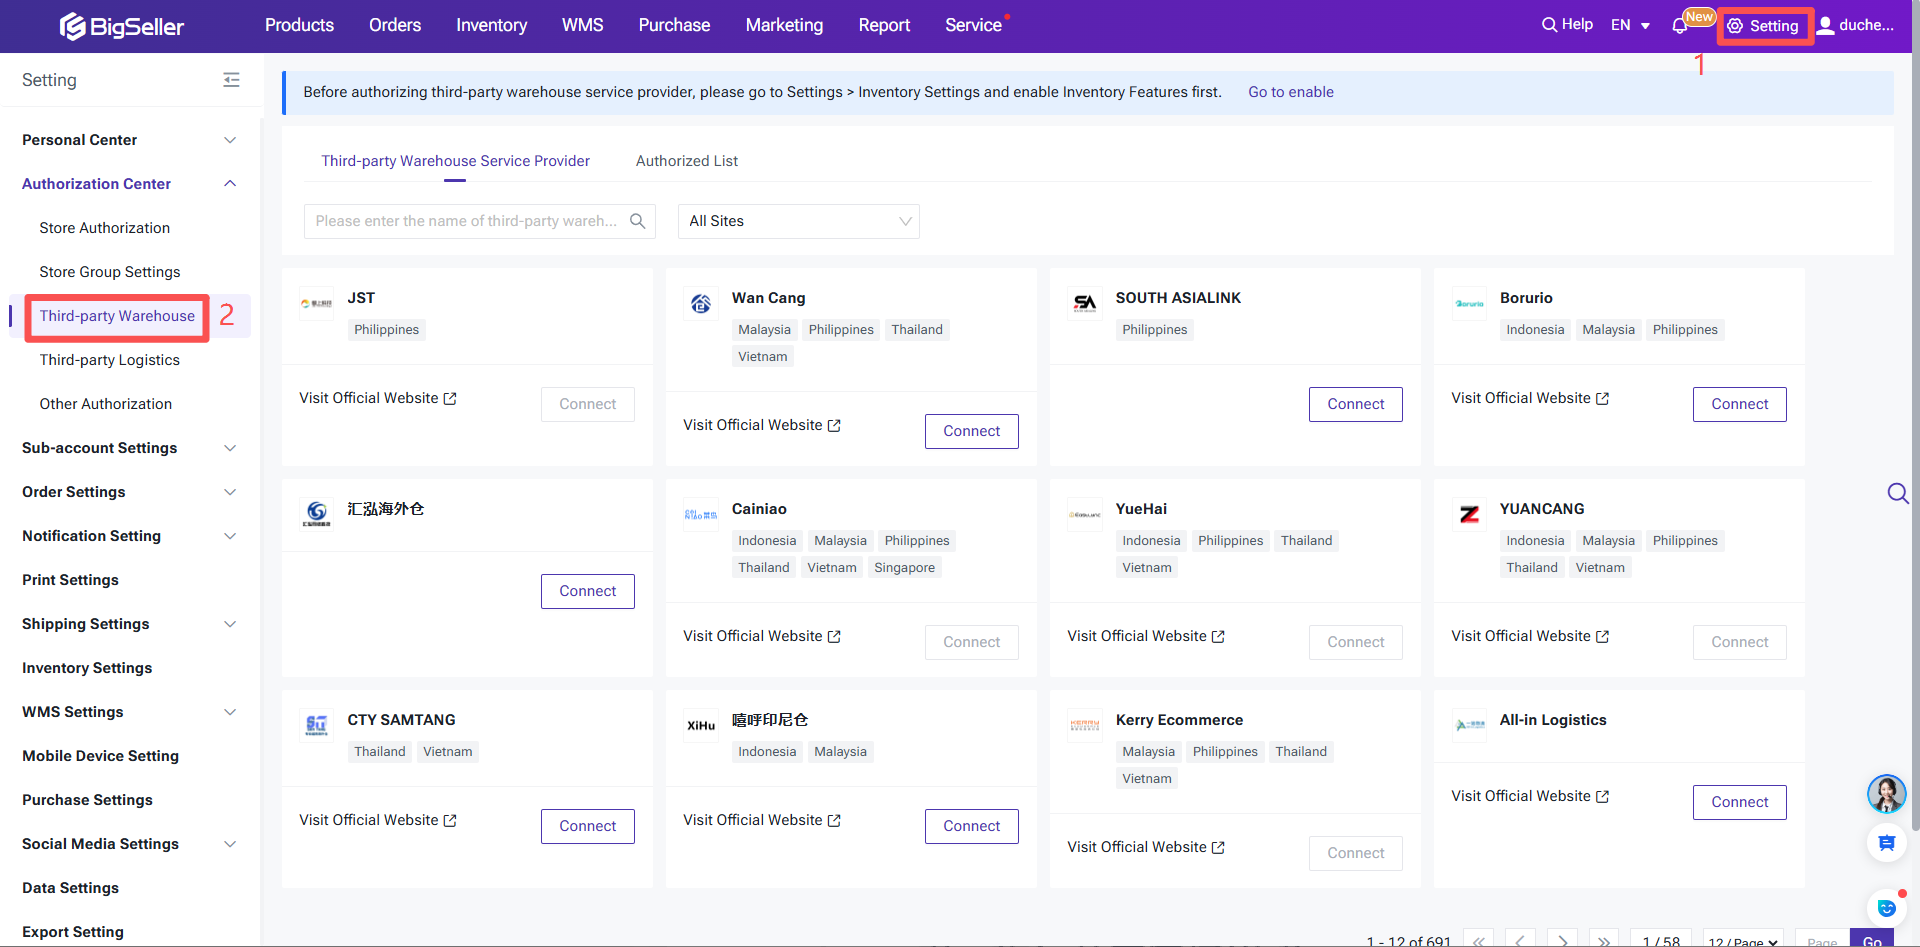
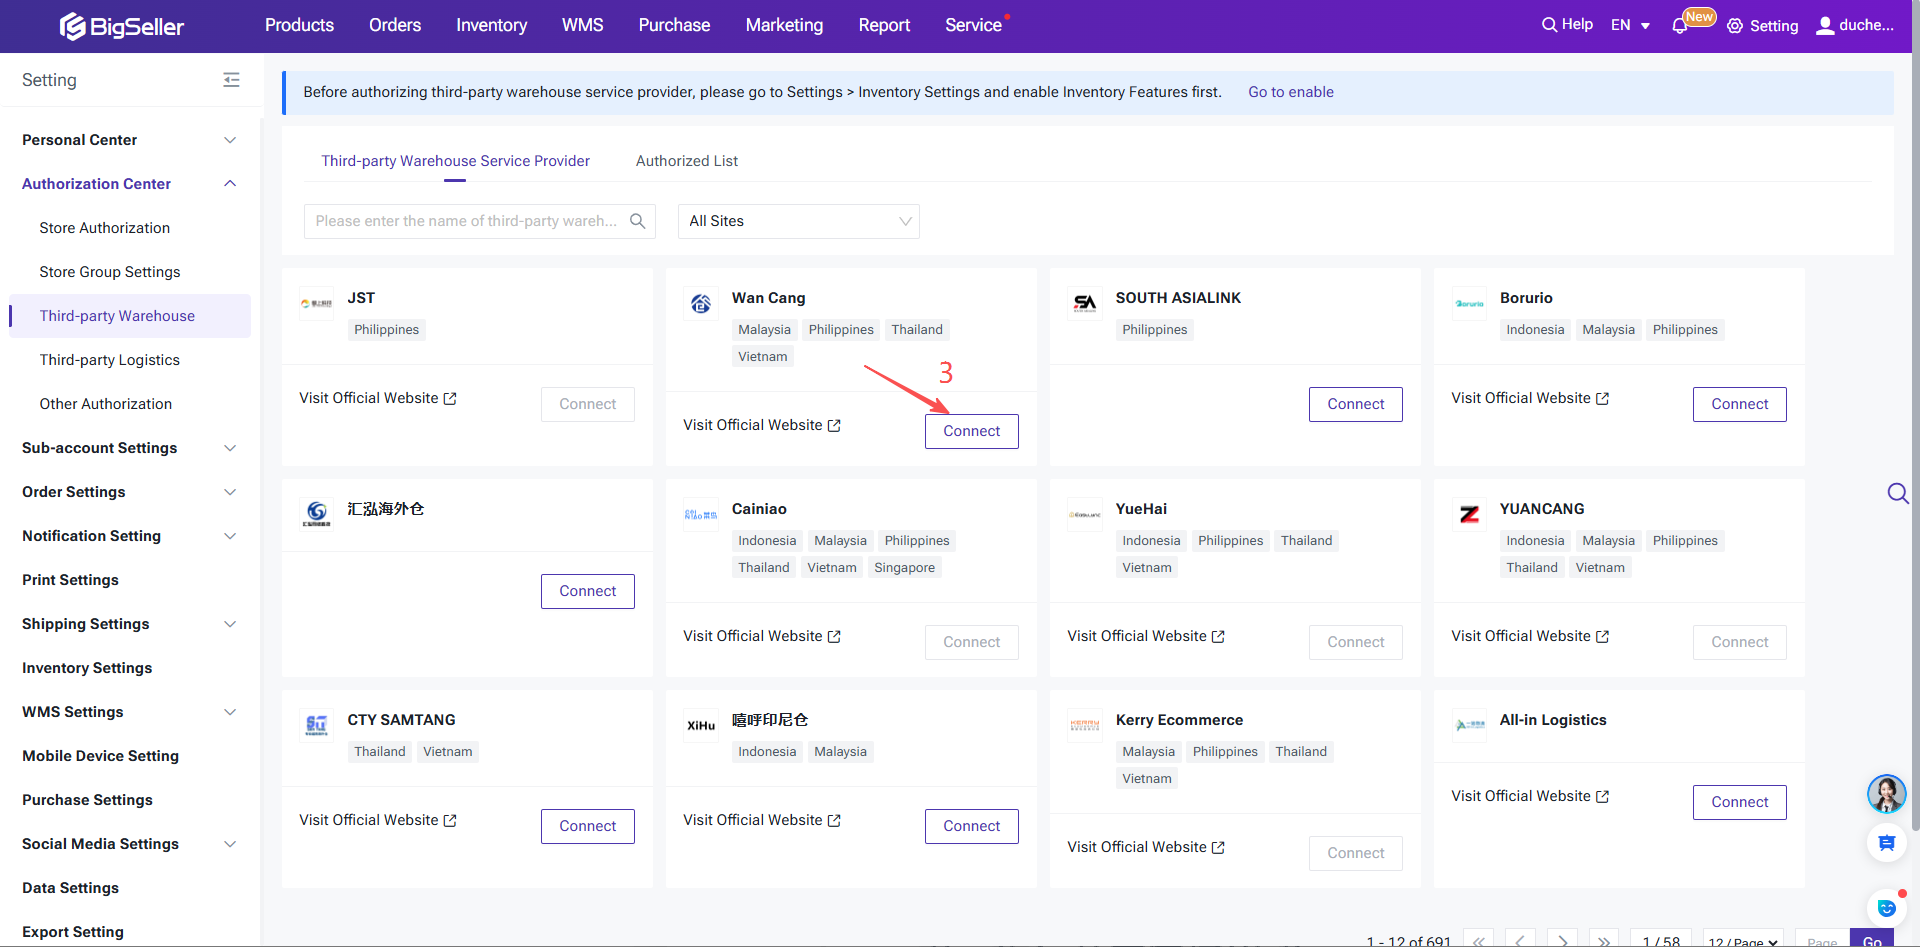
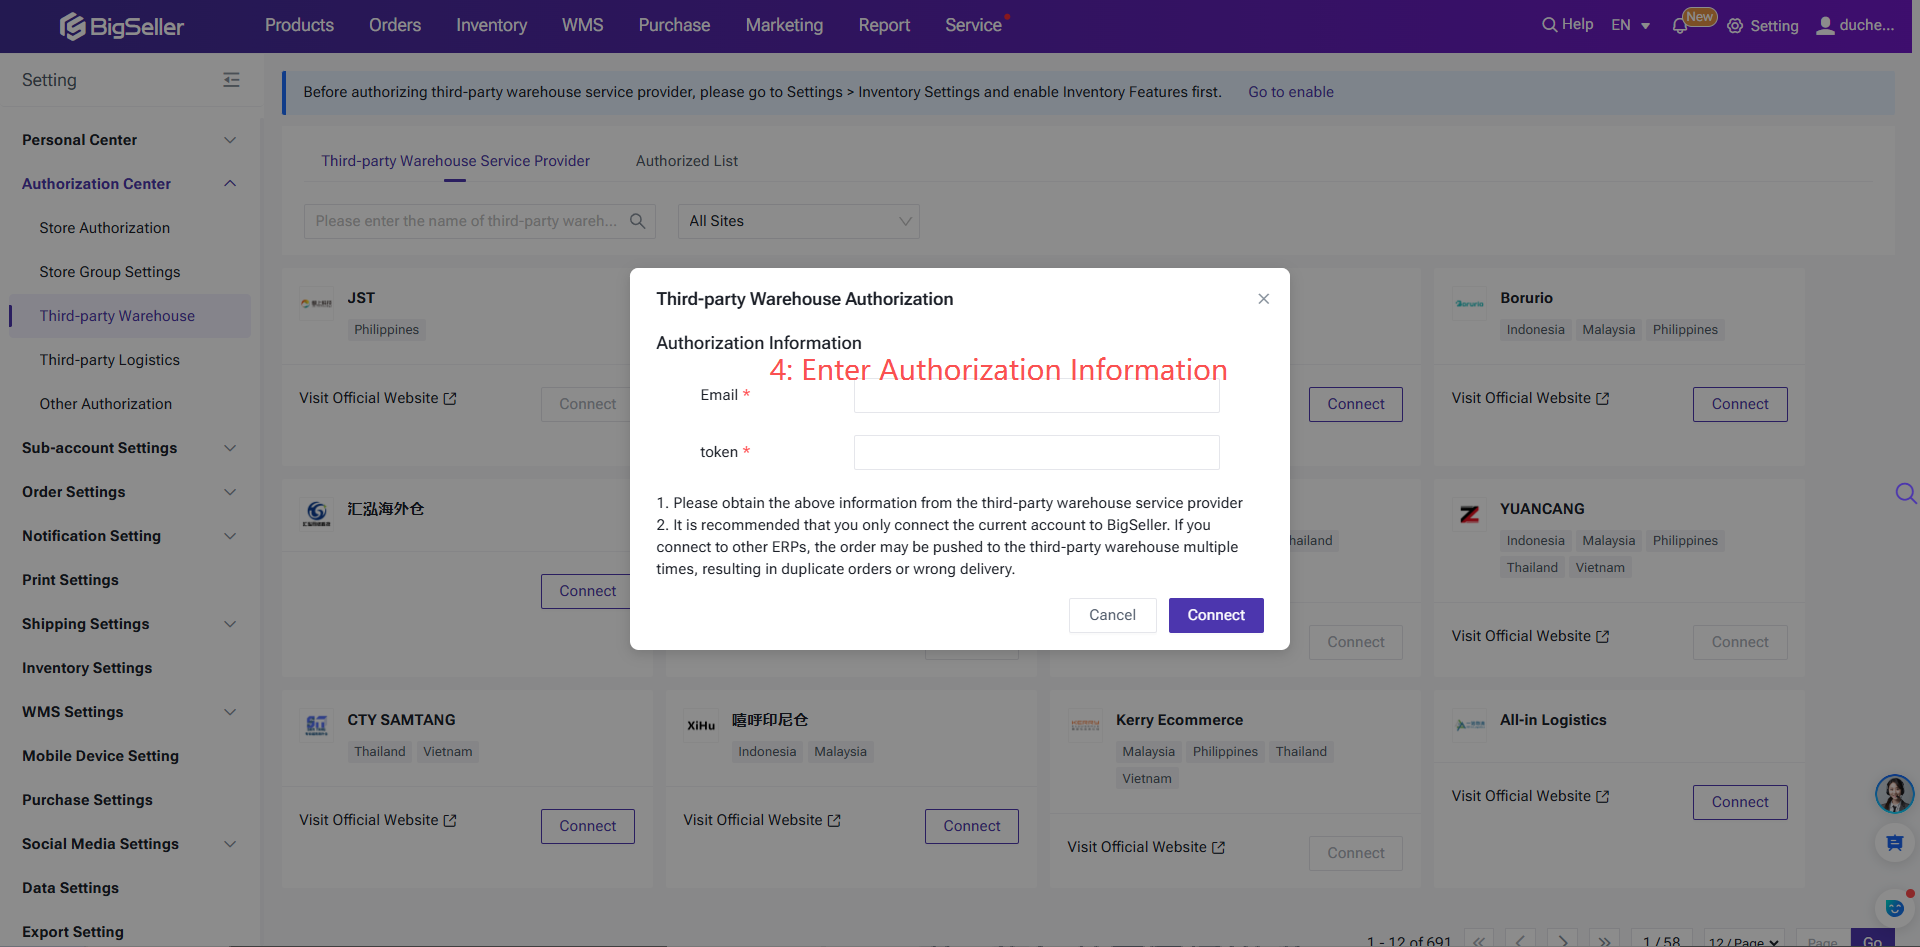
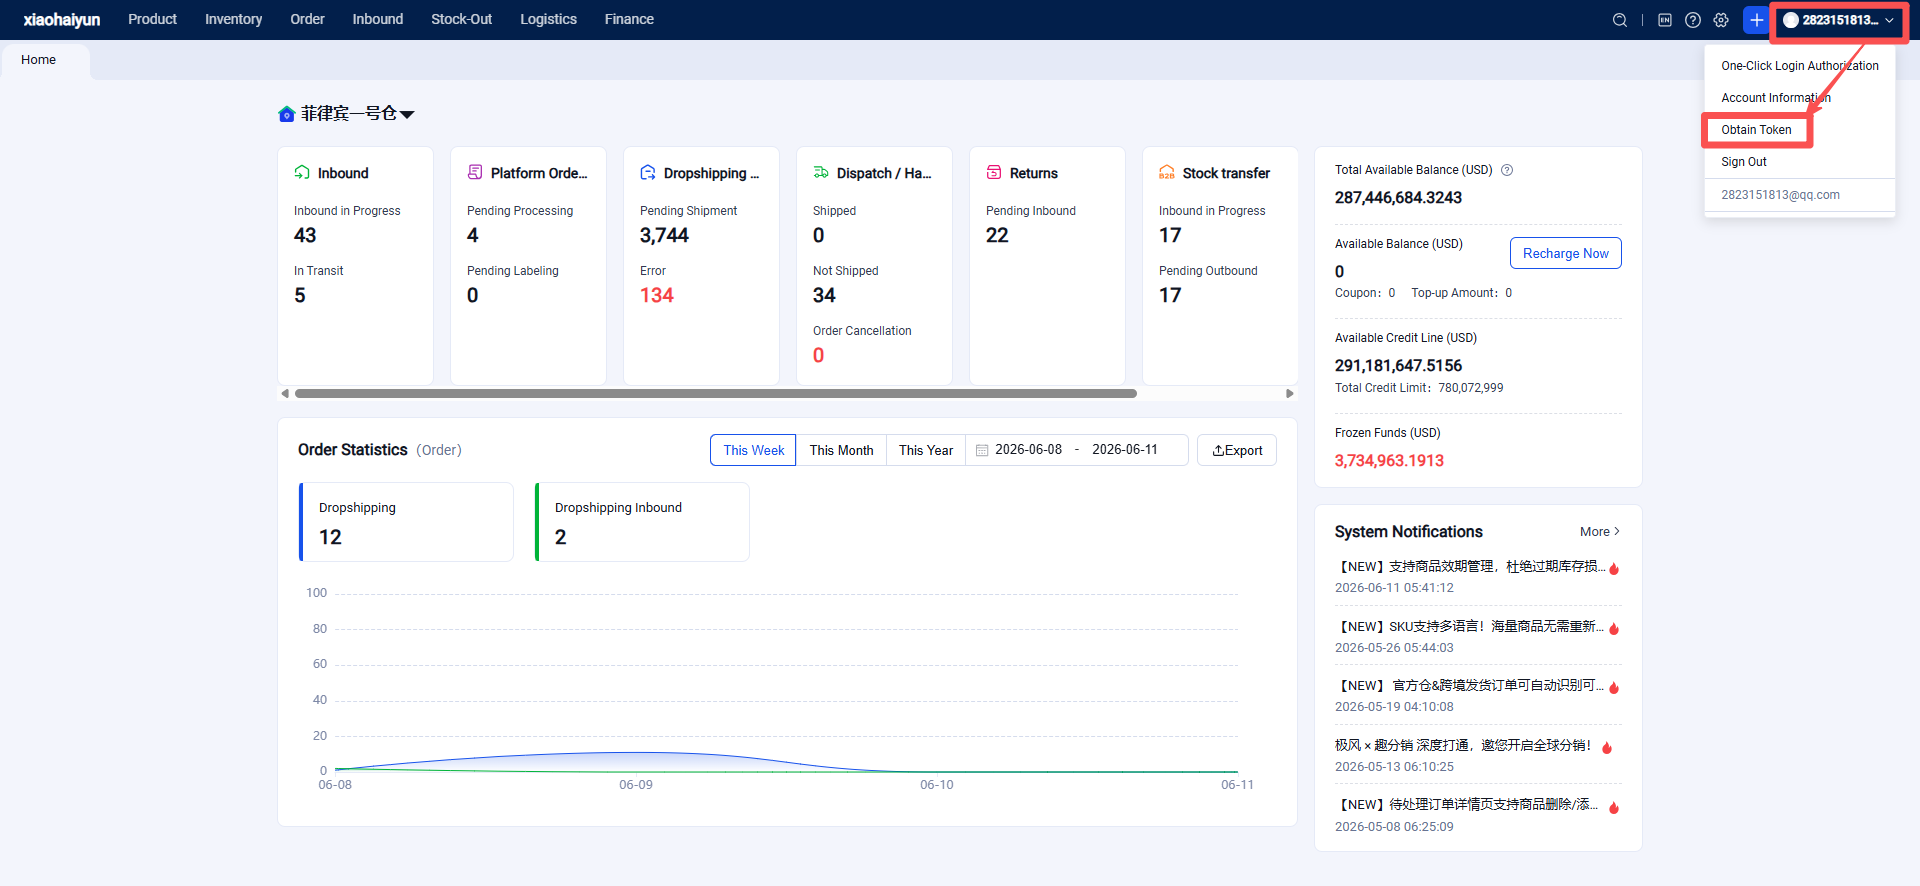
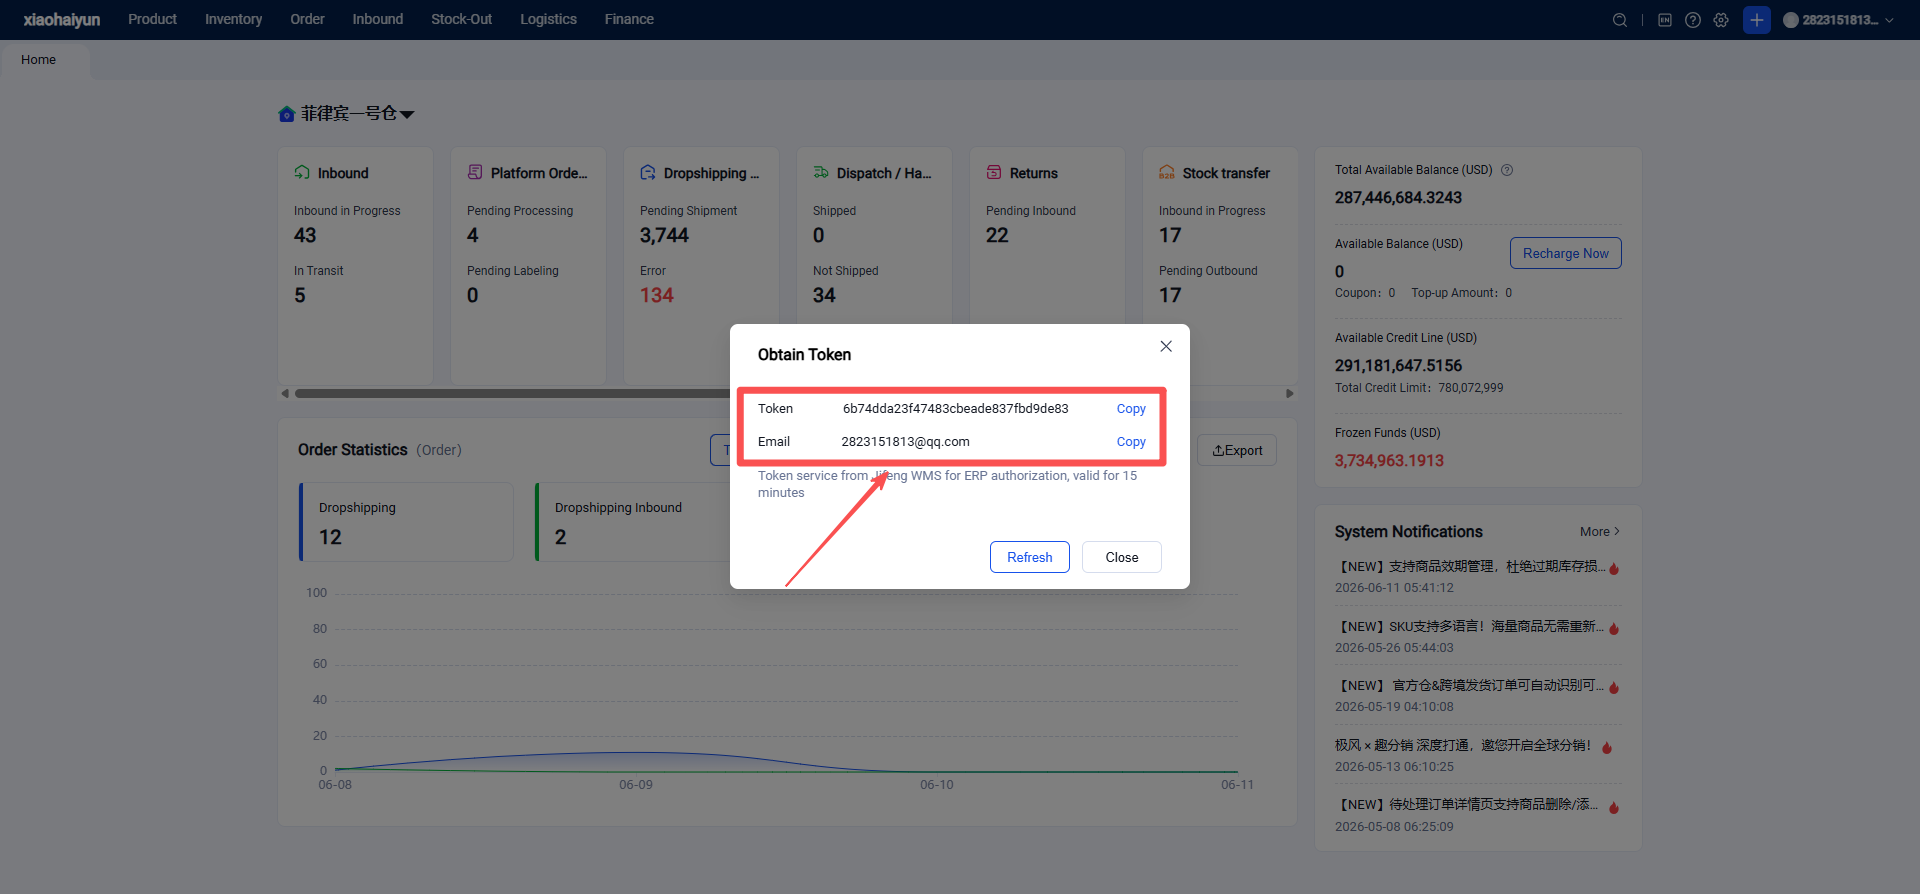
Step 1: Click Authorization Center > Click Third-Party Warehouse Authorization > Click + Authorize > Enter authorization information > Click Authorize to complete the third-party warehouse authorization.
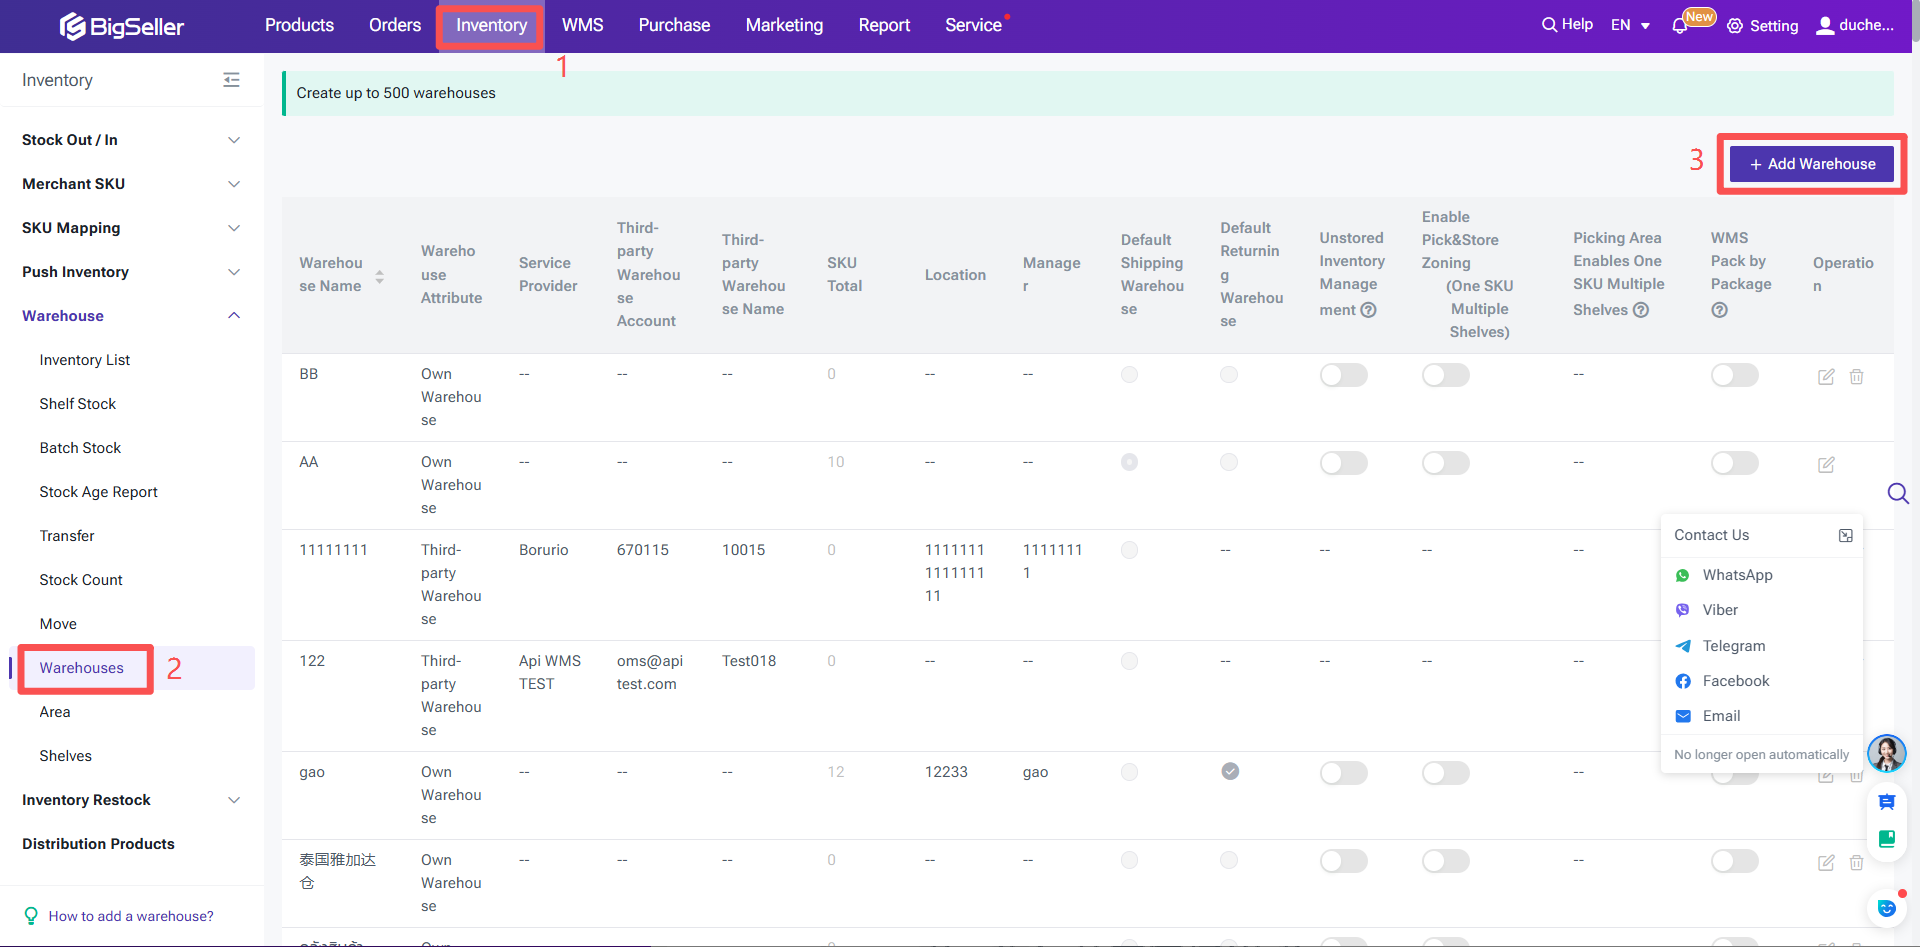
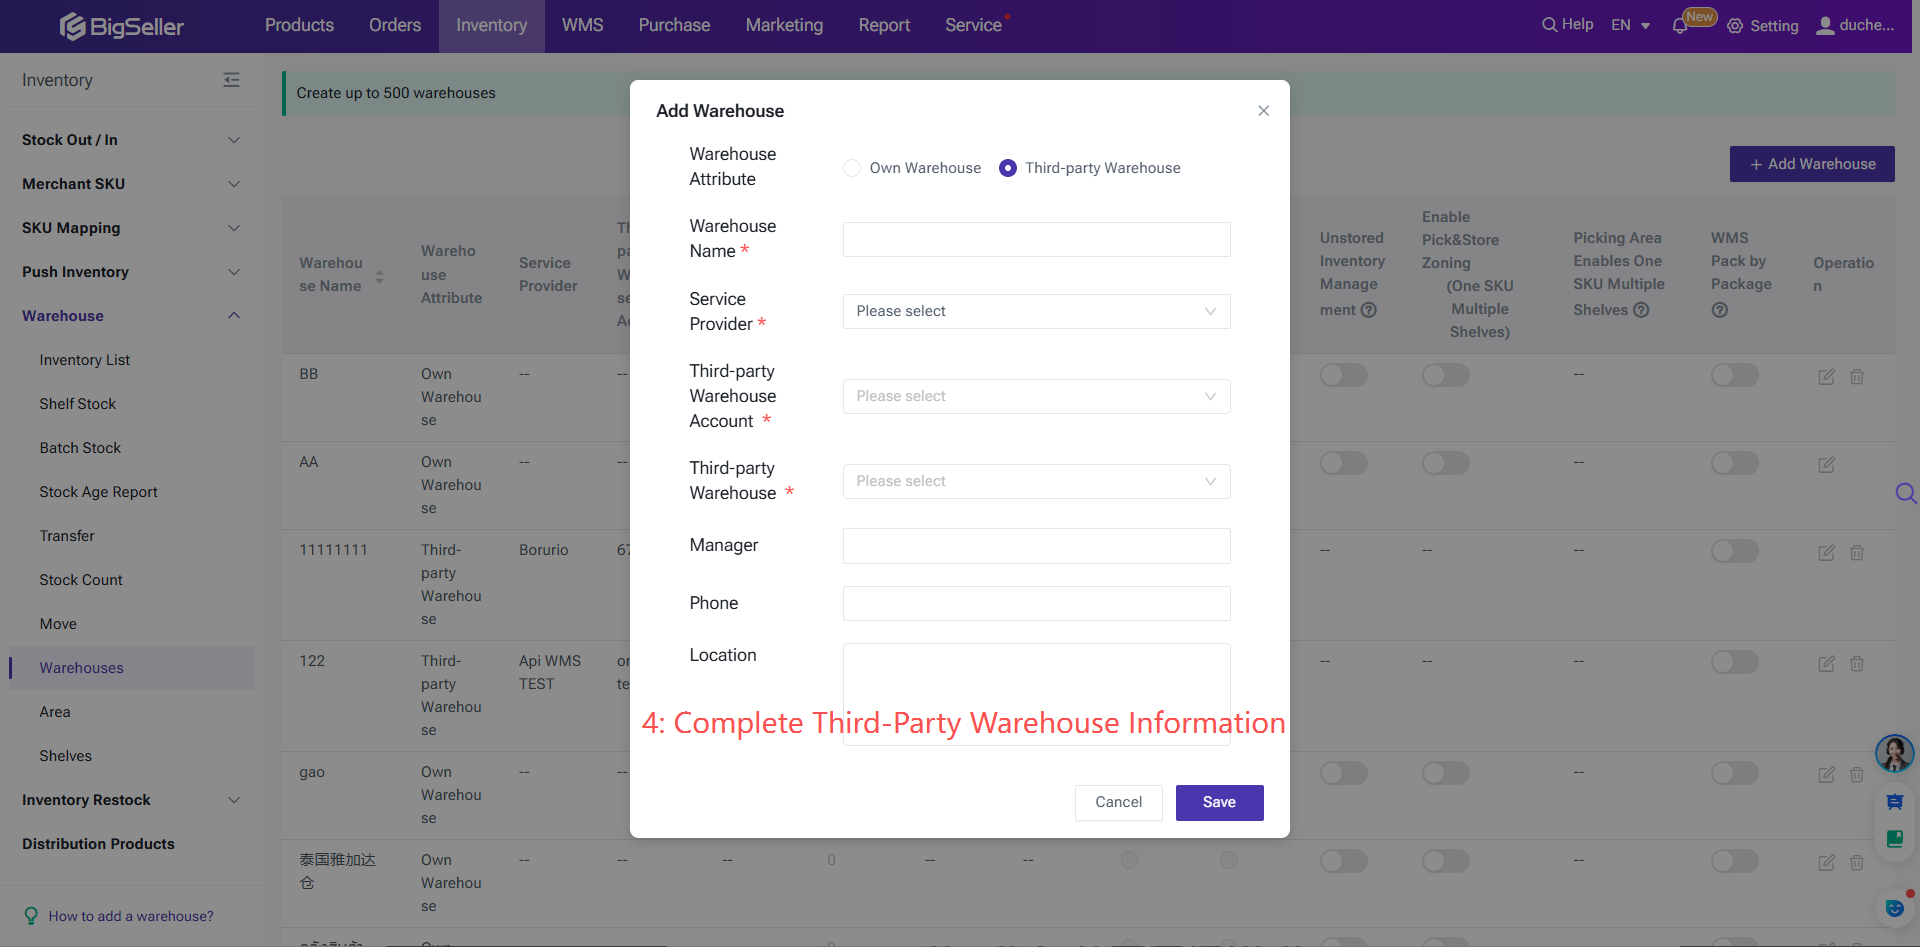
Step 2: Create a Third-Party Warehouse.
Step 5: Push Product SKUs from BigSeller to Jifeng Overseas Warehouse
Step 1: Go to the Product SKU page (Inventory > Product SKU) > Click "Push to Third-Party Warehouse" > Select the product SKUs to be pushed > Click "Push to Third-Party Warehouse".
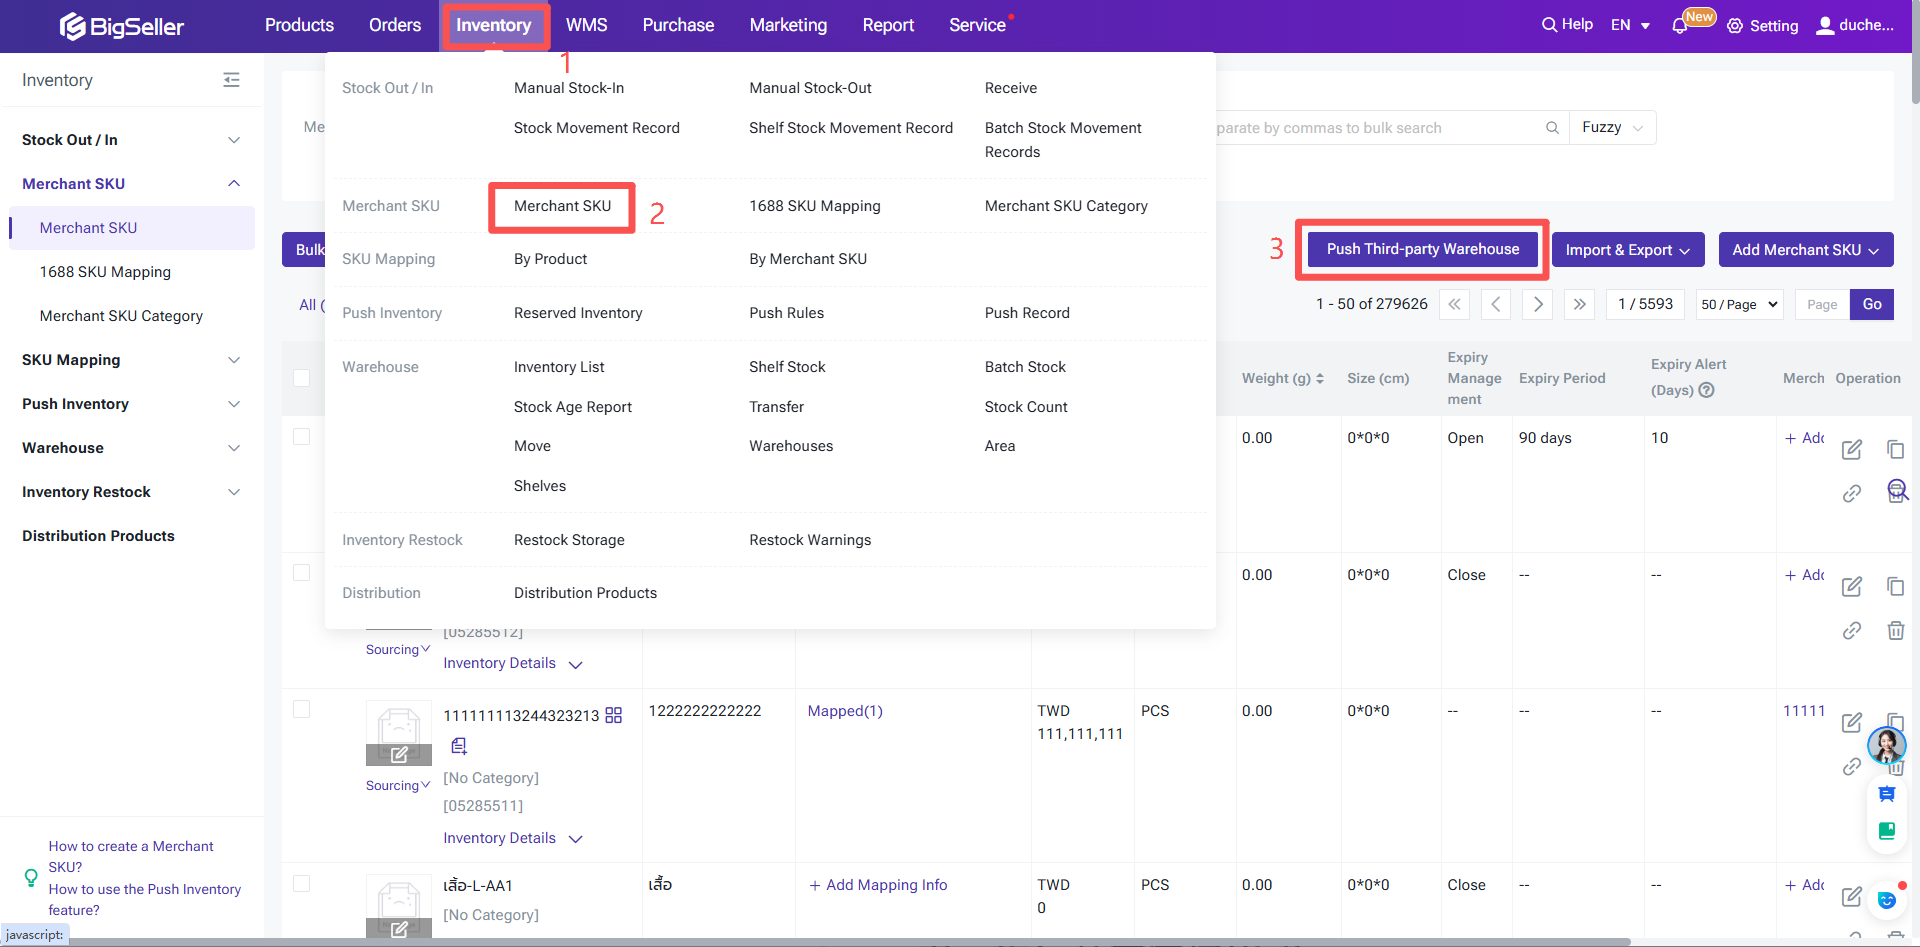
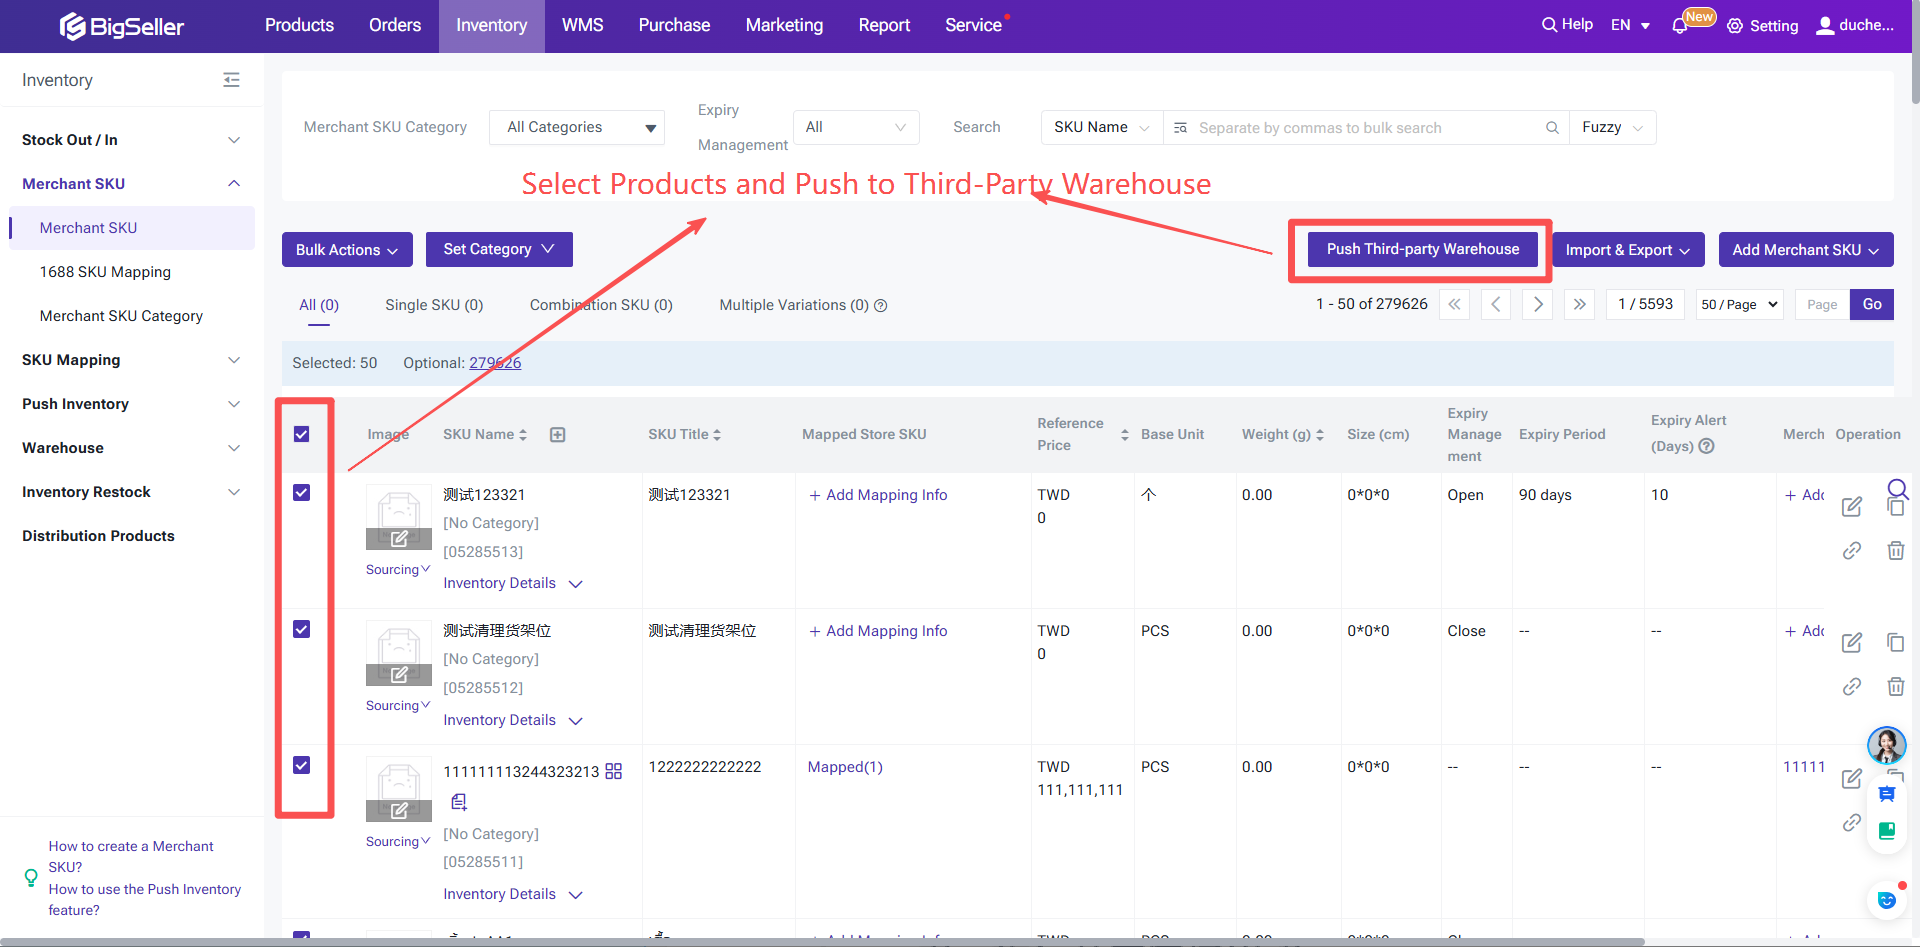
Step 2: Select specific products or push all products to the third-party warehouse.
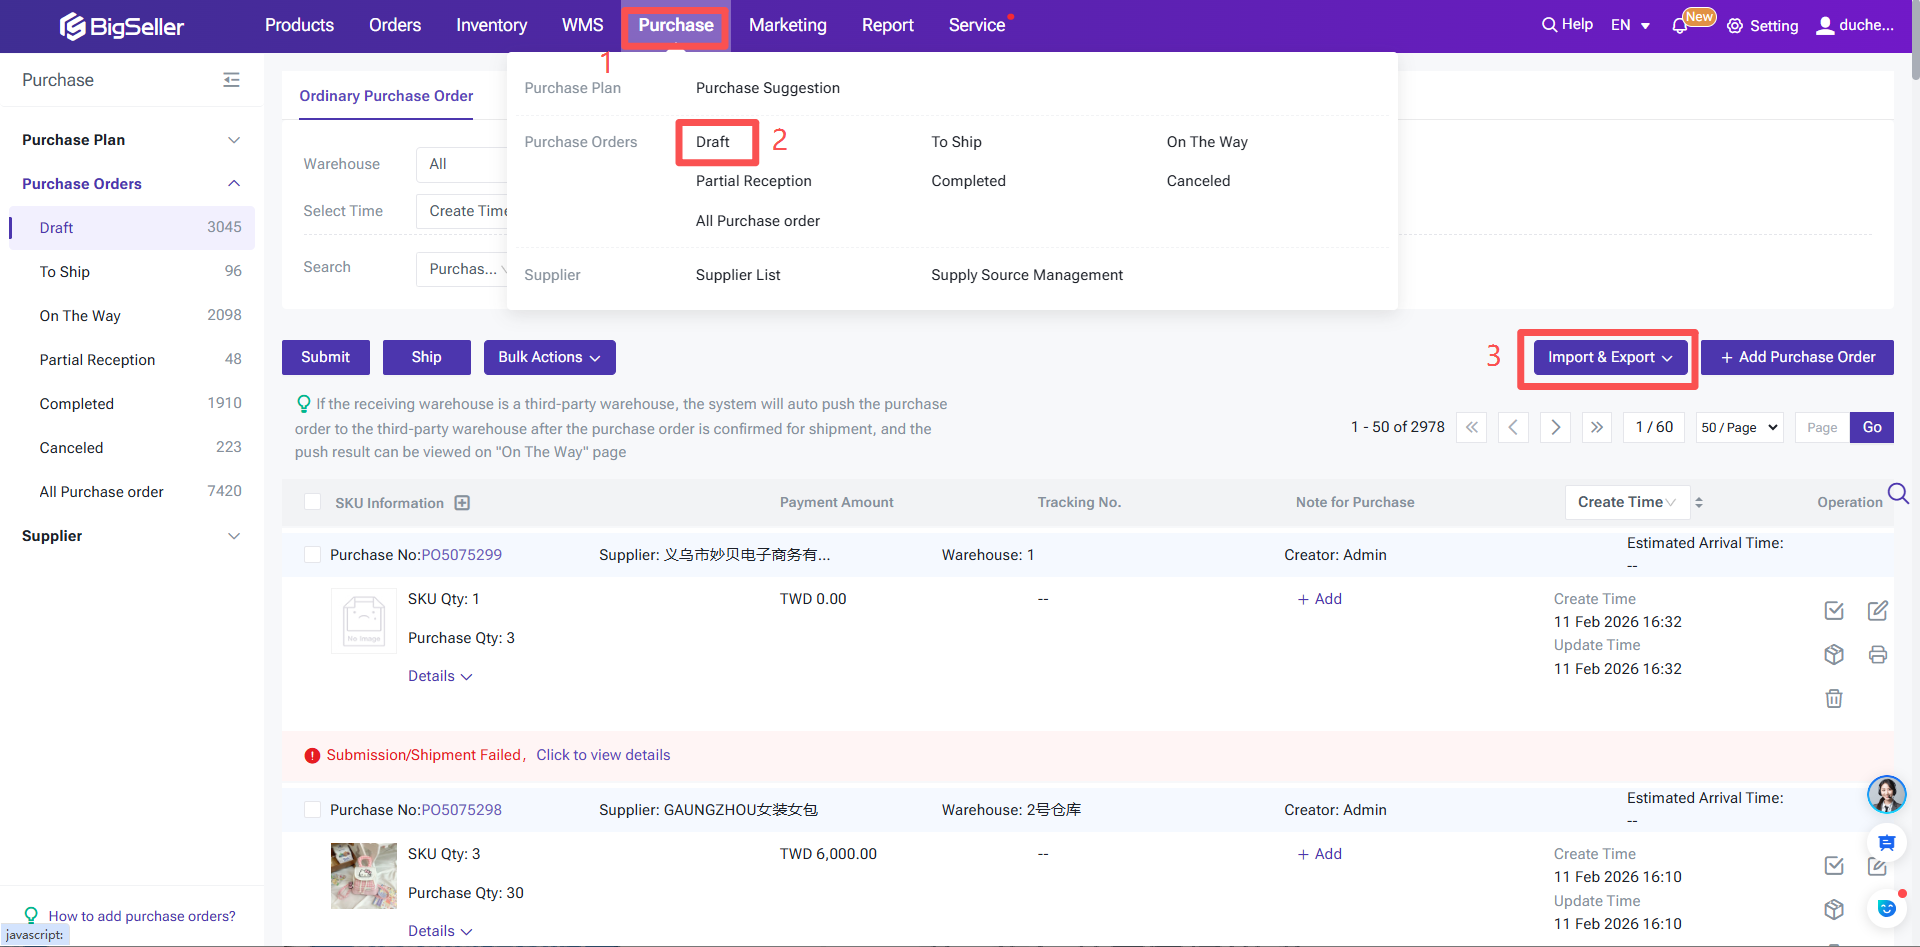
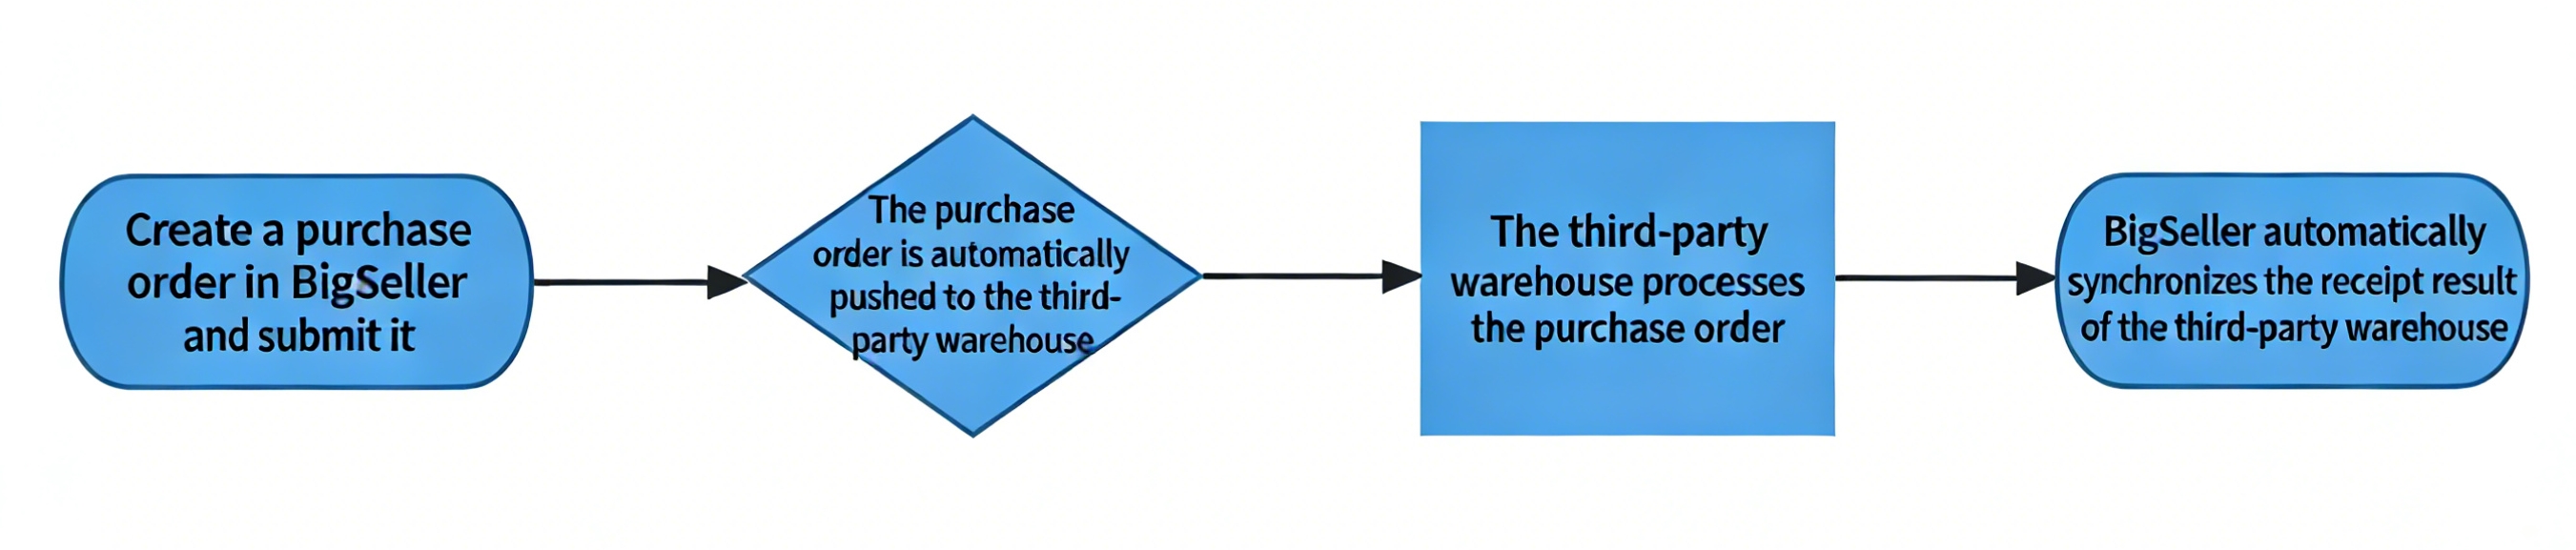
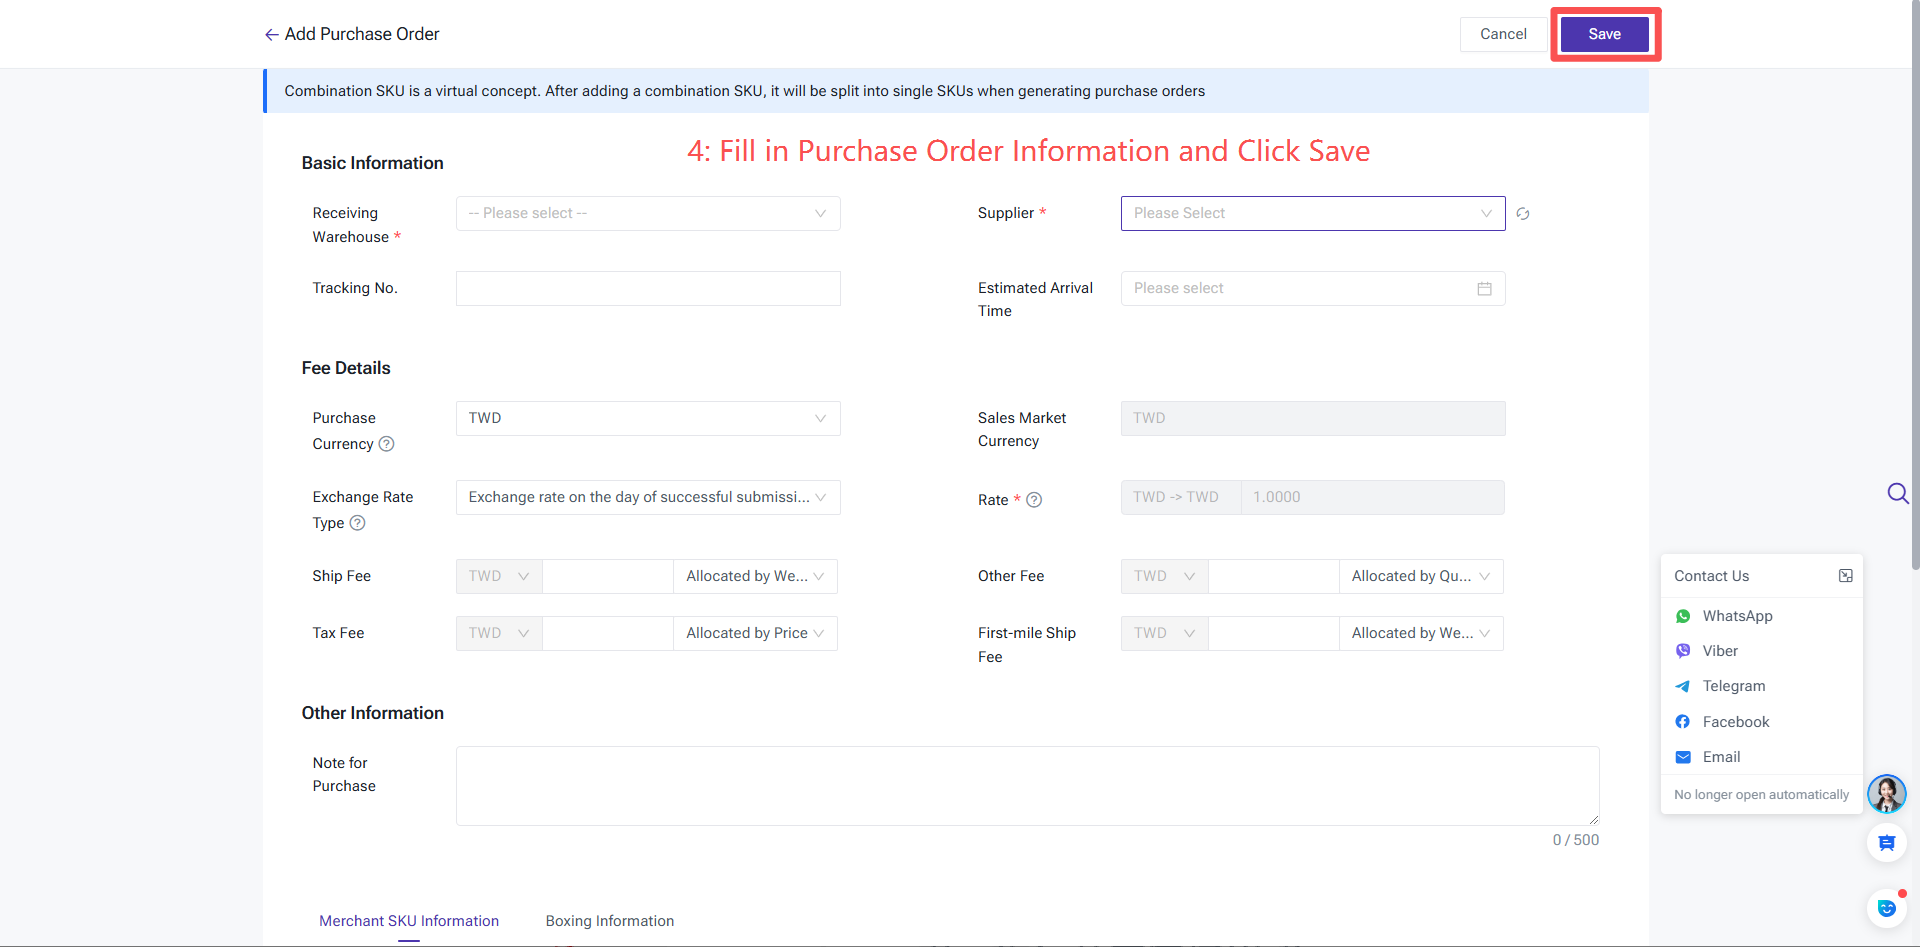
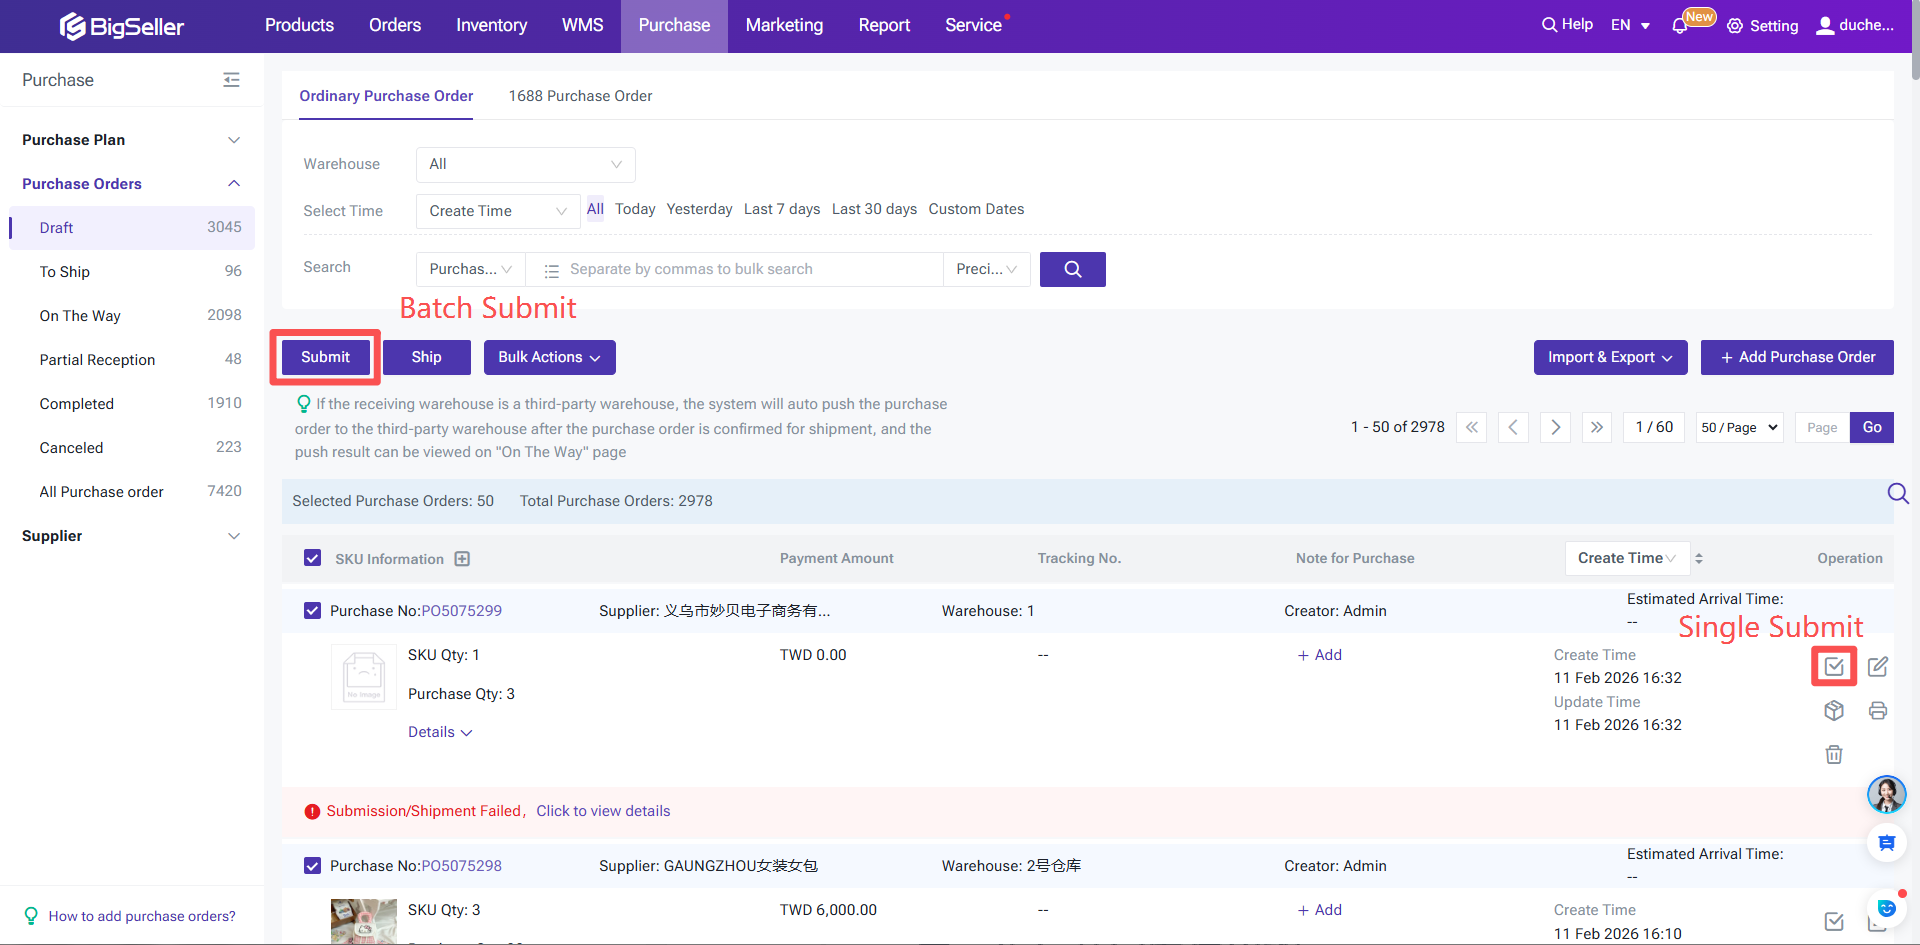
Step 6: Push Purchase Order
Step 7: Synchronize Third-Party Warehouse Inventory
Note: This step can only be performed after the warehouse has initialized inventory or after your purchase order has been completed.
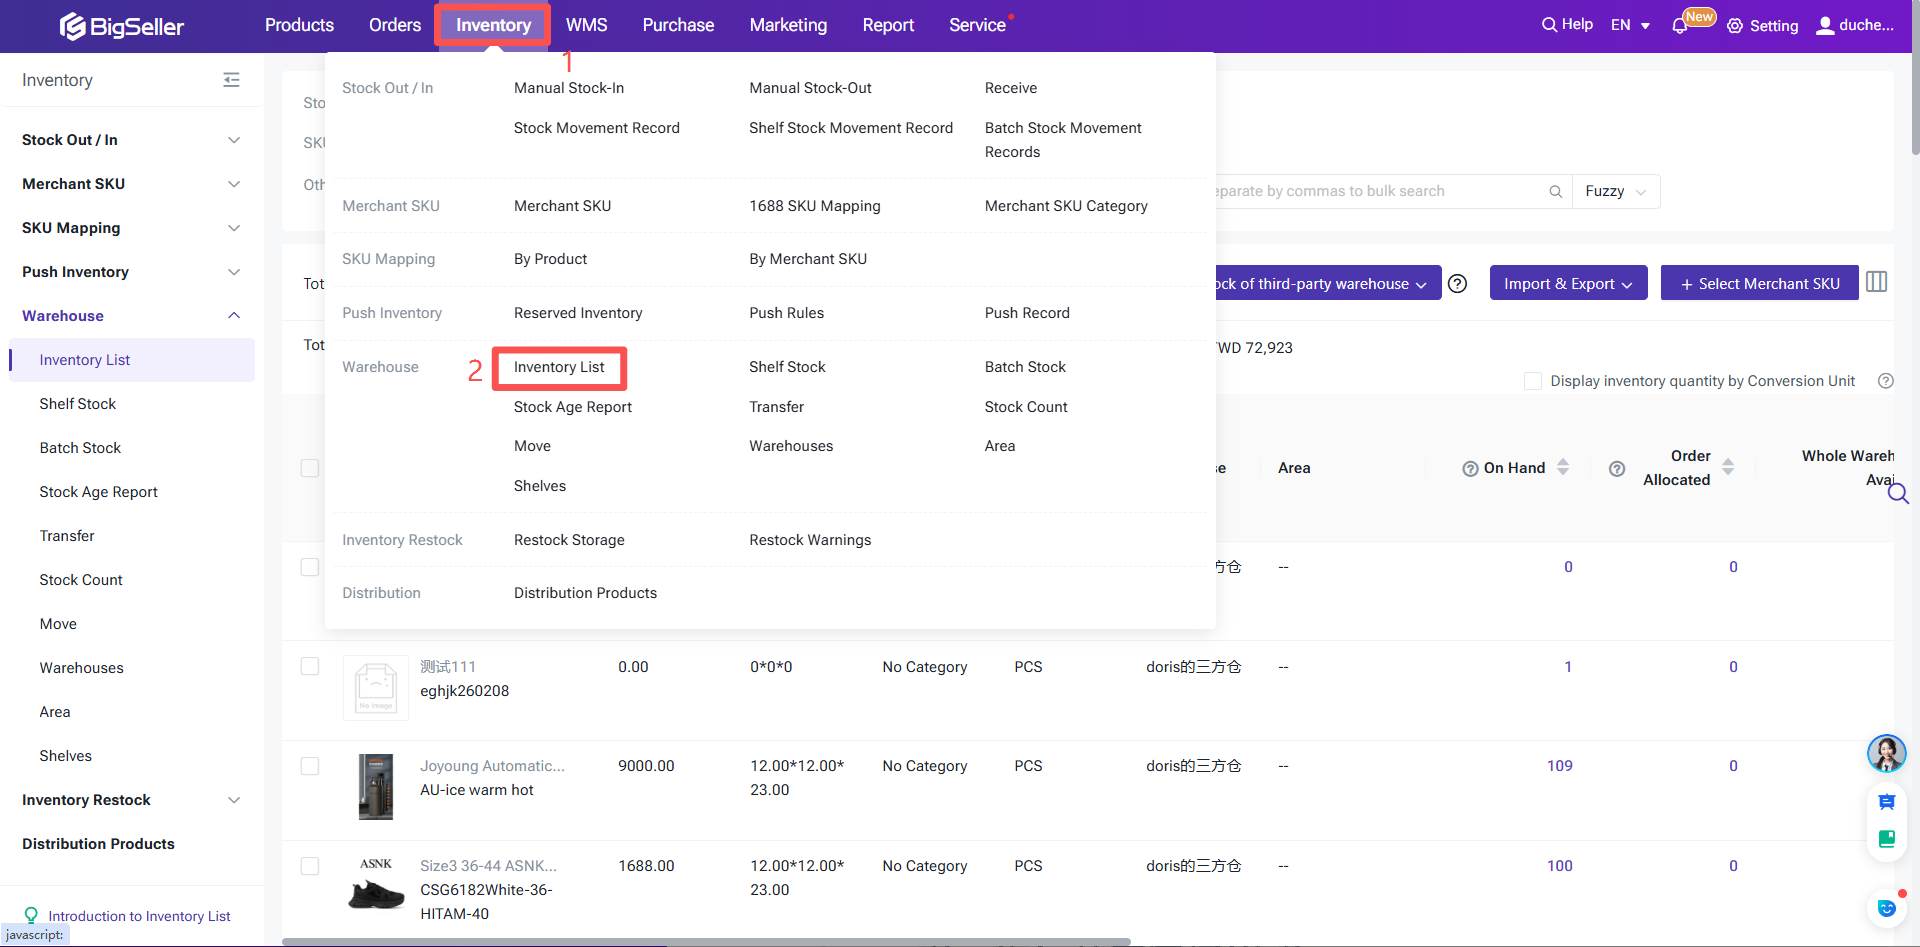
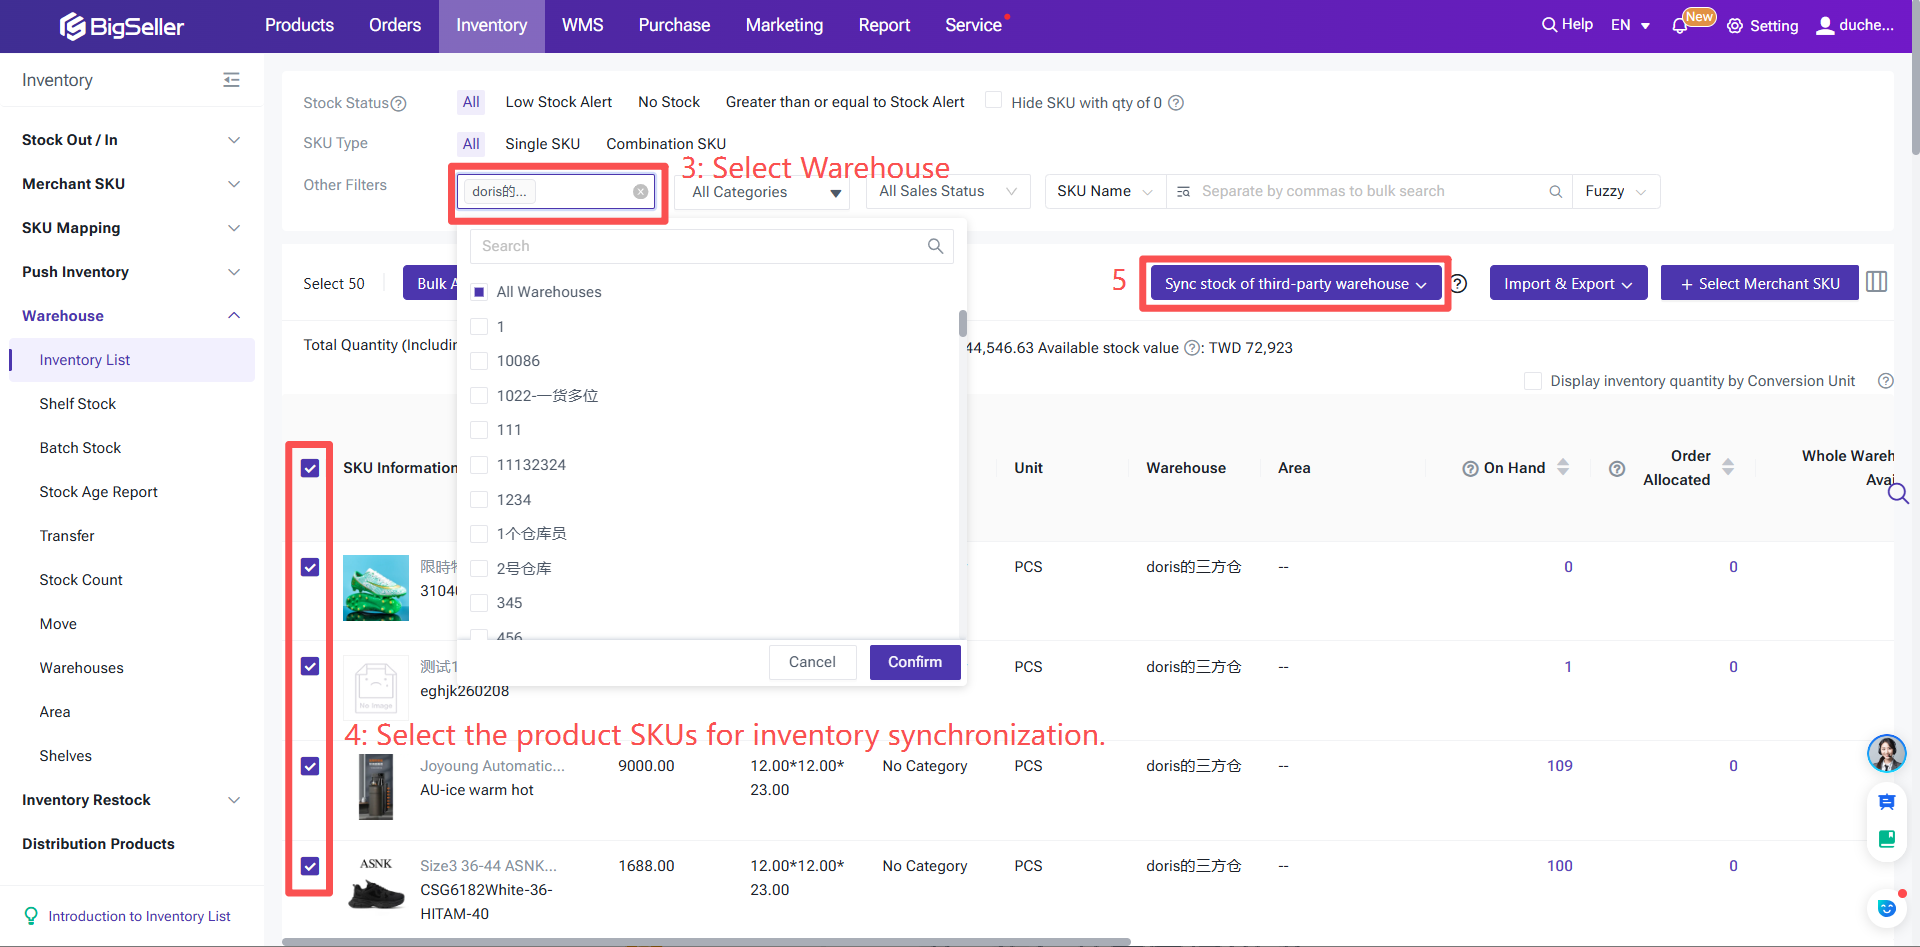
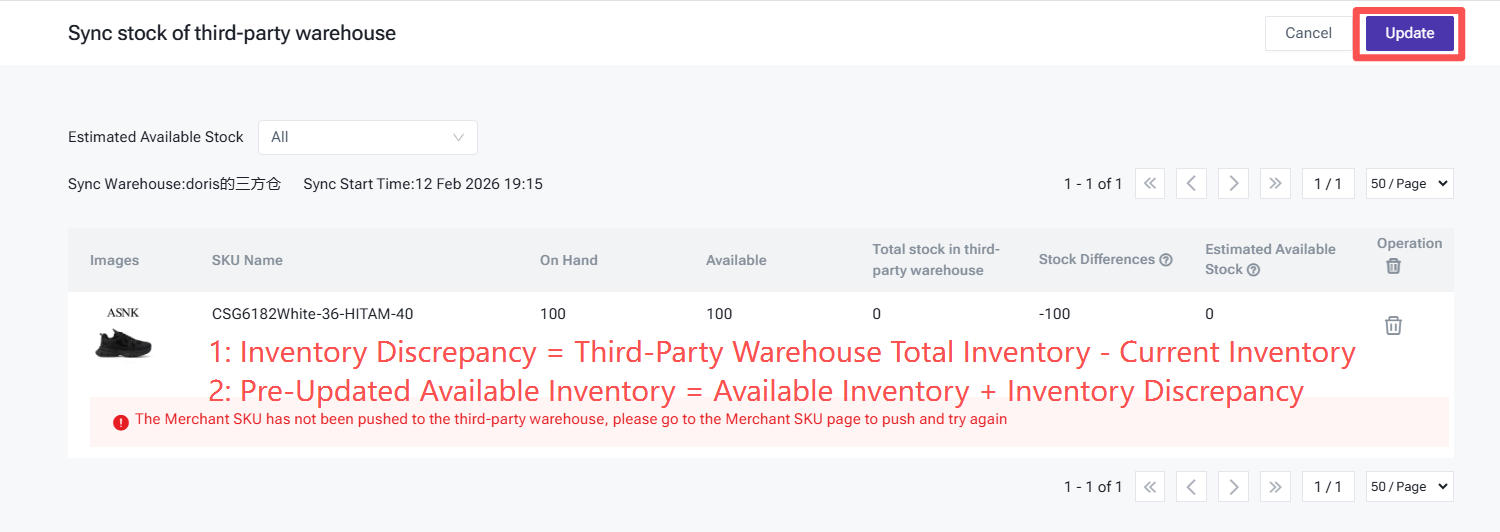
Navigate to Inventory List (Inventory > Warehouse Management > Inventory List) > Select the Third-Party Warehouse > Check the product SKUs you wish to synchronize > Click "Sync Third-Party Warehouse Inventory" > Click "Sync Selected Product Inventory" > Verify the inventory data > Confirm Update.
Step 8: Configure Custom Shipping Label
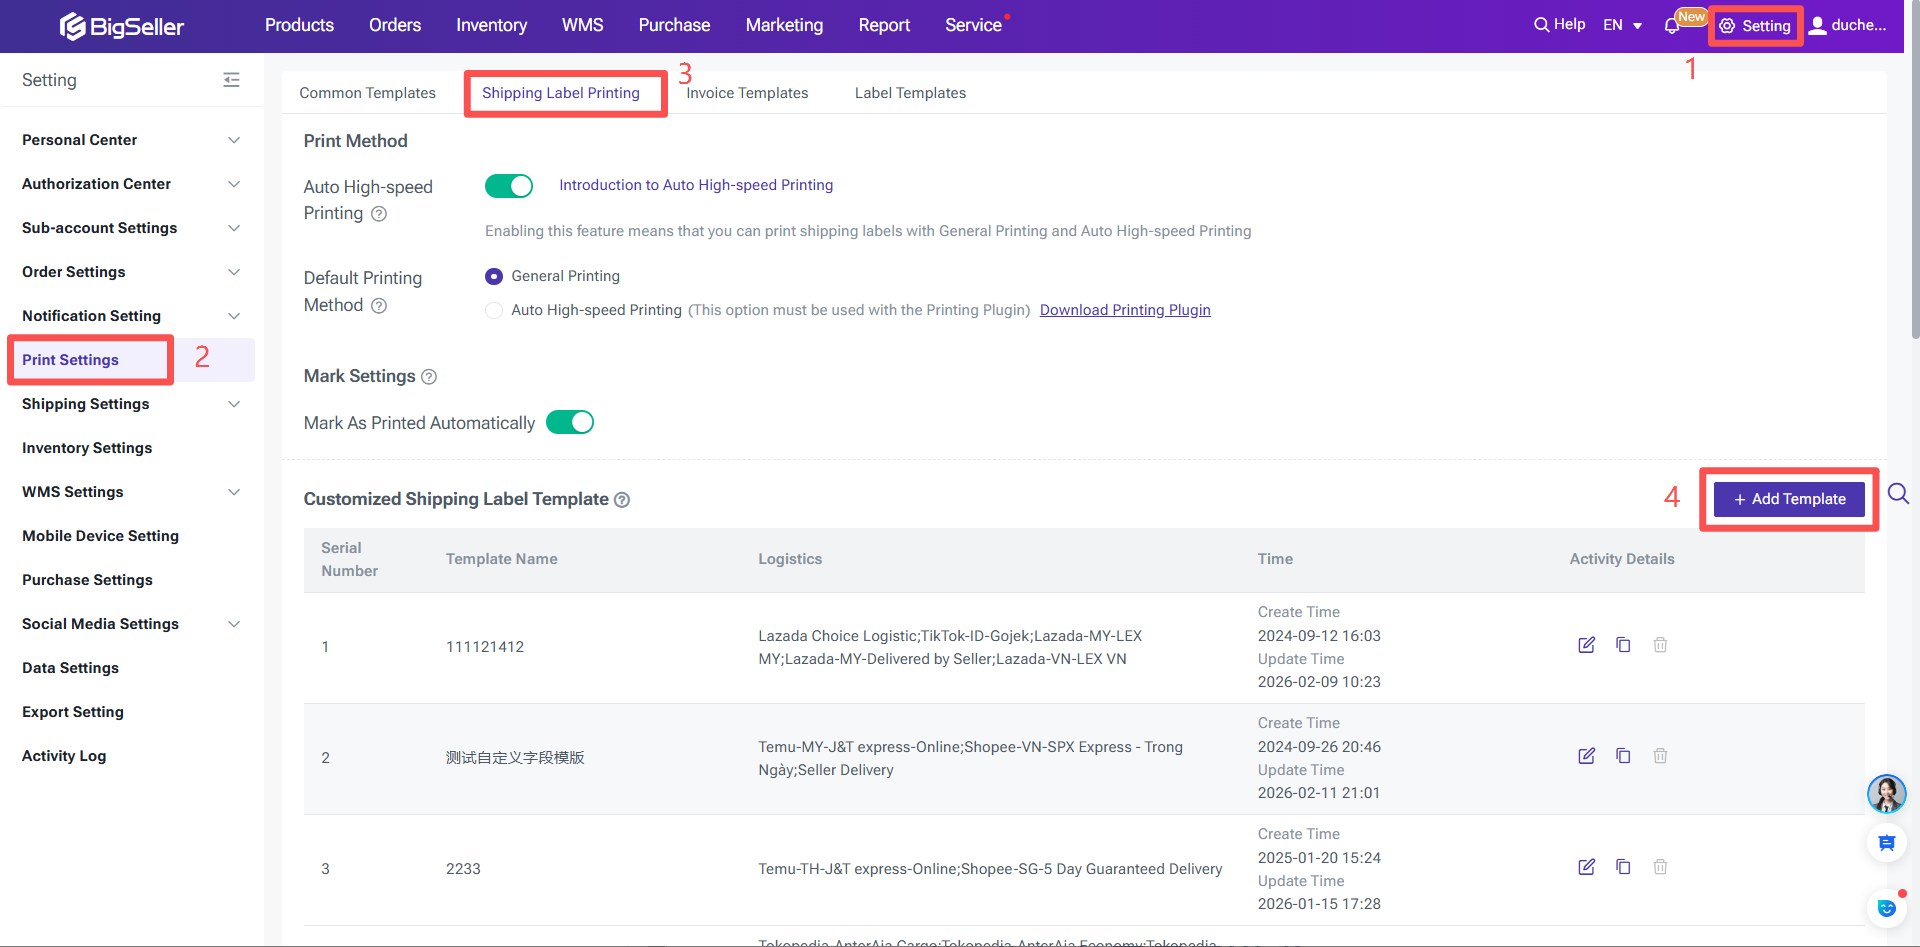
Step 1: Navigate to: Settings > Print Settings > Label Printing > Add Template.
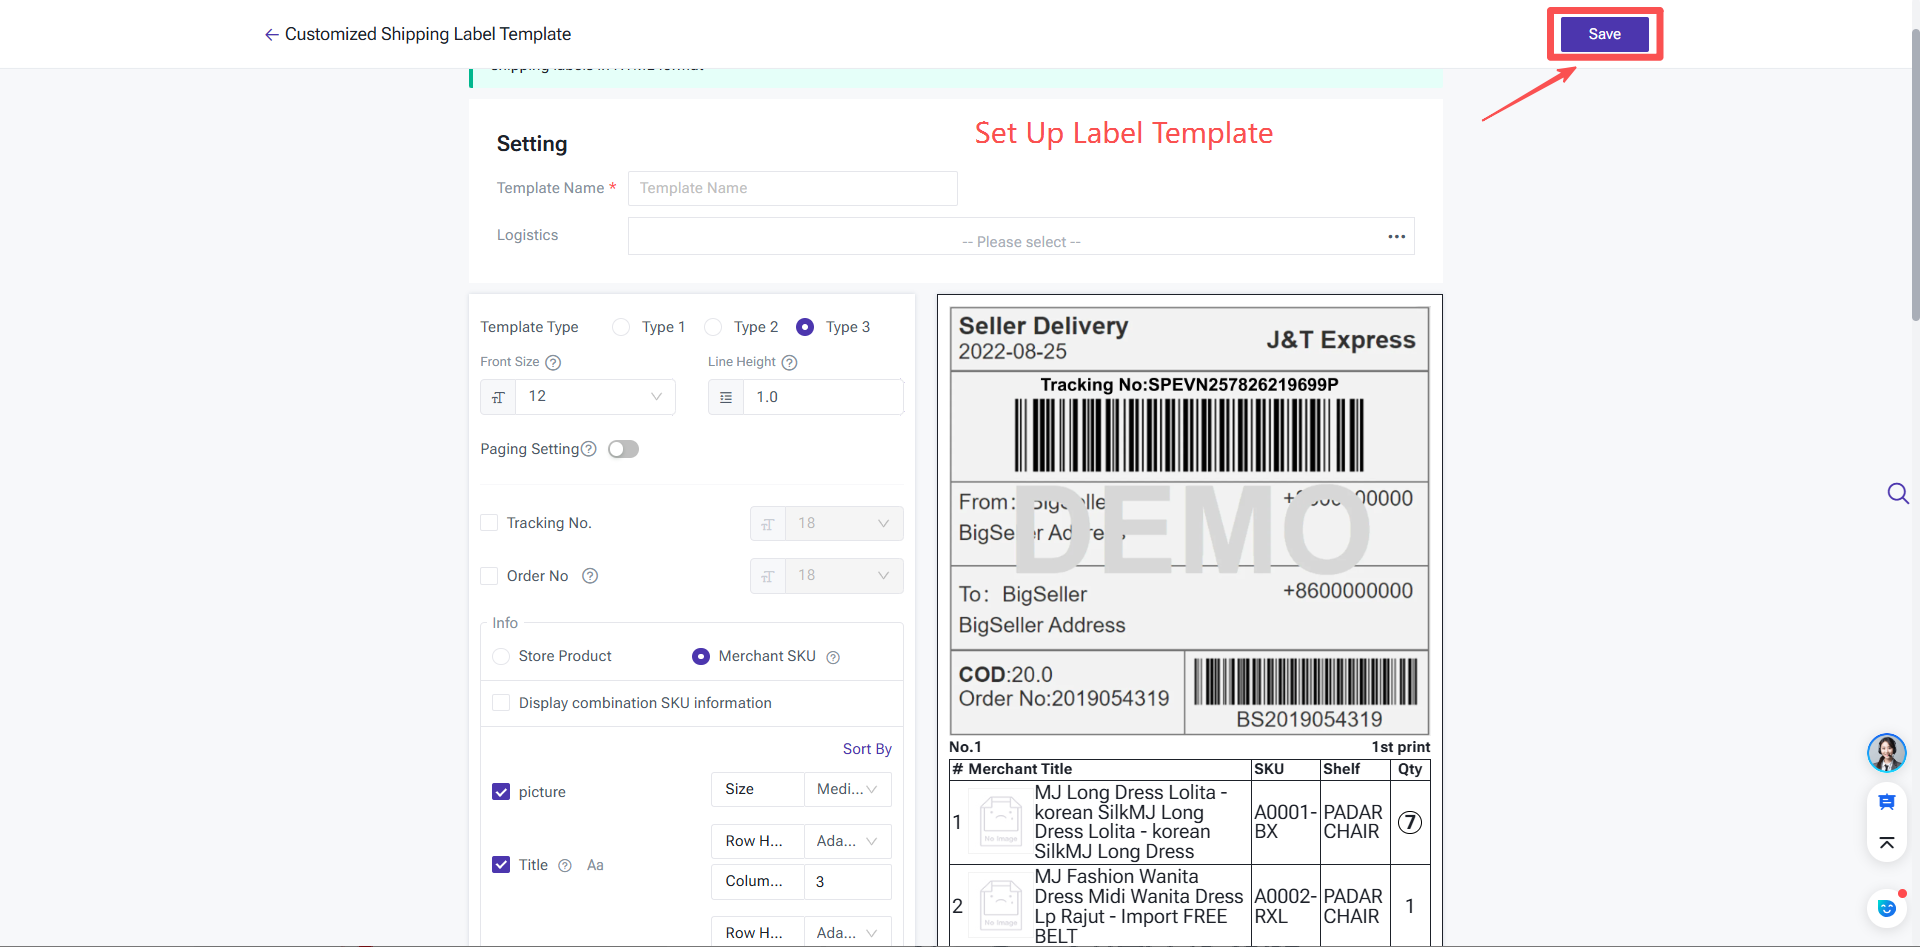
Step 2: Configure the custom shipping label as shown in the figure below.
Step 9: Push Orders to Third-Party Warehouse
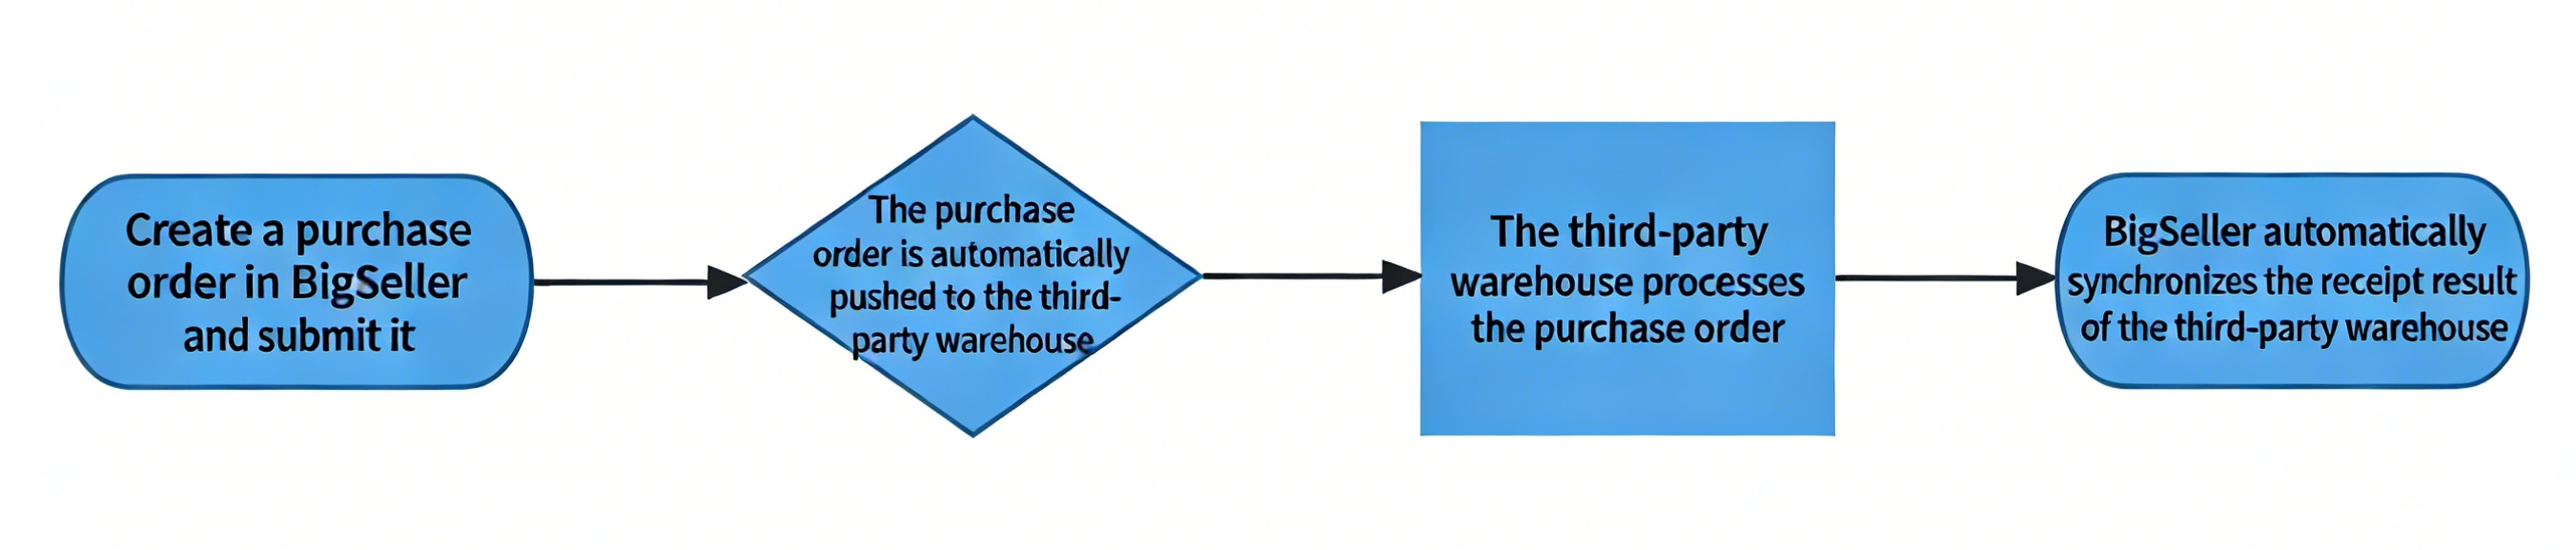
Step 1: Go to Orders > Pending Processing list, click Schedule Orders.
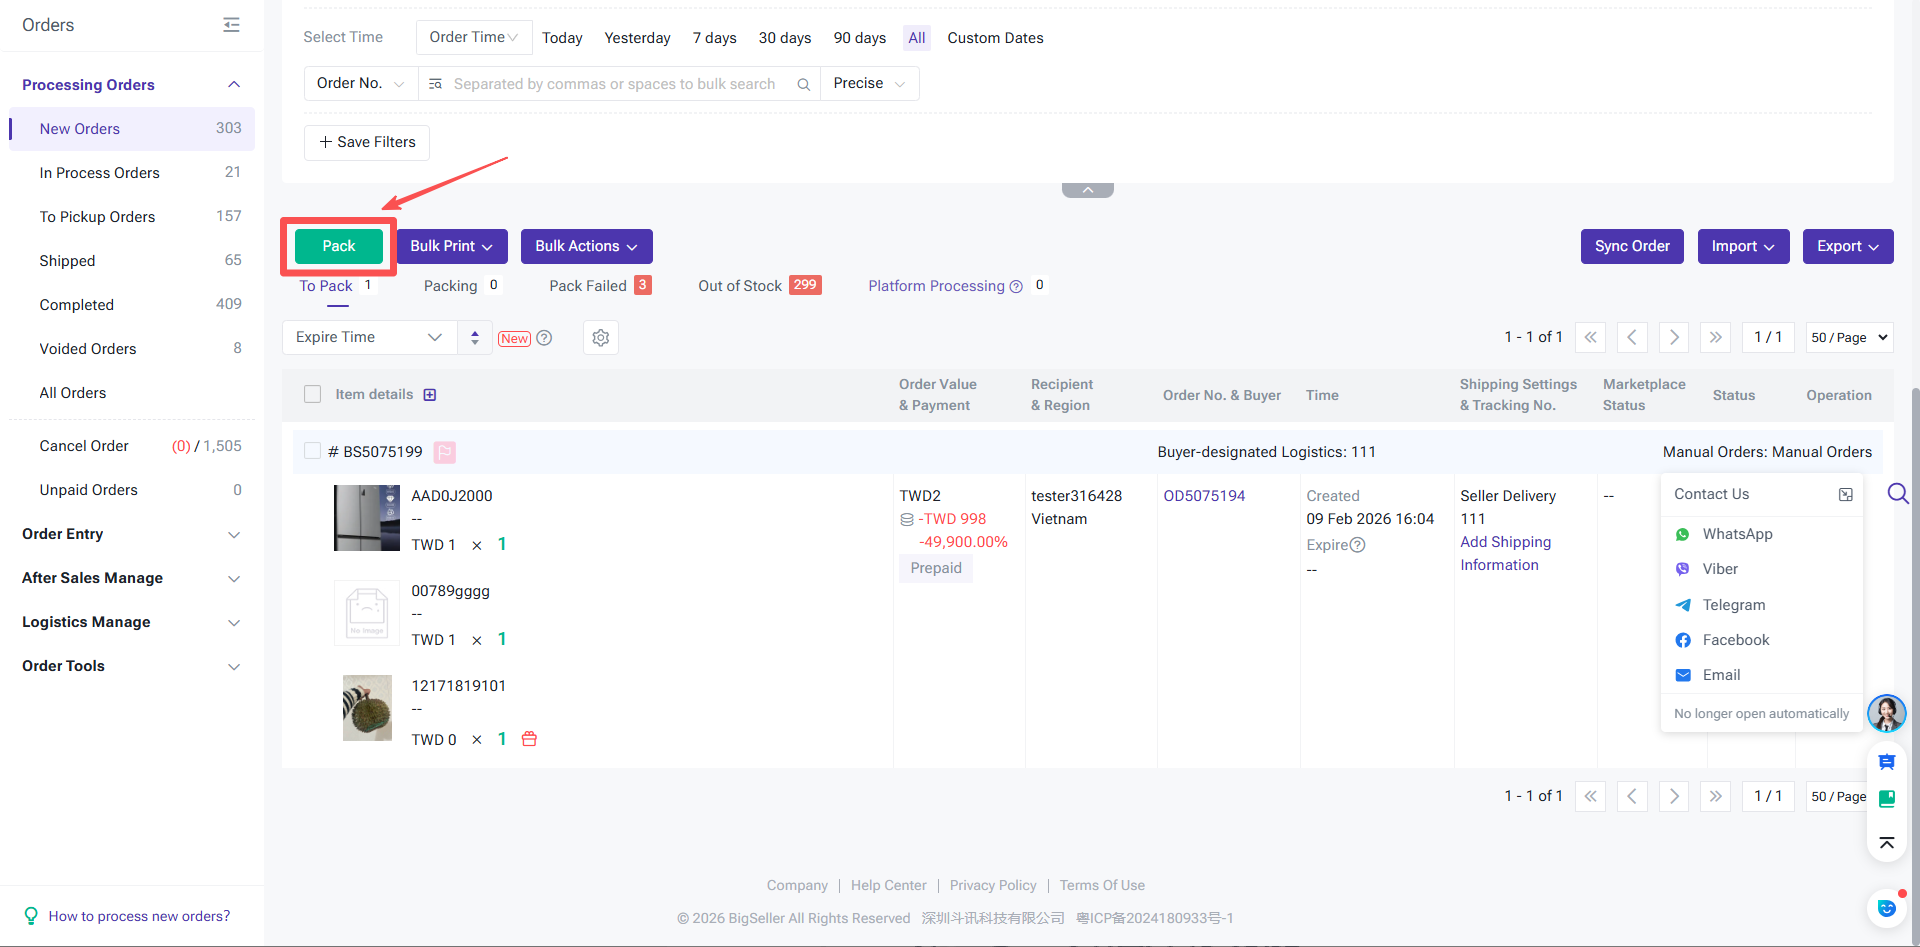
Step 2: After scheduling the orders in BigSeller, they will be automatically pushed to the third-party warehouse. Await processing by the third-party warehouse, after which BigSeller will automatically sync the orders' latest status.