Complete Process for Picking, Packing, and Shipping Using PDA
I. Definition
Overseas warehouses use PDAs bound to picking carts for picking, eliminating the need to print picking lists.
II. Operational Procedure
Step 1: Picking Cart Management
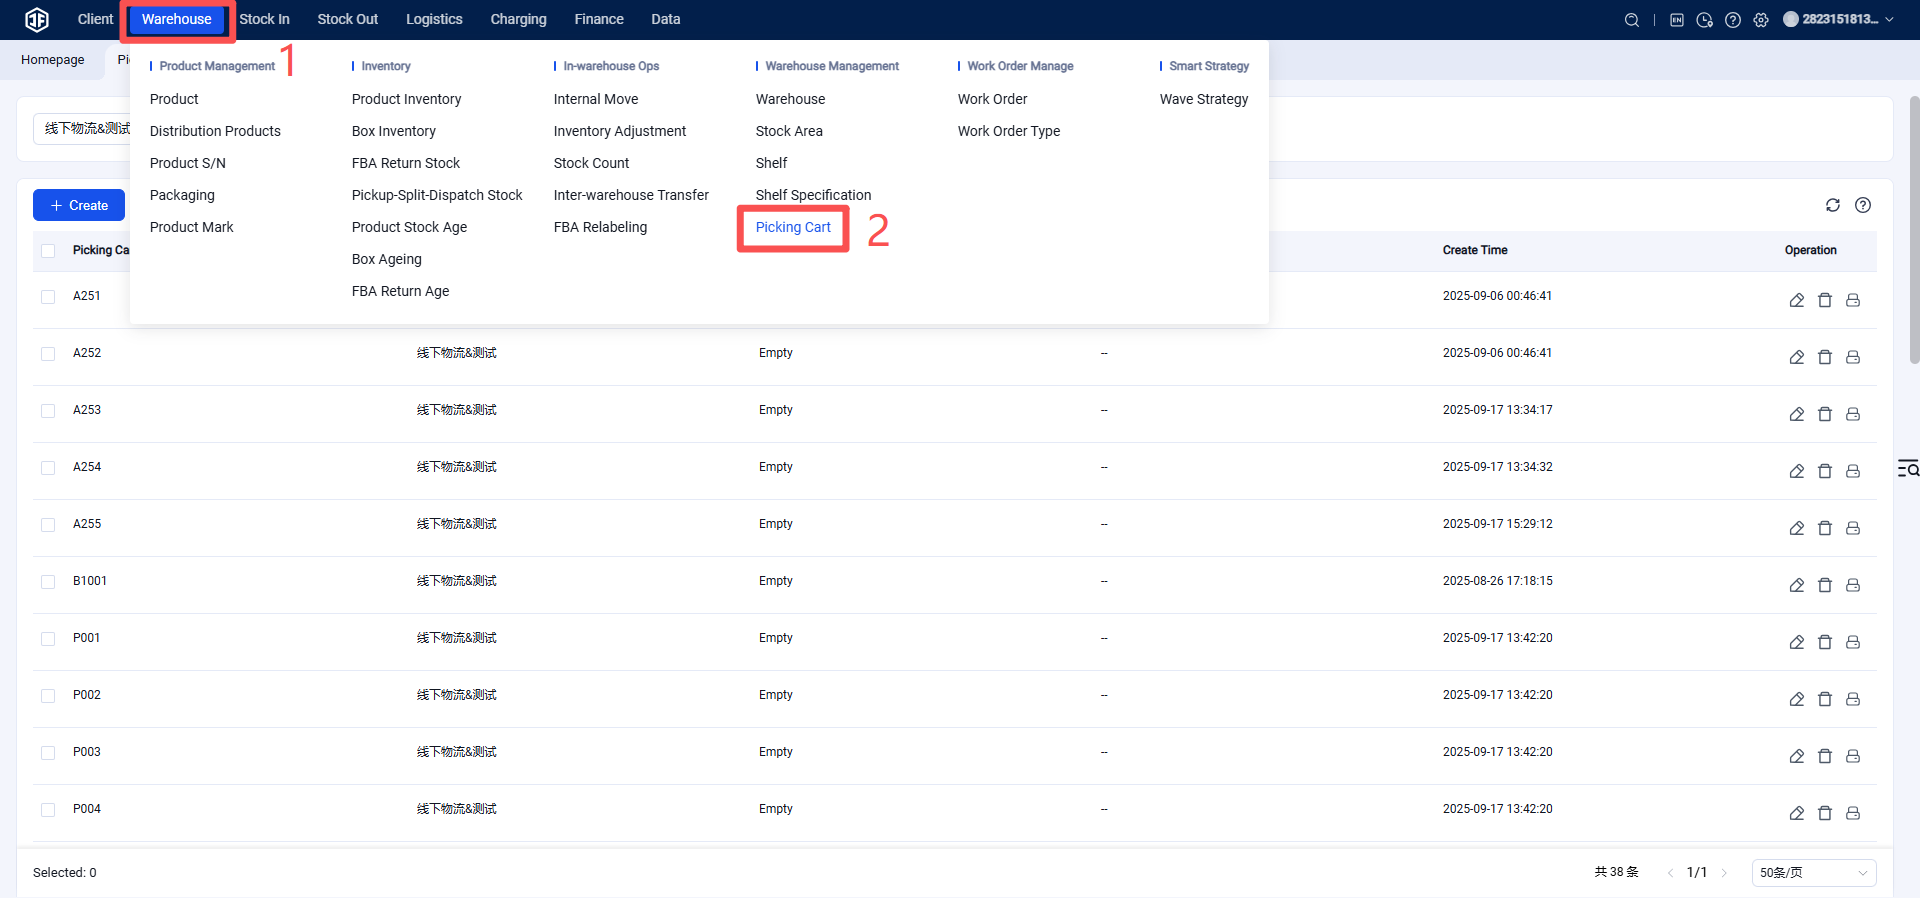
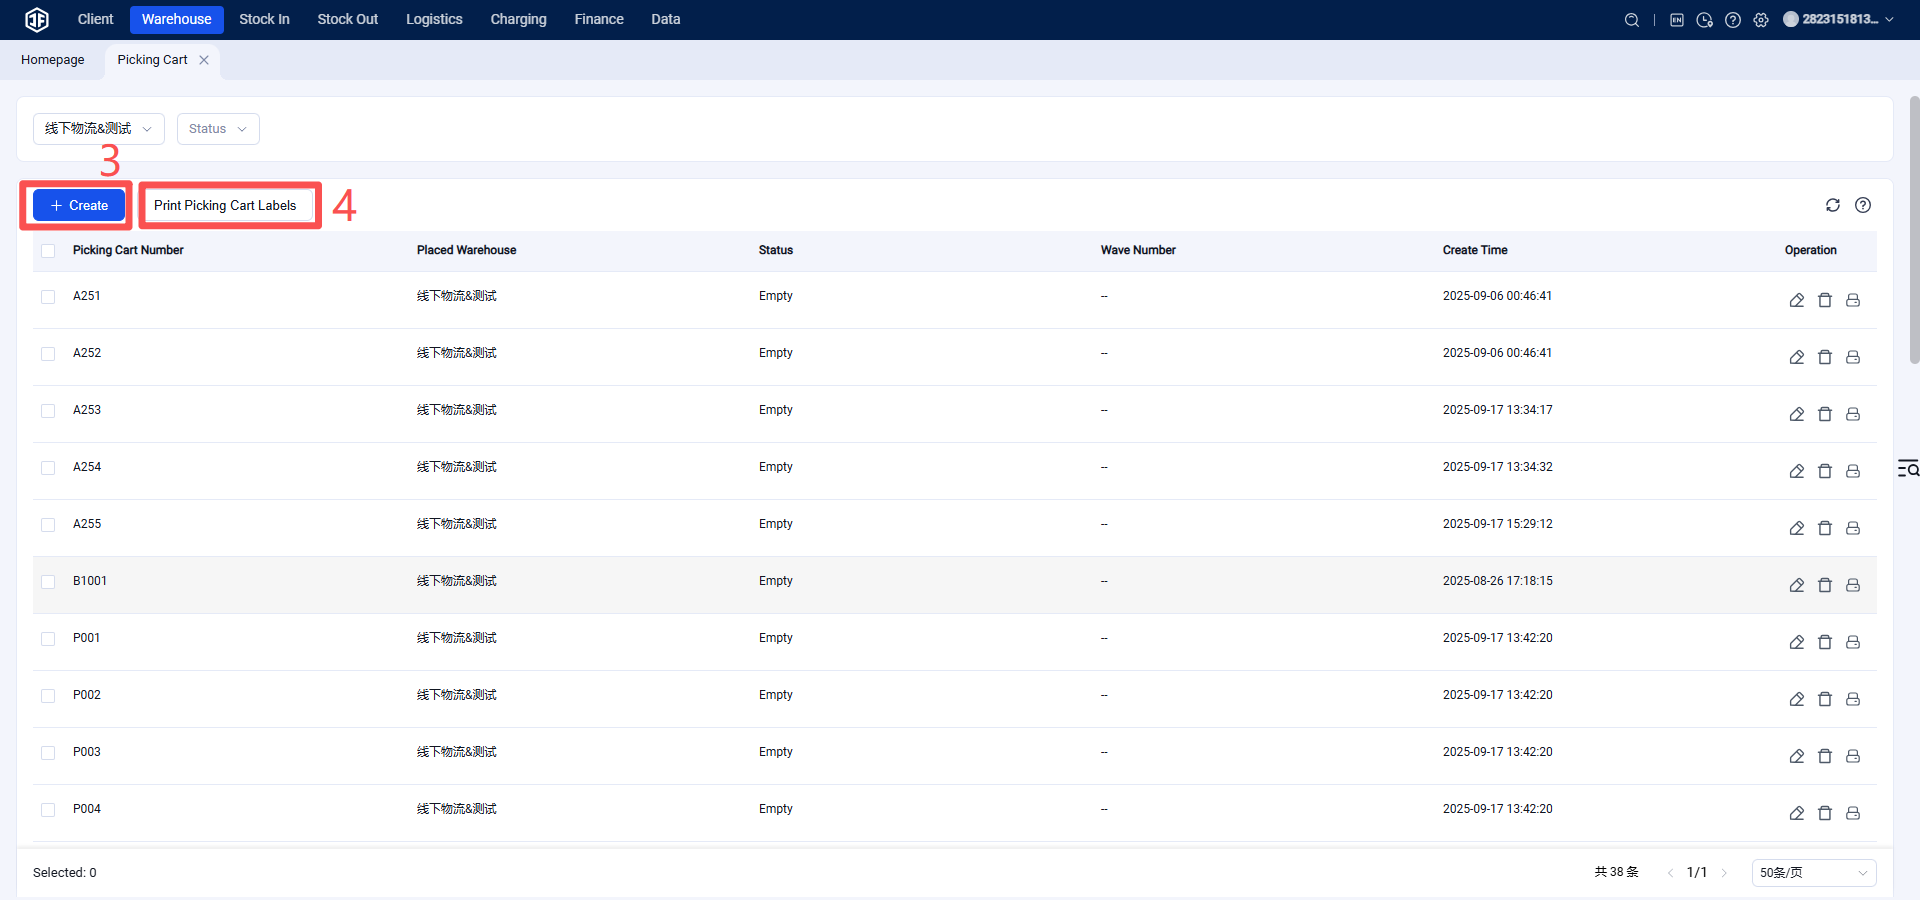
Settings > Picking Cart Management > Create. After creation, the picking cart label can be printed and affixed to the cart for convenient scanning.
Step 2: Download the PDA App
Download link: https://download.jfwms.com//pda/app-release.apk
The PDA app can be downloaded for use on either a dedicated PDA device or a mobile phone.
Step 3: Configure Wave Settings for Picking Cart Operations
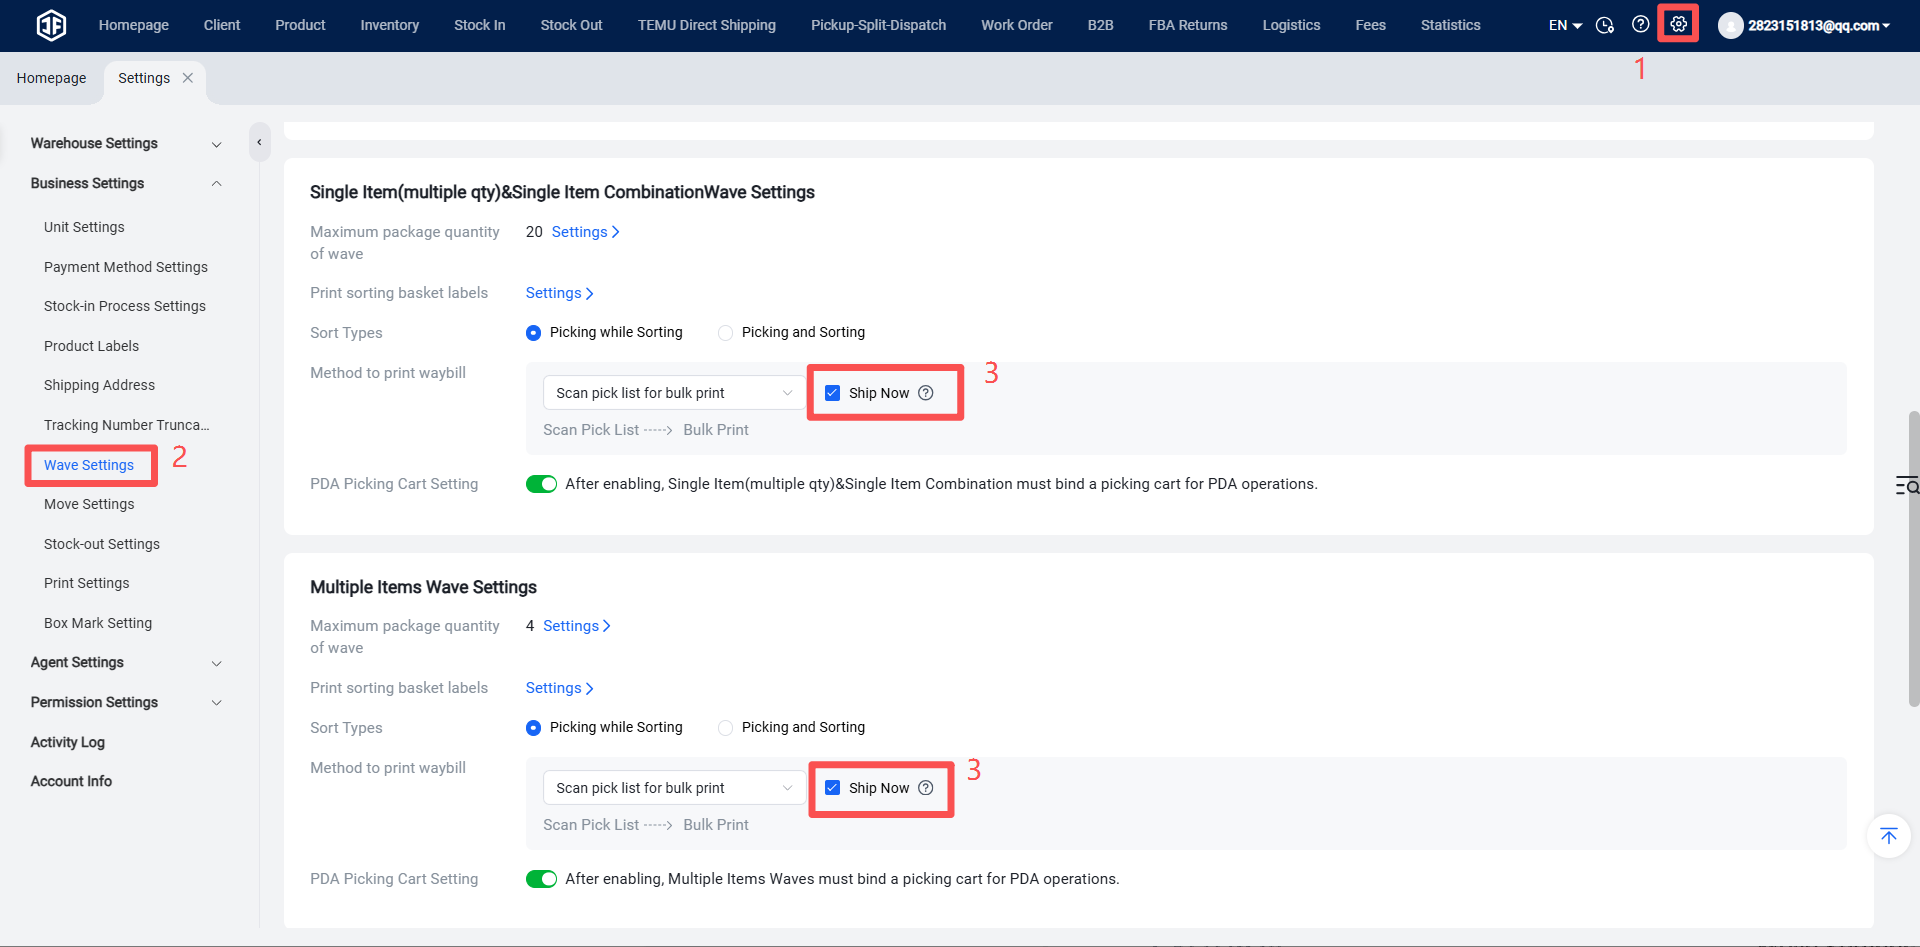
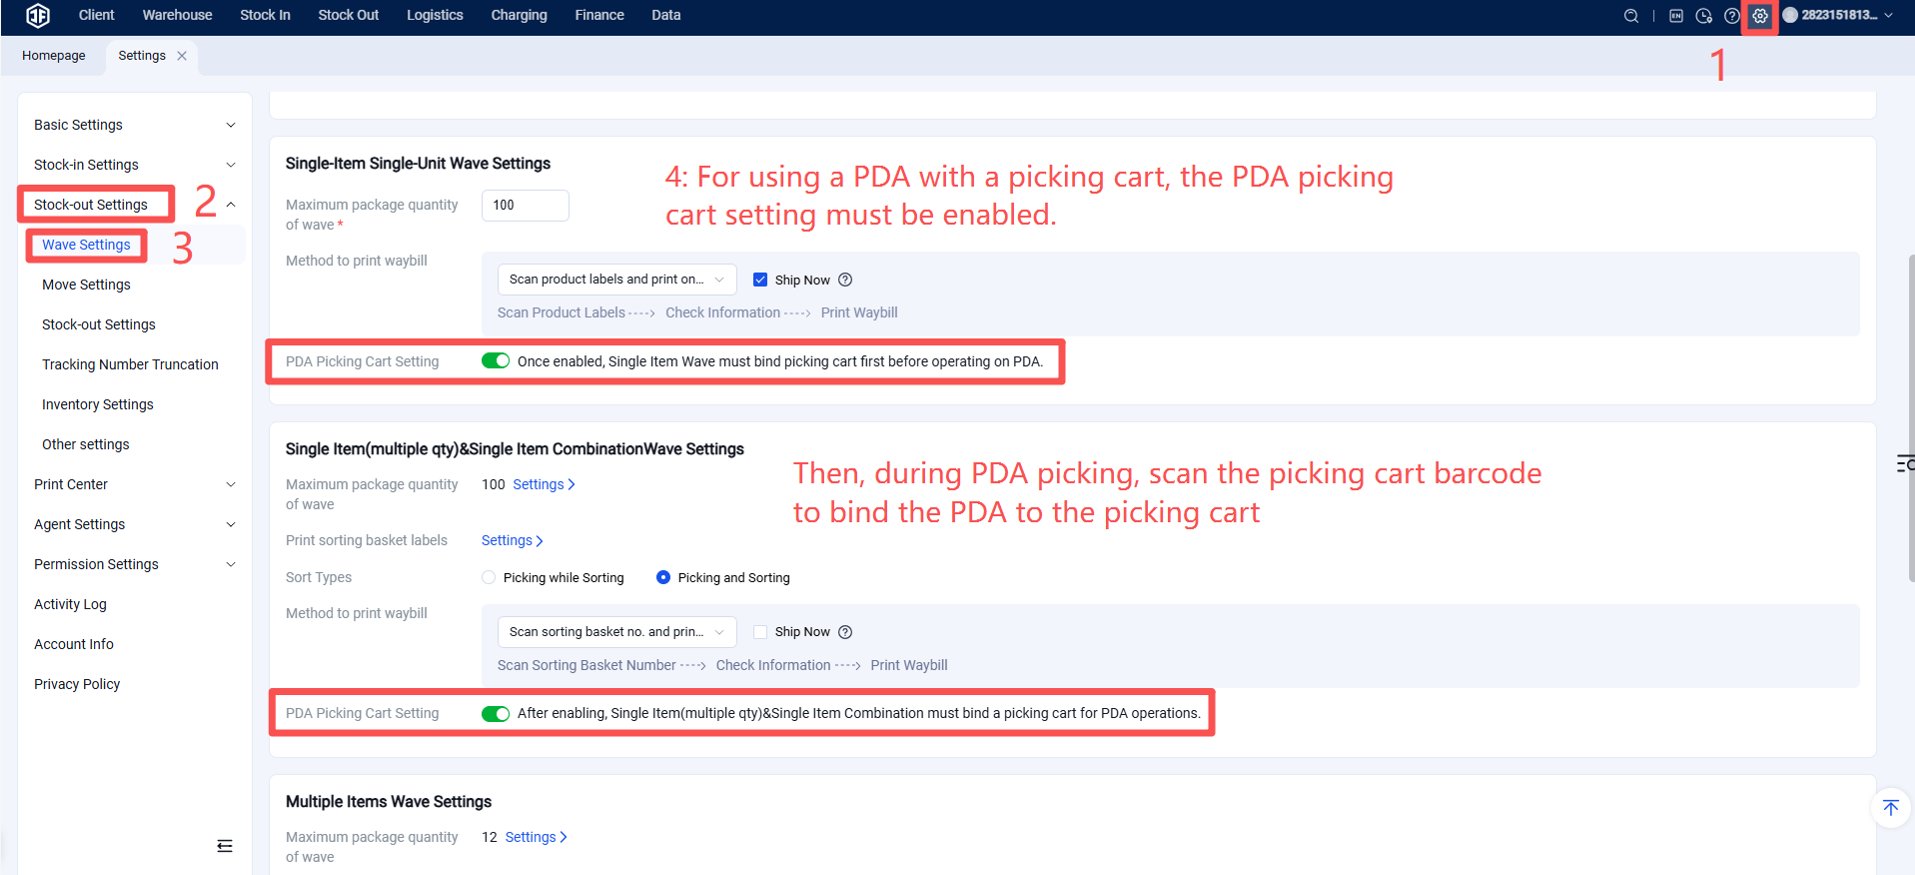
In Settings > Business Settings > Wave Settings, enable the PDA Picking Cart configuration for the corresponding wave type(s).
Step 4: Generate Wave(s)
Outbound > Generate Wave > Set wave generation criteria > Generate Wave.
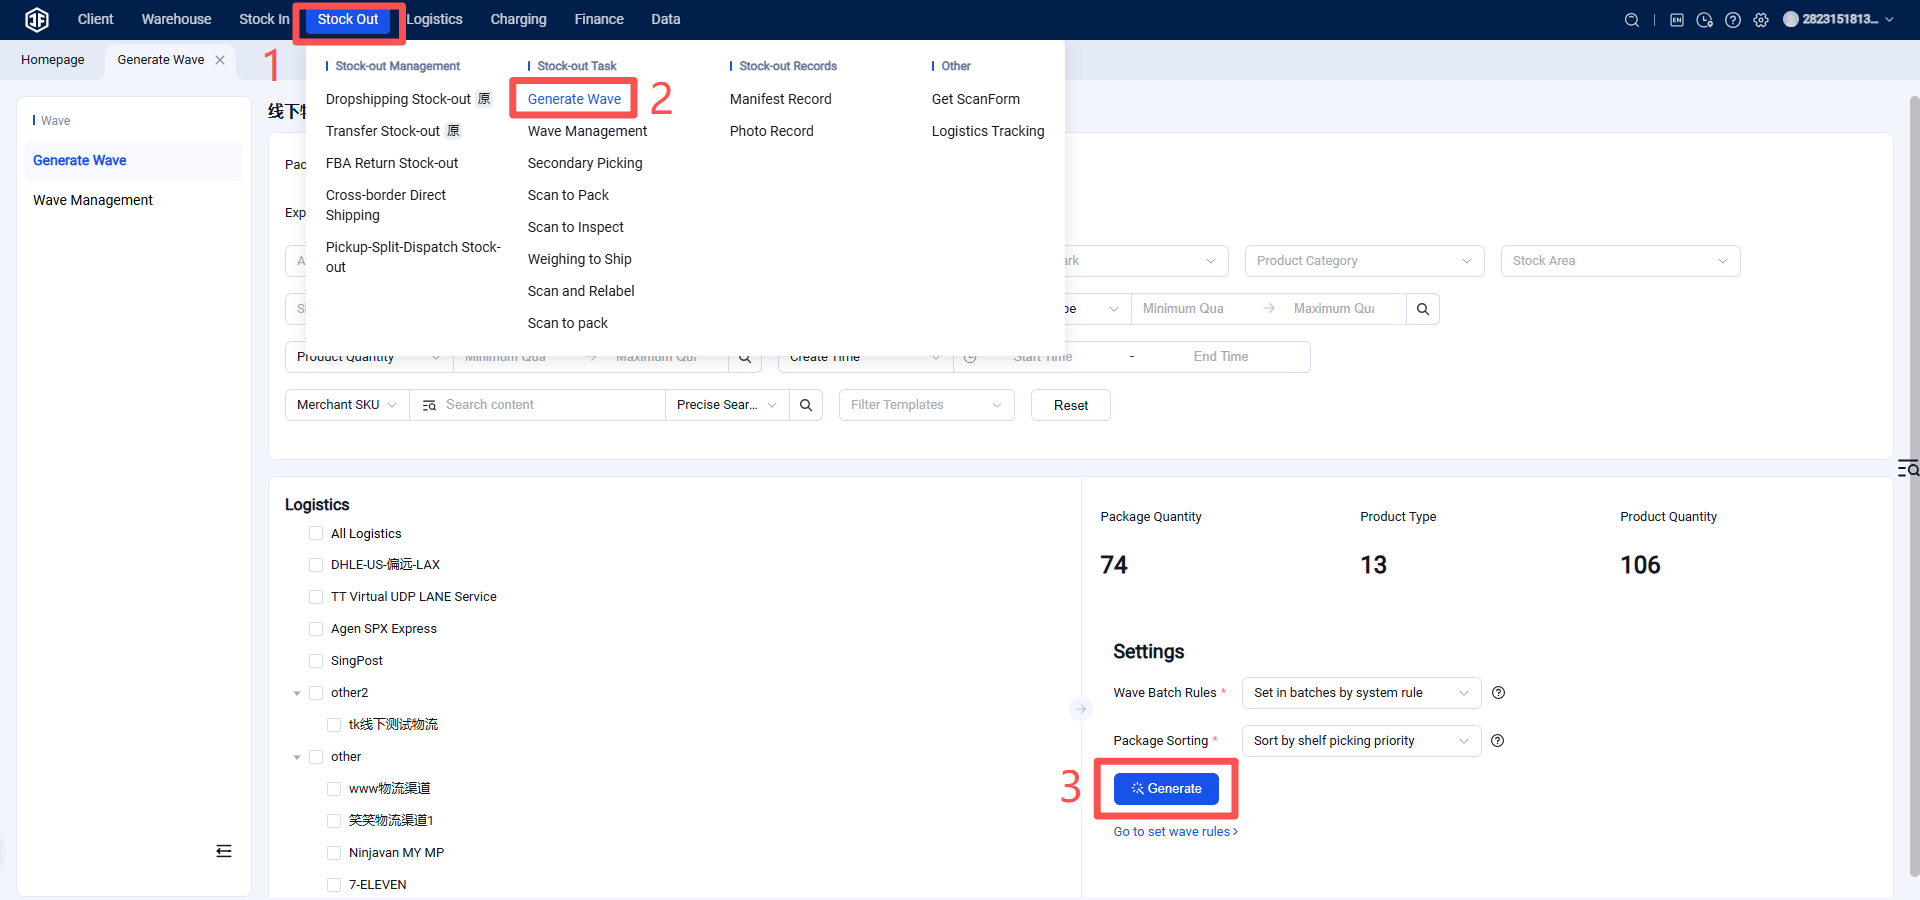
If you need to assign different pickers to a wave, you can perform the picker assignment operation in Wave Management.
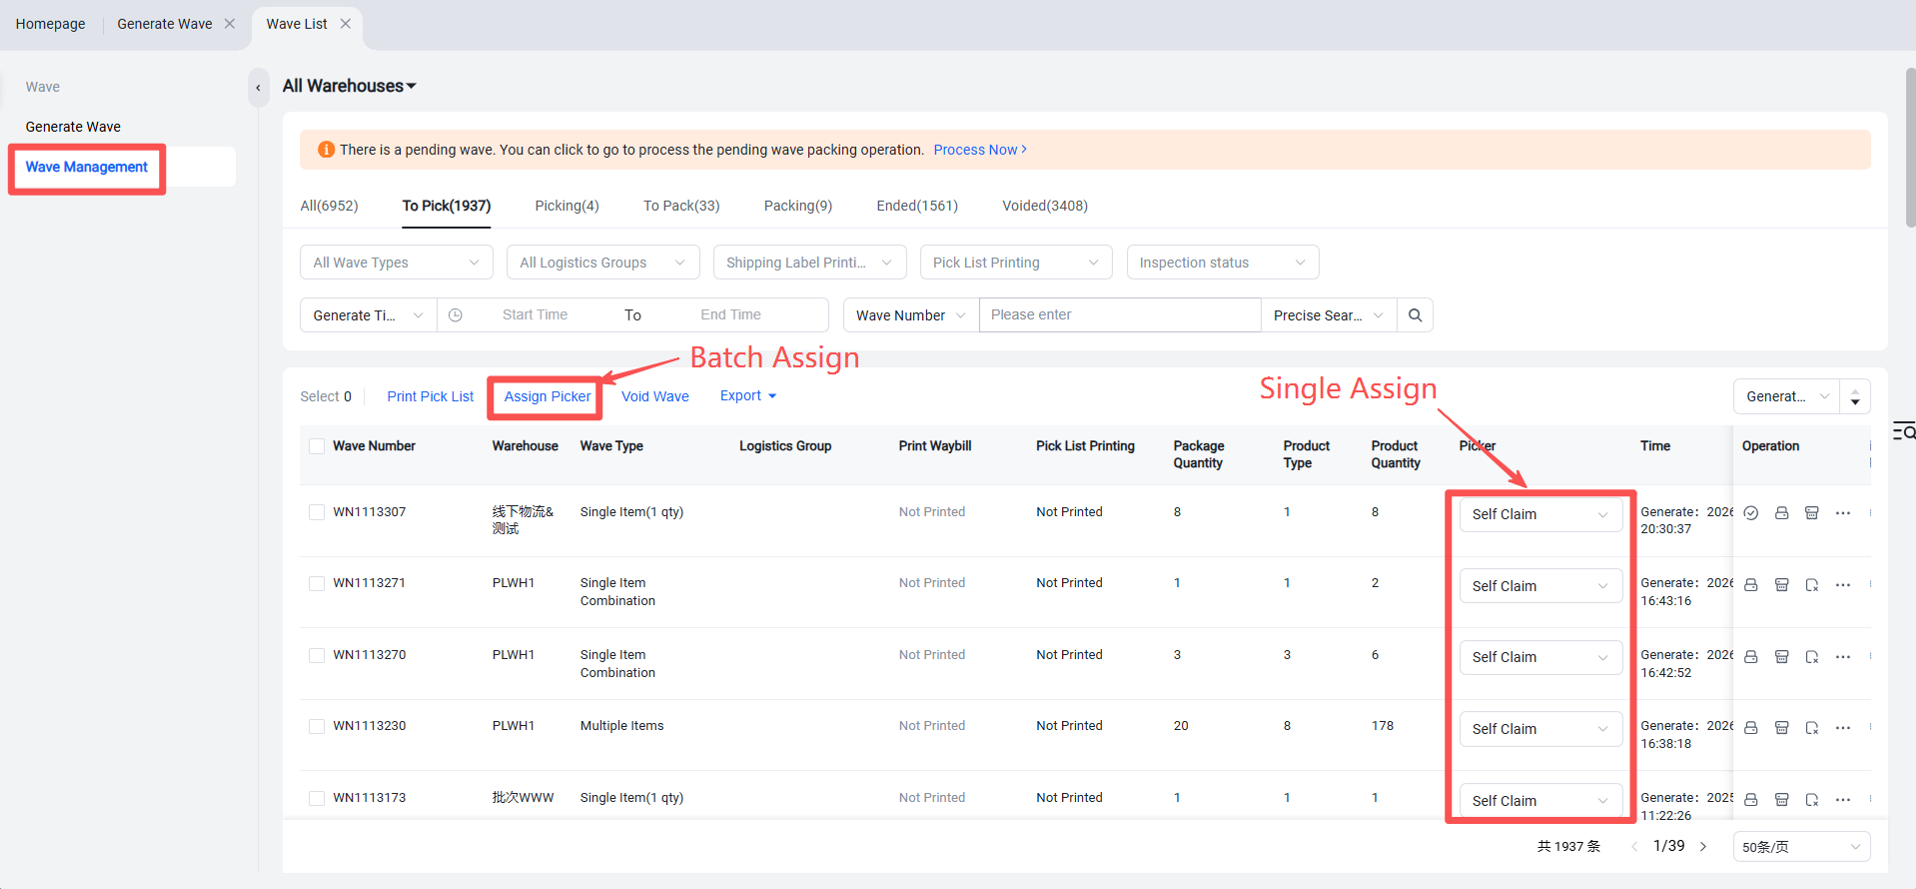
(After a picker is assigned, they will only see waves assigned to themselves and unassigned waves on their PDA.)
If no picker assignment is required, no further action is needed after generating the wave. You can directly log into the PDA to begin picking.
Step 5: Open PDA Warehouse Picking
PDA picking eliminates the need for printed picking lists. After a wave is generated on the web interface, log into the PDA to see pending picking waves and select one to begin.
Important Notes: PDA picking does not require a printed picking list. If you must print one, do not mark it as "Printed" after printing.
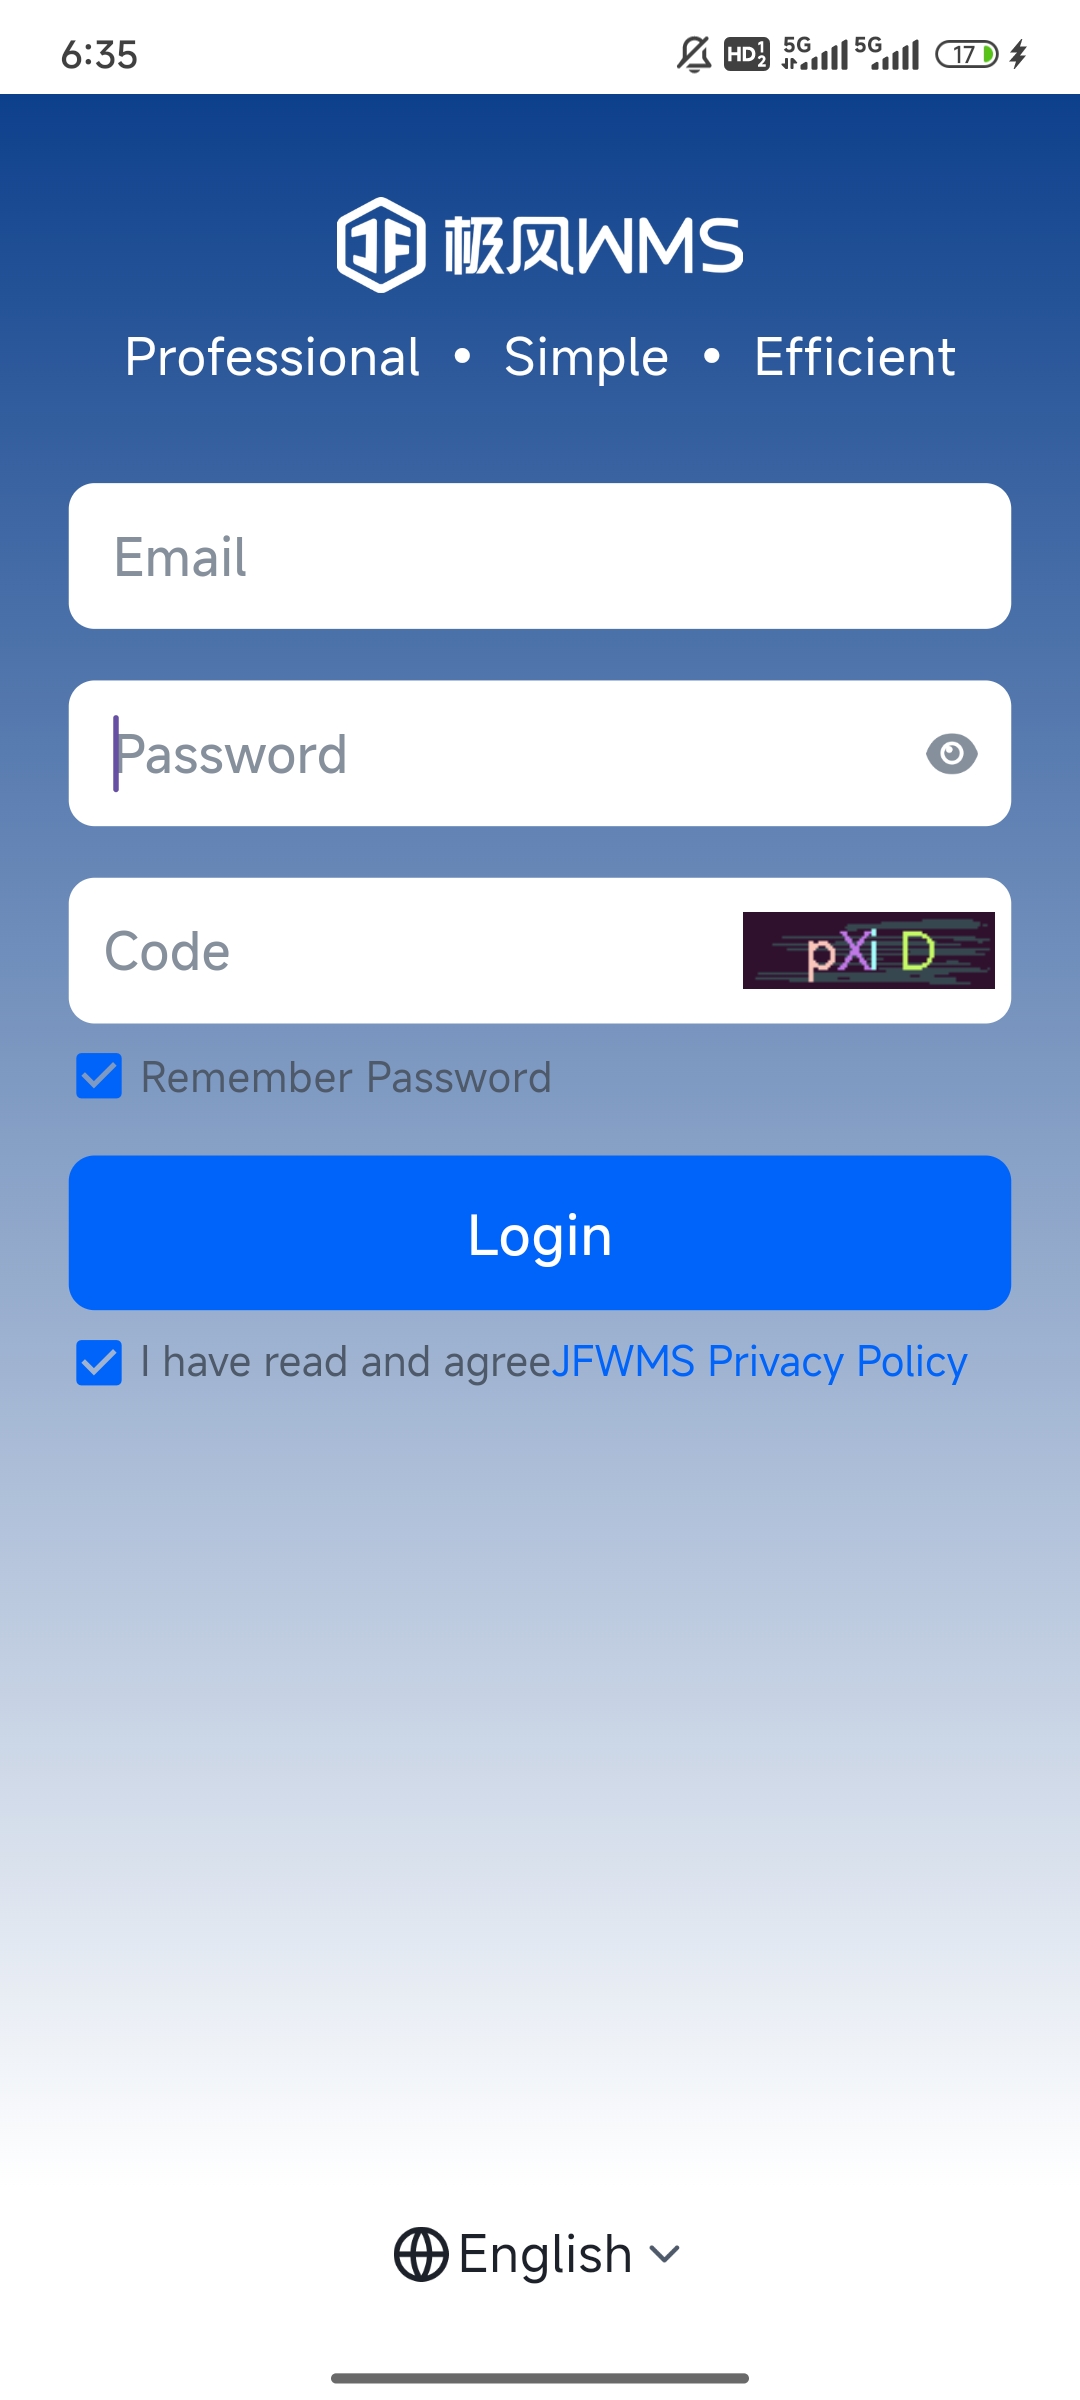
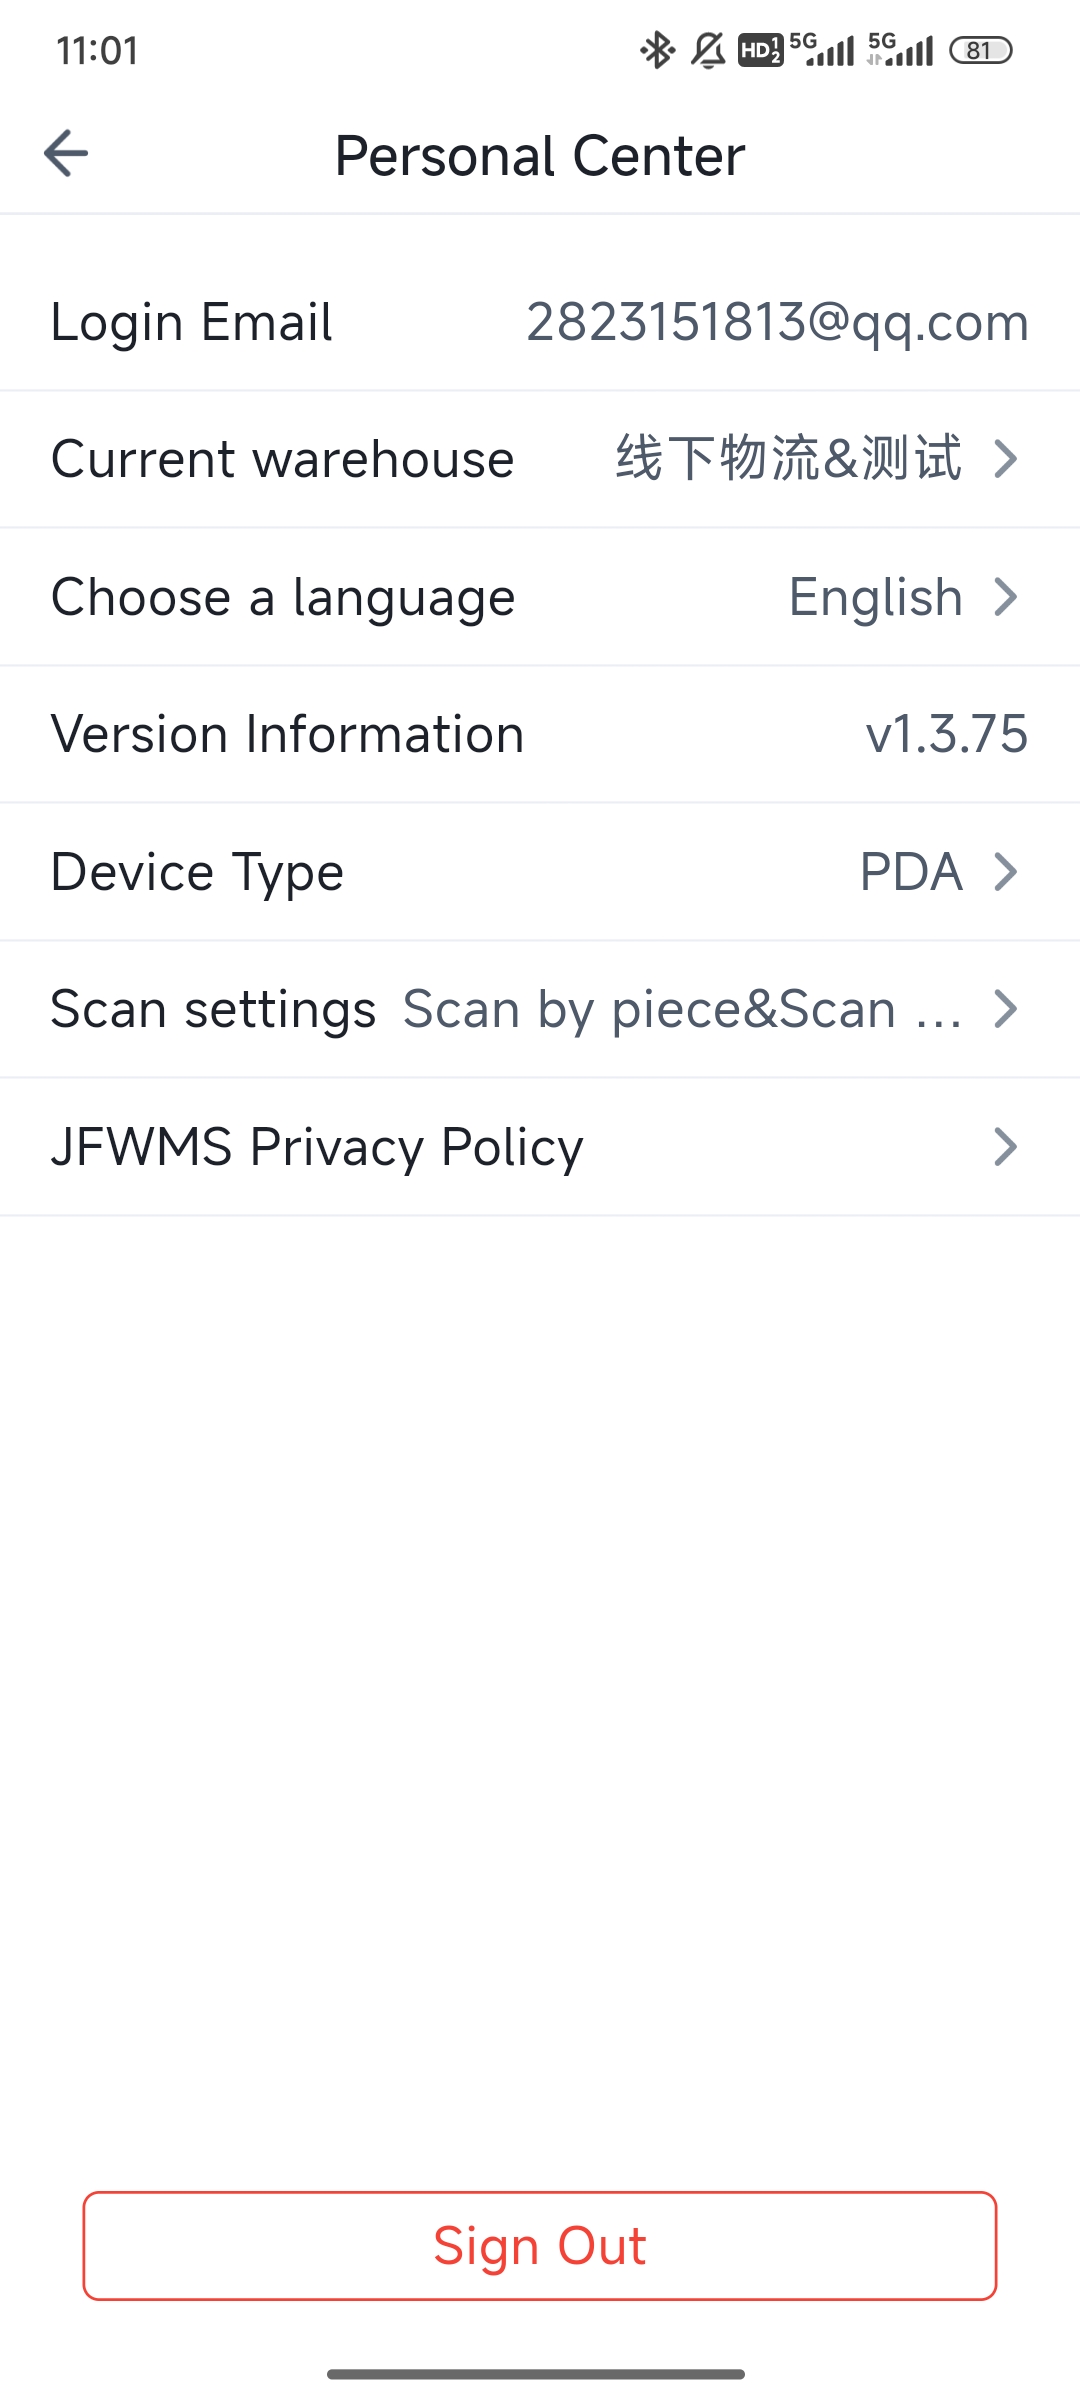
Launch the PDA (1) The login credentials for the PDA are the same as those for the web interface. (2) Click on Personal Center to configure settings such as warehouse and language.
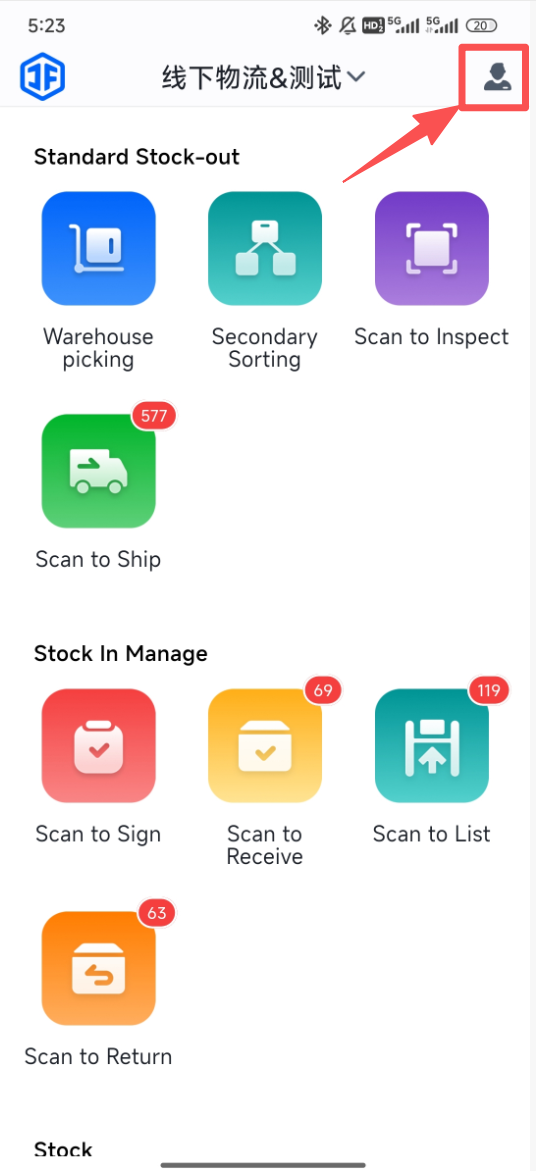
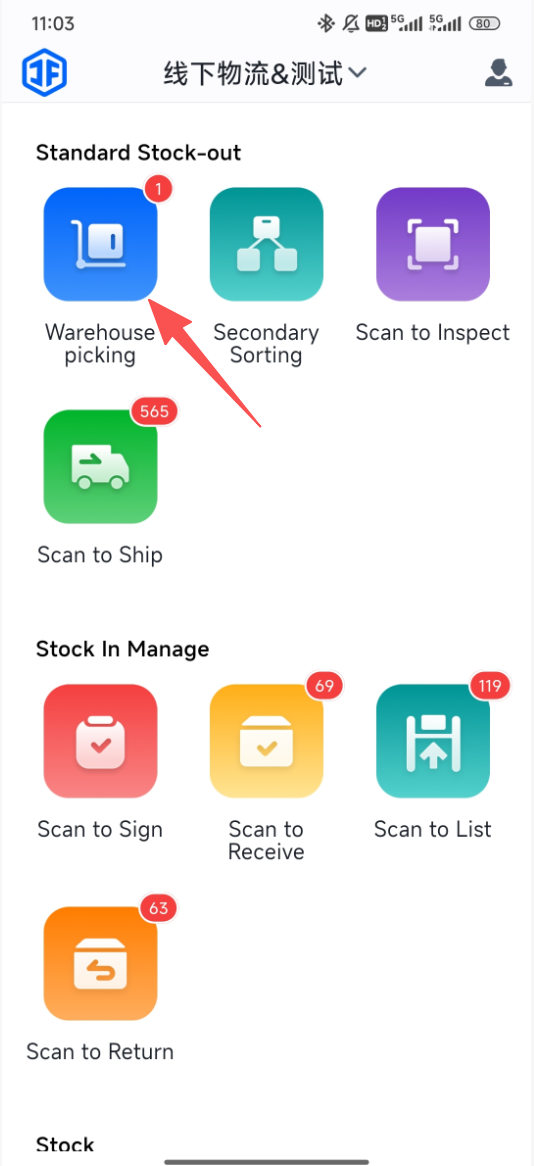
Tap "Warehouse Picking"
You will enter the pending picking waves list page to select a wave.
You can search by wave number or filter by wave type (multiple selections allowed).
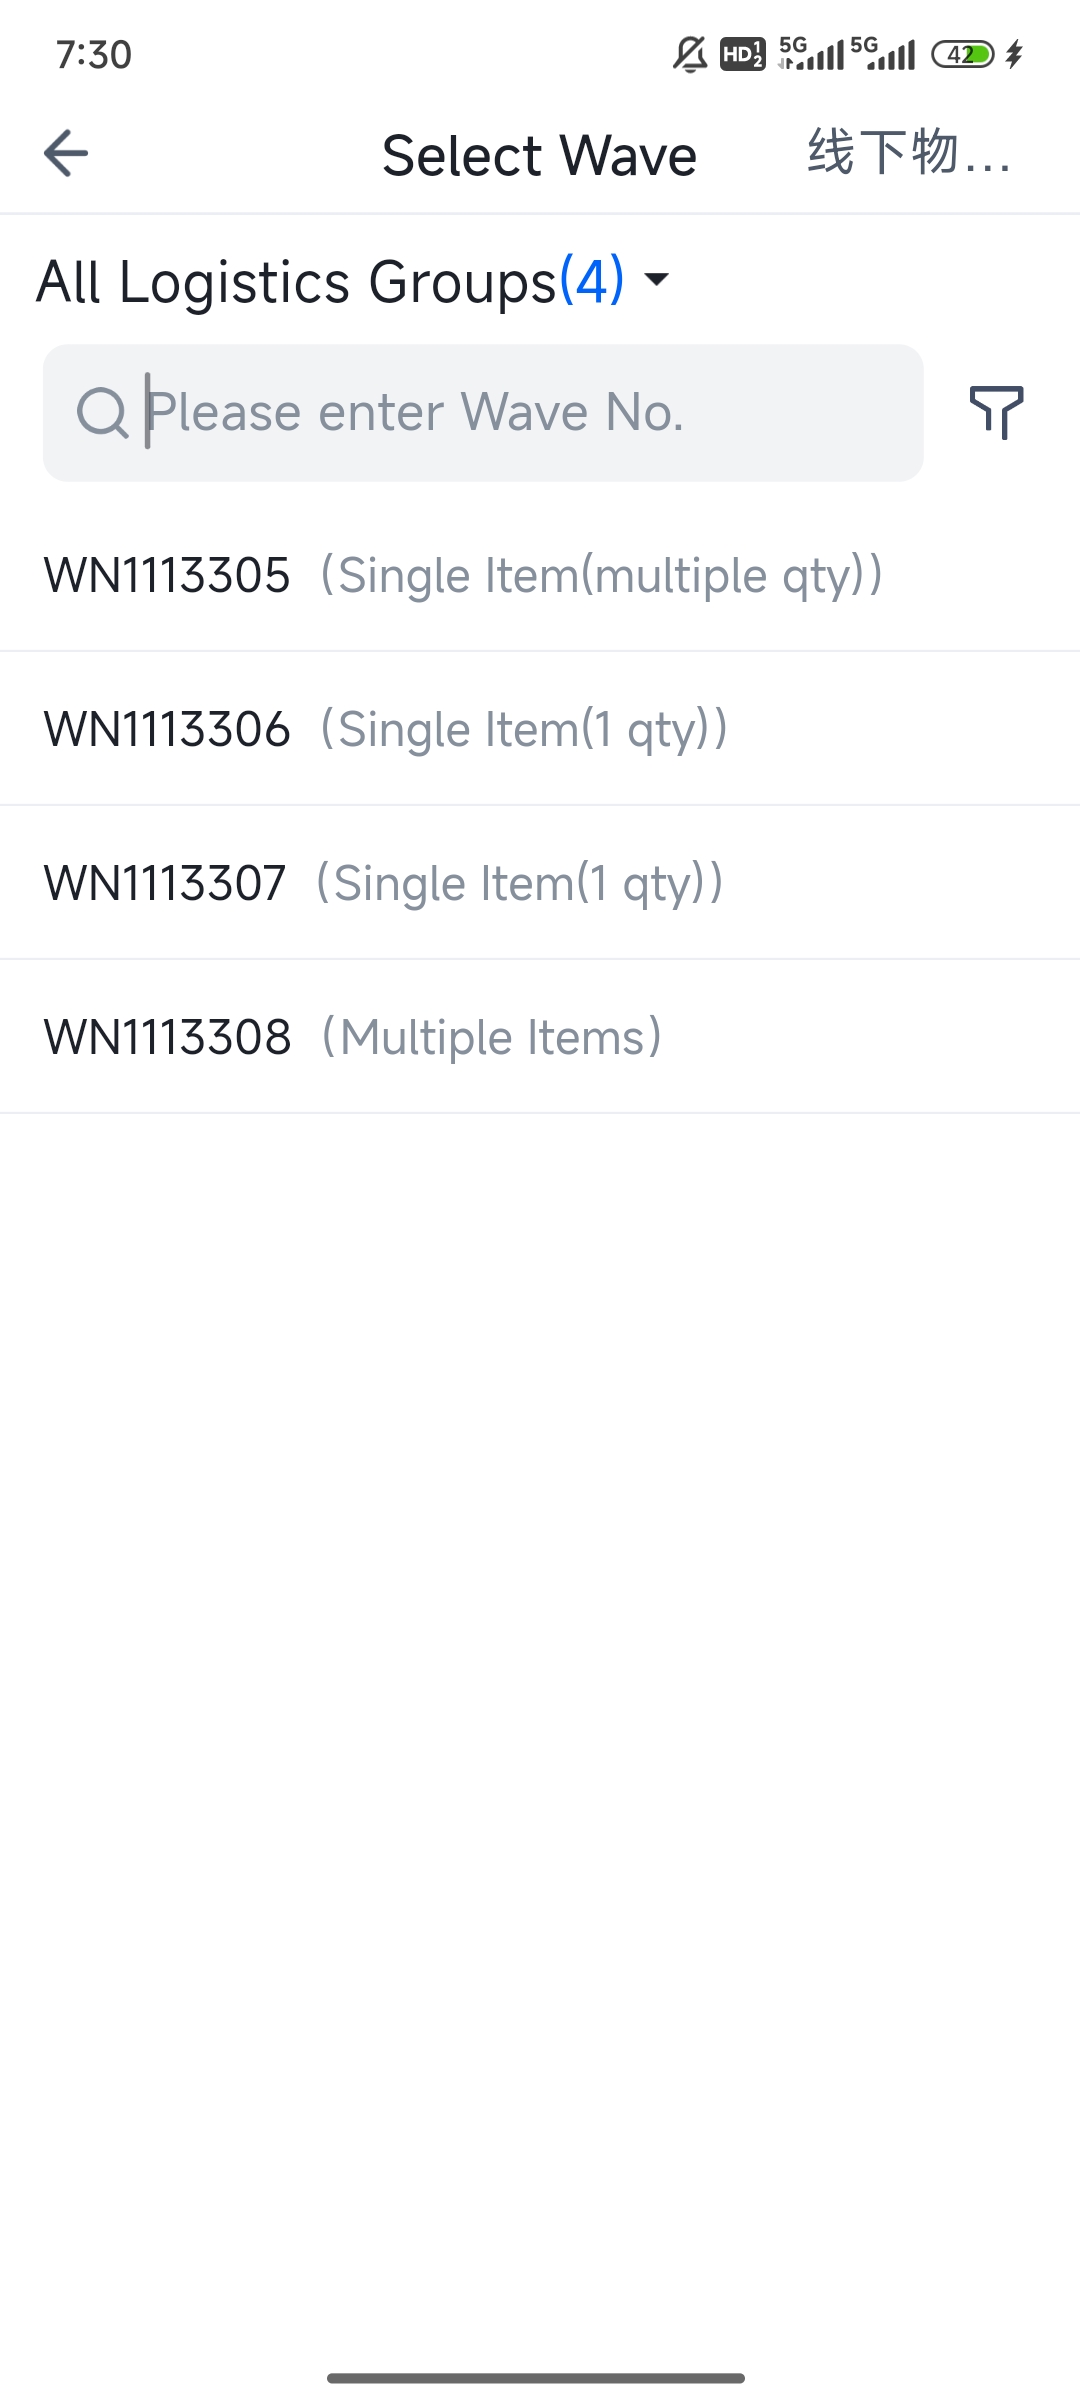
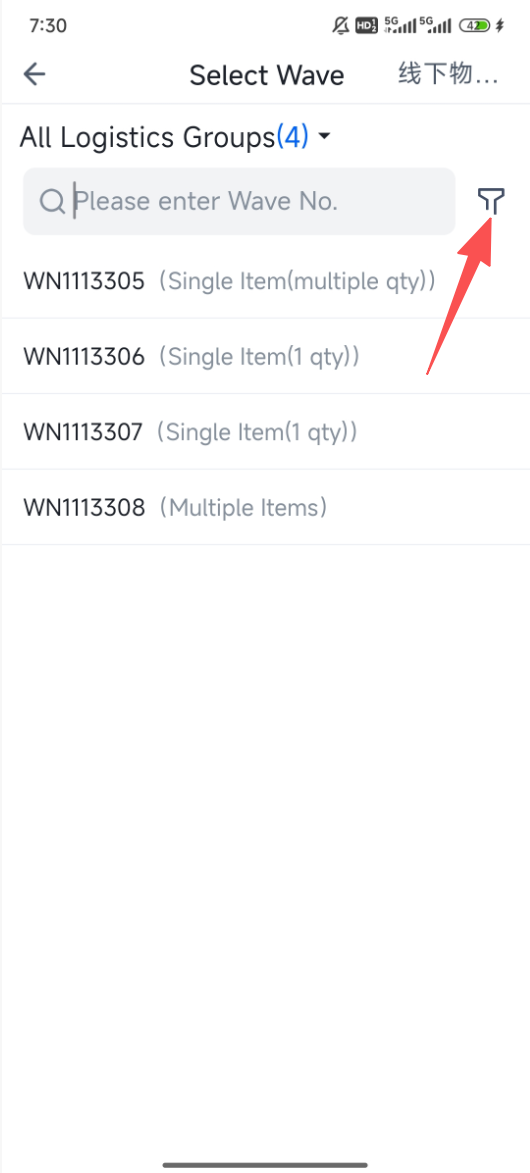
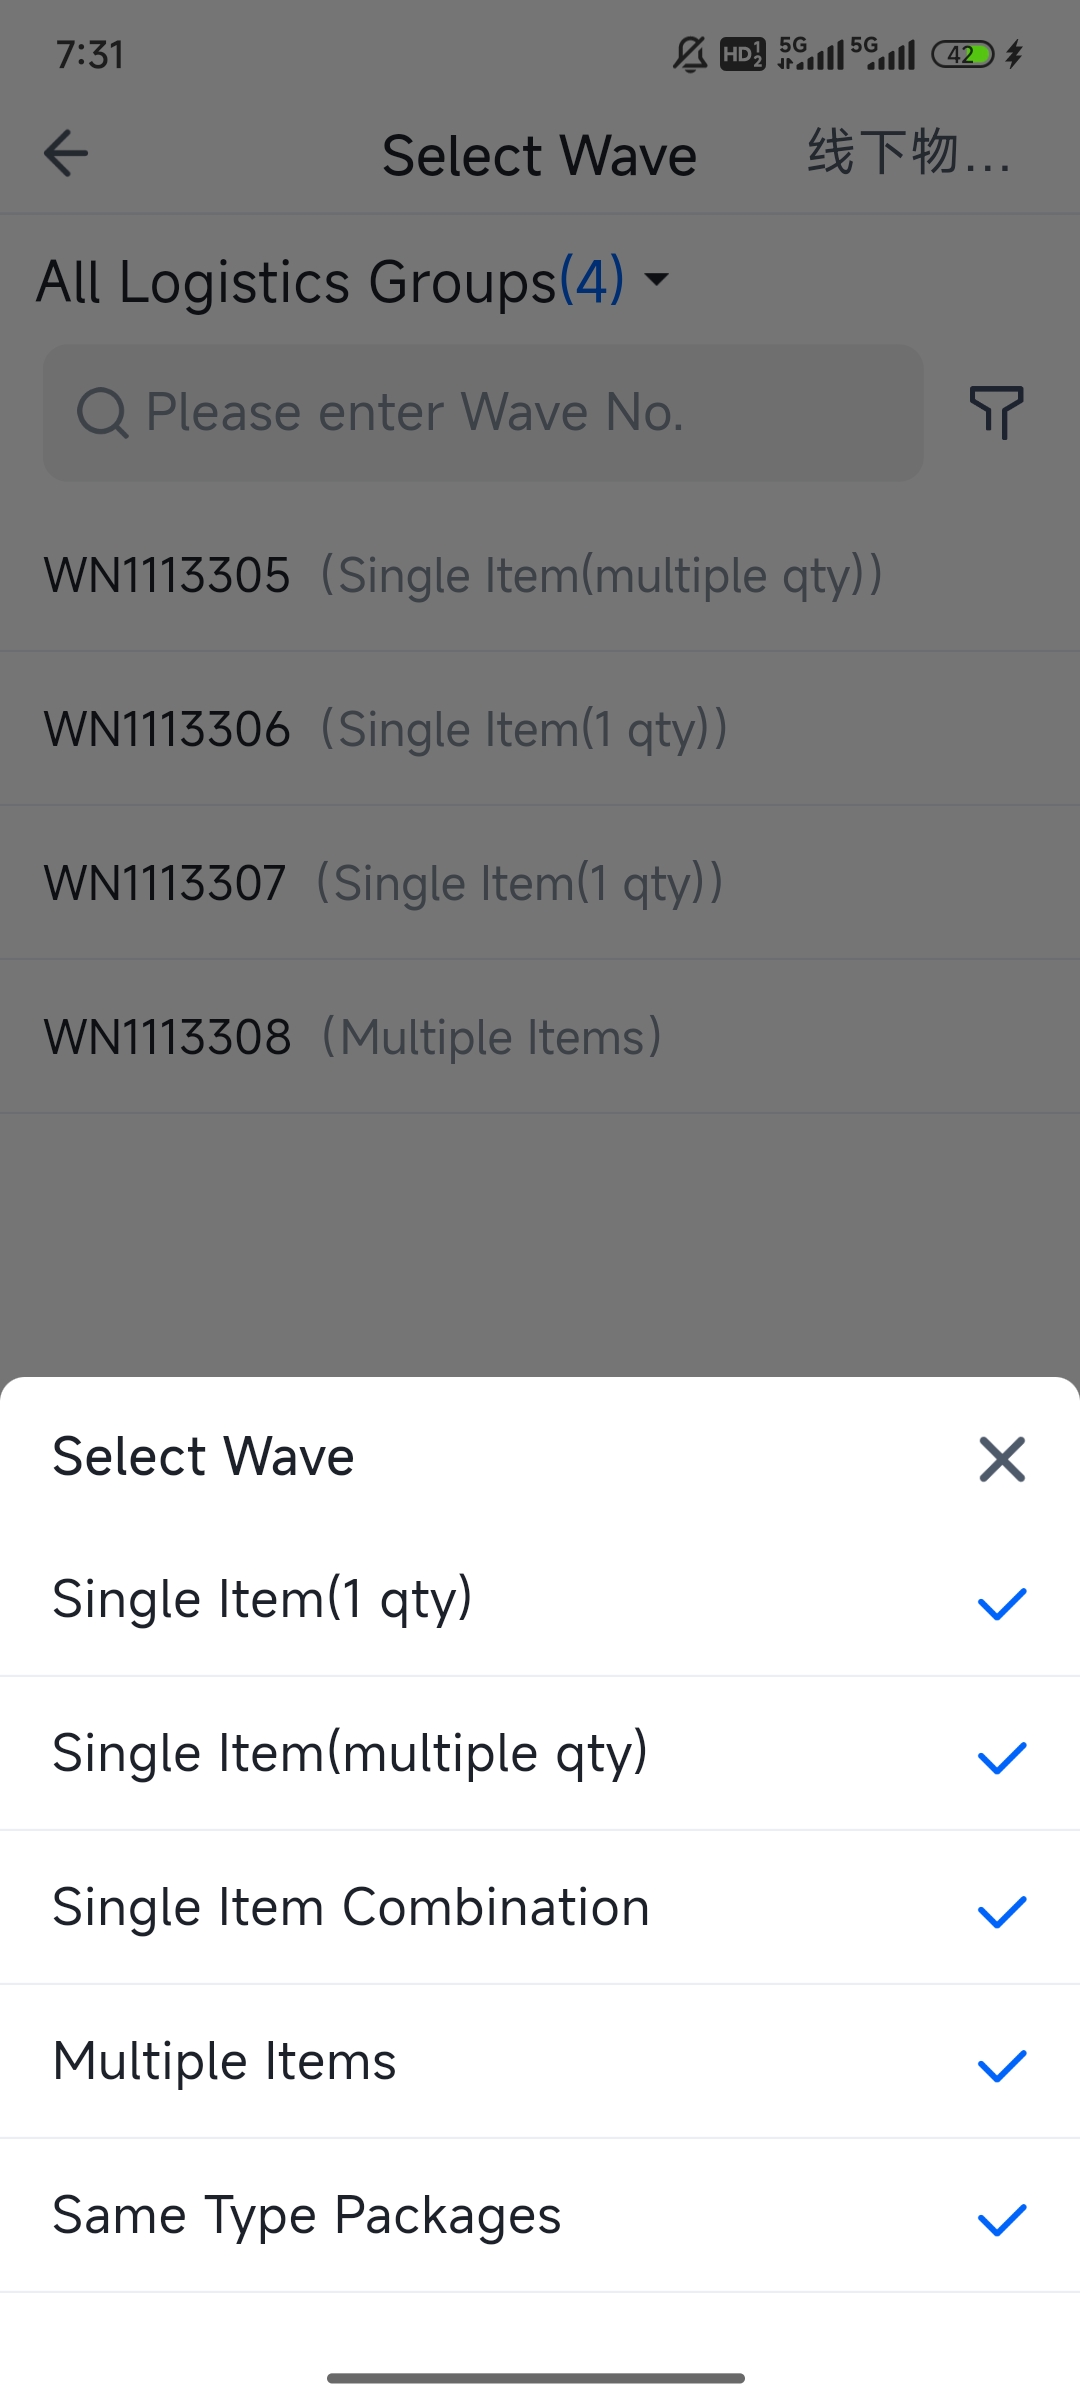
Select a Wave and Bind to a Picking Cart Scan directly with the PDA to bind.
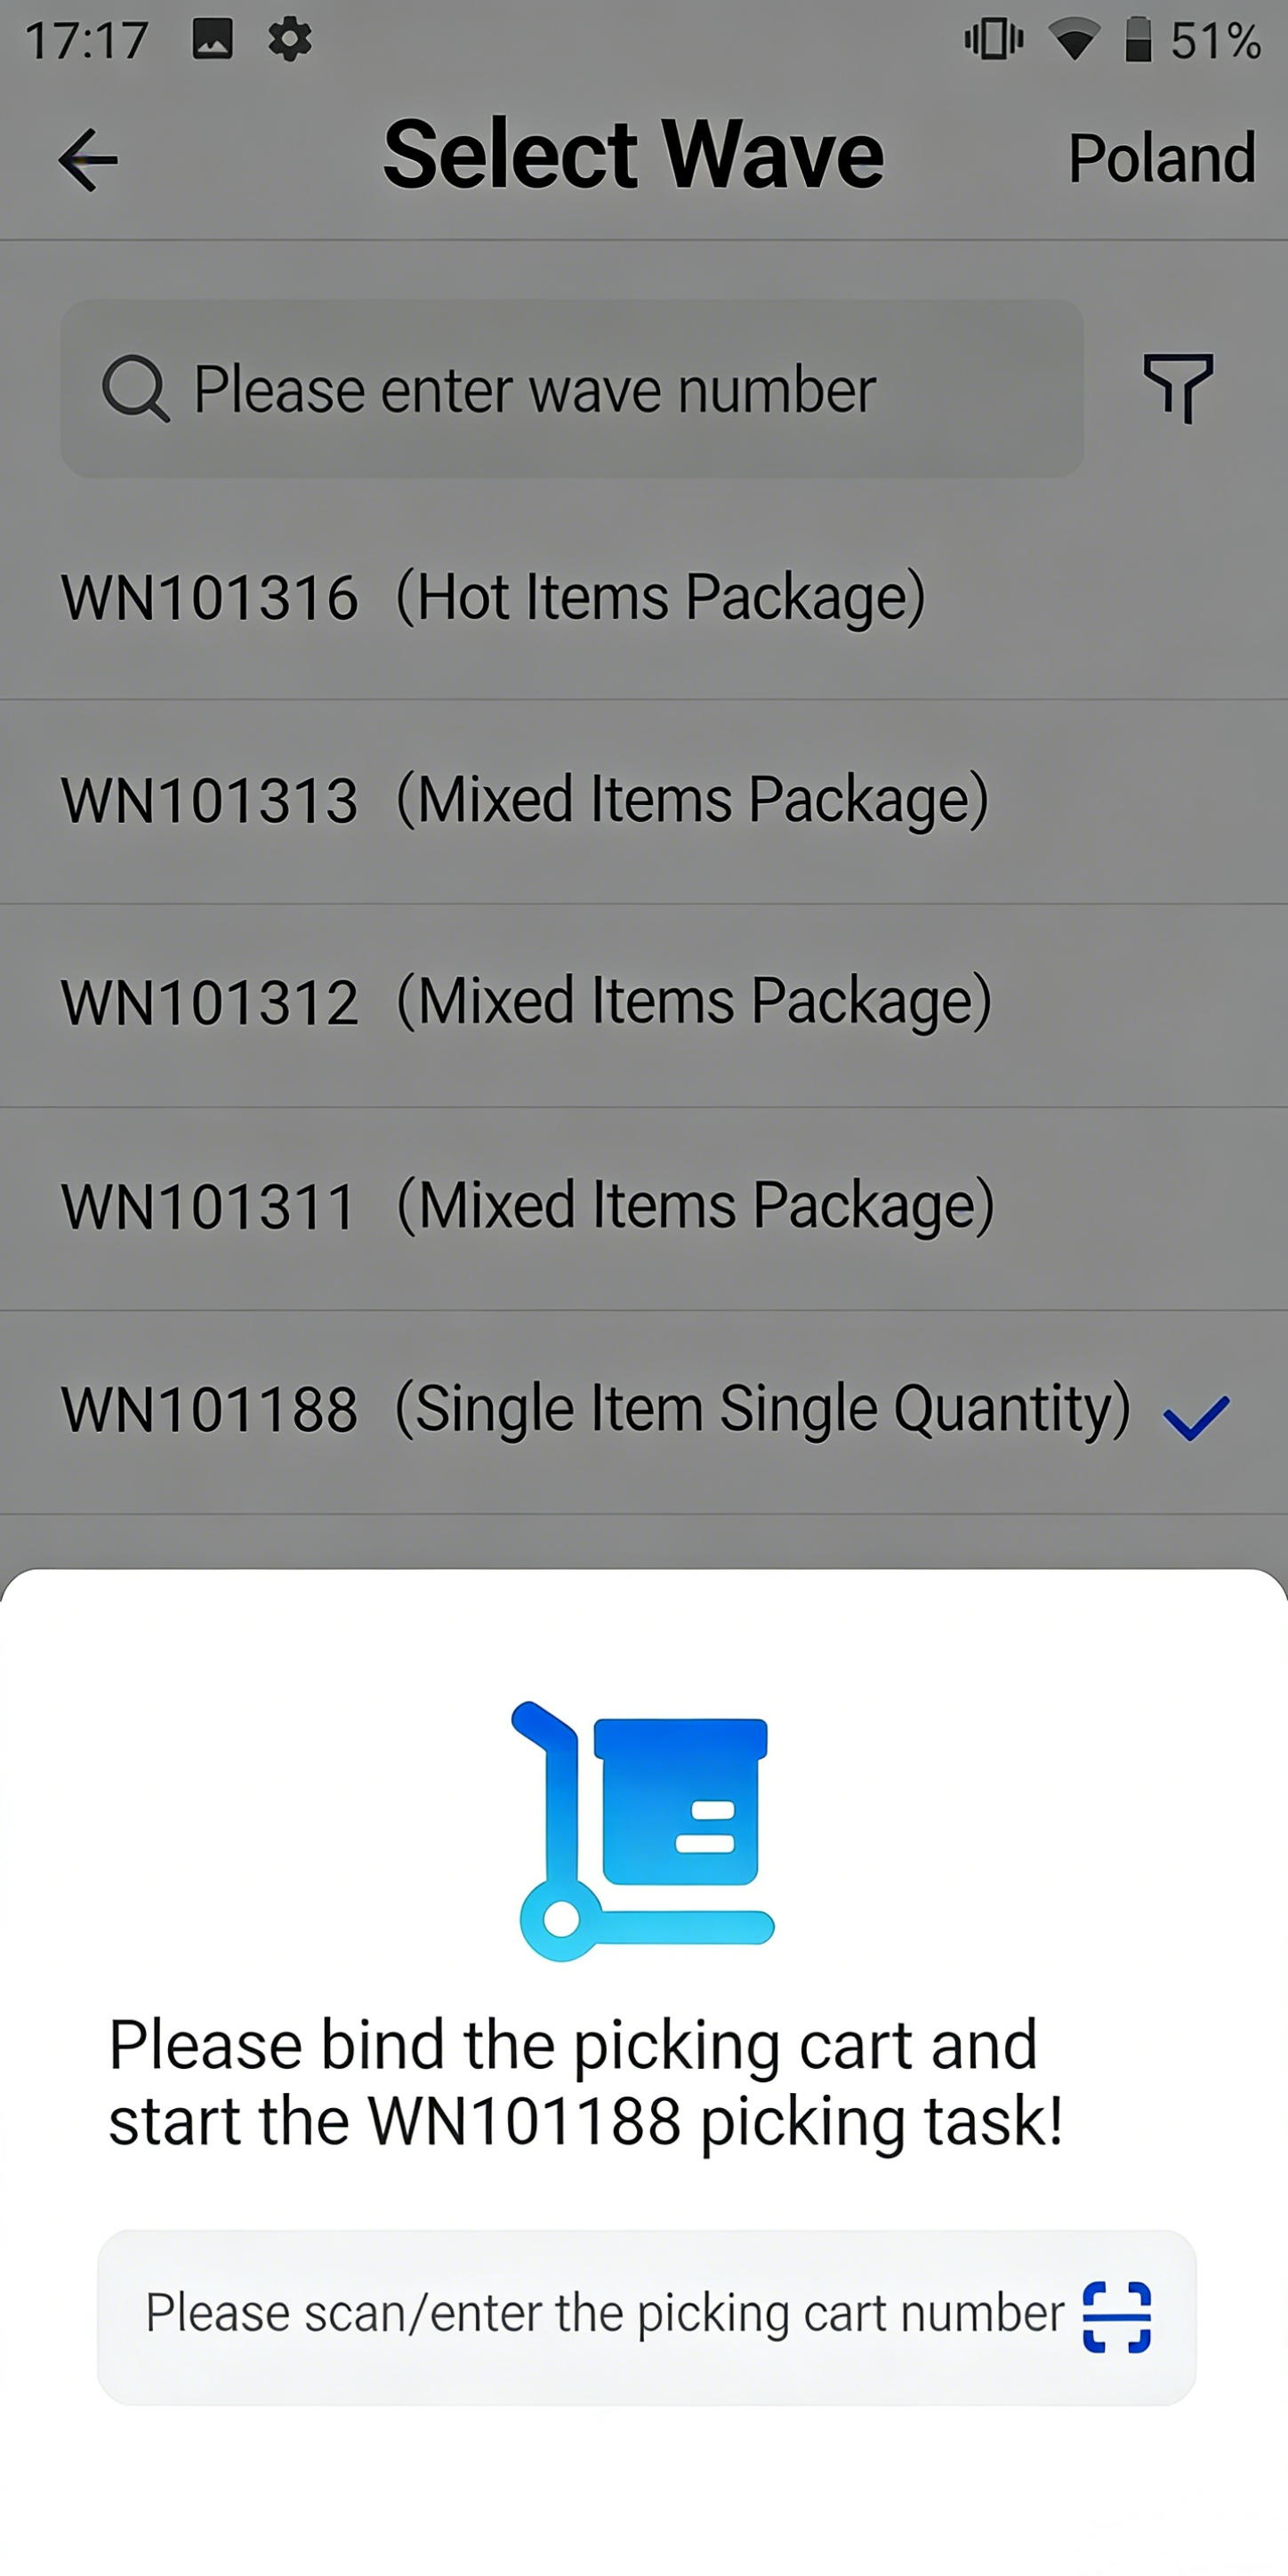
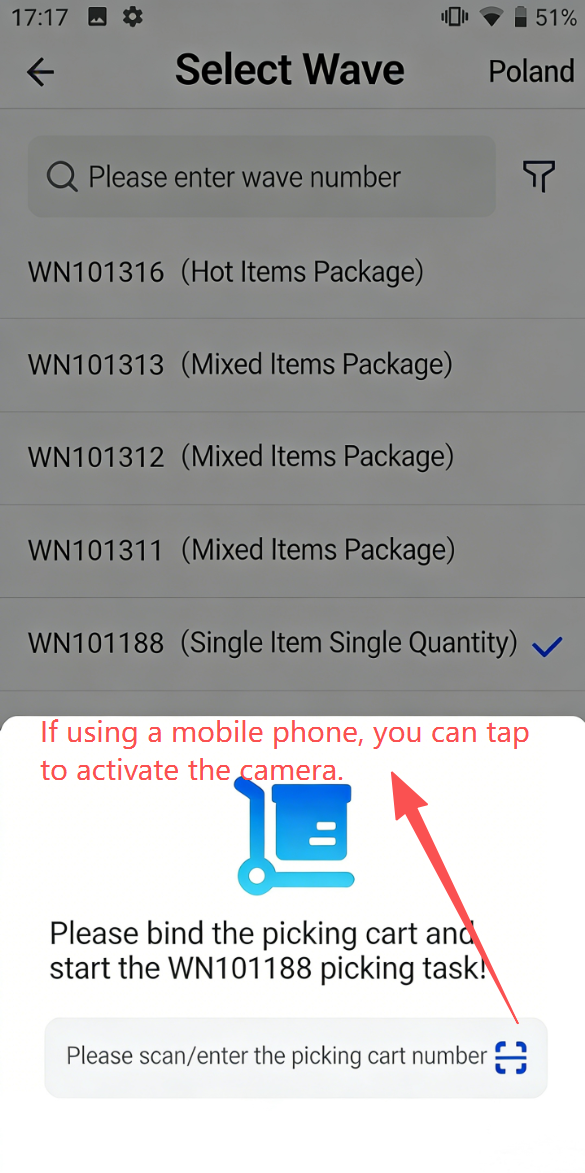
For mobile phones, you can activate the camera to scan.
After successfully binding to a picking cart, enter the picking page. Picking for "Pick First, Sort Second" Mode The picking page for Single-Item Waves / High-Demand Item Packages / Multi-Item Mixed Packages in "Pick First, Sort Second" mode is as follows:
(1) Locate the corresponding shelf location as displayed on the page and scan the matching product for picking.
When the Picked Quantity equals the Required Quantity, the system automatically proceeds to the next product.
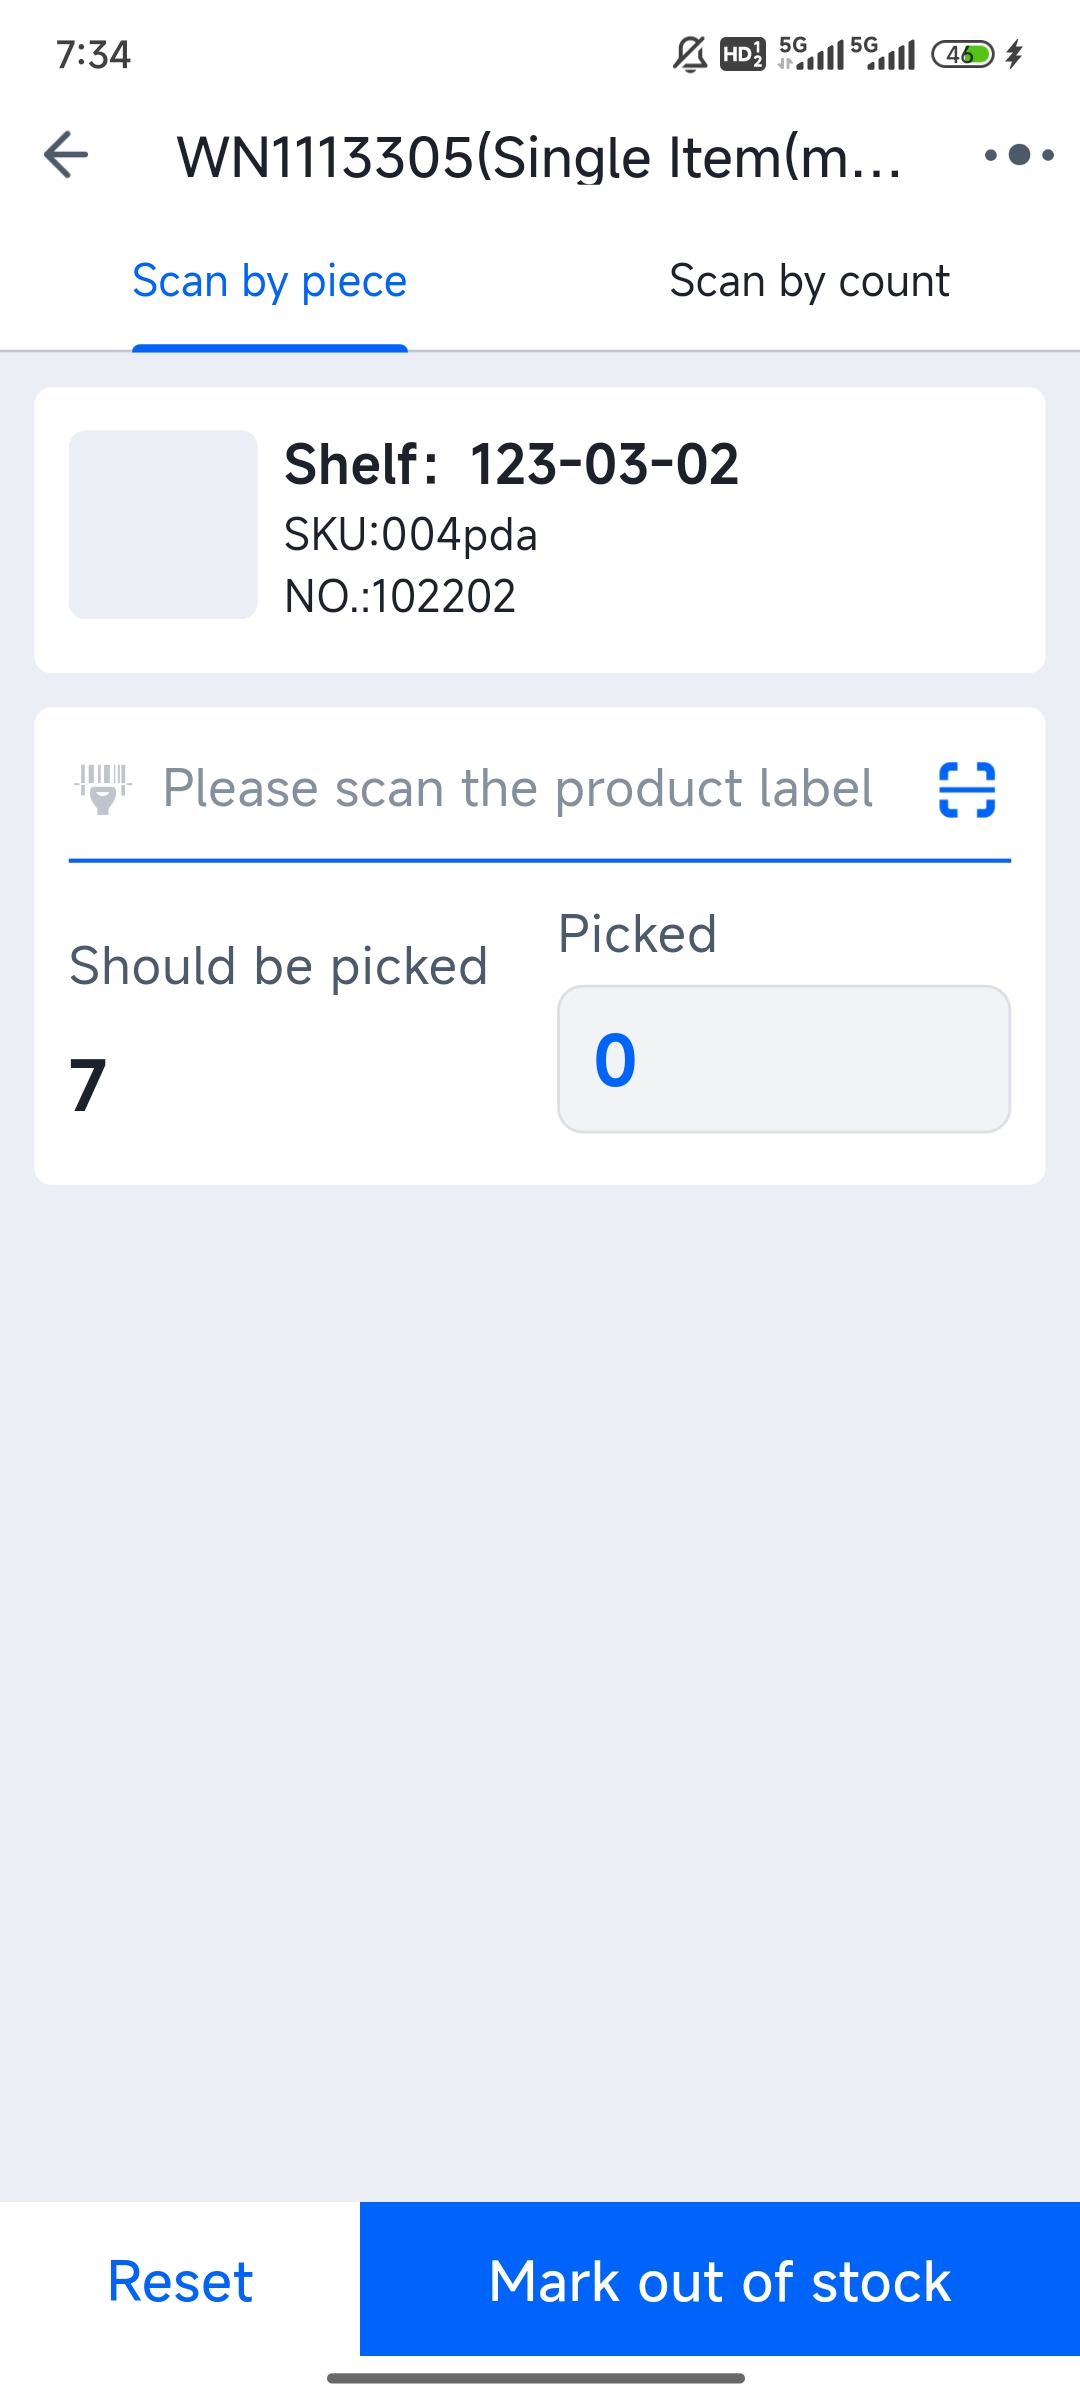
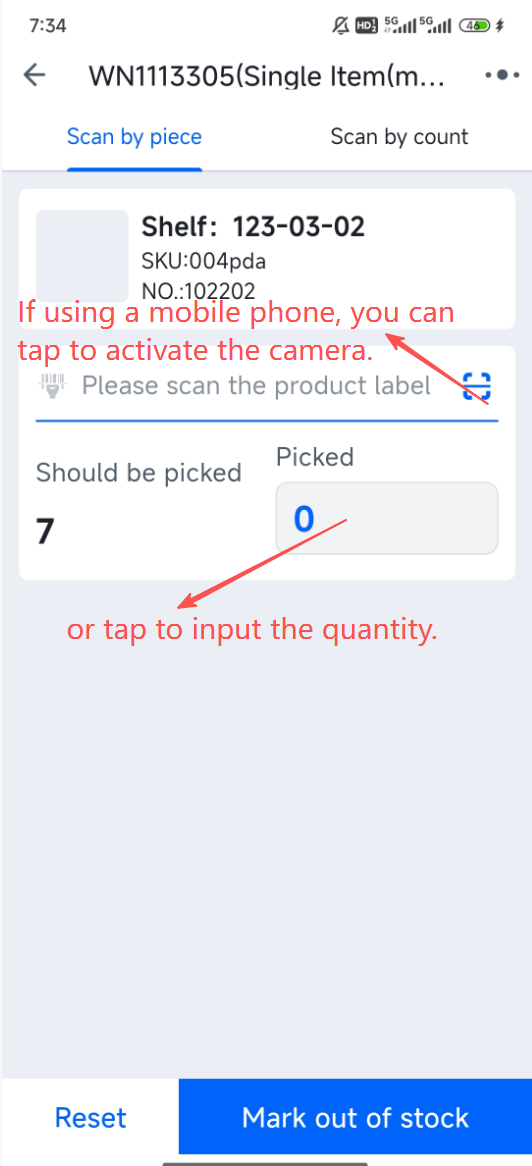
(2) If using a mobile phone, you can tap to activate the camera for scanning.
(3) If the quantity is large, you can also directly tap the input field to enter the number.
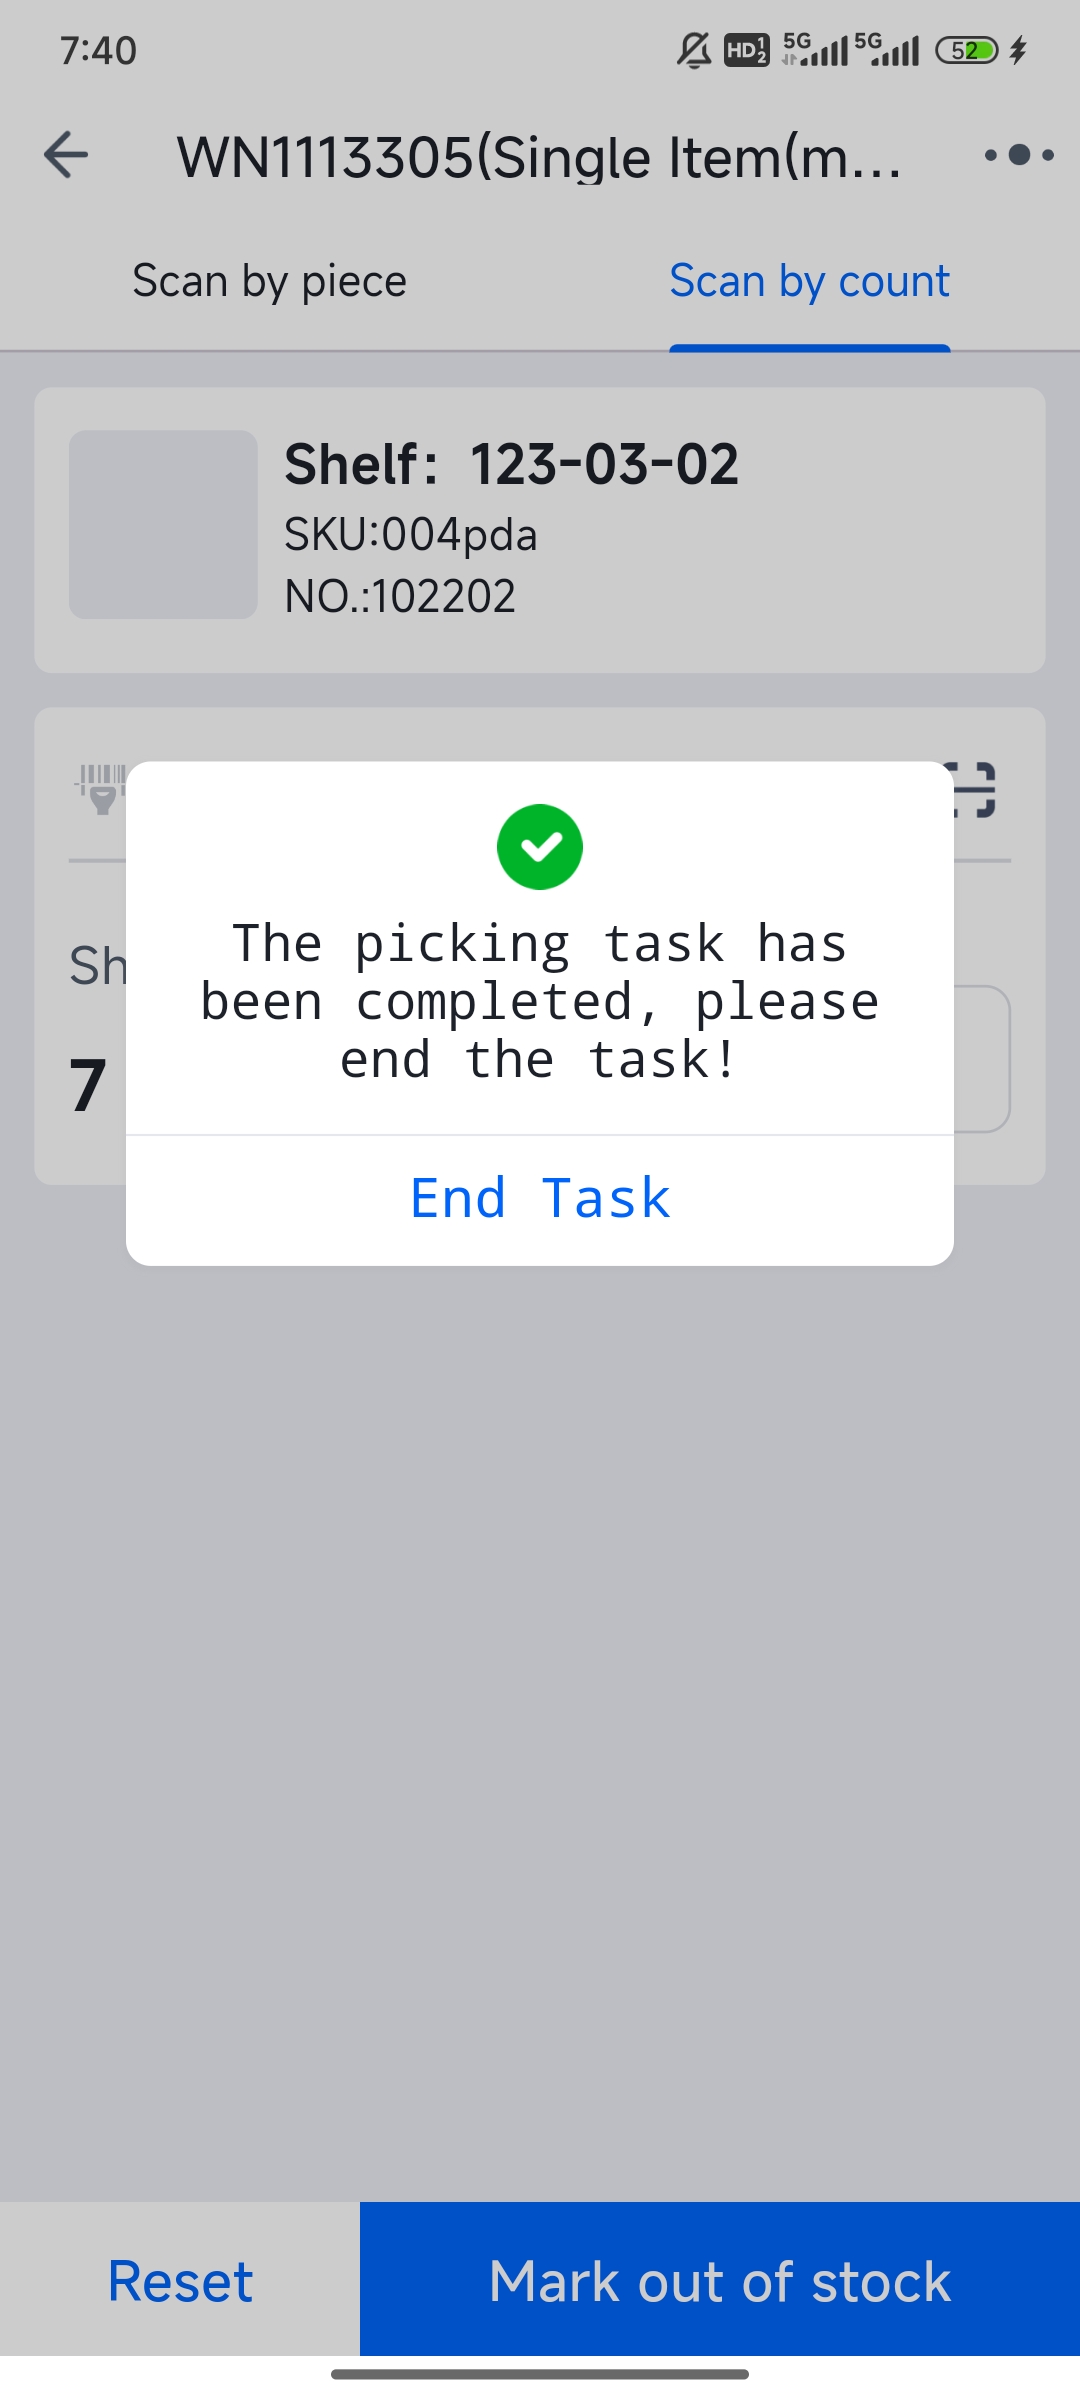
(4) When picking for all items is complete, a prompt to "End Task" will automatically appear. Tapping it completes the PDA picking process.
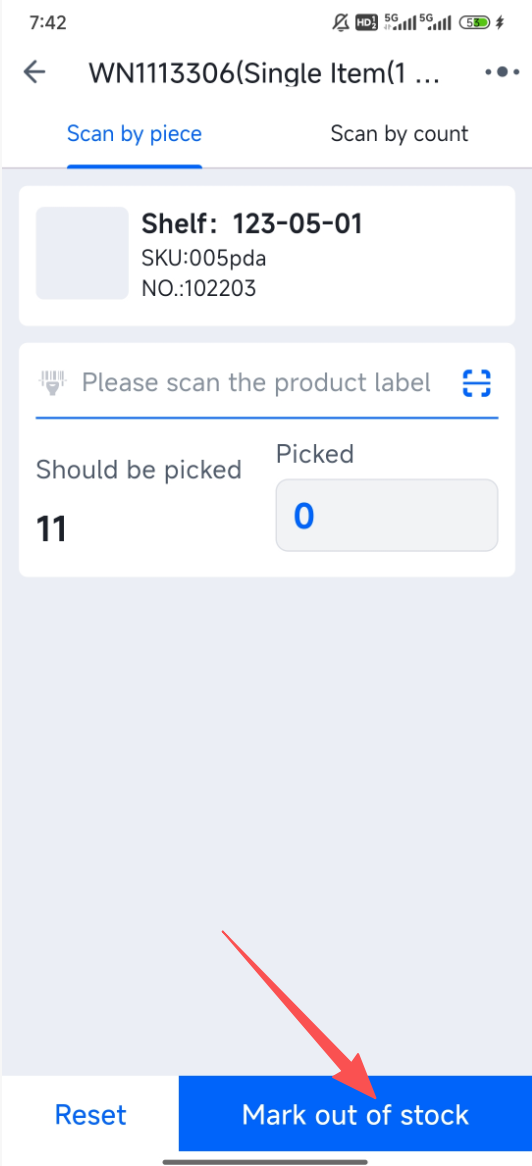
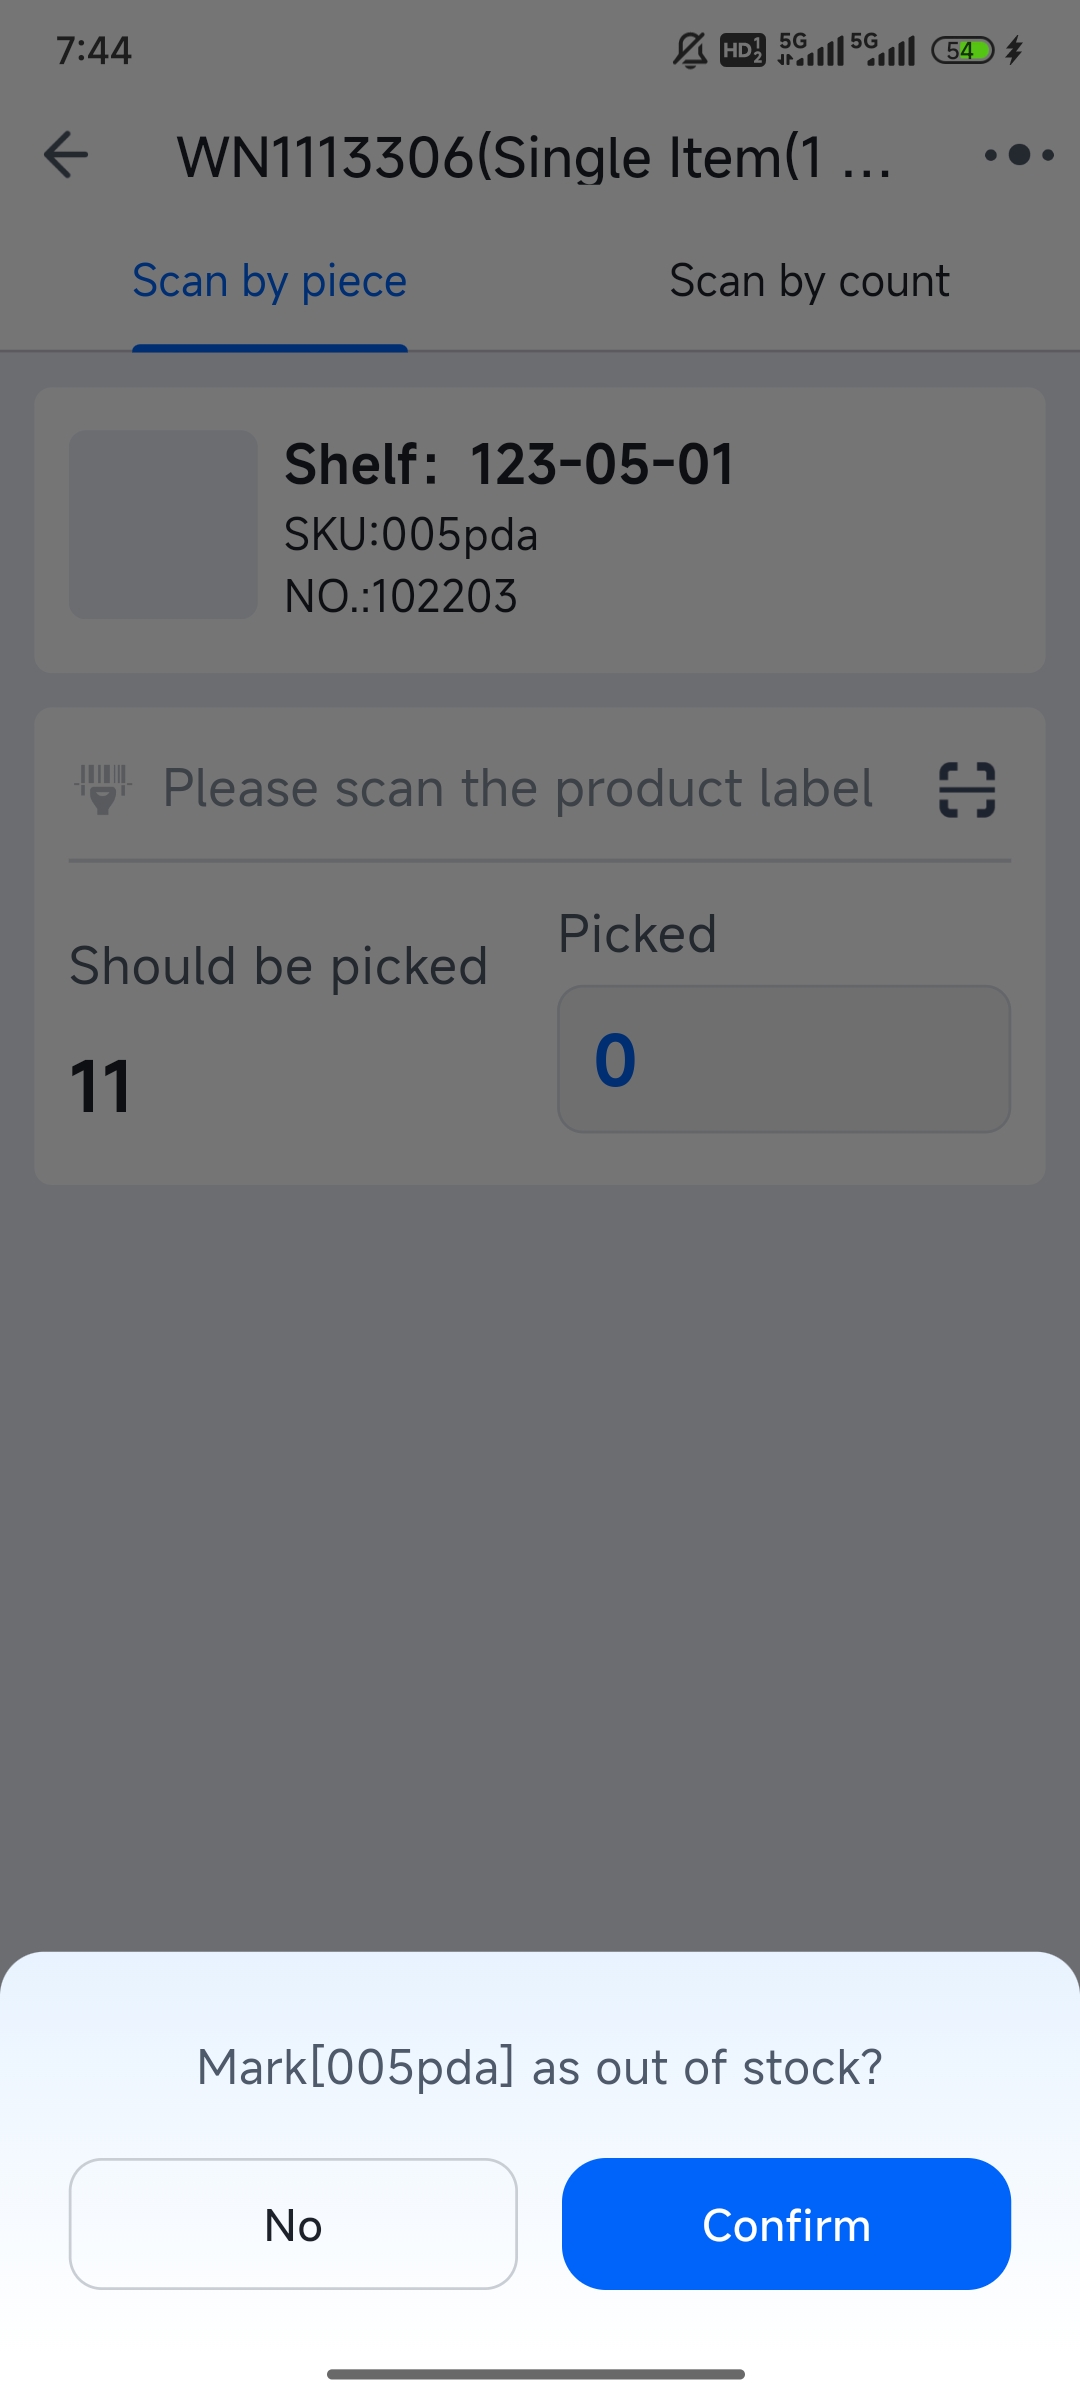
(5) If you encounter an out-of-stock item at the actual shelf location during picking, you can perform the "Mark as Out of Stock" action.
(6) After marking the current product as out of stock, the system will continue picking the next product according to the picking sequence.
(7) When picking for all items is completed, if any items were marked as out of stock, the system will automatically navigate to the wave details page.
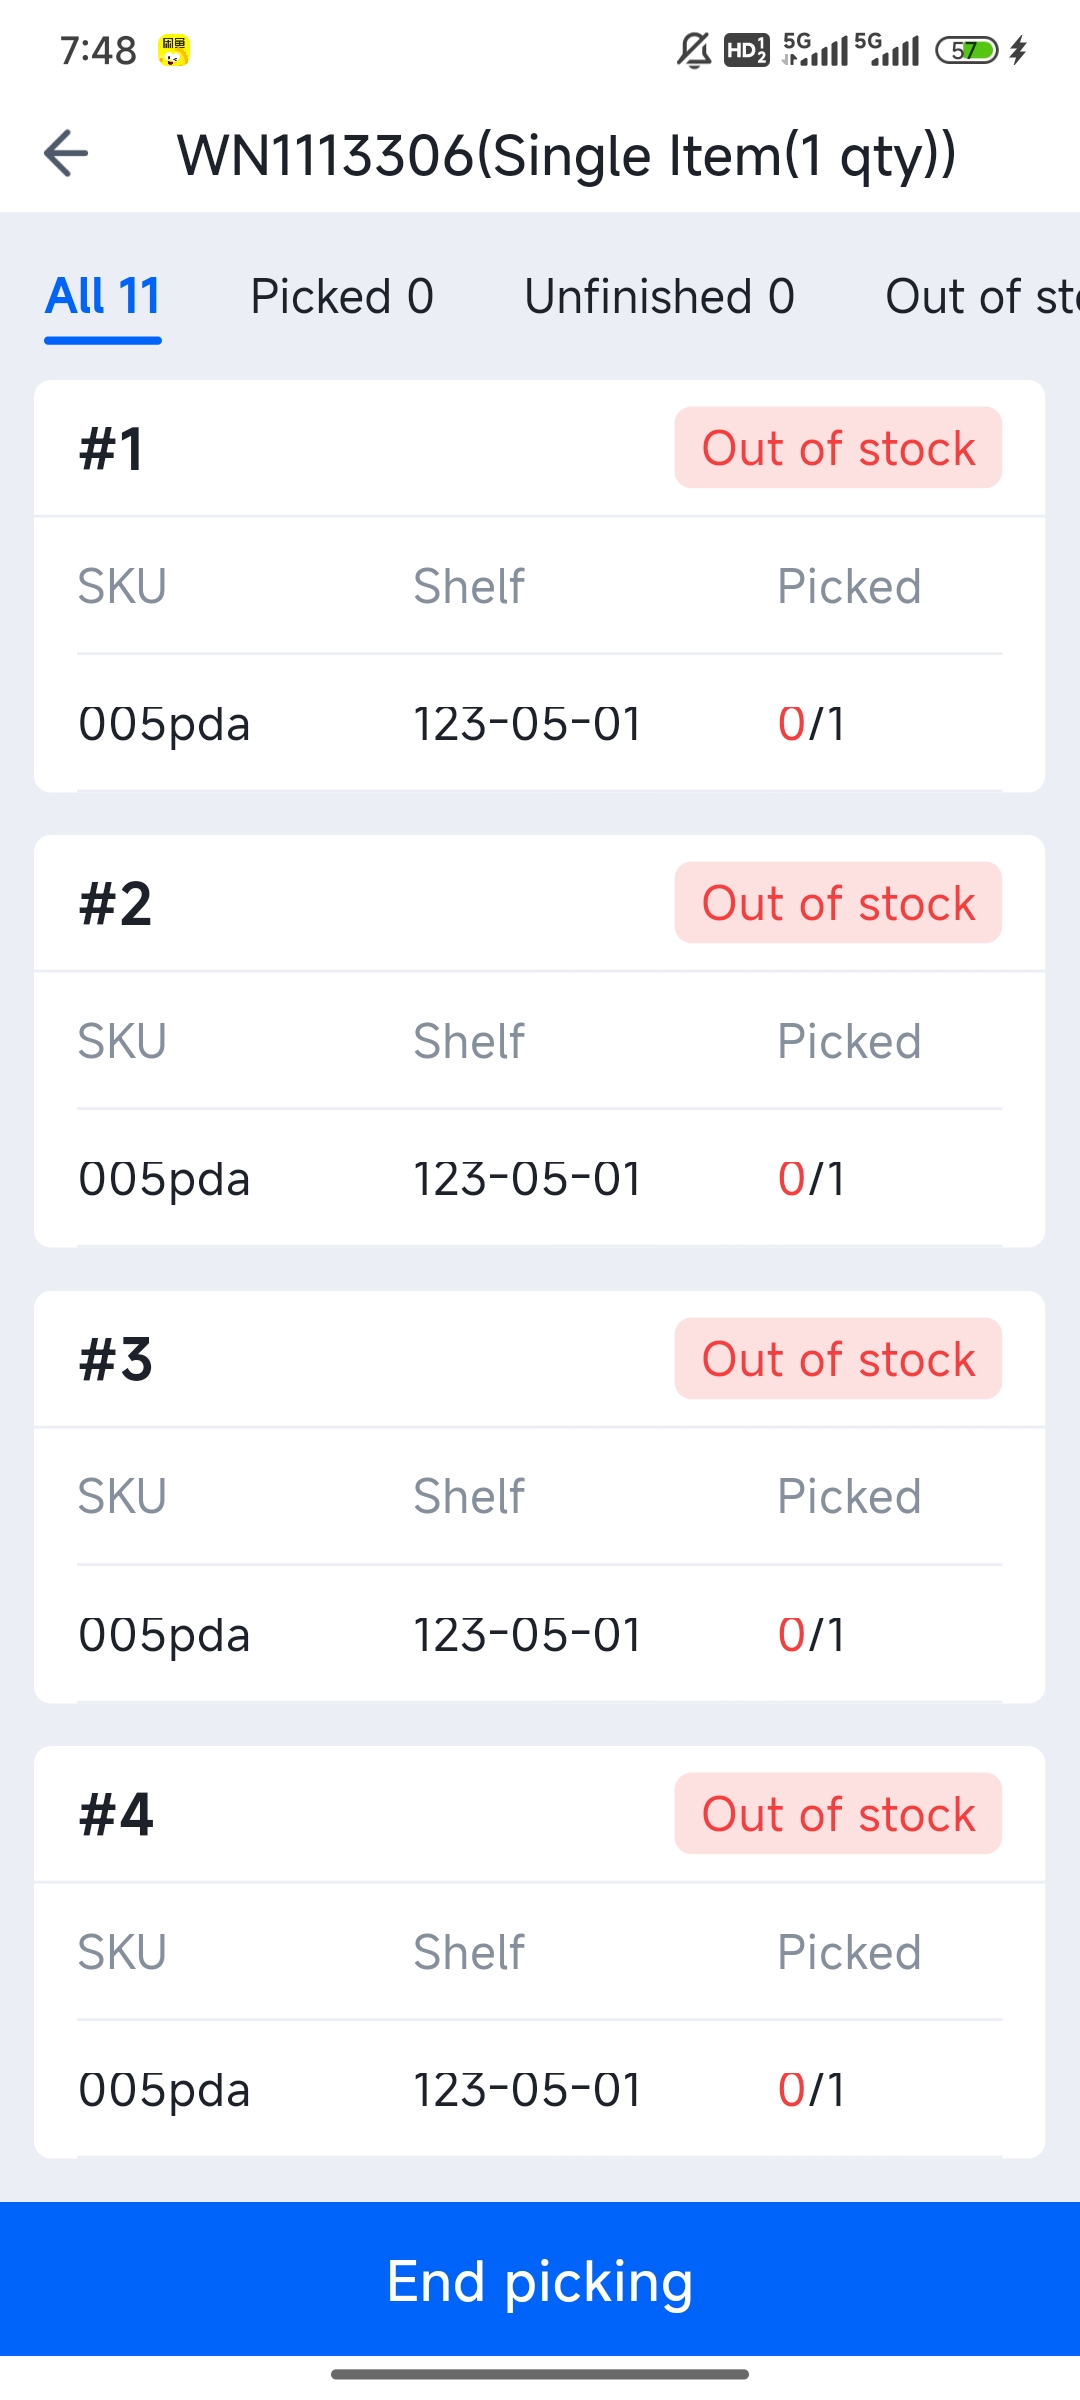
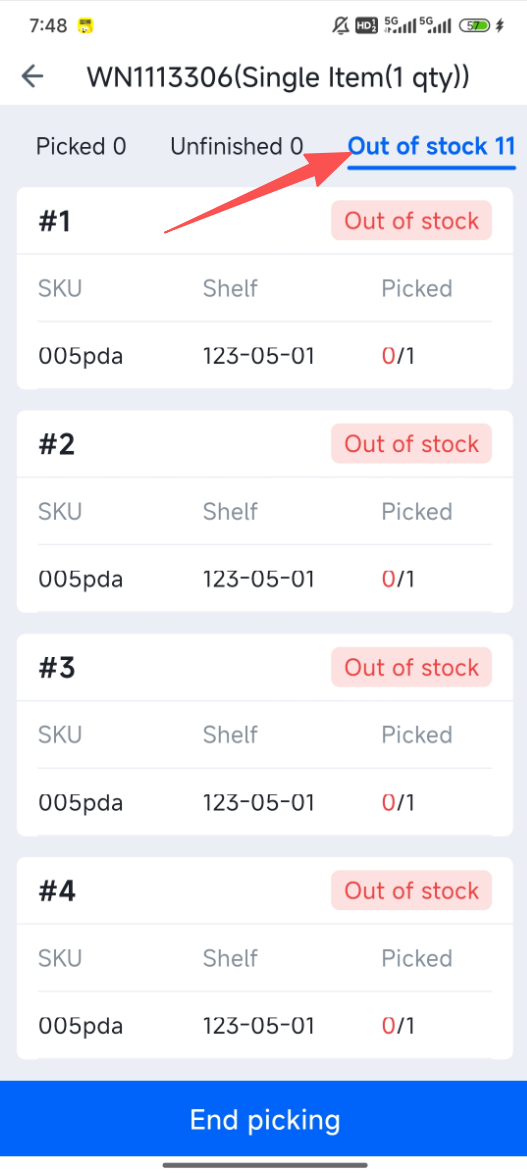
(8) You can tap the "Out of Stock" tab to view the products within the out-of-stock packages.
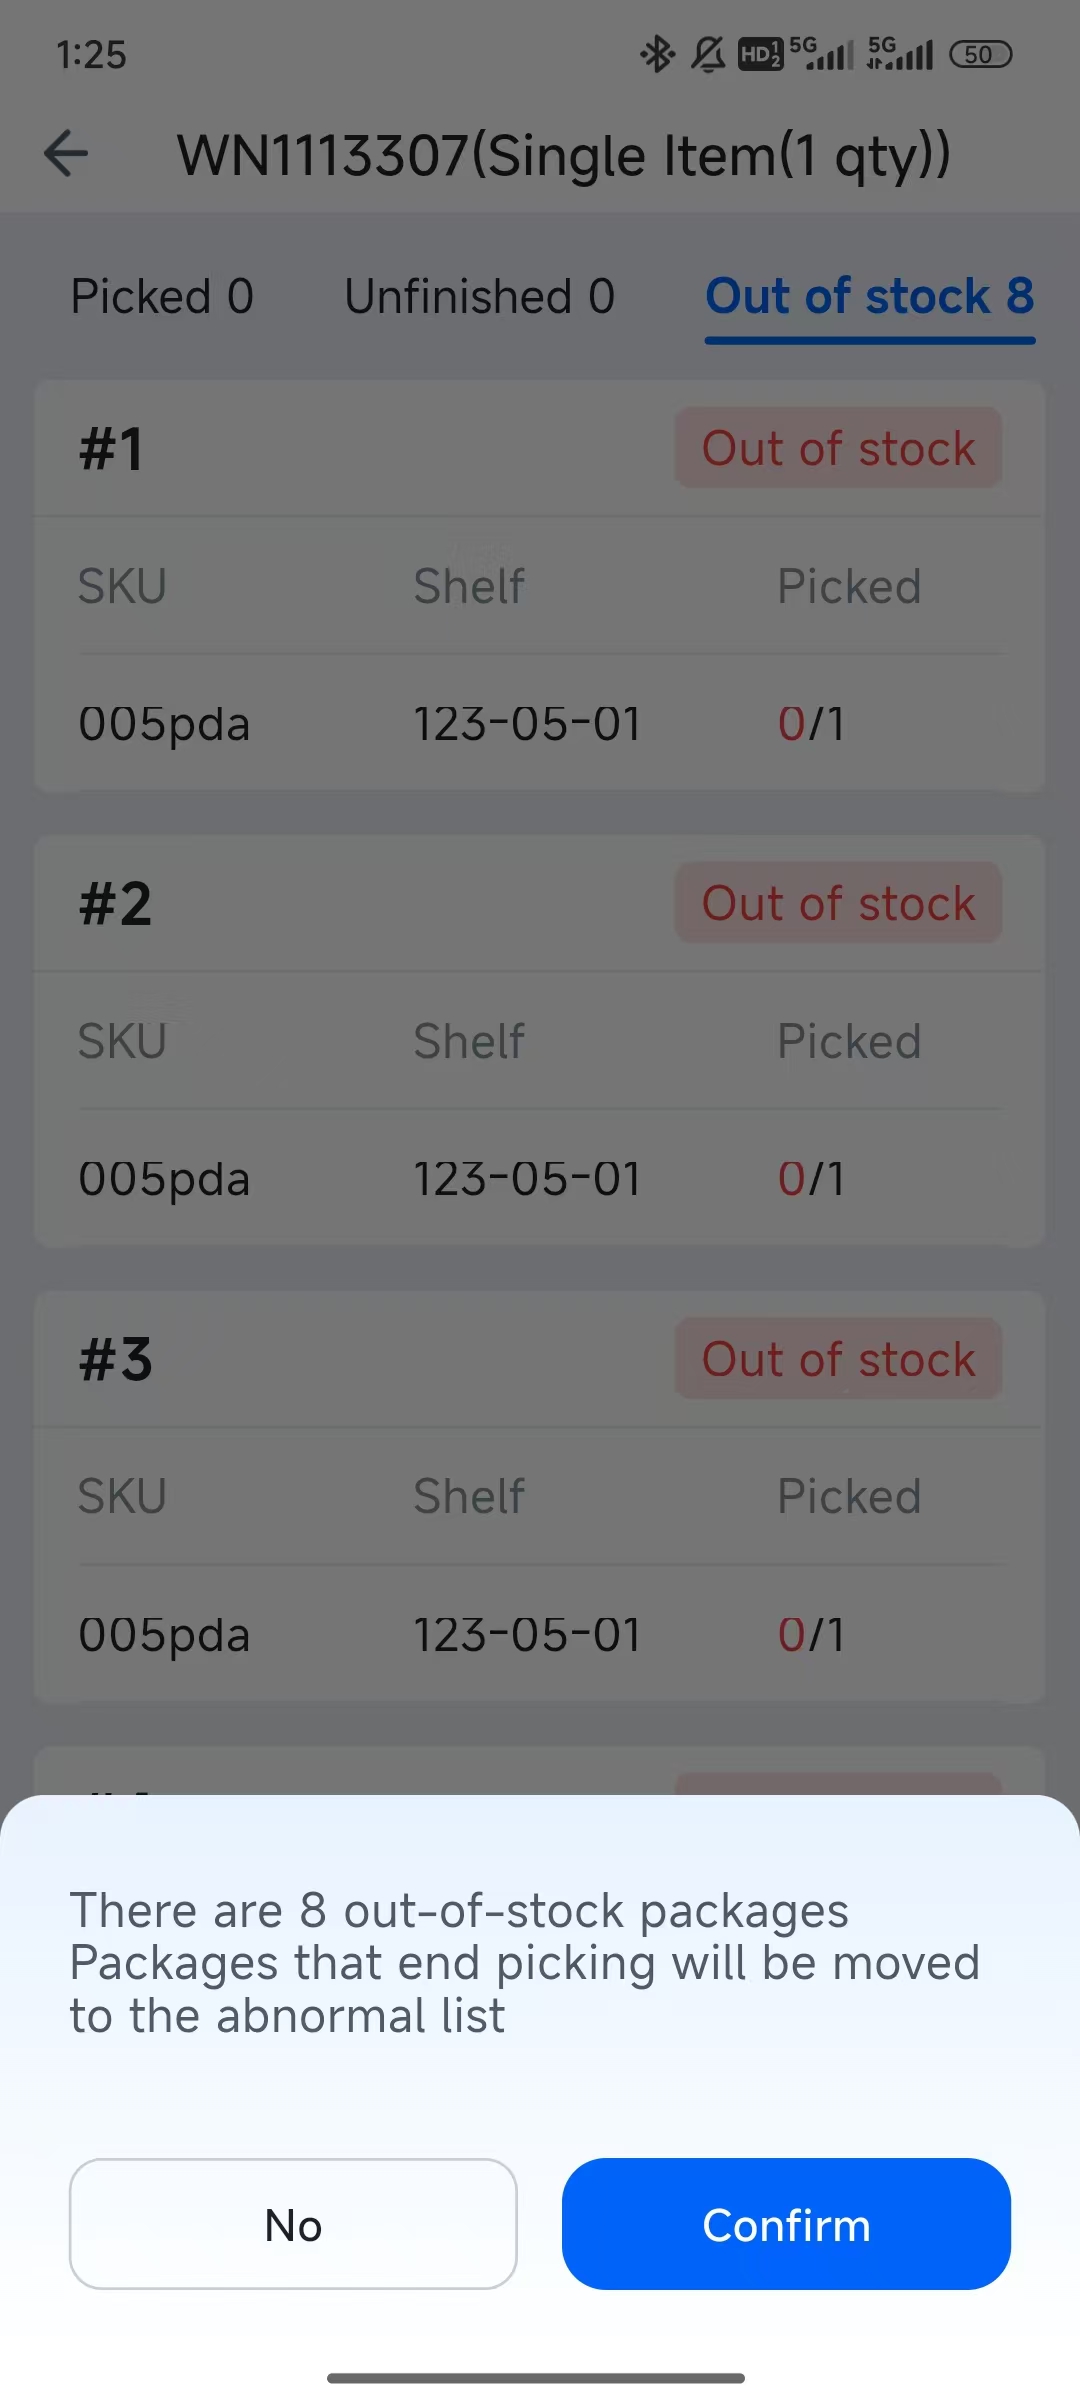
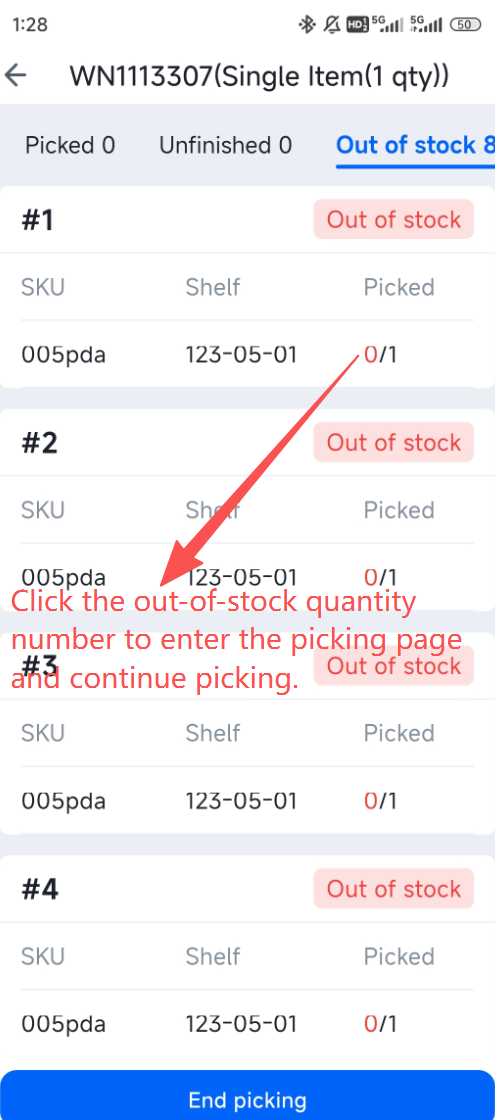
(9) Click "End Picking". If there are out-of-stock items, a prompt will appear. Clicking "Confirm" will move the affected package to the exception list, which can be viewed on the web interface.
(10) You can click on an out-of-stock item to resume picking for it.
"Pick and Sort Simultaneously" Mode Picking The picking page for Single-Item Waves / High-Demand Item Packages / Multi-Item Mixed Packages in "Pick and Sort Simultaneously" mode is as follows:
(1) Locate the corresponding shelf location as displayed on the page and scan the matching product for picking.
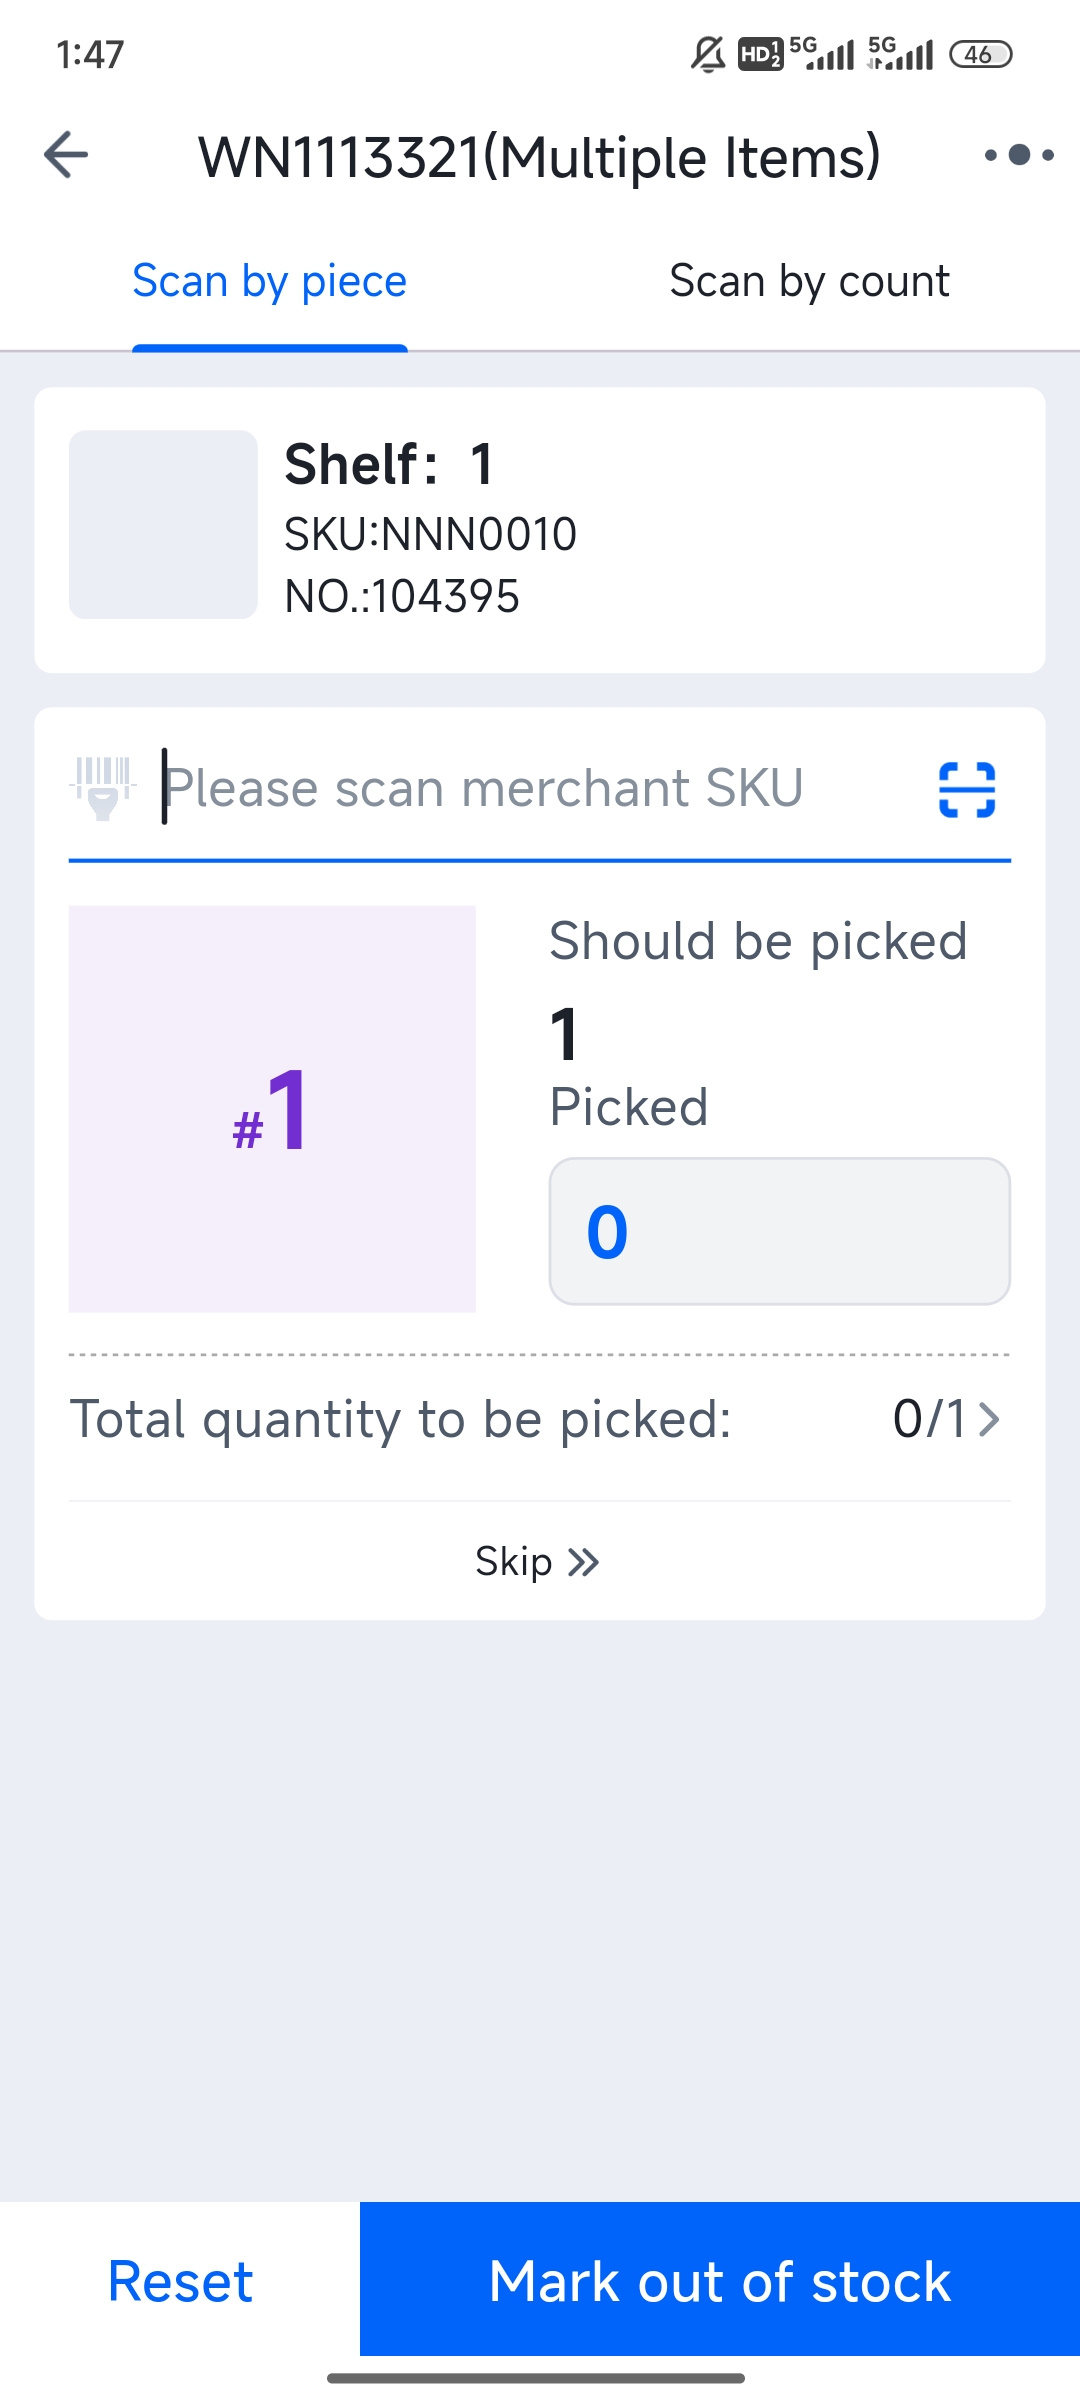
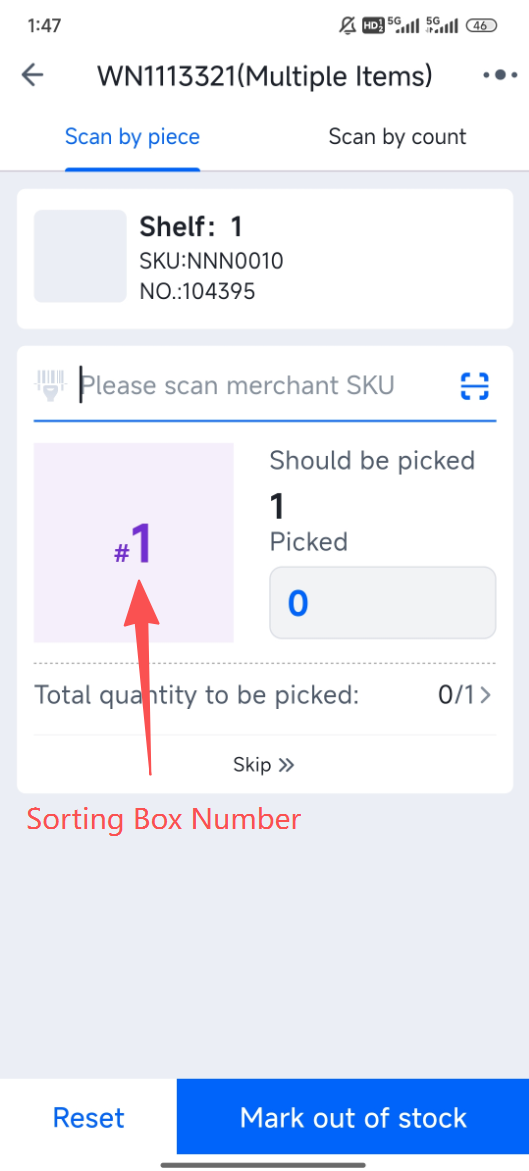
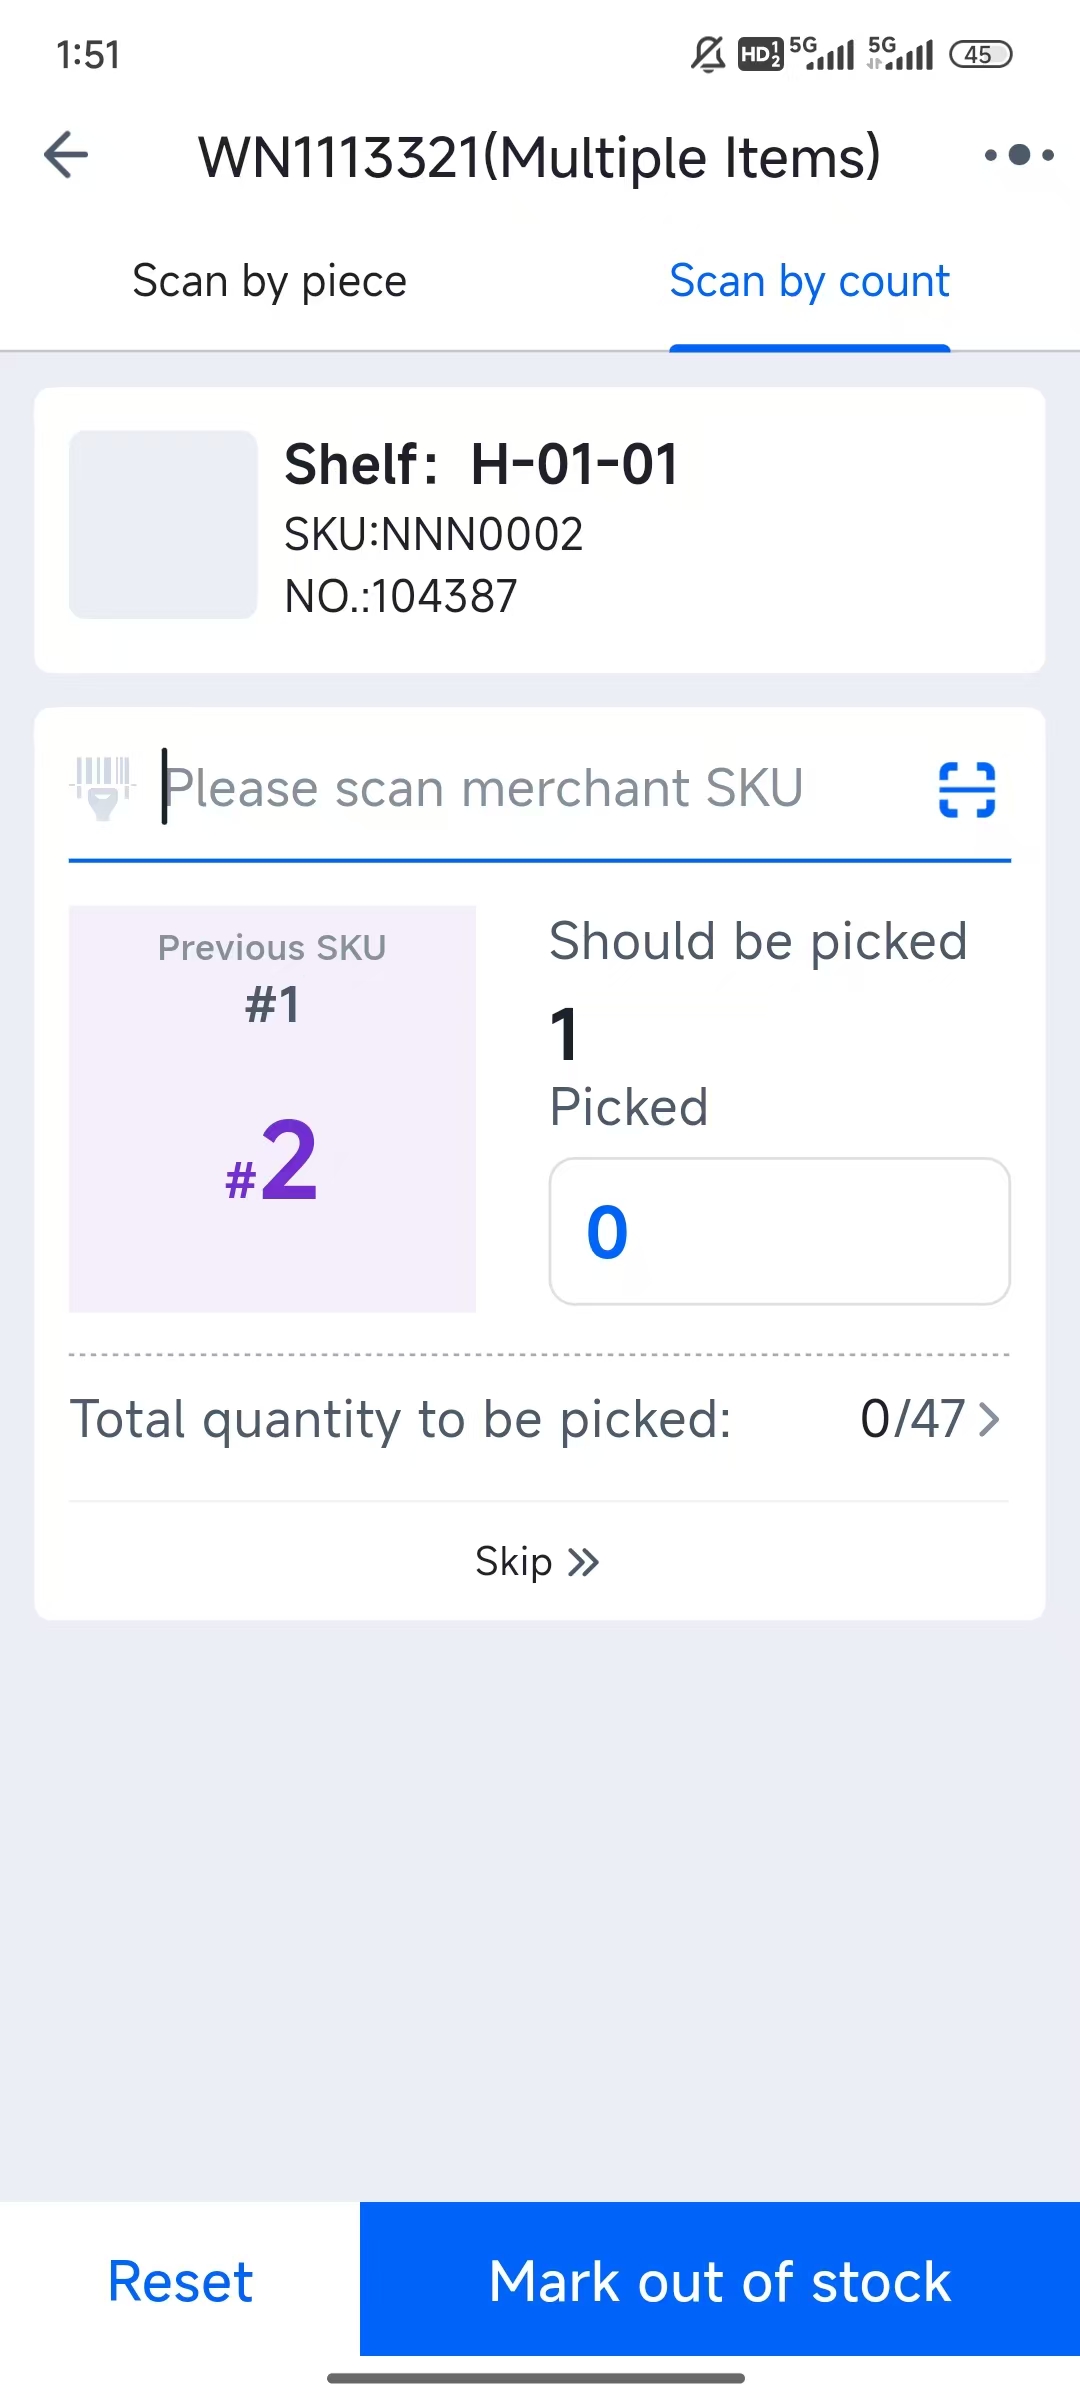
(2) The "Pick and Sort Simultaneously" mode displays the sorting box number, indicating how many of the current item should be picked and placed into which box.
(3) Completing the picking for one sorting box automatically proceeds to the picking for the next sorting box.
(4) You can also quickly complete the picking for all sorting boxes required for that item.
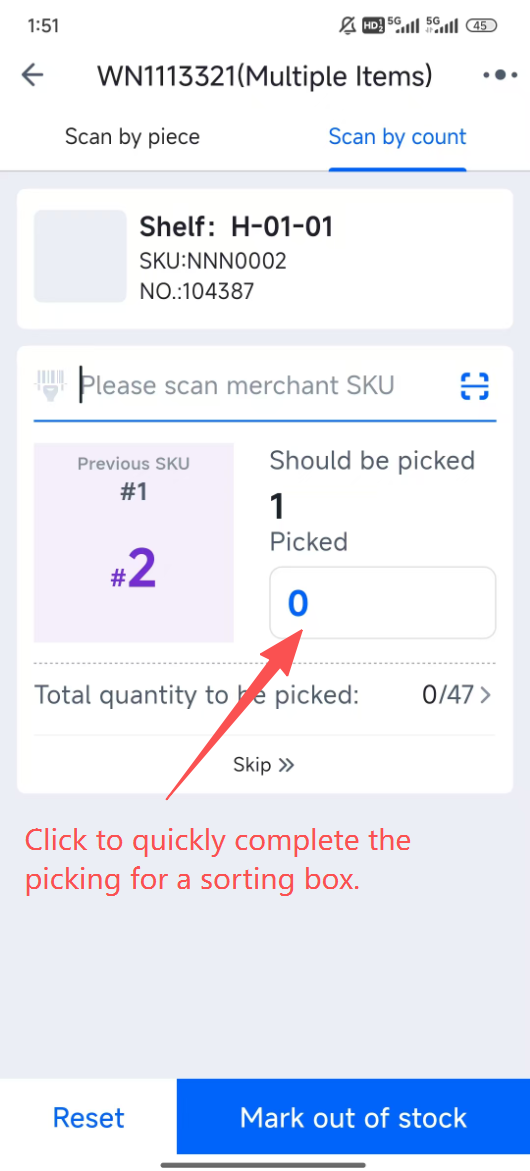
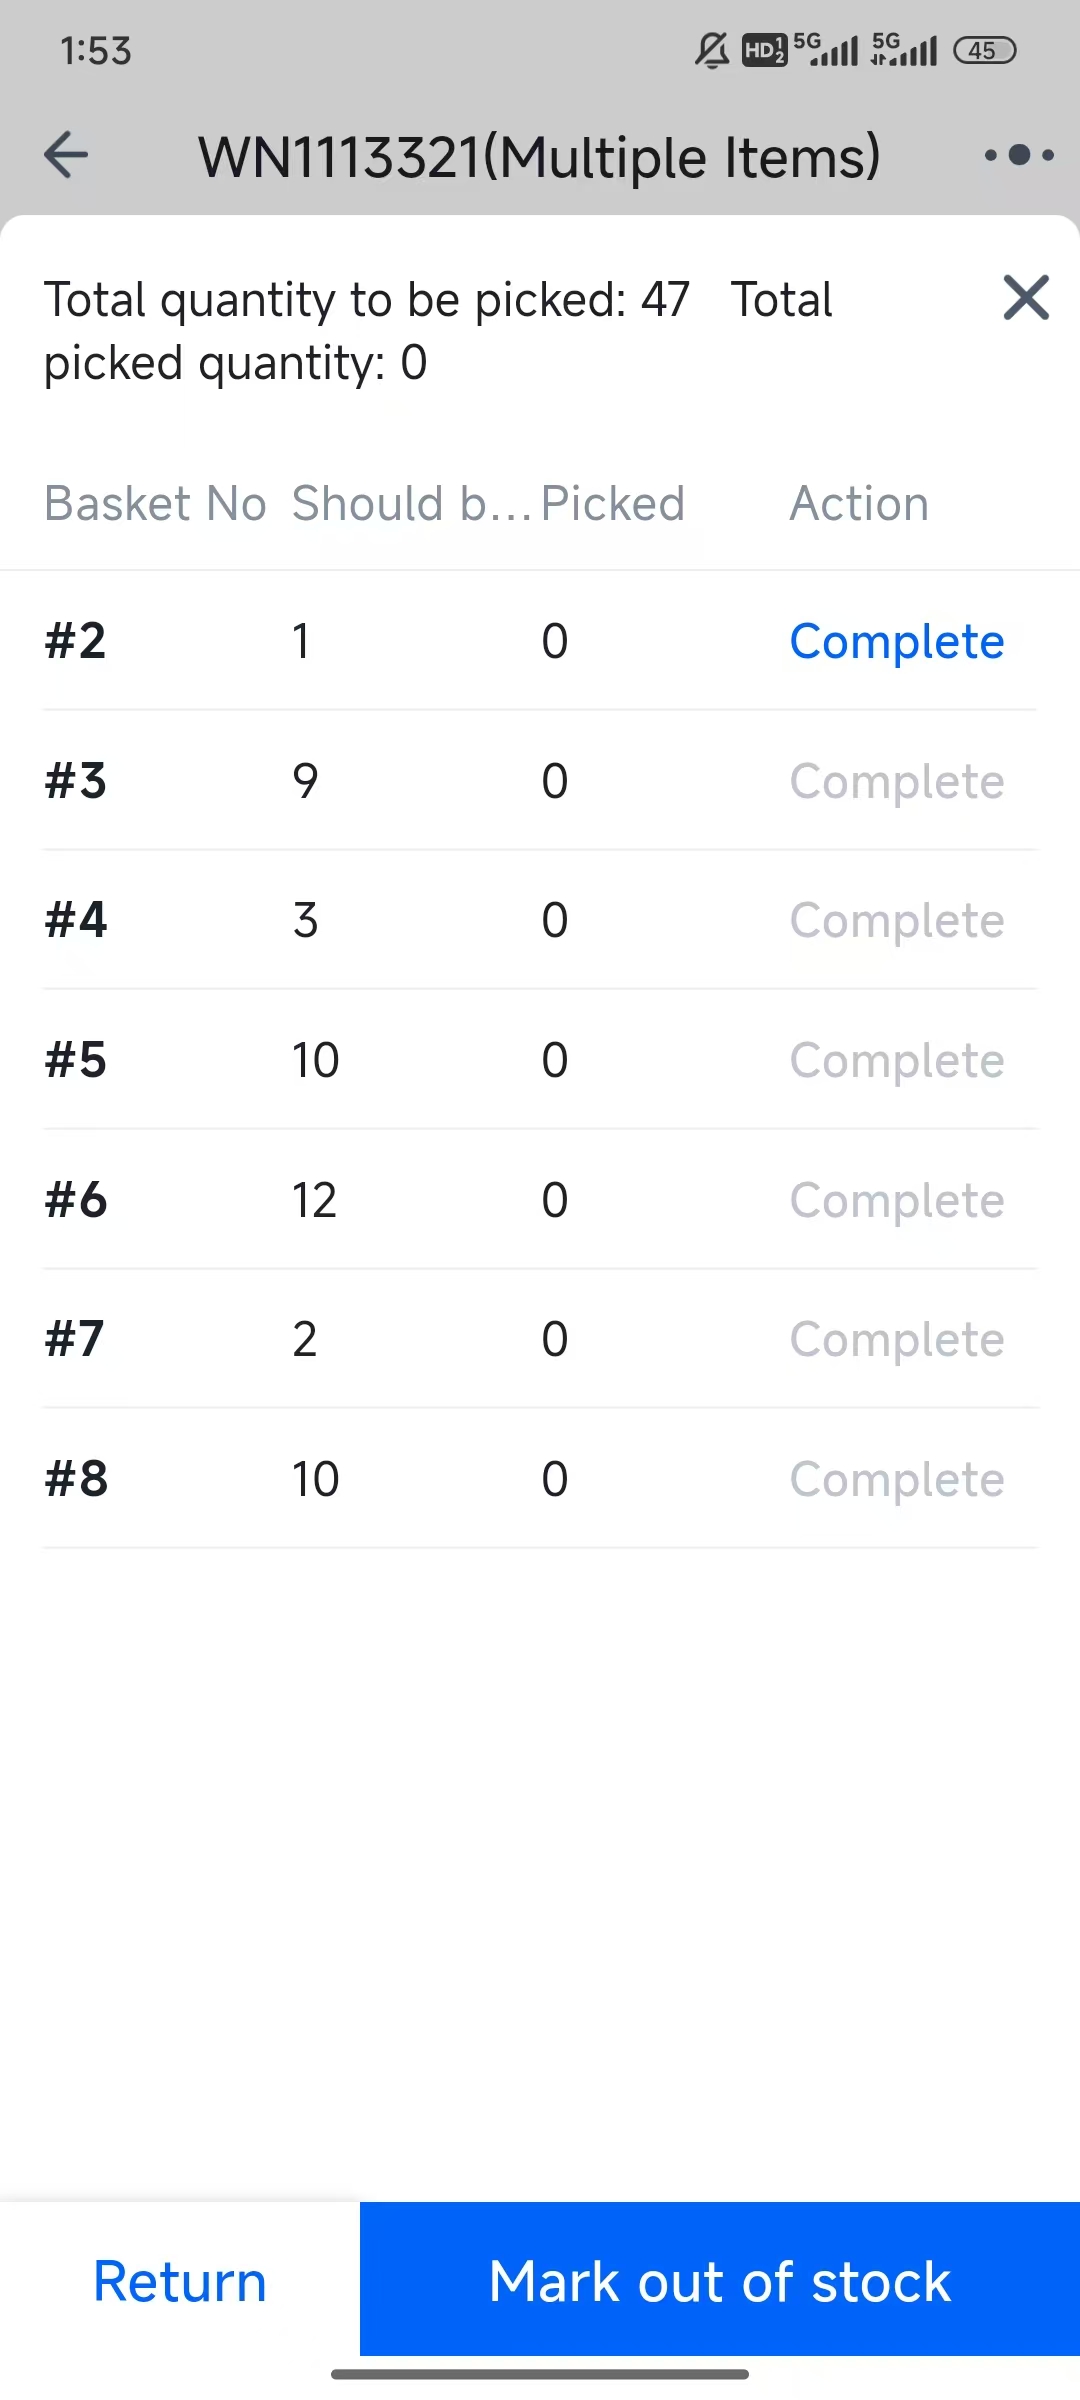
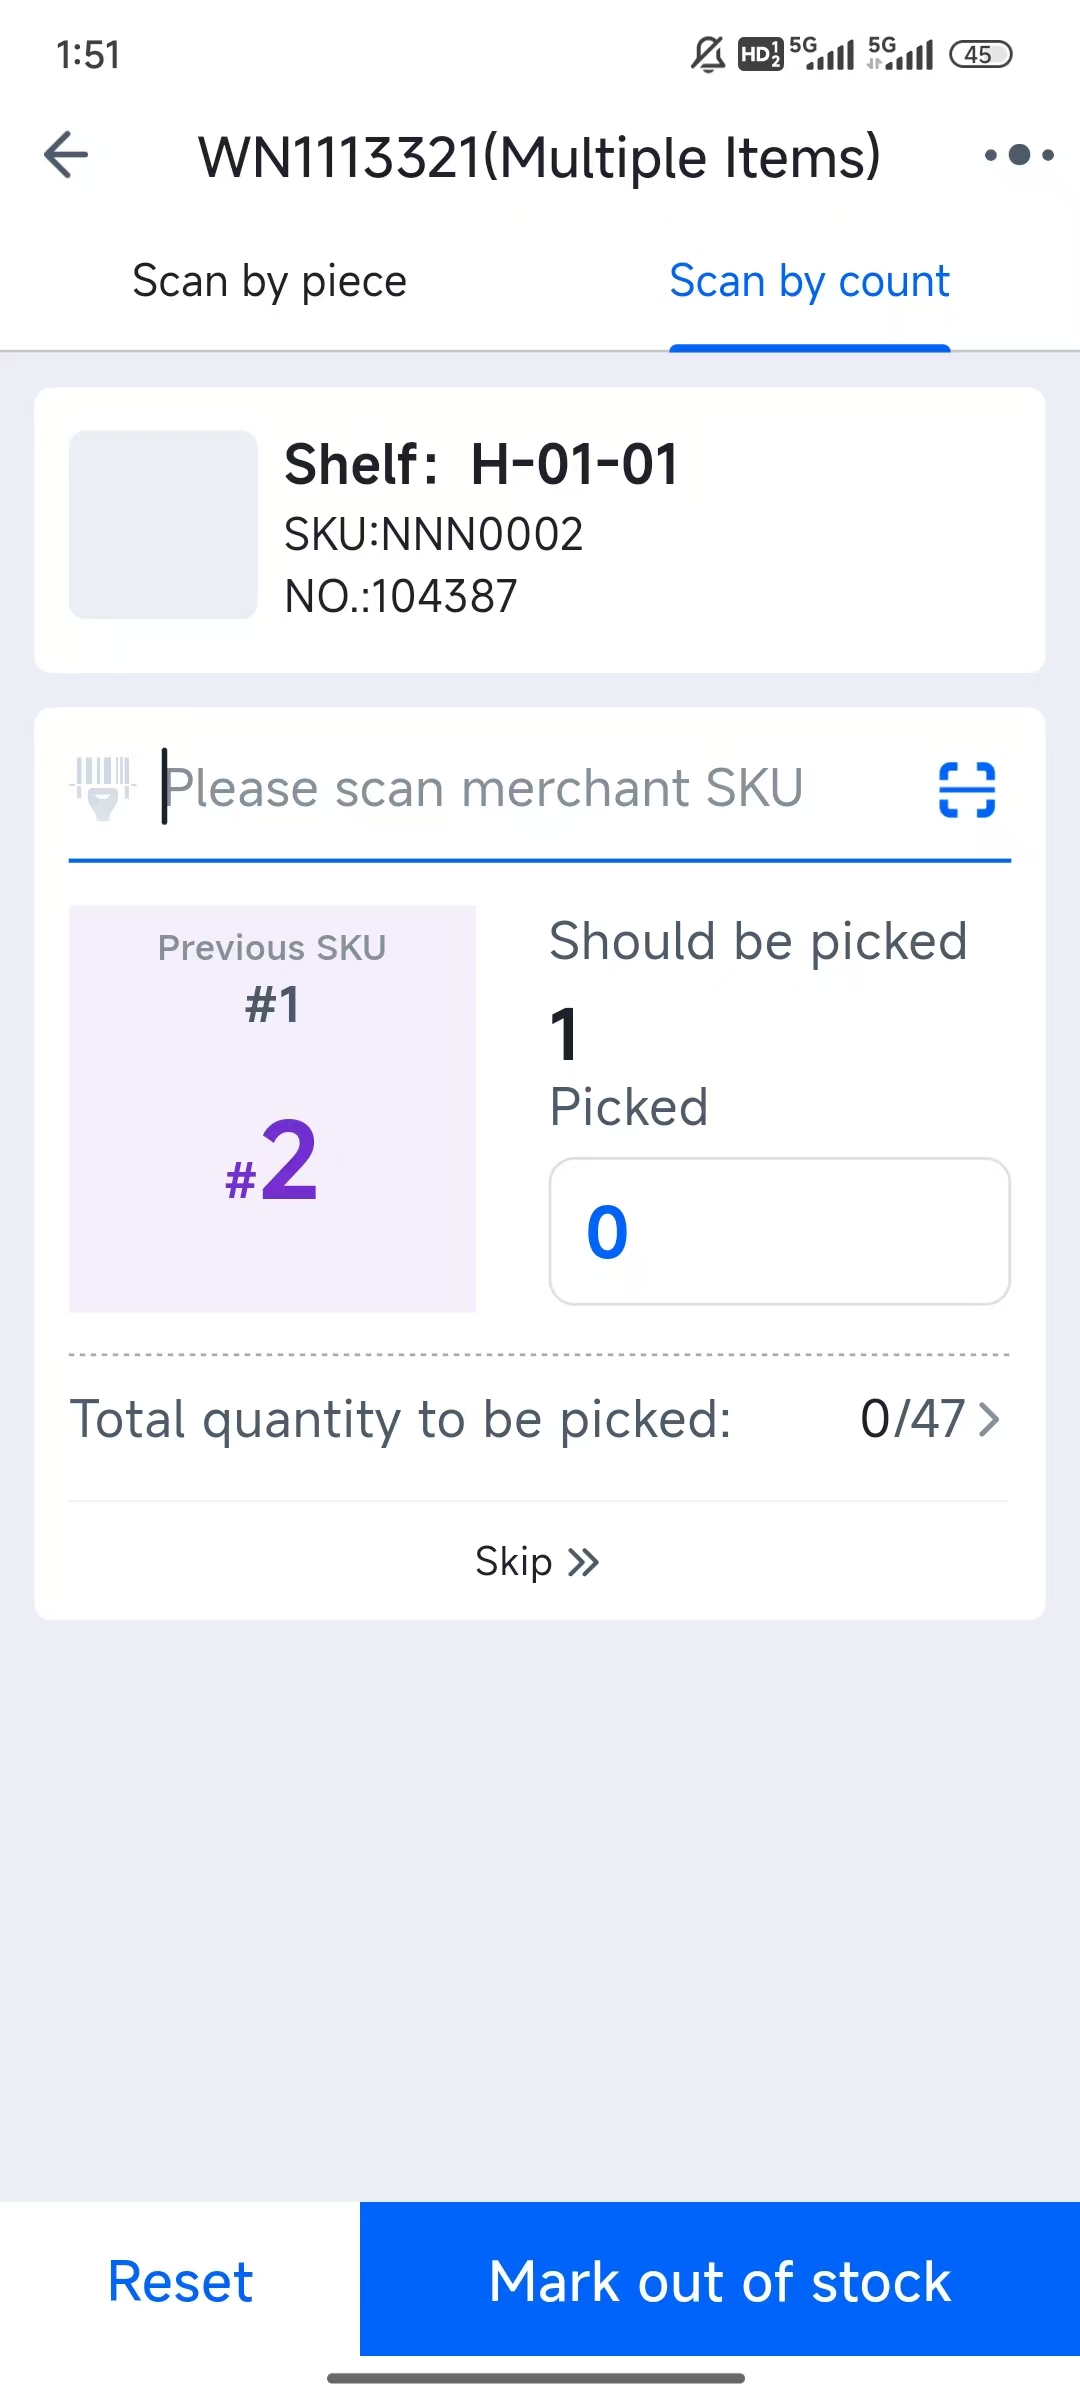
(5) Open the page and click "Complete" in sequence.
(6) After all are completed, proceed to picking the next item.
The remaining operations are the same as for single-item picking.
Step 6: Picking Completed, Proceed to Packing
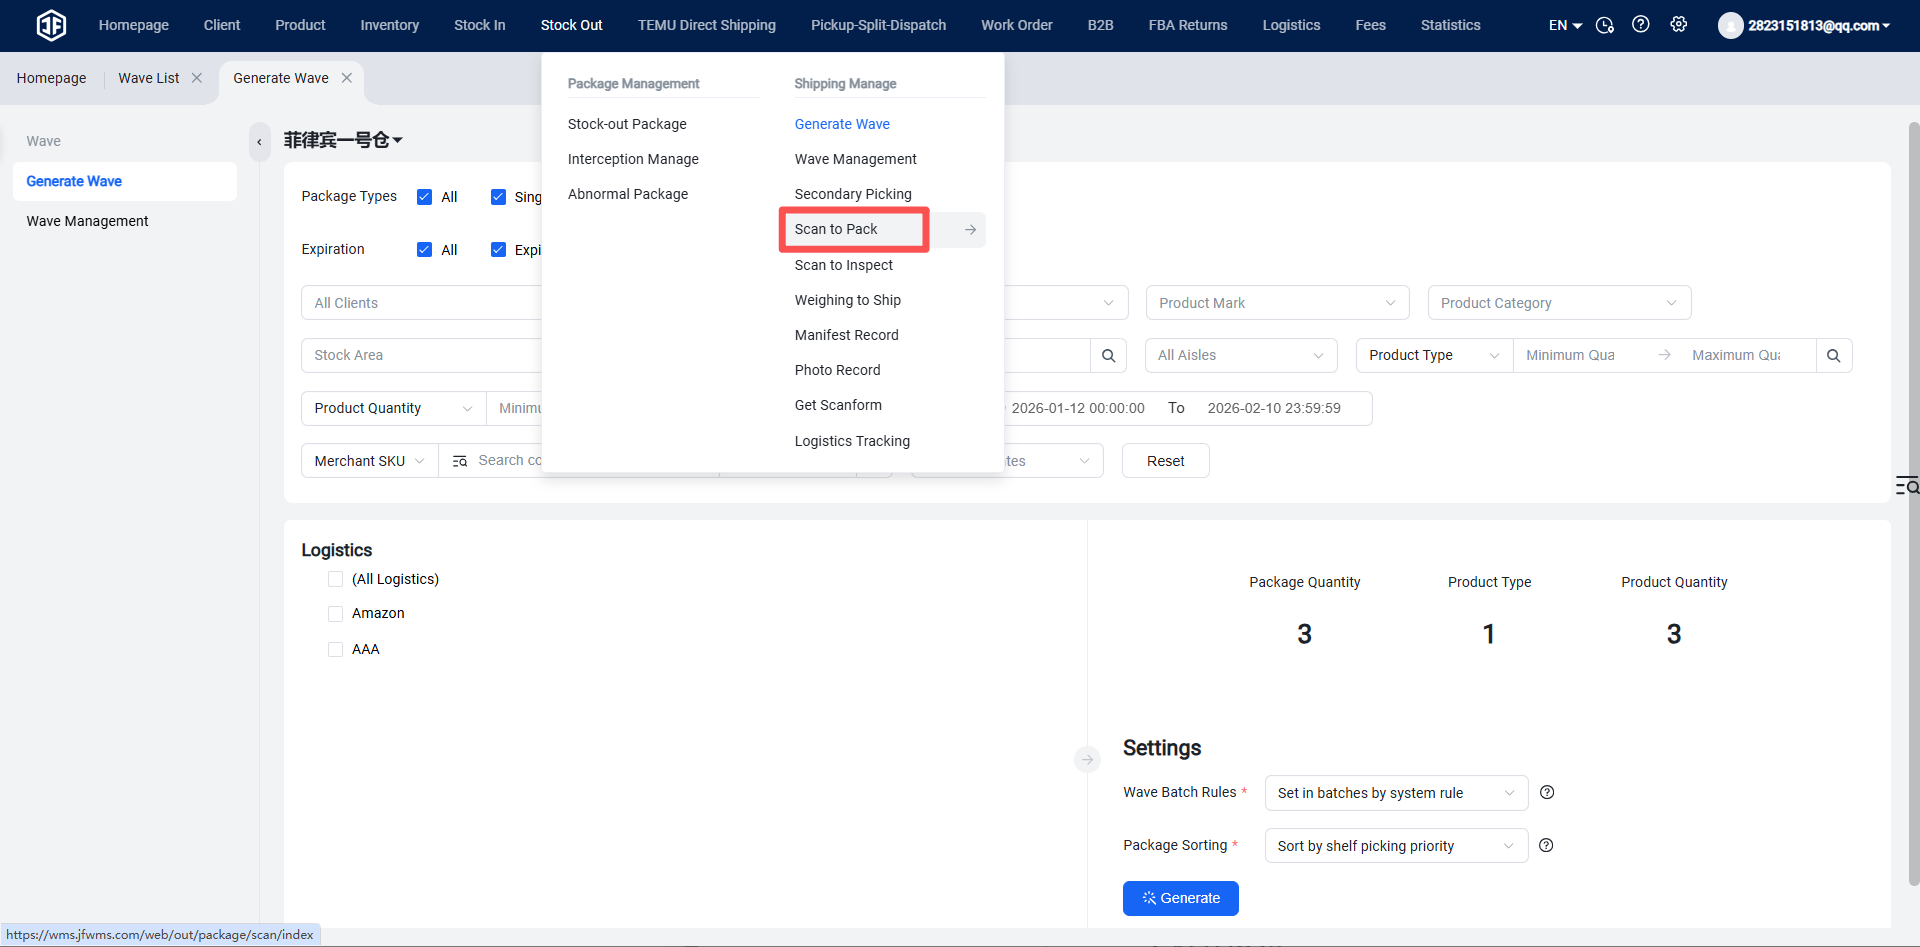
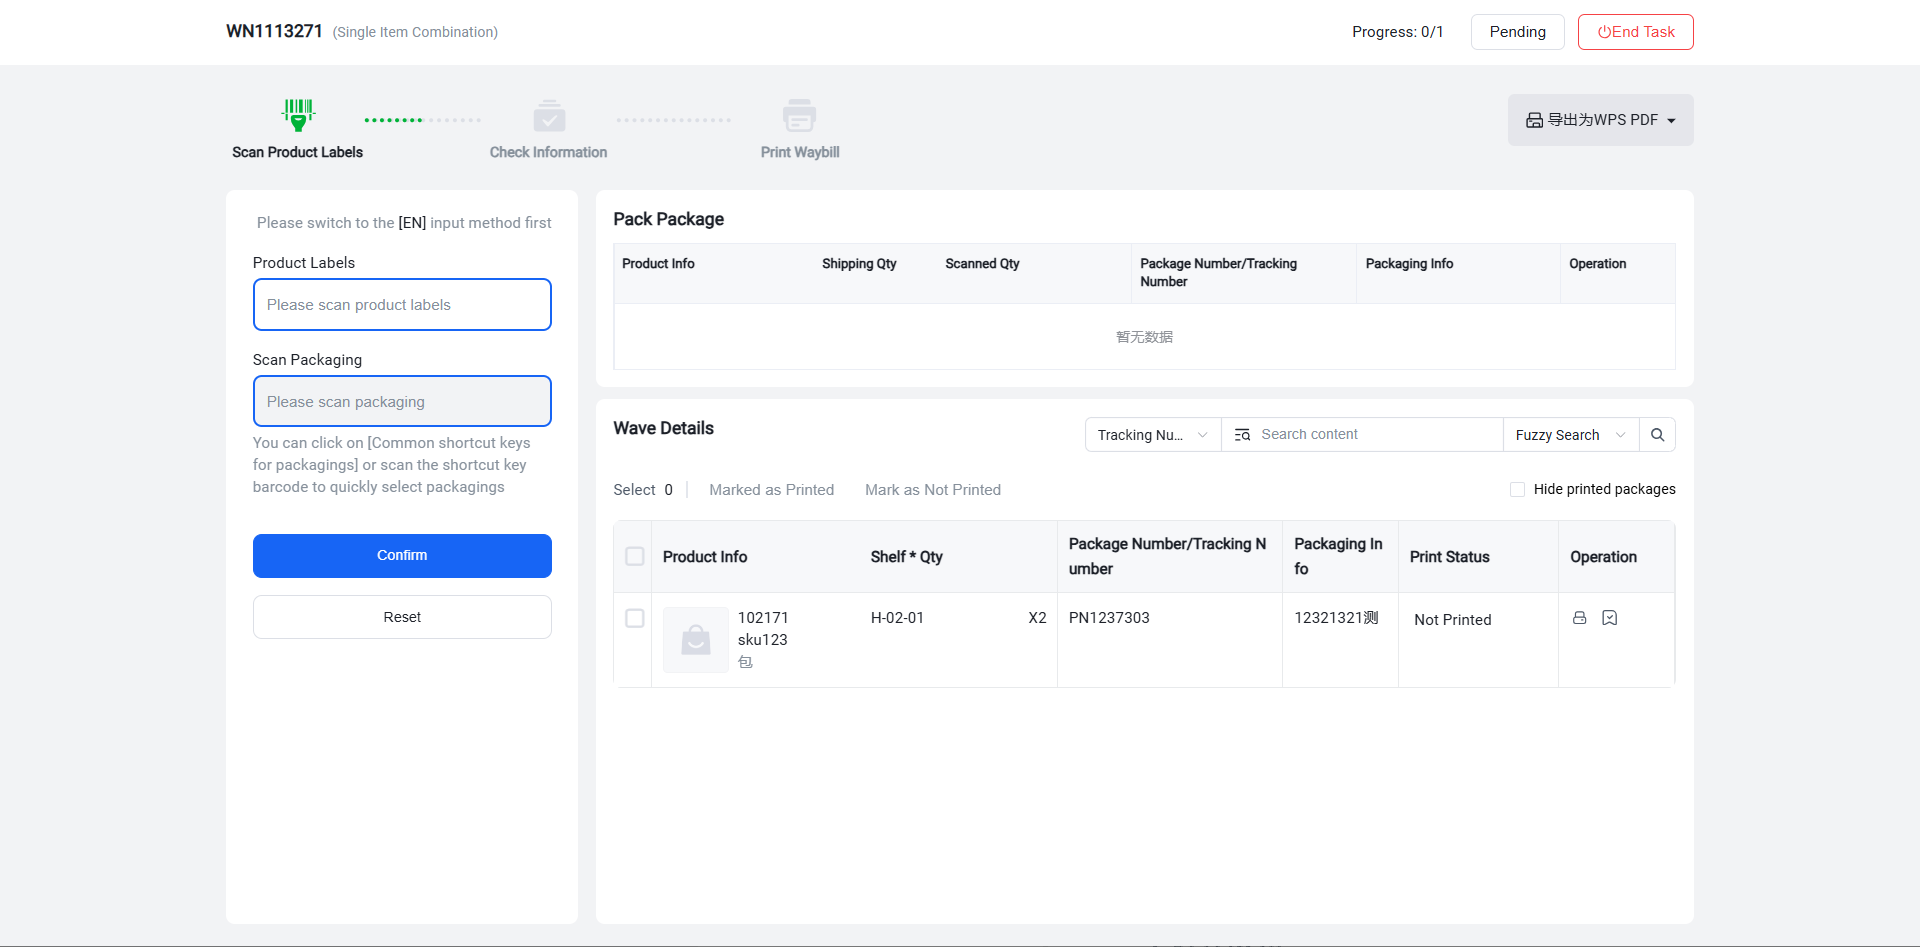
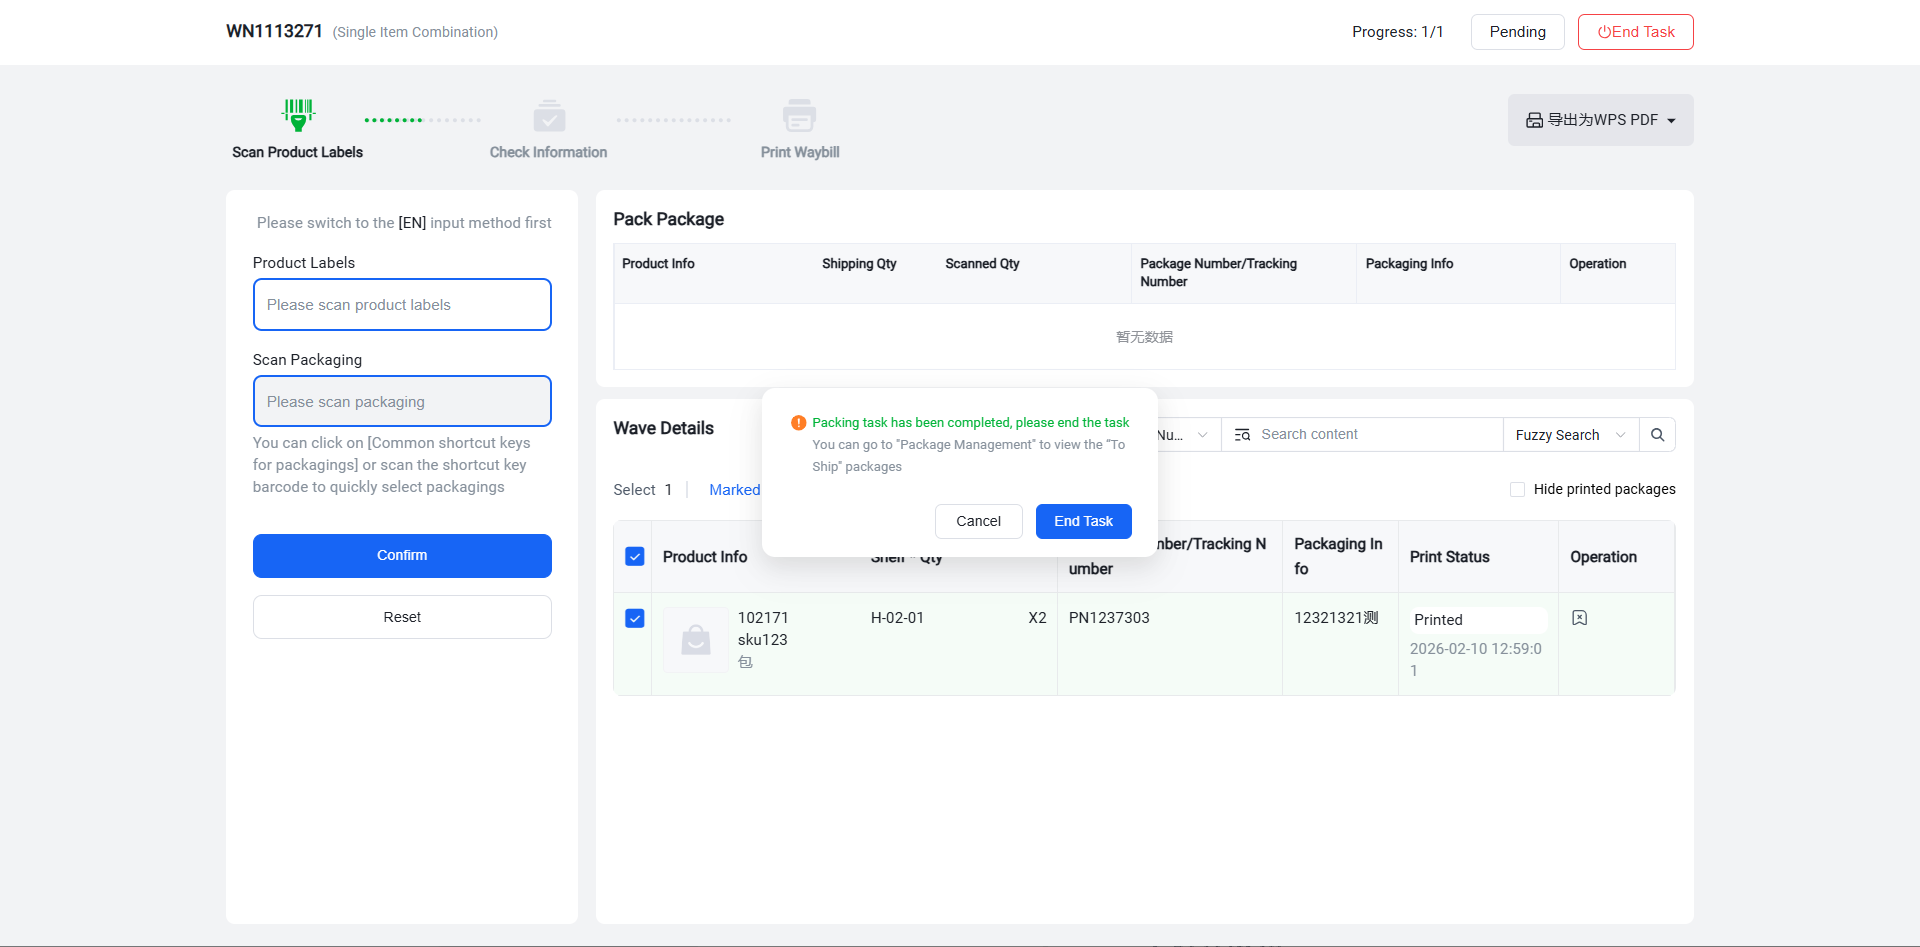
After picking is completed and the status is "Pending Packaging," open Jifeng WMS > Outbound > Scan to Pack (refer to the tutorial images below).
(Overseas warehouses can also, based on their own needs, directly print shipping labels from the wave page.)
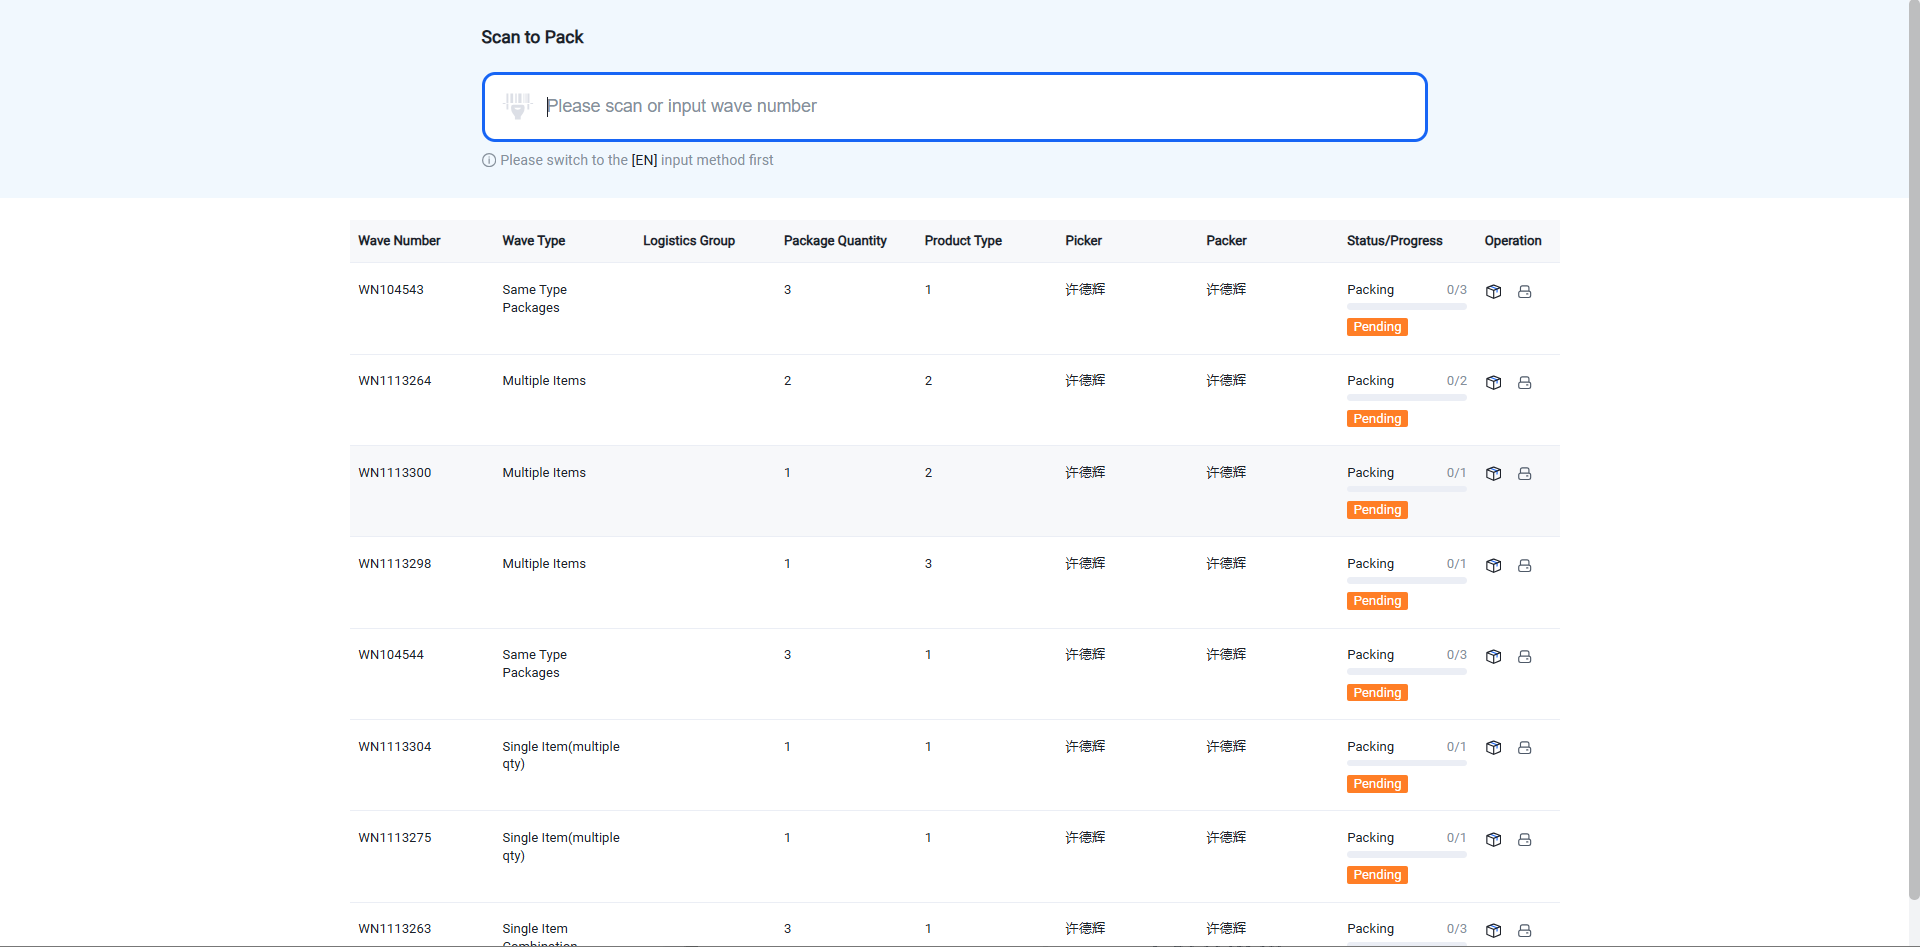
Scan the order SKUs sequentially. After packing is completed, click "End Task".
Step 7: Shipping
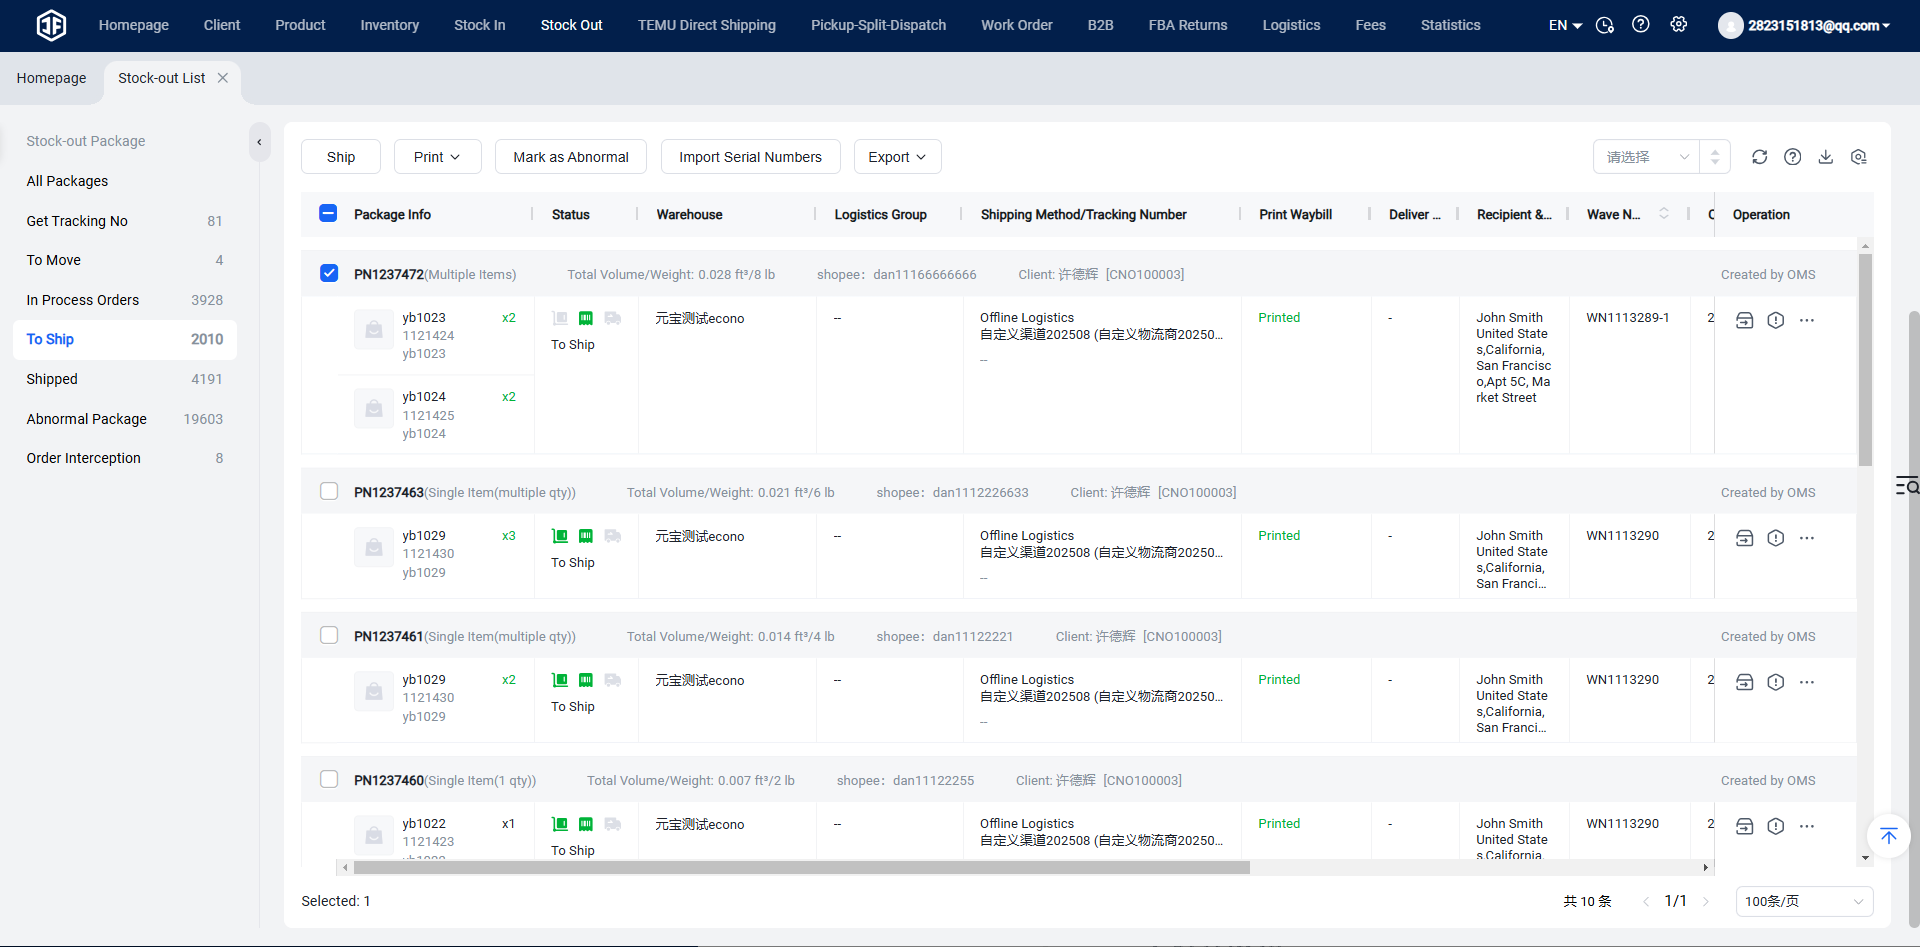
After the warehouse prints the shipping labels and packages the goods, you can click "Ship", use scan-to-ship (with or without weighing), or configure the system to auto-ship upon label printing.
Method 1: Manual Shipping Outbound > Outbound Packages > Pending Shipment > Select order(s) > Click "Ship".
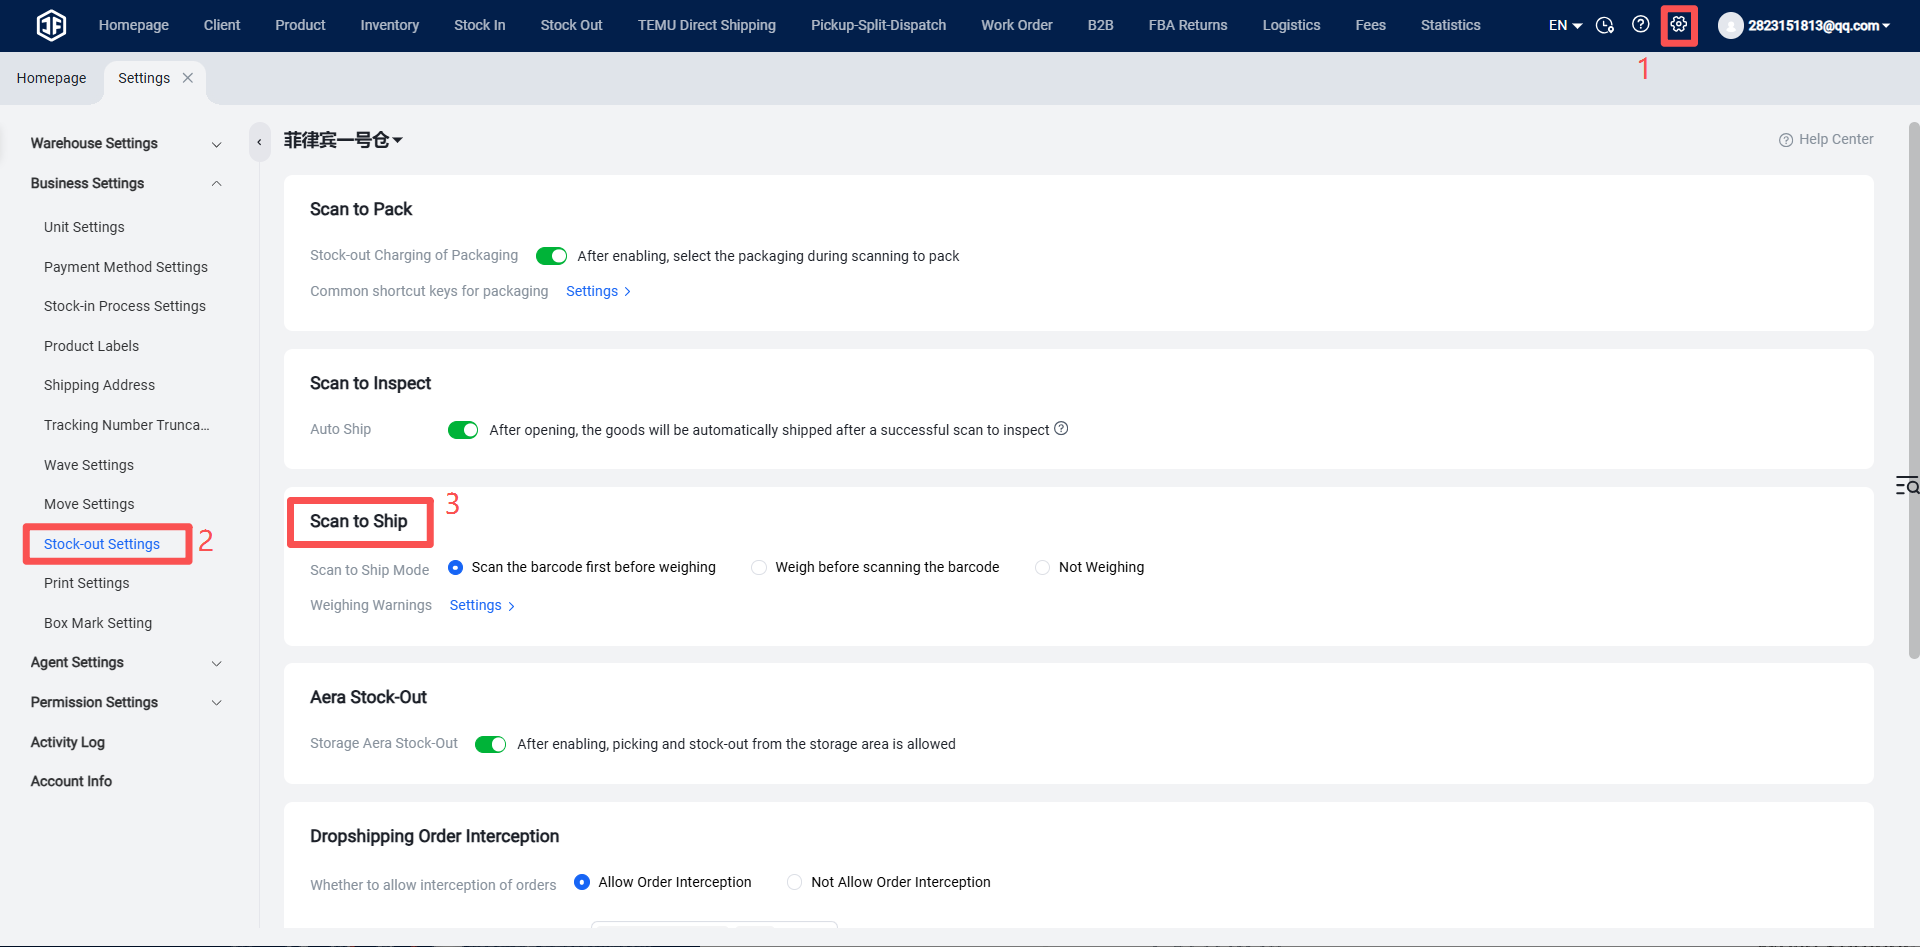
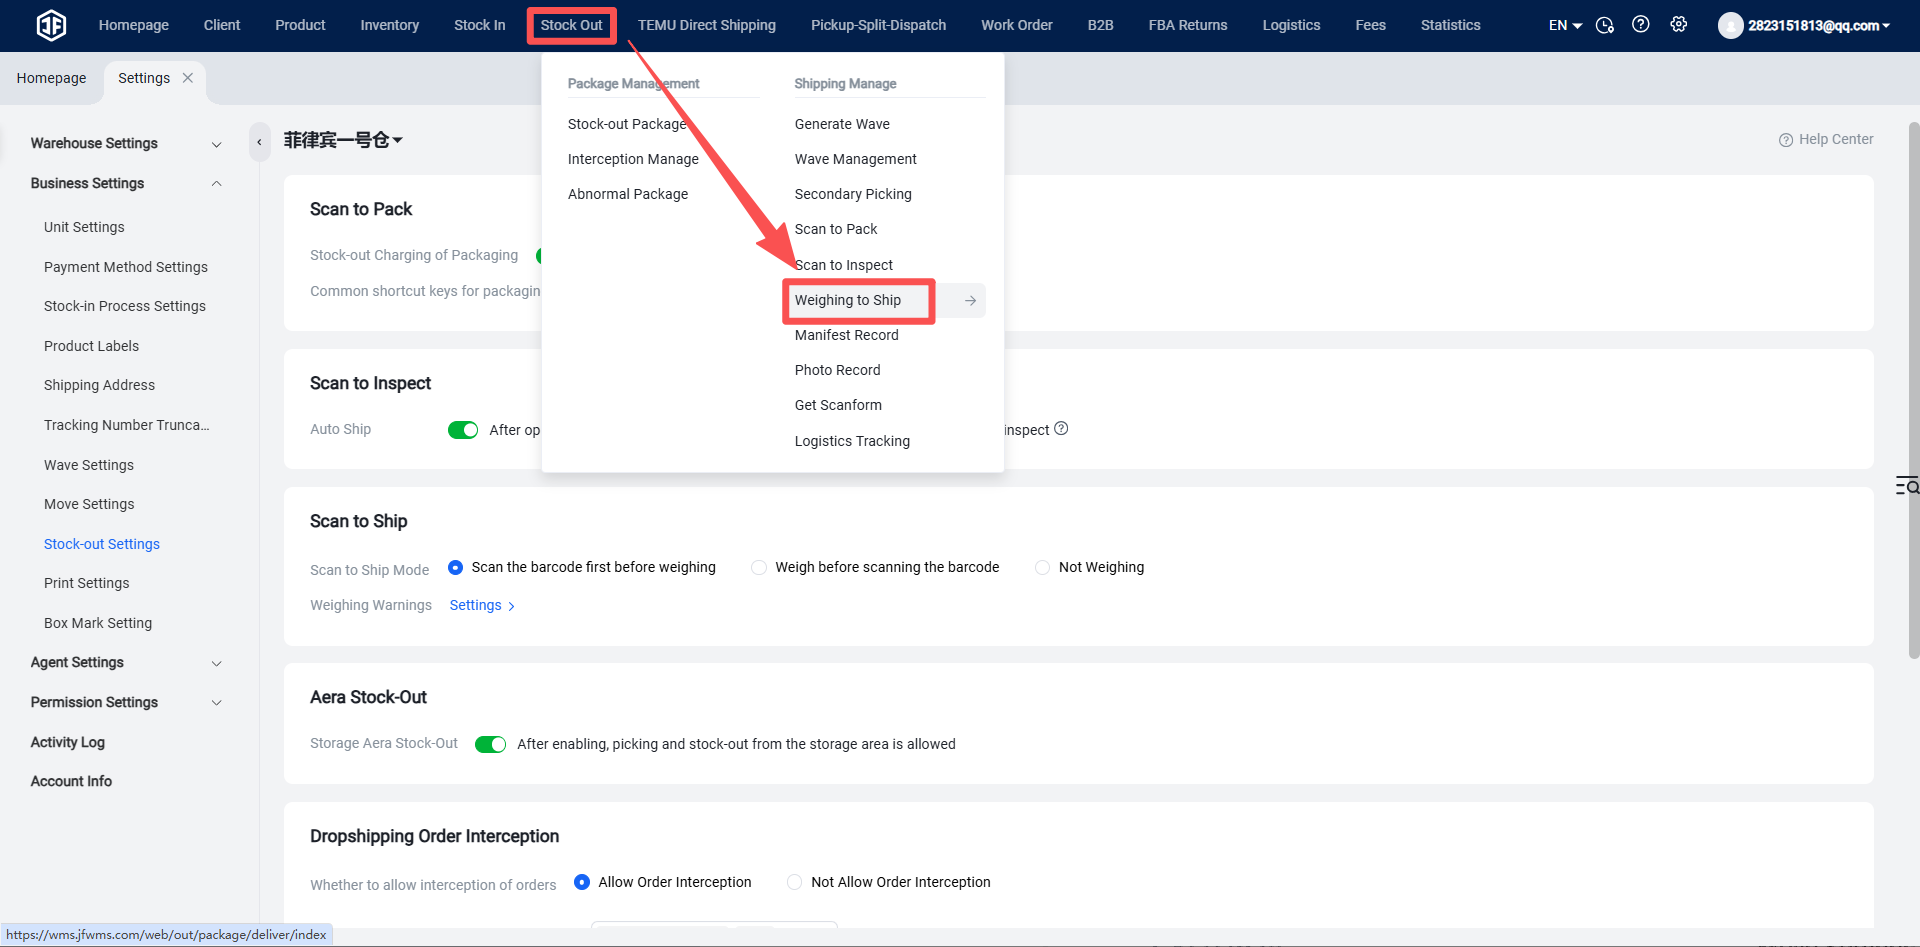
Method 2: Scan to Ship or Weigh and Scan to Ship First, configure the scan-to-ship settings.
Then proceed with scan-to-ship.
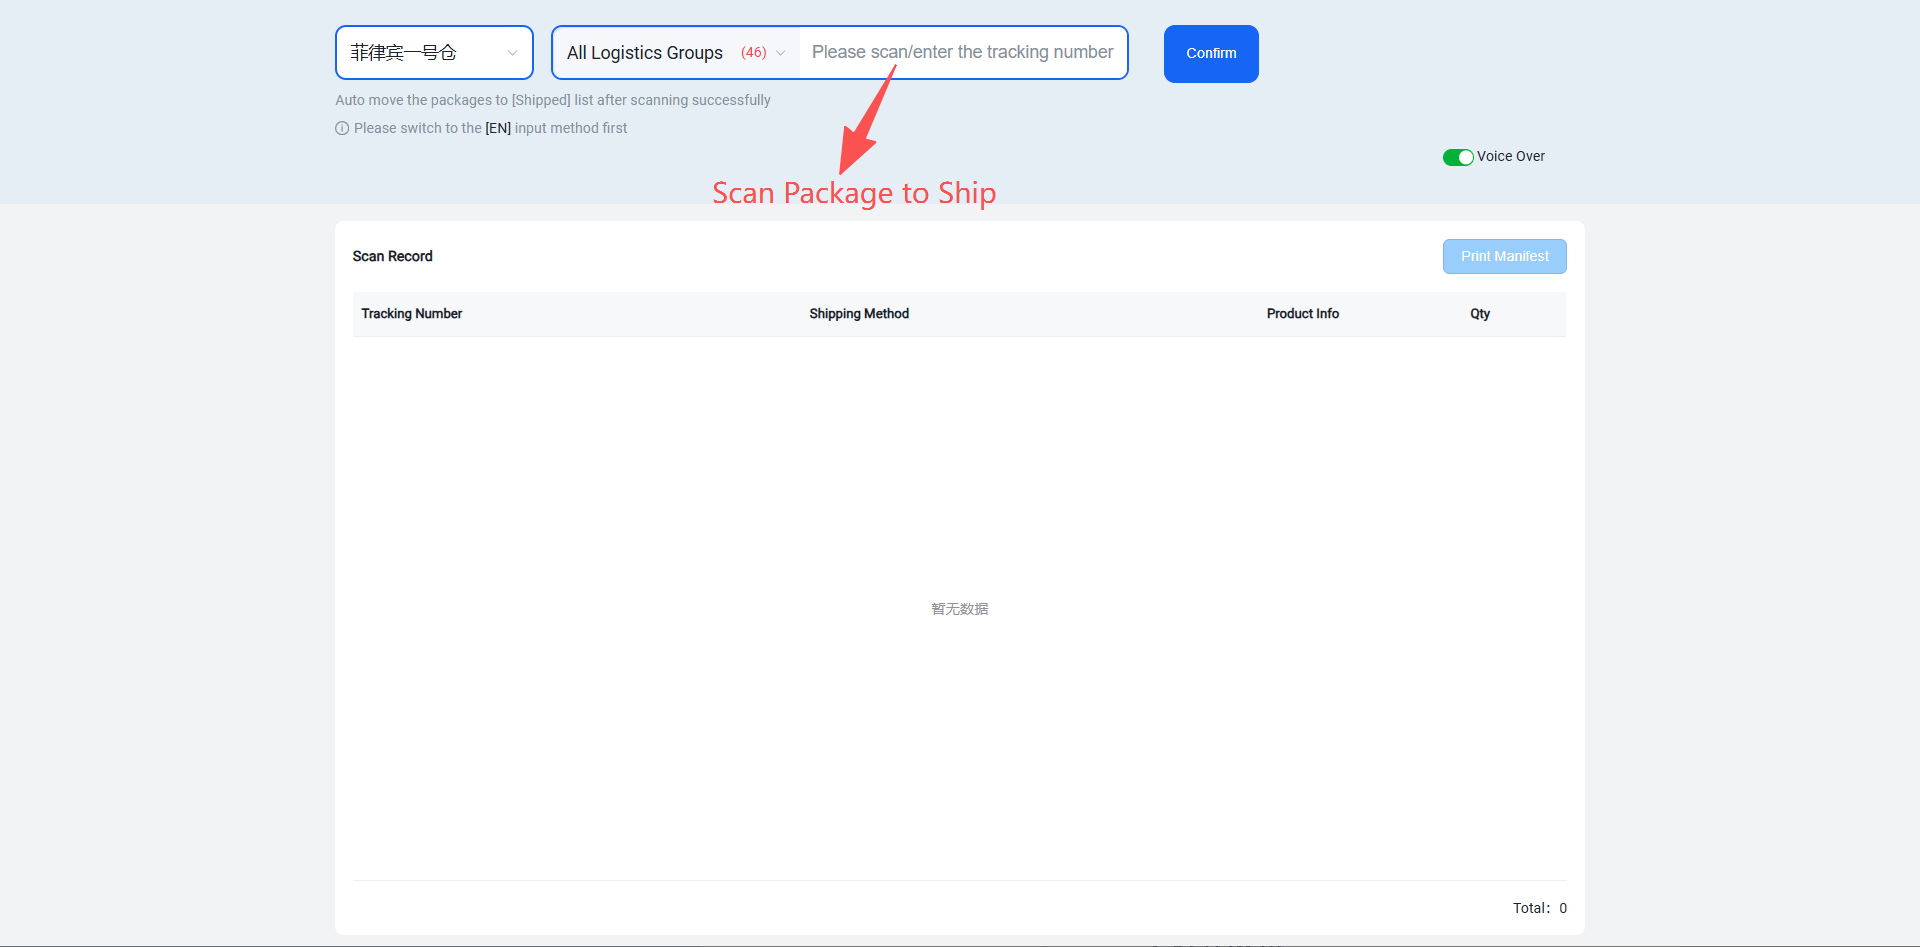
On this screen, scan the package's tracking number to mark it as shipped.
Method 3: Configure Auto-Ship Upon Printing Shipping Label