Quick Overview of System Settings
I. Definition
This section provides an overview of the configuration options within the Jifeng WMS system, including warehouse settings, business settings, agent settings, permission settings, service authorizations, operation logs, and account information.
II. Basic Introduction
1. Warehouse Settings
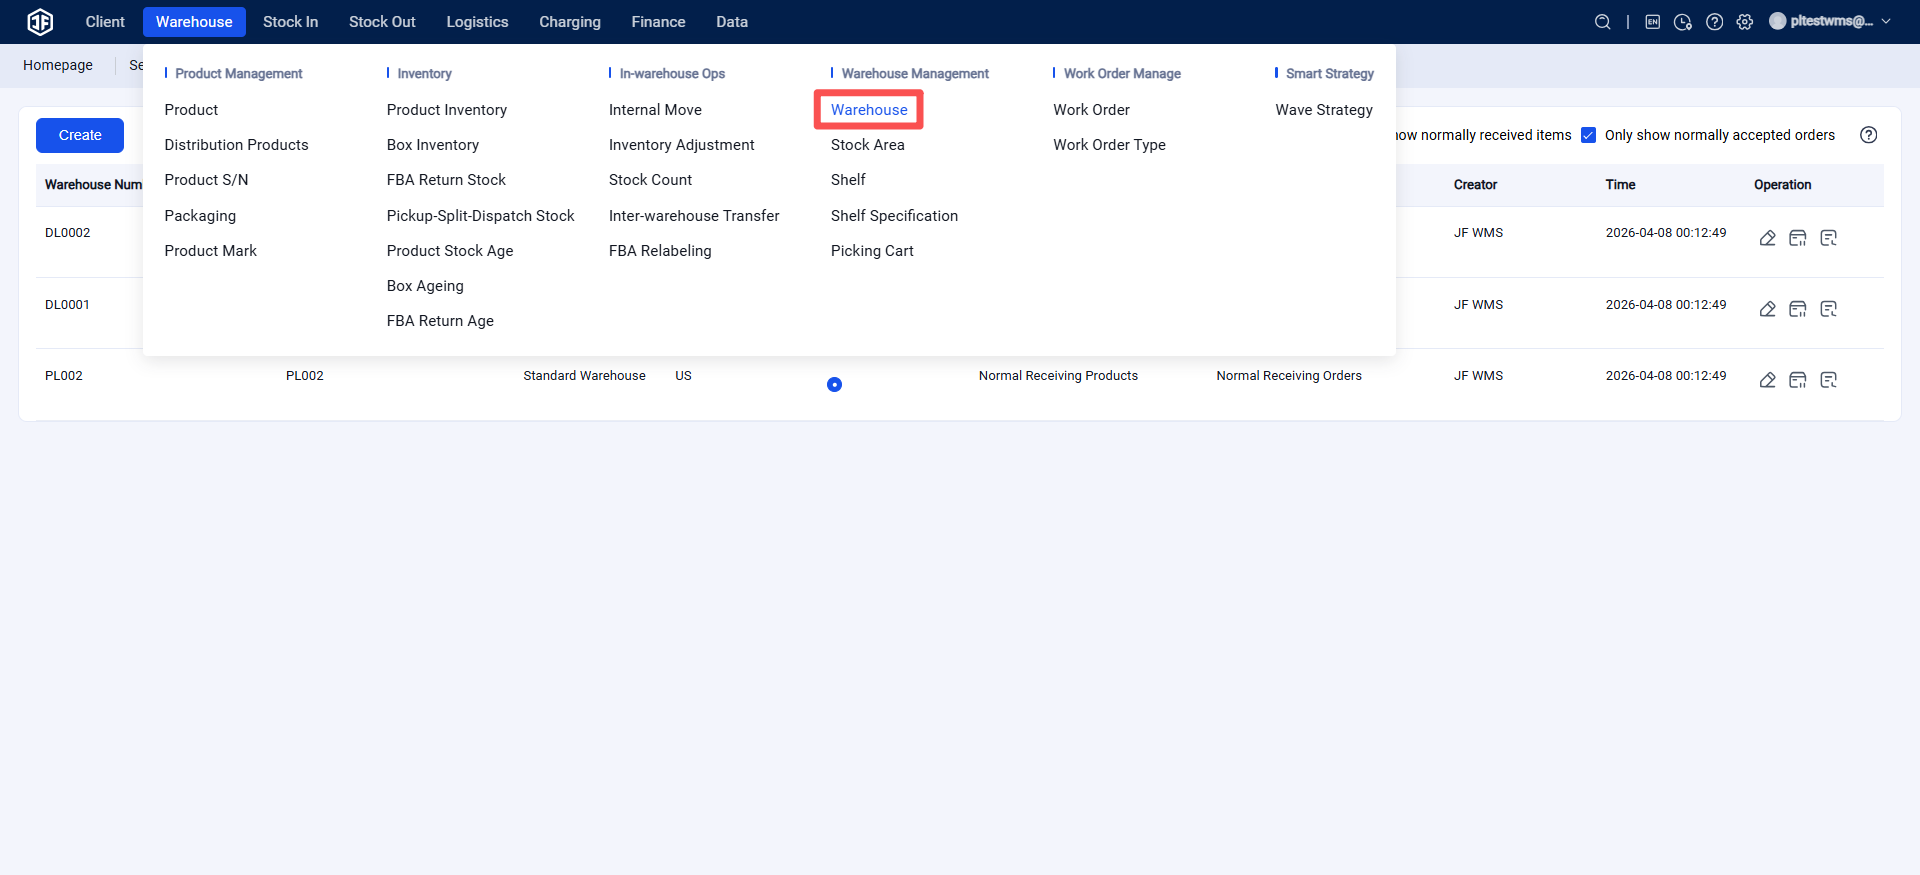
(1) Warehouse Management List
Displays and allows creation of new warehouses, showing details such as warehouse activation time, warehouse type, warehouse country location, etc.
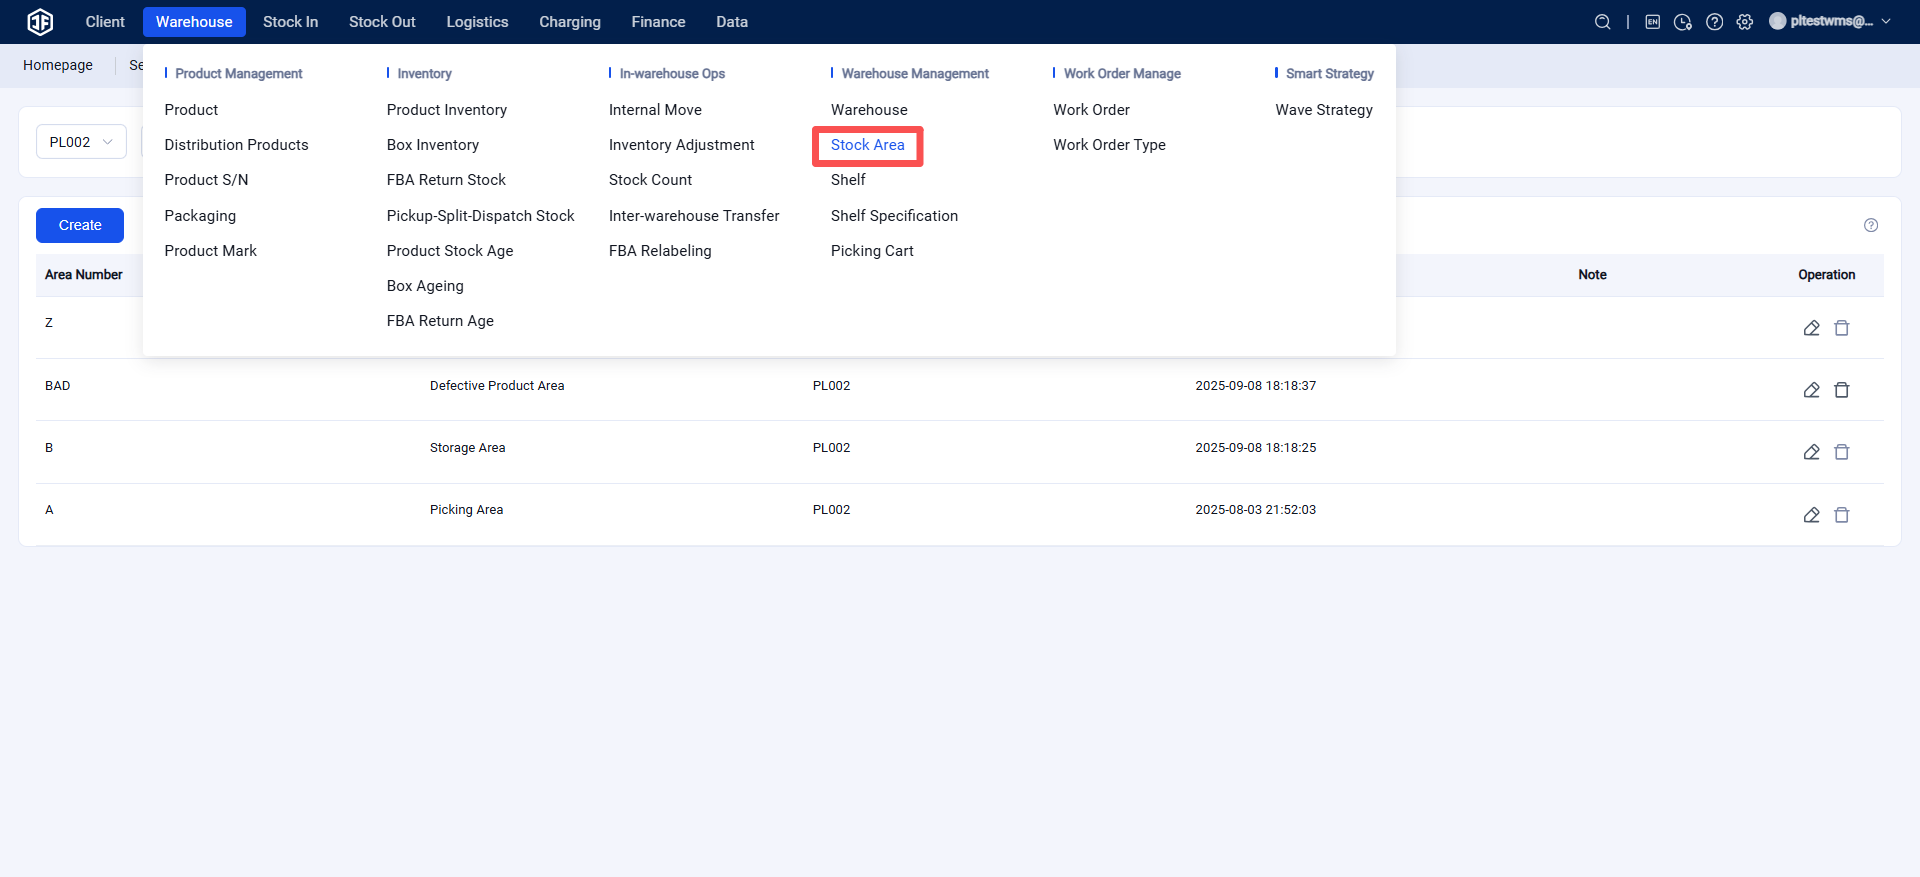
(2) Zone List
Displays and allows creation of warehouse zone types and their associated warehouses. Zone types mainly include: picking zone, storage zone, defective goods zone, and transfer zone.
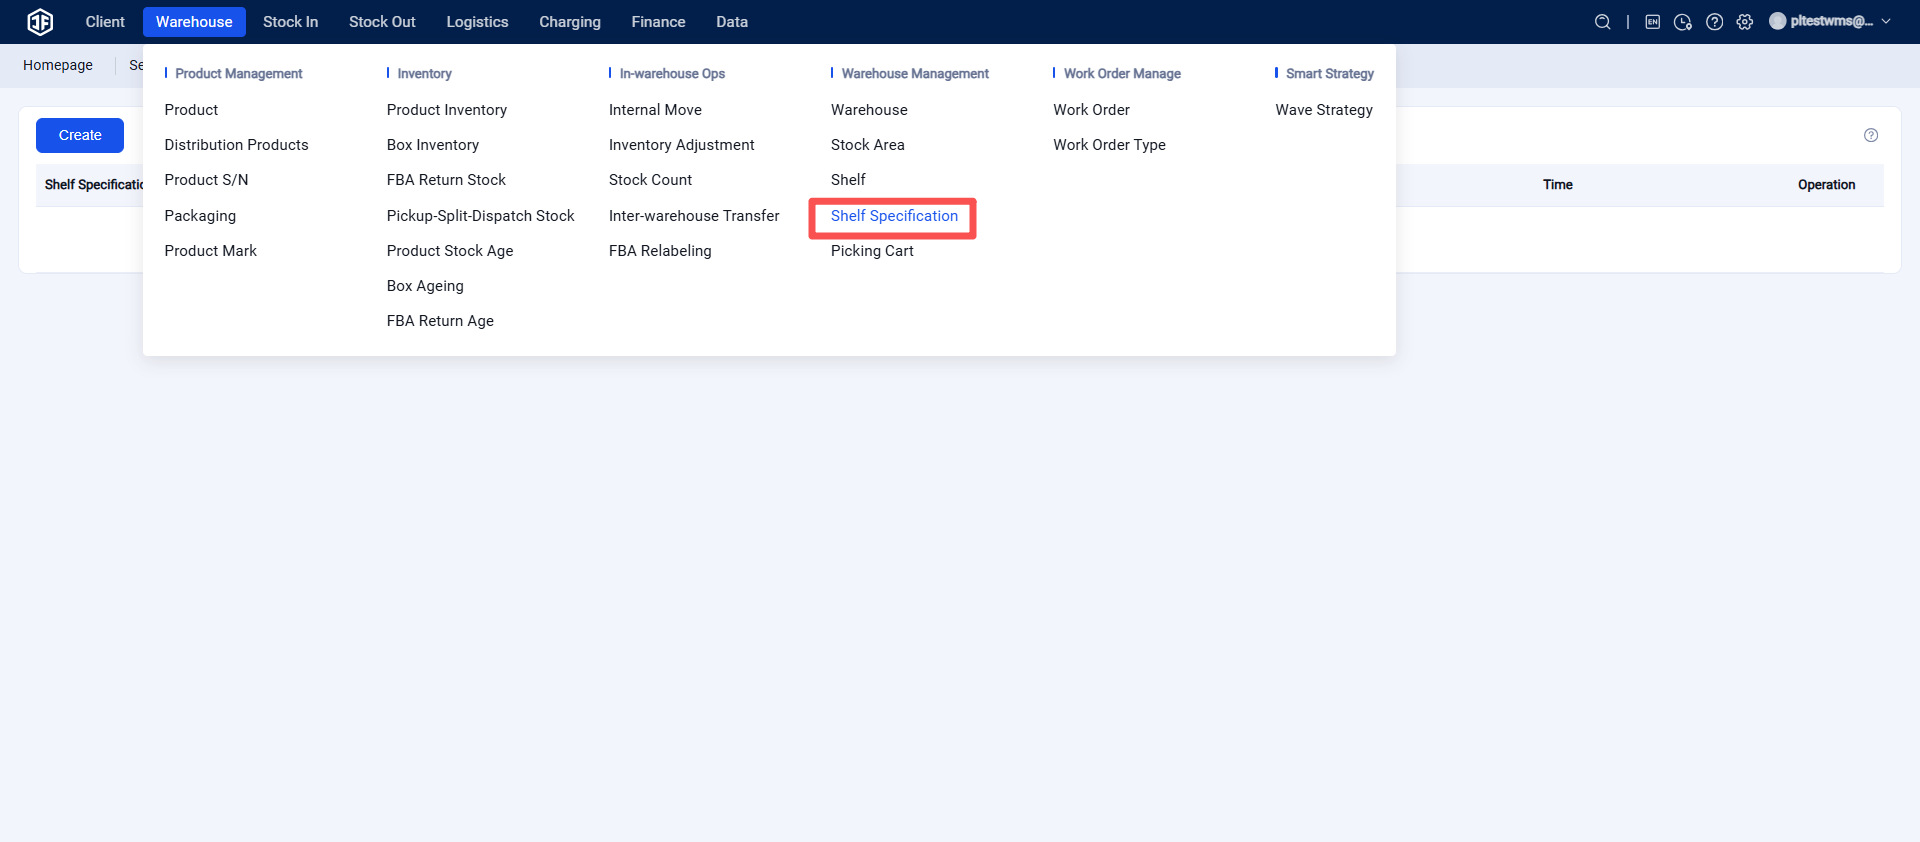
(3) Rack Location Specifications
Displays and allows creation of rack location dimensions (length, width, height) configured for the overseas warehouse.
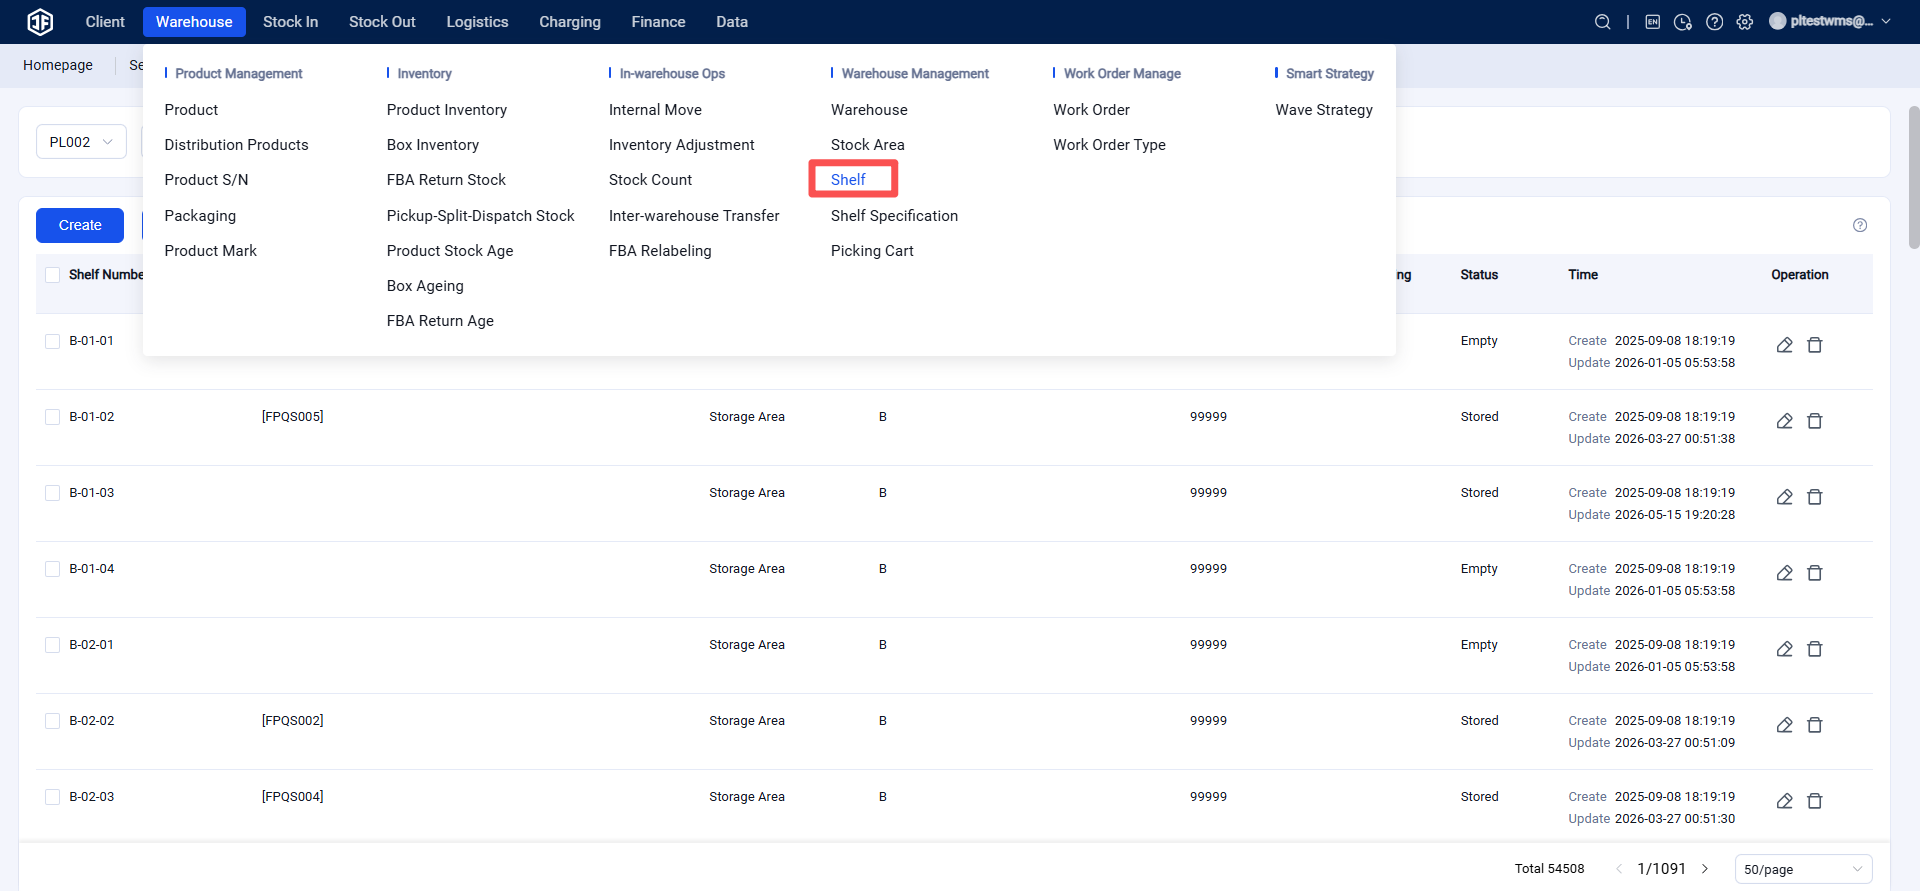
(4) Rack Location List
Displays and allows creation of rack location numbers, stored product information, the zone where the rack is located (including zone number), rack specifications, picking priority, and rack status (occupied or available).
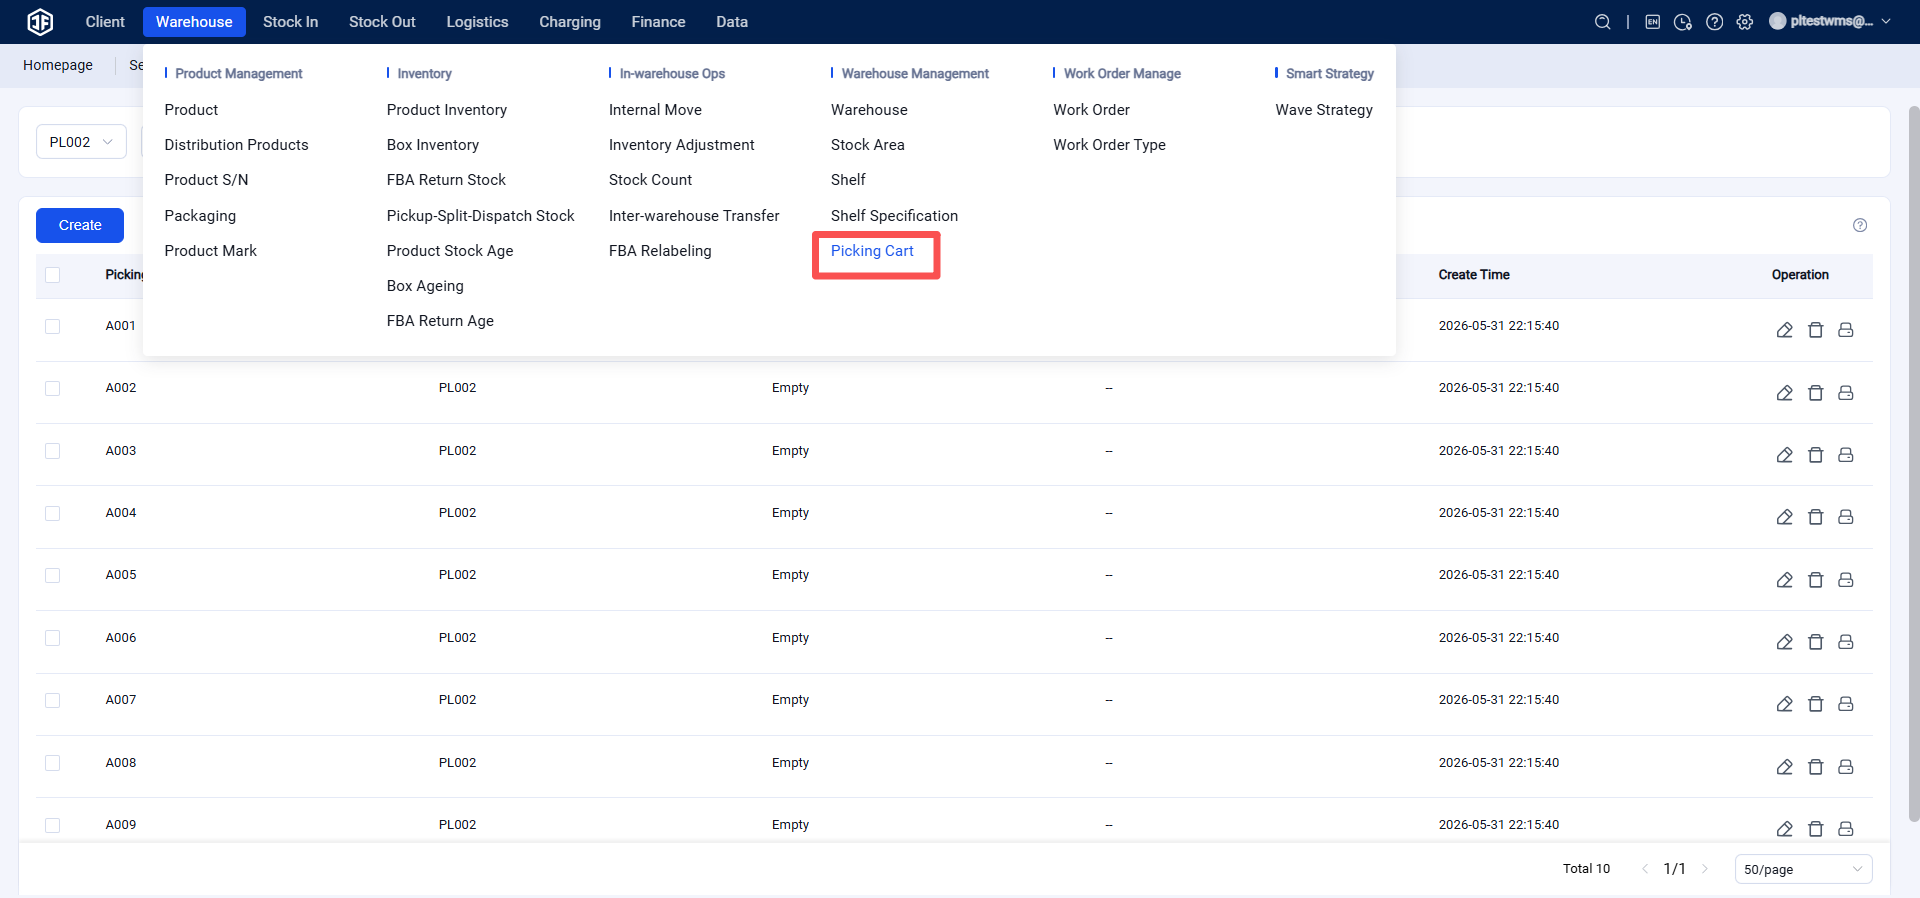
(5) Picking Cart Management
Displays and allows creation of picking carts, printing of picking cart labels, and shows which warehouse the picking cart belongs to, its current status, and the picking wave it is currently assigned to.
2. Business Settings
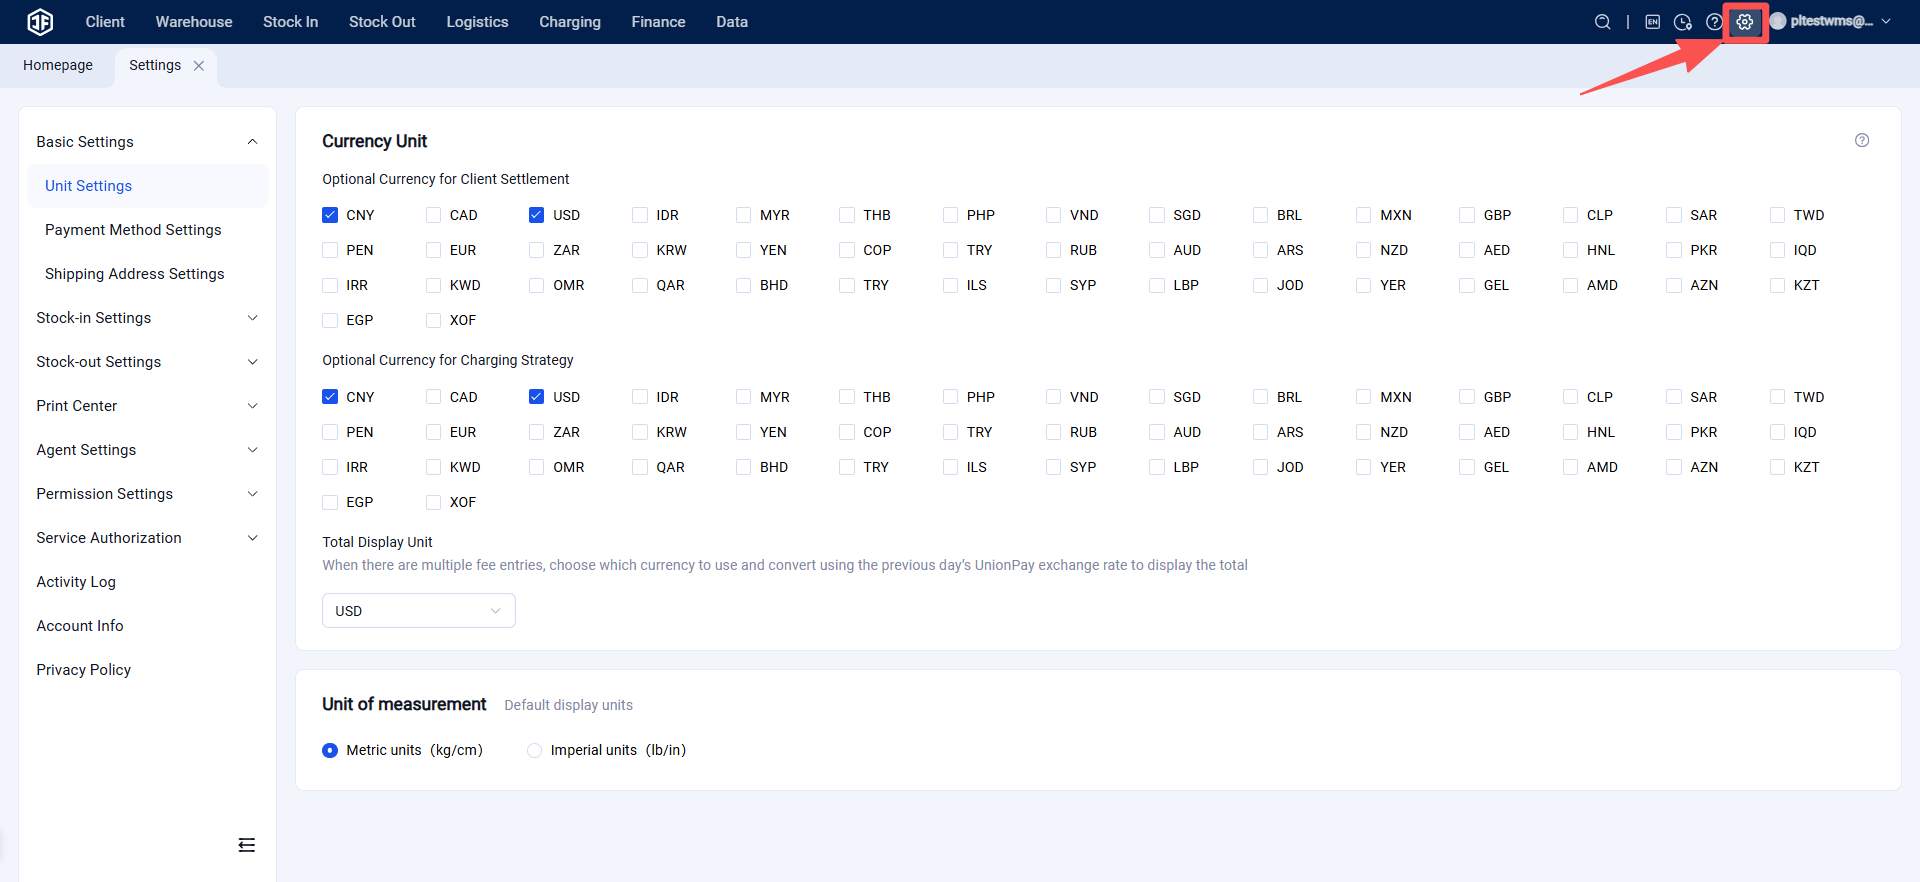
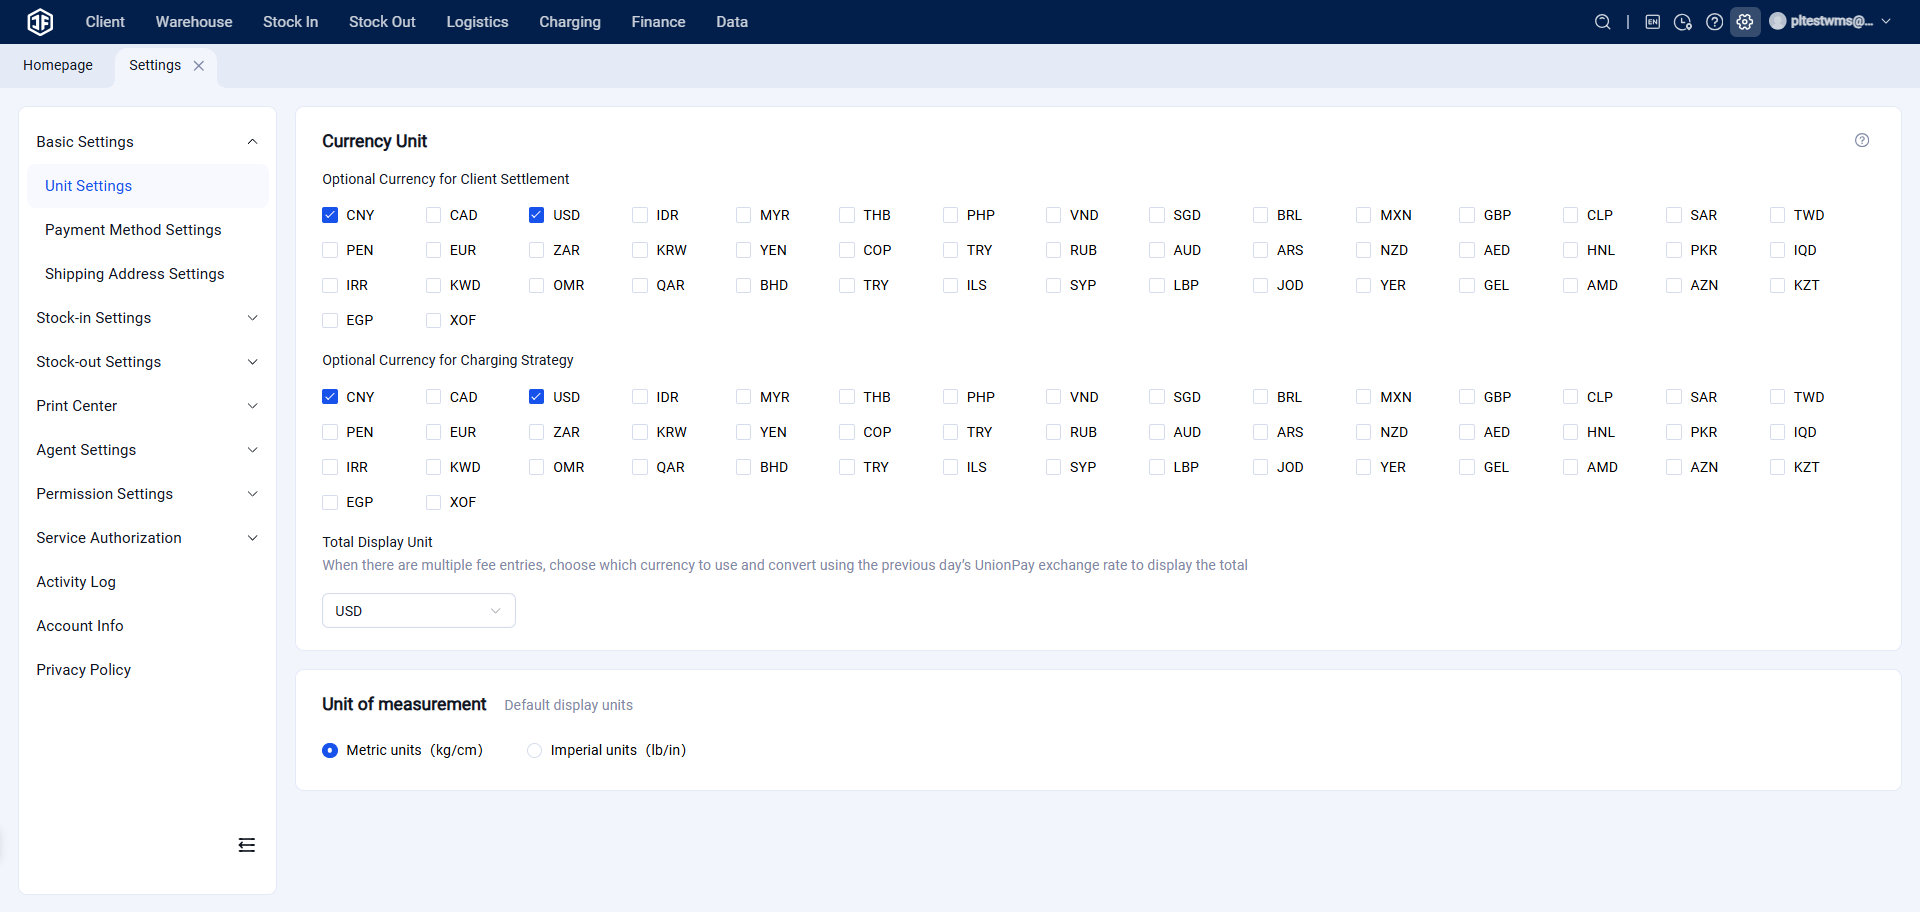
(1) Unit Settings
Displays the available currencies for customer settlement, billing measurement currencies, and the warehouse system's measurement units (e.g., kg/cm or lb/in).
(2) Payment Method Settings
Configure customer top-up methods in the warehouse system, supported currency units, applicable warehouses, and designated approvers.
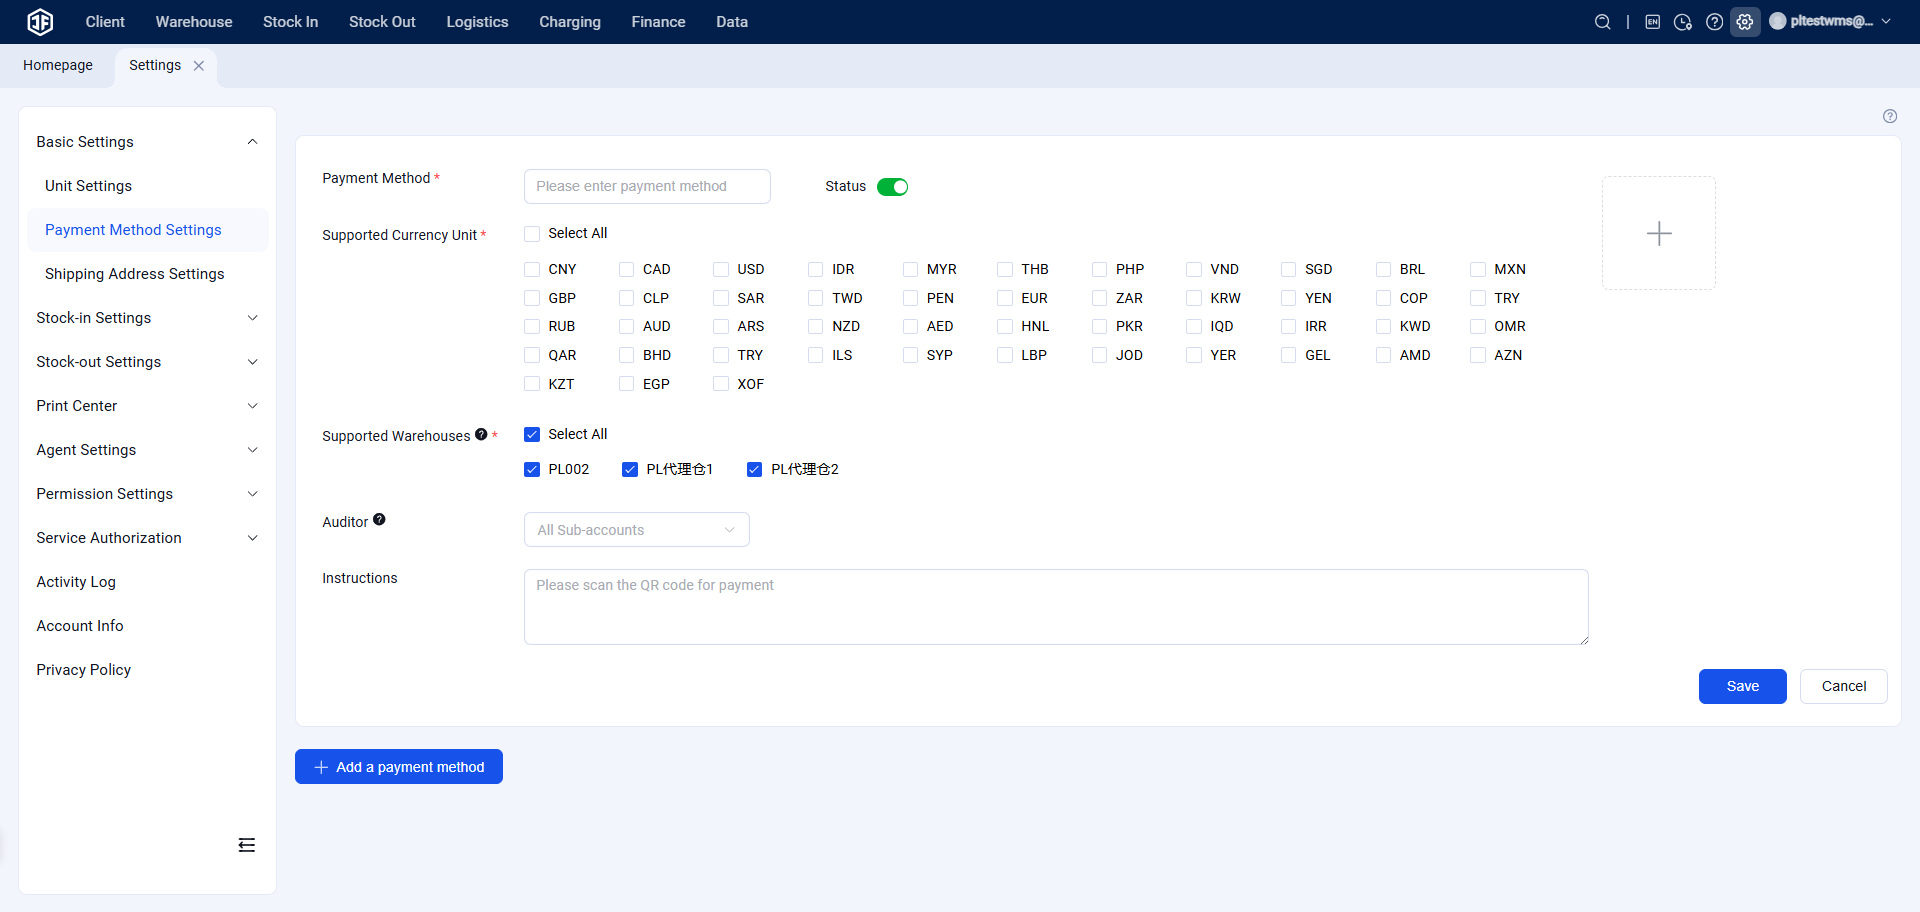
(2) Display customer settlement currency options, billing measurement currency options, and warehouse system measurement units (kg/cm or lb/in).
(3) Inbound Process Settings
① Receiving Settings:
Multi‑Carton per Order Setting: Choose whether an inbound order with multiple cartons should be received as a whole order or scanned carton by carton.
Product Label Scanning Setting: Set whether to scan each product individually by default or scan once and enter quantity.
Inbound Order Validation for Product Dimensions/Weight: Decide whether to validate product weight and dimensions when inbound orders are pushed.
Direct‑Mail Order Receiving Process: For warehouses handling direct‑mail orders, enable scanning of parcels upon receipt to confirm the quantity of received Temu customer Y2 direct‑mail parcels.
Batch Receiving for Carton‑Based Inbound: Allow inbound orders to be received in batches when processed by carton.
② Put‑away Process:
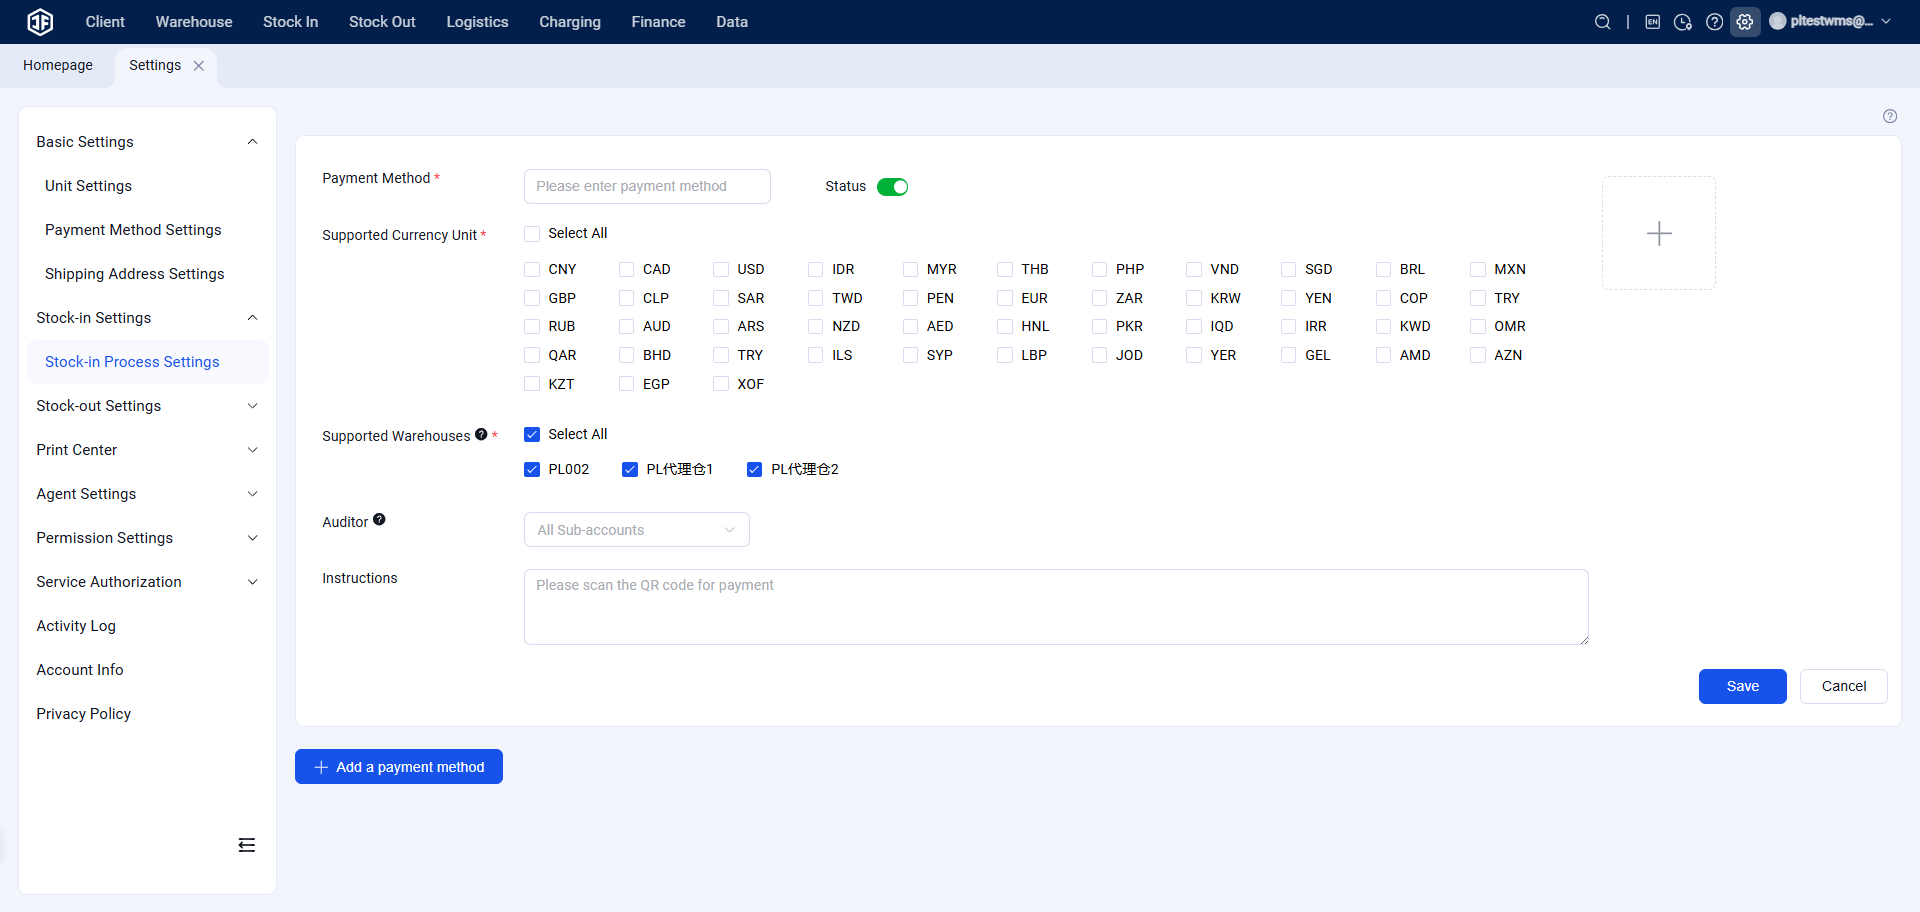
Put‑away Flow Setting: When goods arrive, choose whether to first complete receiving and then proceed to put‑away, or directly assign a rack location during receiving for immediate put‑away.
New Product Rack Location Recommendation: When the warehouse receives goods, decide whether to recommend available rack locations automatically. If "No recommendation" is selected, the warehouse must manually choose a location.
(4) Product Labels
Scanning Settings:
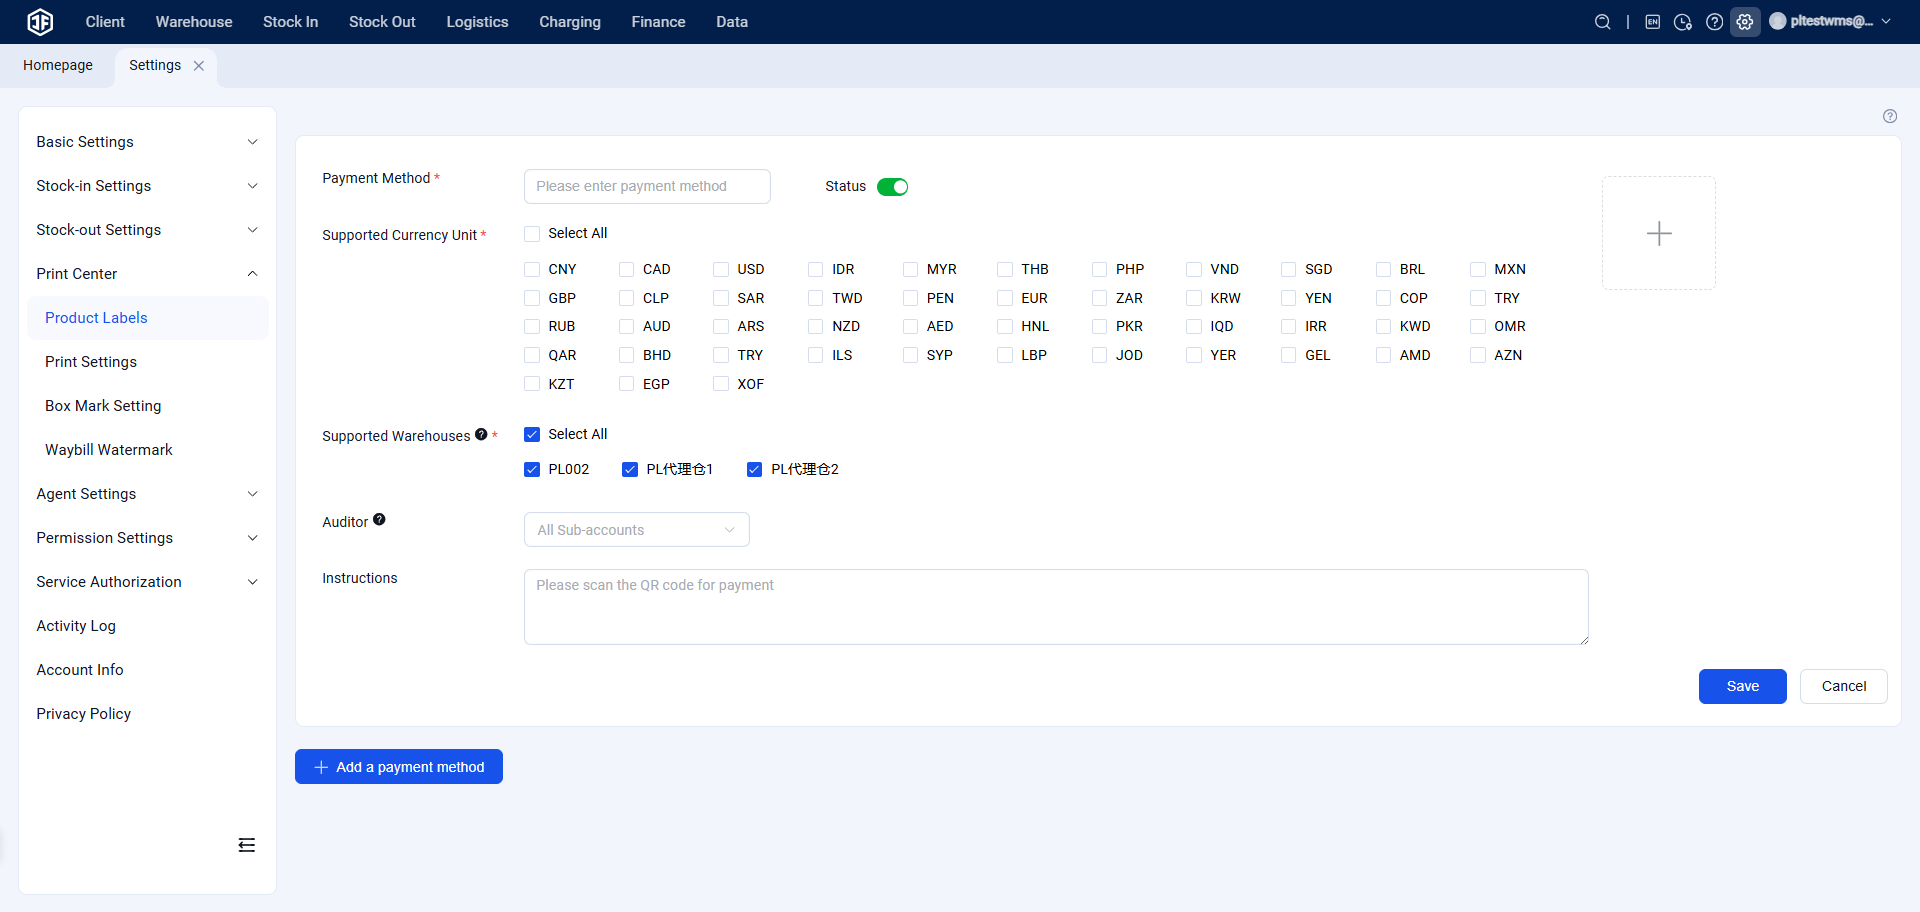
Configure which barcode(s) the warehouse system can scan to identify a product. Options include product code, product SKU, or the product's own identification barcode. One or all of these can be set as recognizable barcodes.
Label Template:
To enable sellers to print warehouse product labels from the seller portal, click [Create Template] here to set up a label template. If no template is set, the standard product label template will be used by default.
(5) Shipping Address Settings
Shipping Address Configuration:
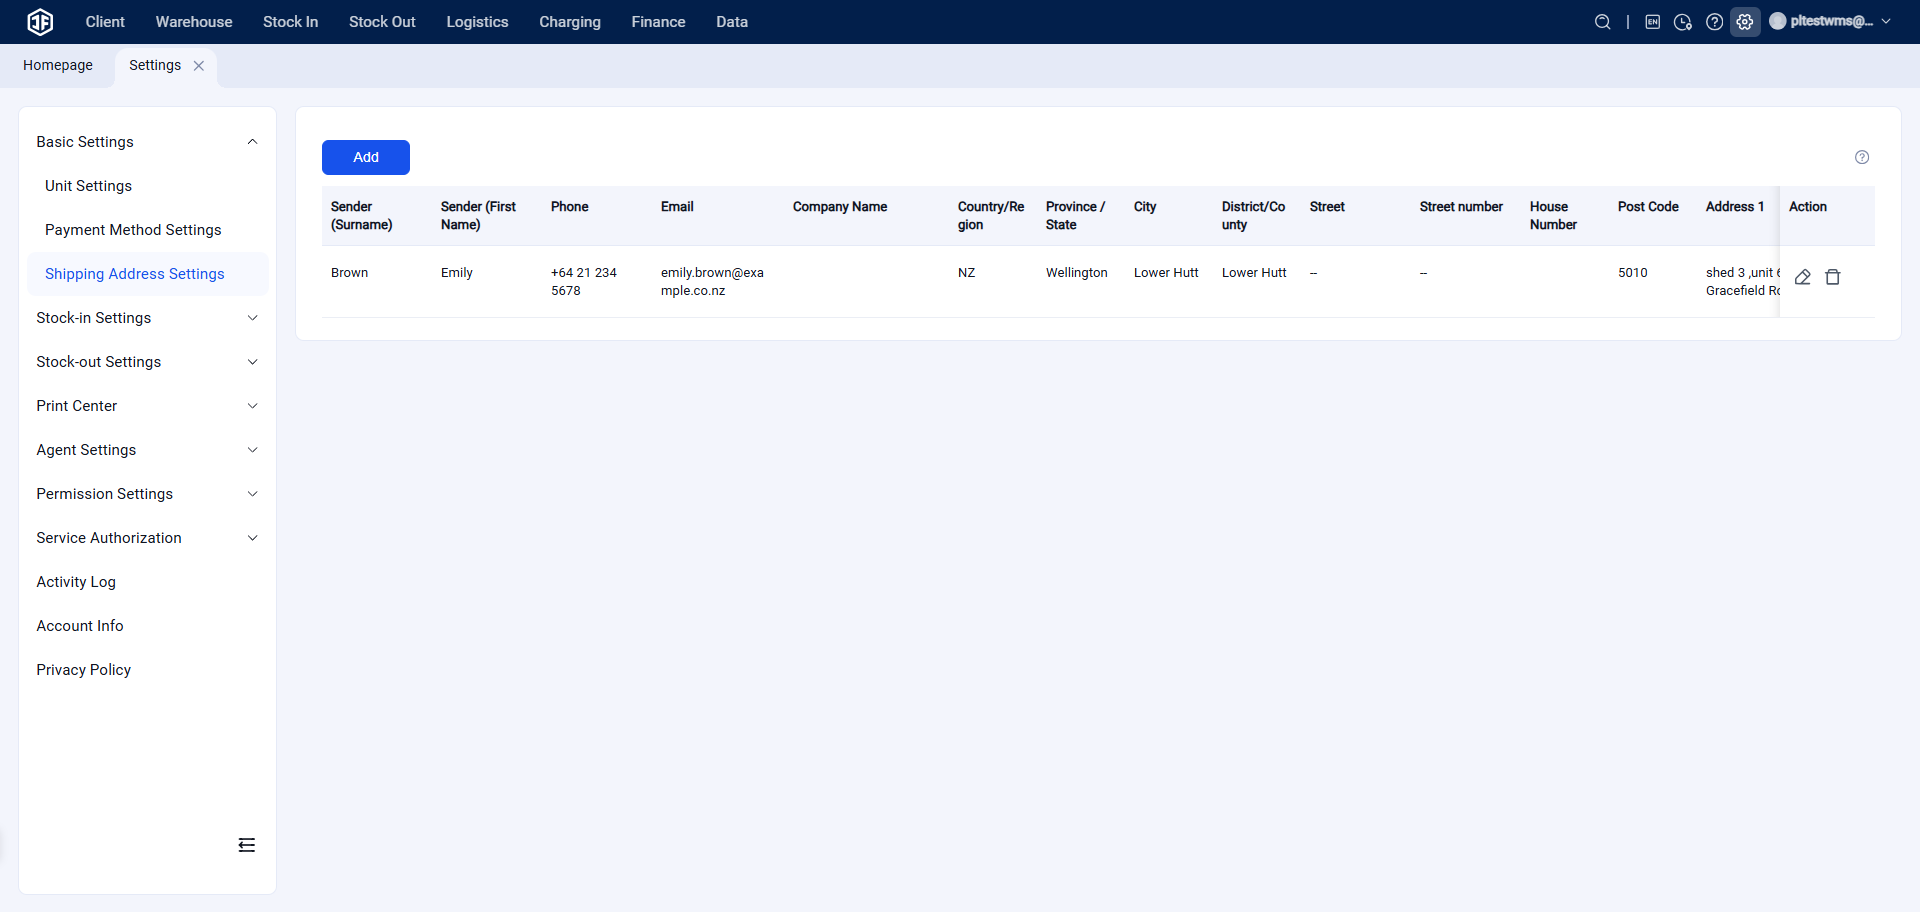
Click [Add Shipping Address] here to set up shipping addresses. This serves two purposes:
Provides the origin address required by offline logistics channels.
Allows quick selection of shipper information when creating stock transfer orders to other warehouses.
(6) Wave Settings
(1) General Settings:
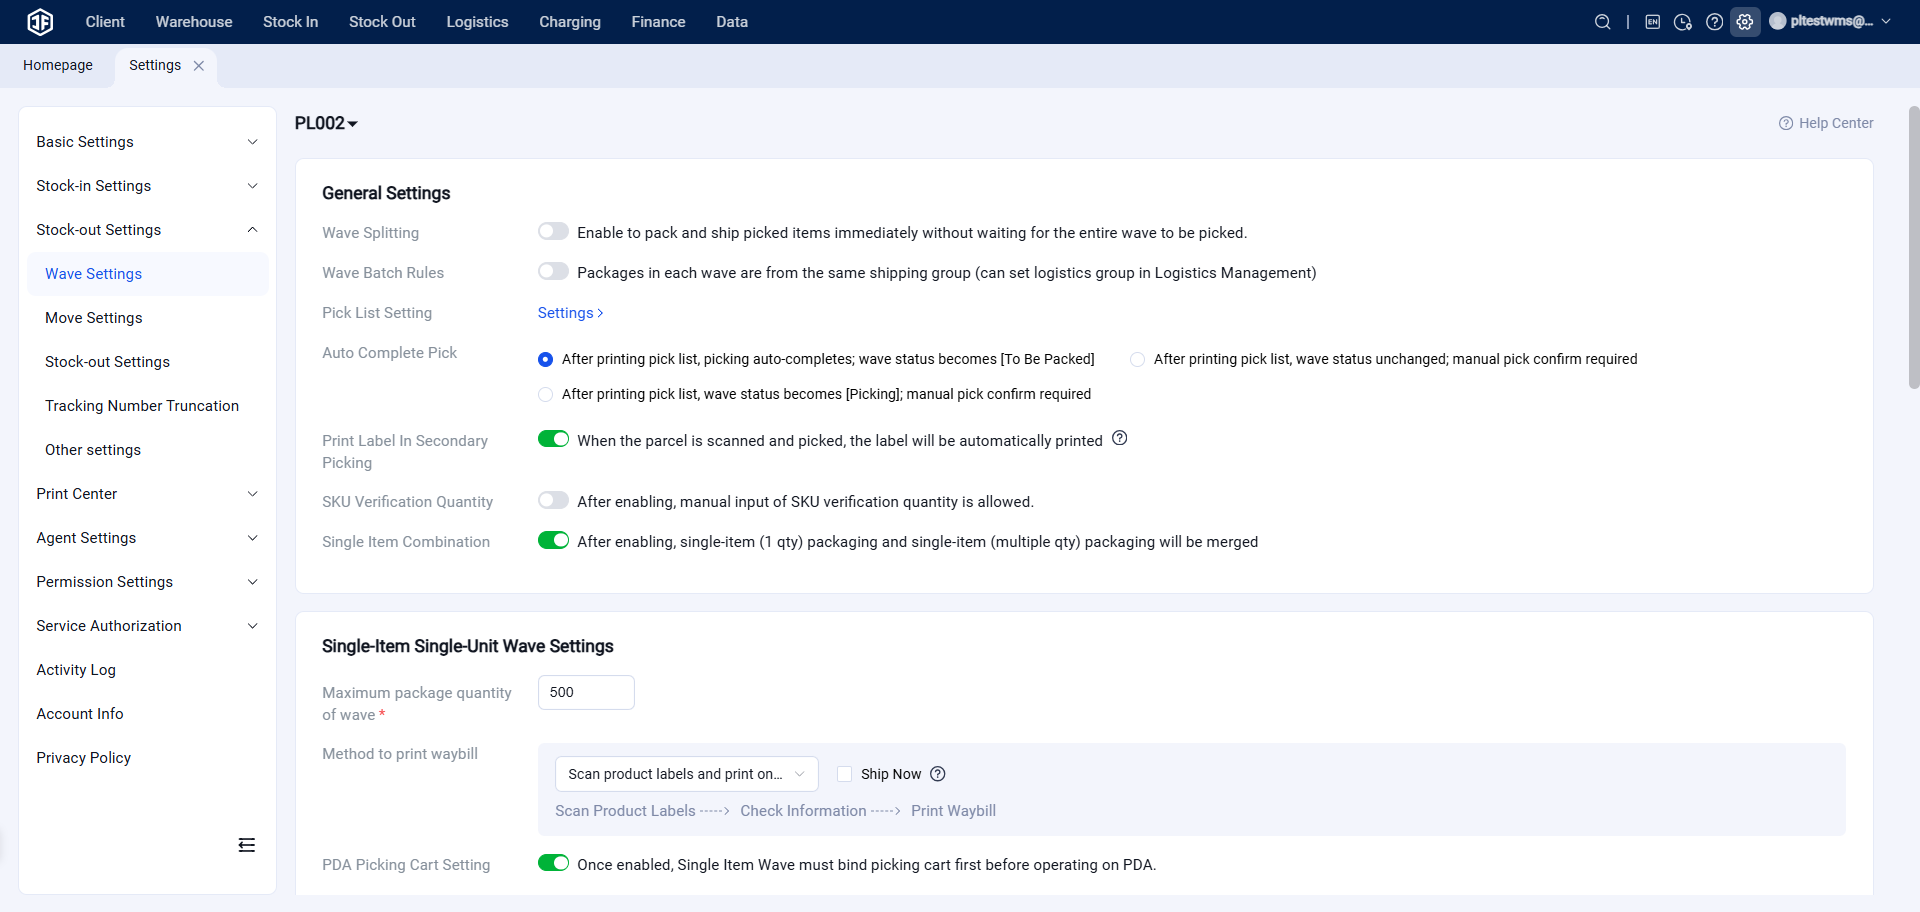
① Wave Grouping Rule: Packages within the same wave must belong to the same logistics group.
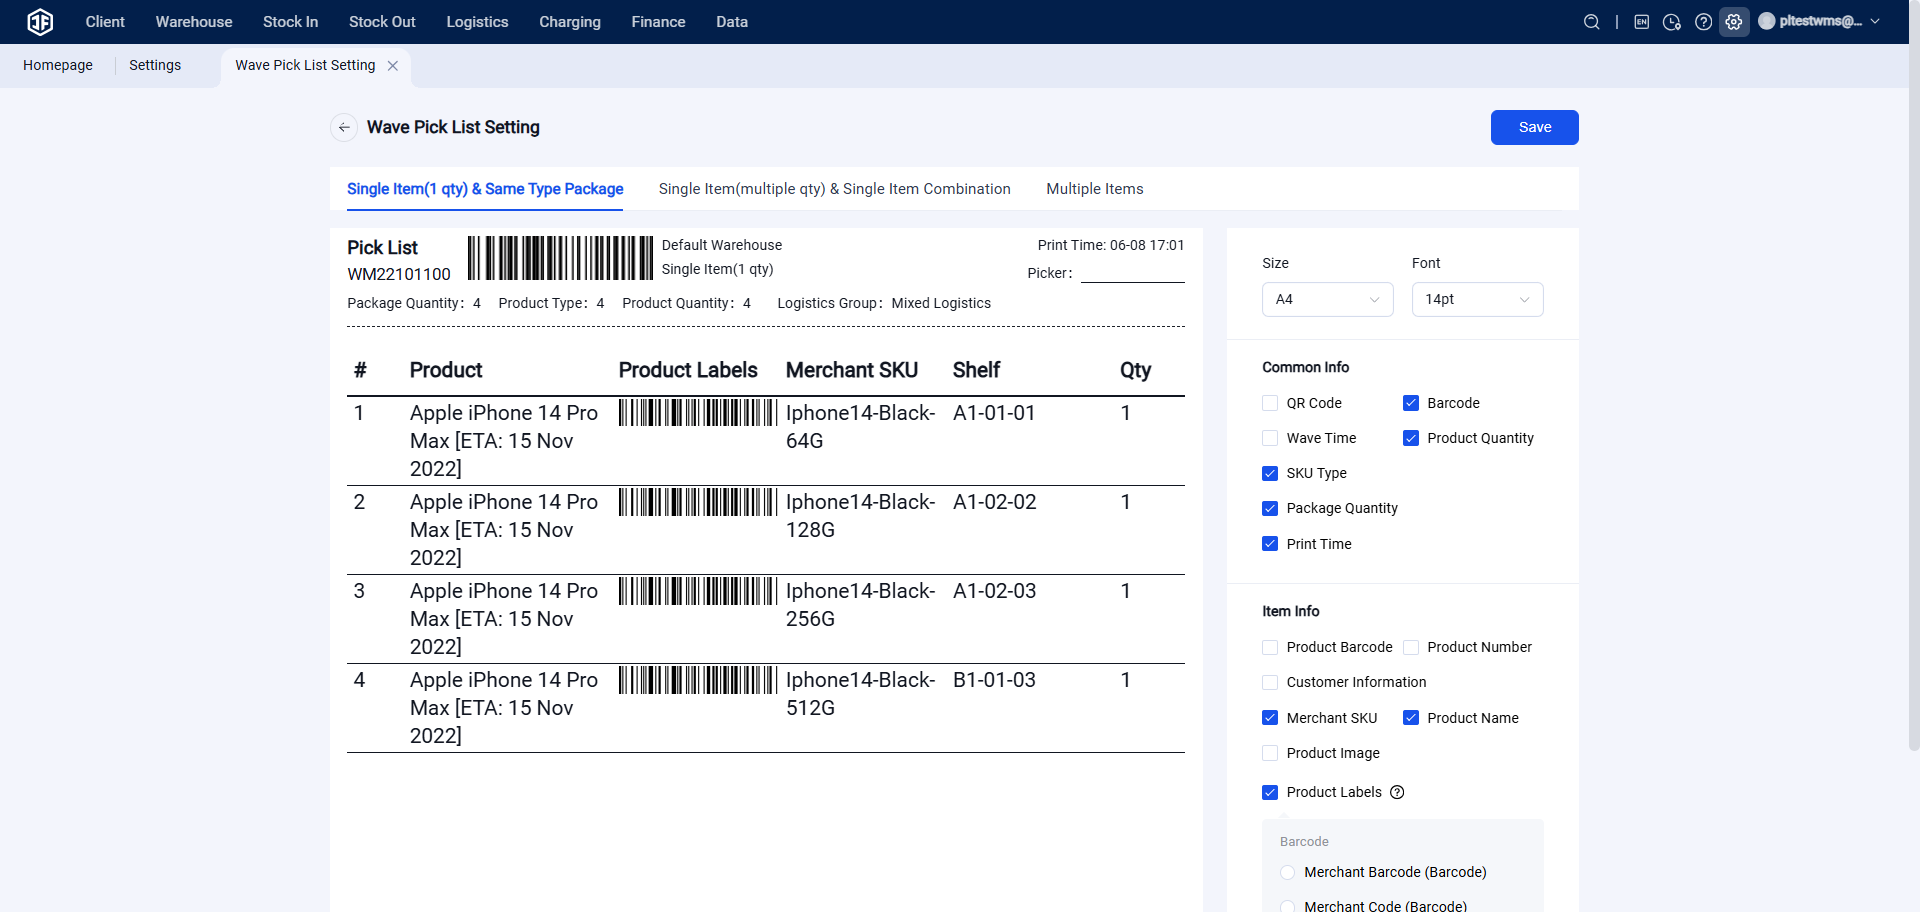
② Picking List Settings: Picking lists can be organized by product dimension or by package dimension. Configurations include paper size and the information displayed on the picking list.
③ Auto‑Confirm Picking: Normally, after a wave is generated, it enters "Pending Picking" status. Here, the wave picking list can be printed, and the wave only changes to "Pending Packaging" after picking is manually confirmed.
If Auto‑Confirm Picking is enabled, the system will automatically mark picking as complete once the picking list is printed, and the wave status will immediately change to "Pending Packaging."
④ Print Labels After Sorting: Determines whether shipping labels should be printed automatically after packages are sorted during the secondary sorting process.
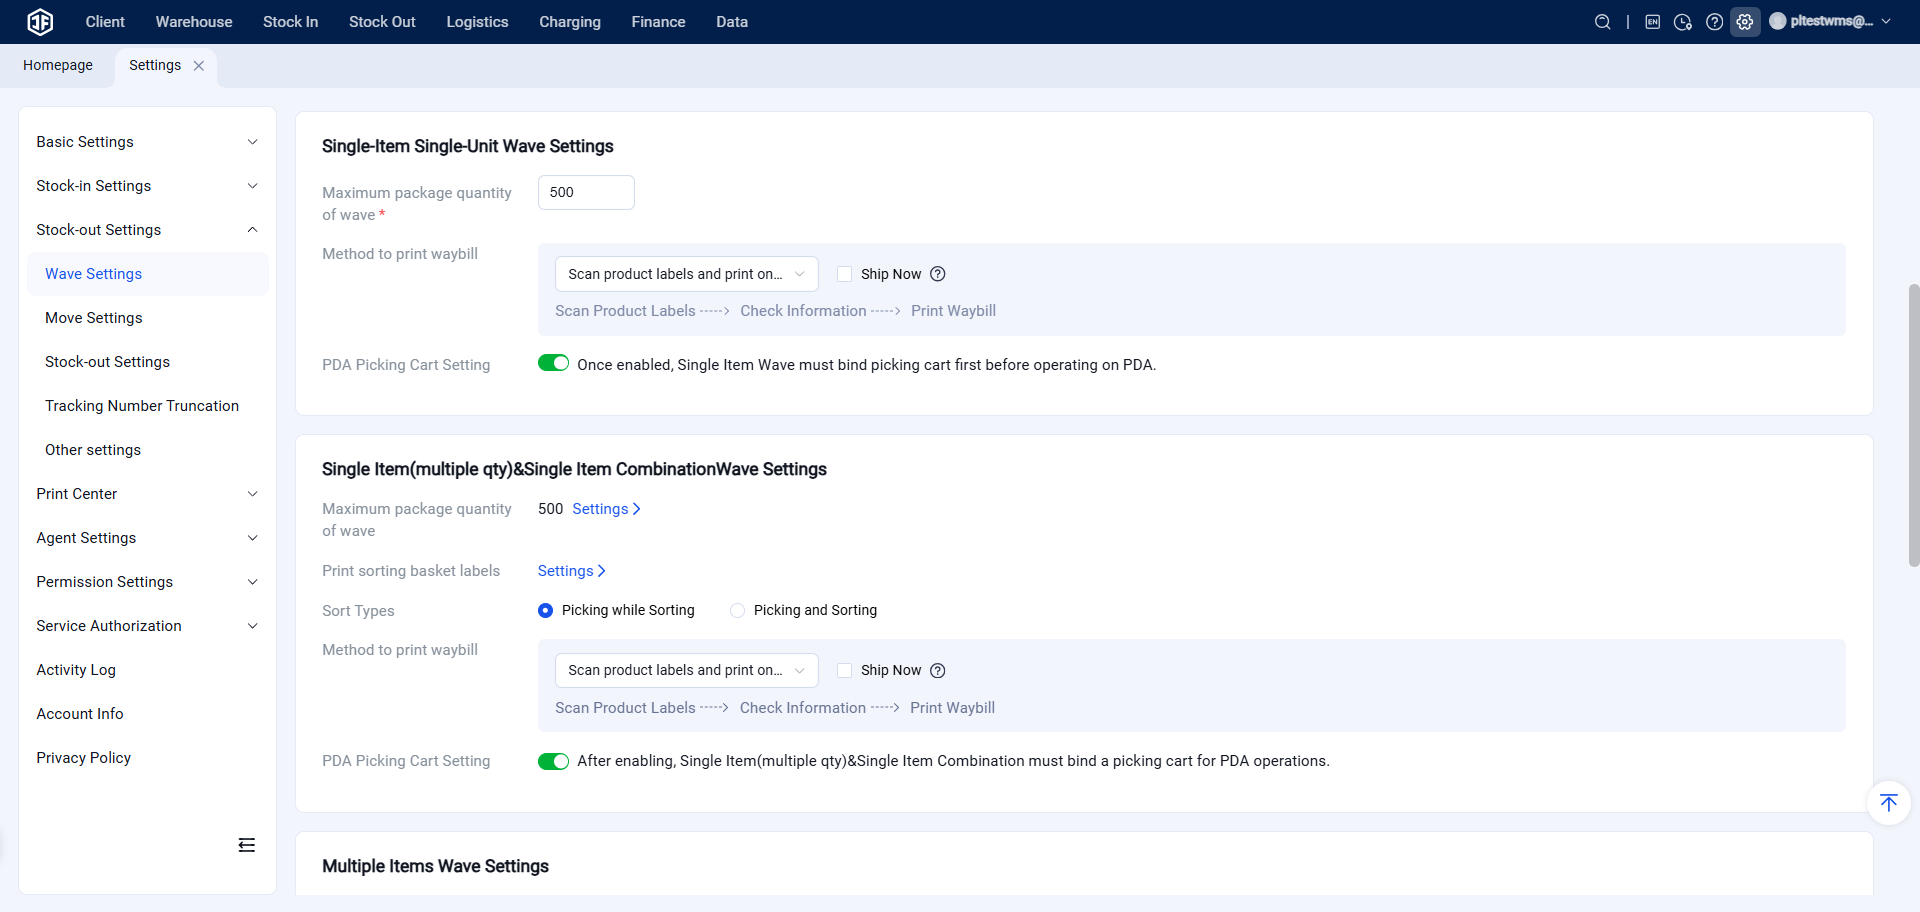
(2) Single‑Item Wave Settings
① Merge Single‑Item Orders: When enabled, single‑item single‑quantity packages and single‑item multi‑quantity packages will be grouped together for picking.
② Maximum Packages per Wave: Sets the maximum number of package orders that can be included in a single wave each time it is generated.
③ Label Printing Method: Options include scanning the picking list to print labels in batch, or scanning each product label to print labels one by one.
④ Ship Immediately: If checked, printing the label will automatically submit the order to the "Shipped" status.
⑤ SKU Quantity Verification: Allows sellers to manually enter SKU quantities for verification. If disabled, quantities must be verified by scanning.
⑥ PDA Picking Cart Binding: When enabled, PDA operations for single‑item waves must be bound to a picking cart before picking can proceed.
(3) Multi‑Item Mixed Package Wave Settings
① Maximum Packages per Wave: Determines how many multi‑item packages are picked together in each wave, based on product characteristics and the maximum processing capacity of the sorting rack.
② Sorting Rack Setup: When unified picking is done using a picking cart, mixed items need to be separated by package. This requires a sorting rack configuration. The setup includes specifying the number of rows and columns, so that during sorting, when an item is displayed as belonging to "Bin 1," the picker simply places it into Bin 1.
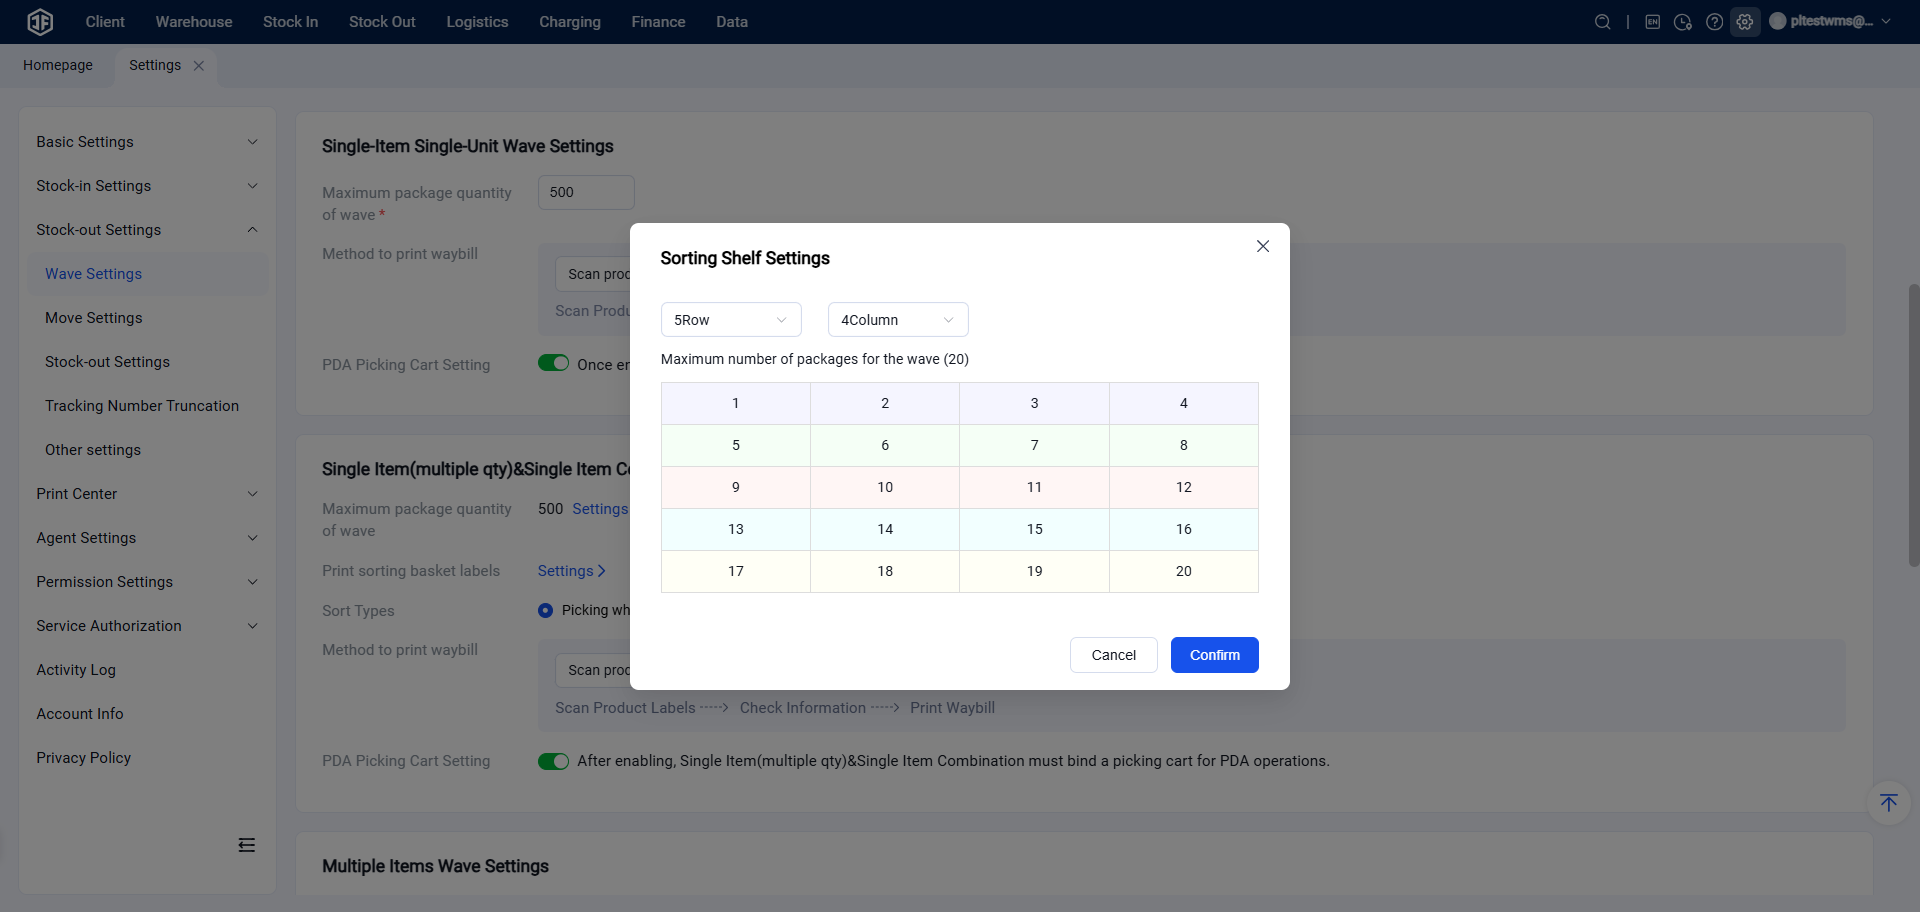
③ Print Sorting Bin Labels: After the sorting rack is configured, you can set it to print sorting bin labels, which are then attached to the corresponding bins.
④ Sorting Mode Setting: There are two sorting modes:
Pick‑and‑Sort Simultaneously: Pick items while simultaneously placing them into the bins corresponding to each package.
Pick First, Sort Later: Pick all items first, then perform a secondary sorting step to distribute items into the correct bins by package.
⑤ Shipping Label Printing Method Setting: There are three printing methods:
Scan Picking List for Batch Printing: Scan the wave number to directly print all labels for that wave, offering high printing speed.
Scan Sorting Bin Labels for One‑by‑One Printing: Scan each sorting bin label to print labels individually.
Scan Product Labels for One‑by‑One Printing: Scan each product label to automatically generate and print its label, ensuring high accuracy.
⑥ Ship Immediately: When checked, printing the label will automatically submit the package to the "Shipped" status.
⑦ PDA Picking Cart Binding: When enabled, PDA operations for single‑item waves must be bound to a picking cart before picking can proceed.
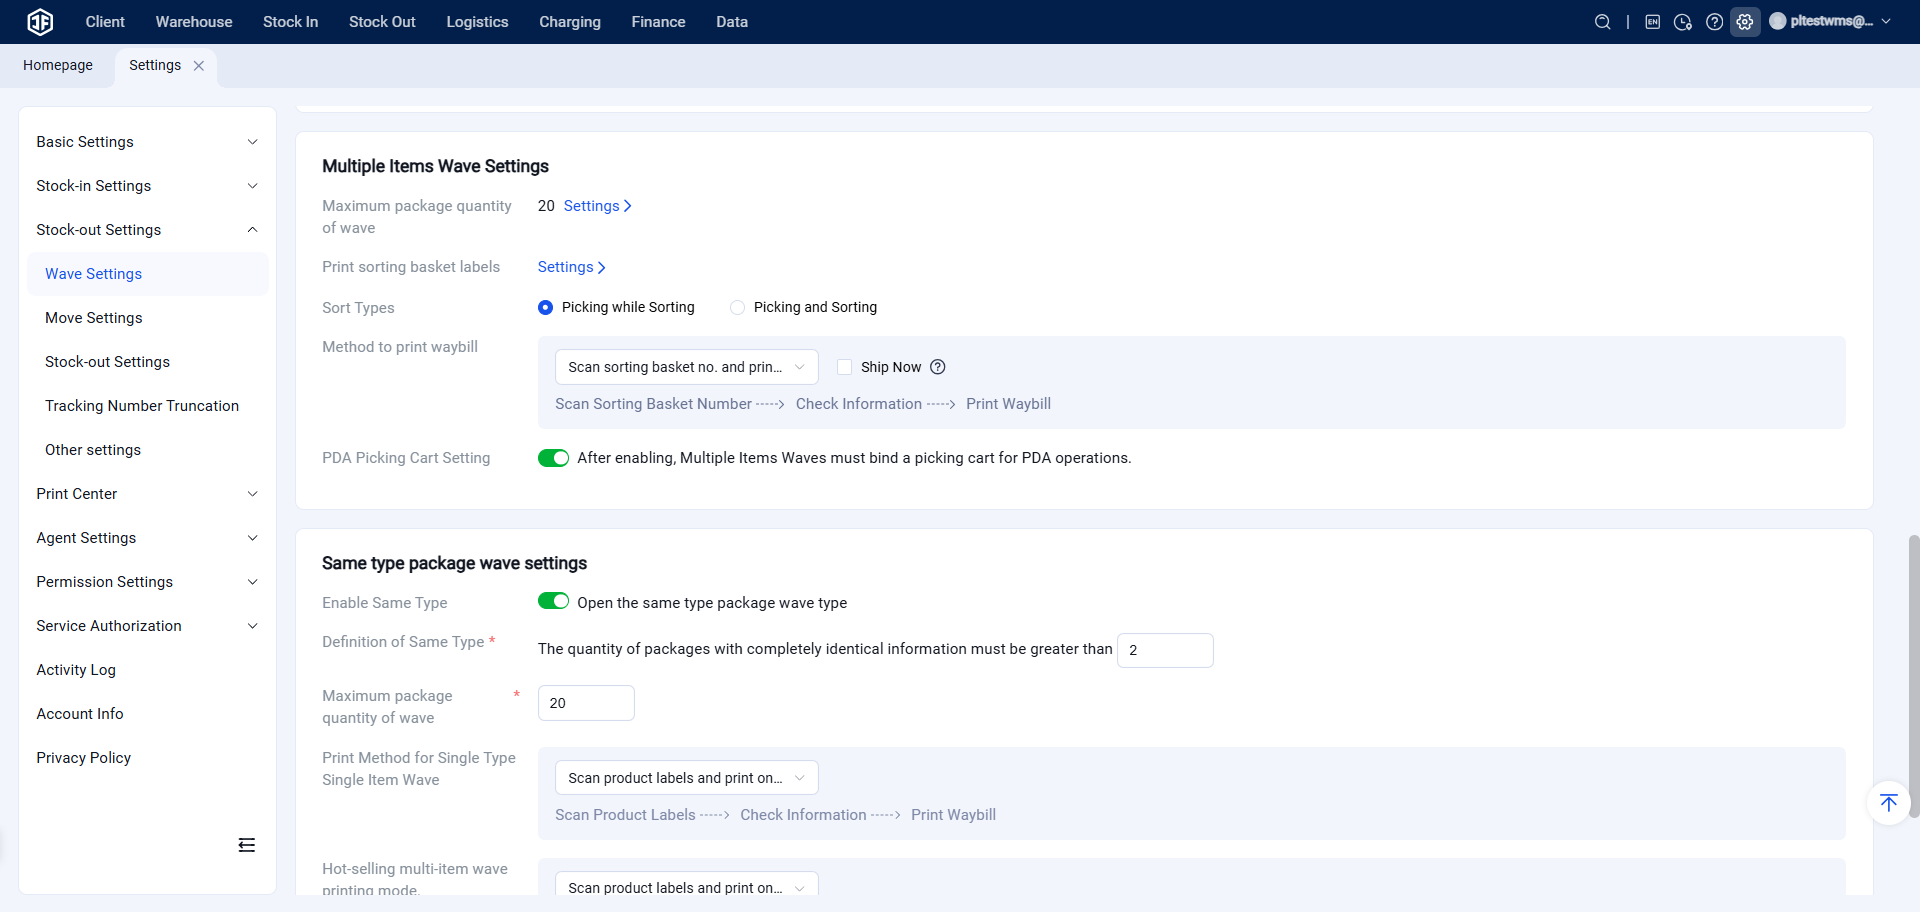
(4) Hot‑Selling Item Wave Settings
① Enable Hot‑Selling Items: When activated, orders containing identical products can be grouped into a single picking list and picked separately. This is suitable for high‑volume single‑item or multi‑item orders, as well as promotional products during holiday sales or major campaigns.
② Hot‑Selling Definition: The number of packages with completely identical order product information must exceed a set threshold to be classified as hot‑selling packages.
③ Maximum Hot‑Selling Quantity per Wave: Determines the picking quantity per wave based on product characteristics and picking cart capacity.
④ Shipping Label Printing Type: Since hot‑selling package orders are identical, there is no need to print labels individually. Labels can be printed in batch by scanning the wave picking list.
⑤ Auto‑Ship Setting: When labels are printed, hot‑selling orders are automatically submitted to the "Shipped" status.
⑥ SKU Verification: Once enabled, SKU verification is required during packaging scanning; labels can only be printed after verification passes.
⑦ PDA Picking Cart Binding: When enabled, PDA operations for single‑item waves must be bound to a picking cart before picking can proceed.
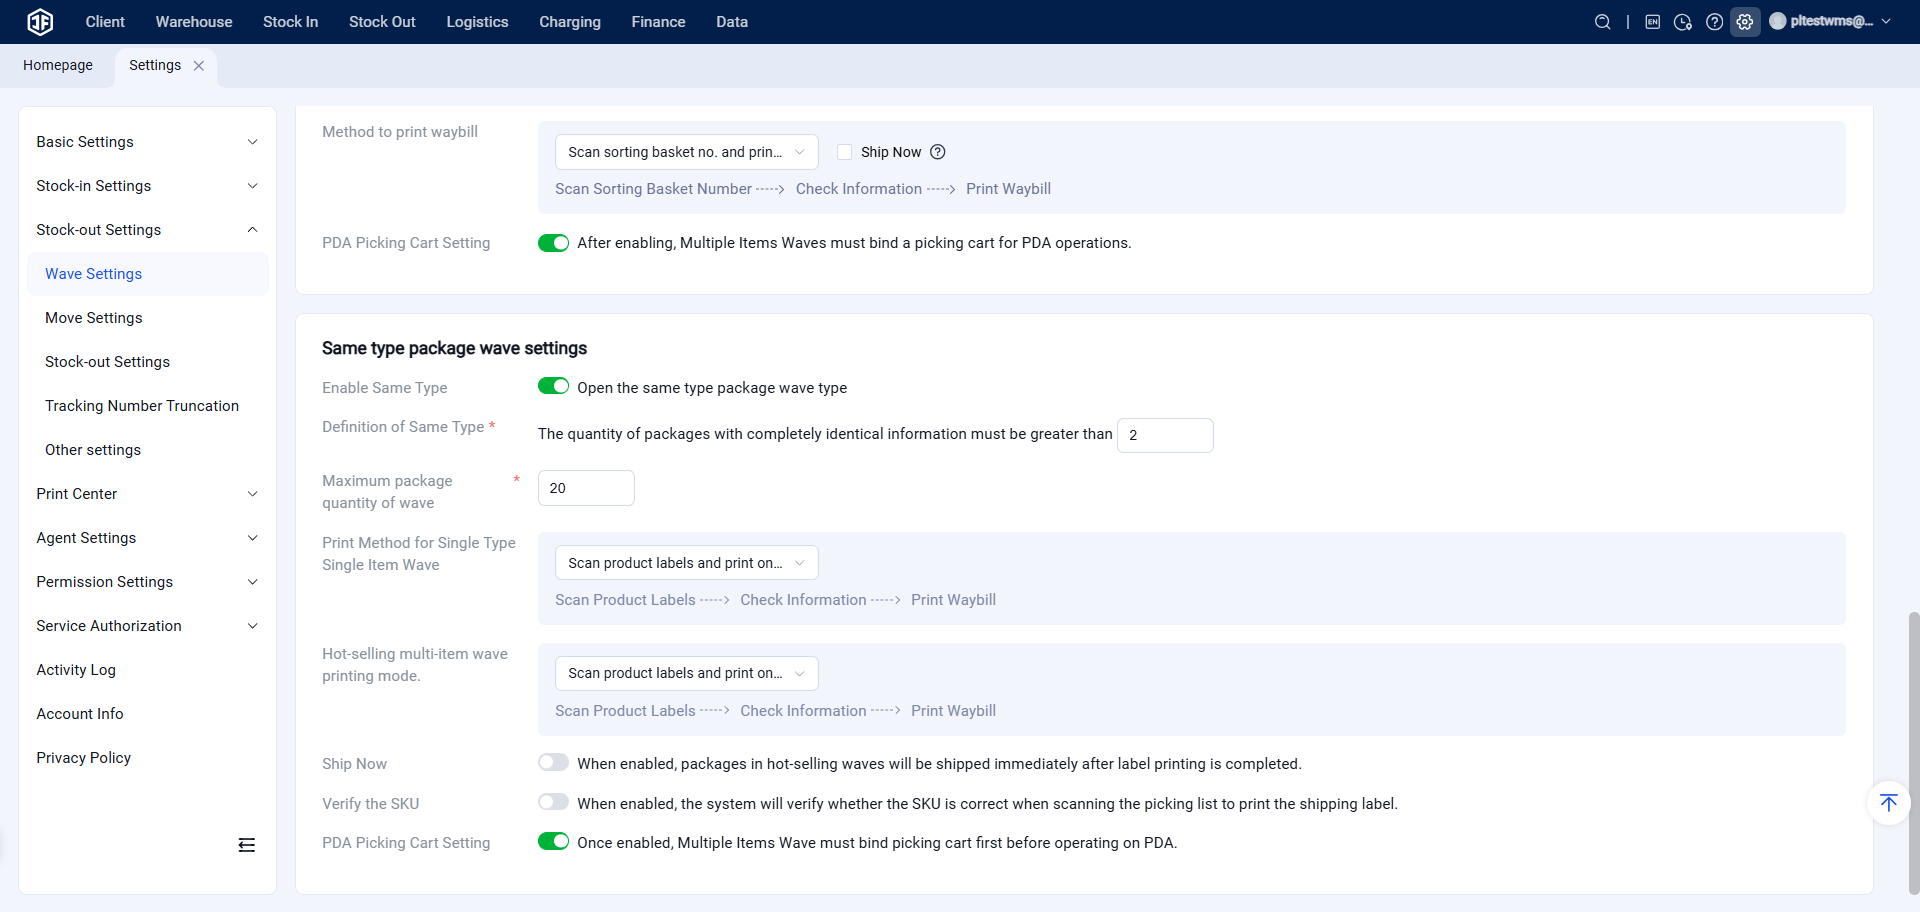
(7) Stock Transfer Settings
Shortage Transfer Suggestion Quantity Setting: When warehouse inventory has set upper and lower replenishment limits for rack locations, you can configure whether the transfer quantity for shortages follows the actual shortage amount or the upper replenishment limit.
PDA Task Transfer Setting: When using PDA for stock transfers, choose between moving items one by one (out then in) or moving out in batch first, then moving in batch.
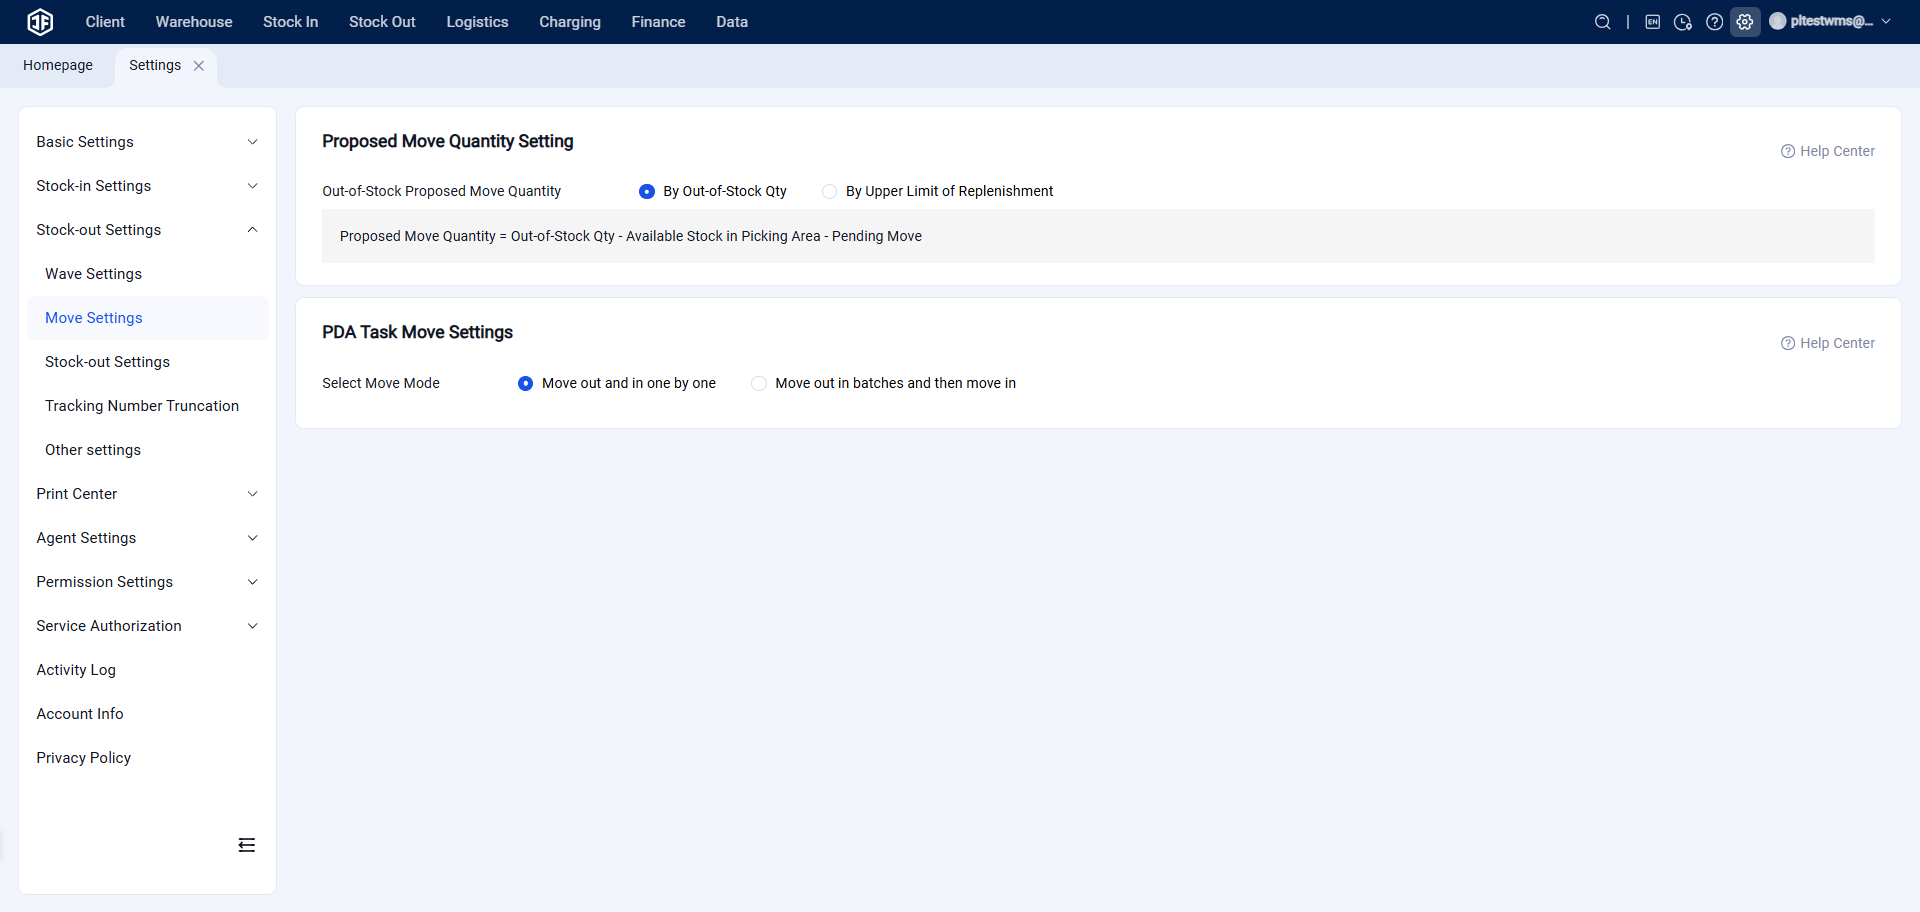
(8) Outbound Settings
① Scan‑to‑Pack Settings
Packing Material Outbound Billing: When enabled, warehouse staff can select packing materials during packaging and charge accordingly.
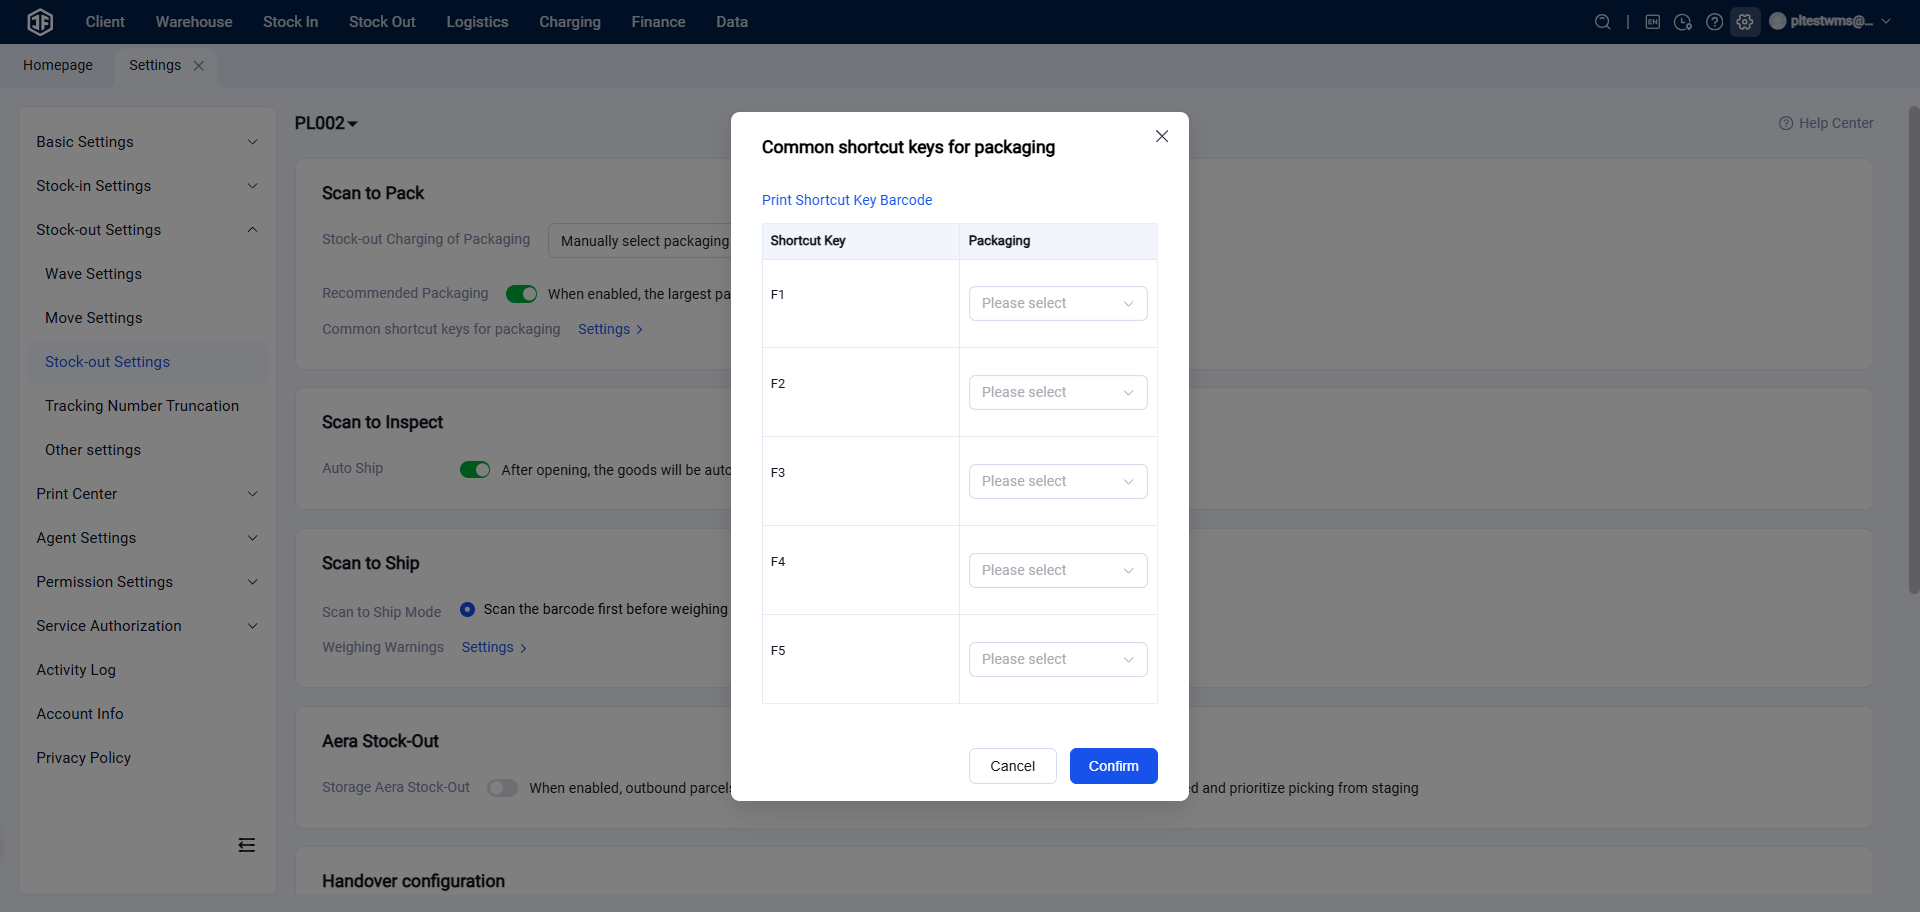
Packing Material Shortcut Key Setup: If packing materials have been configured in Products > Packing Materials, shortcut keys can be set here for quick selection. Additionally, barcodes for these shortcut keys can be printed and scanned to rapidly choose packing materials.
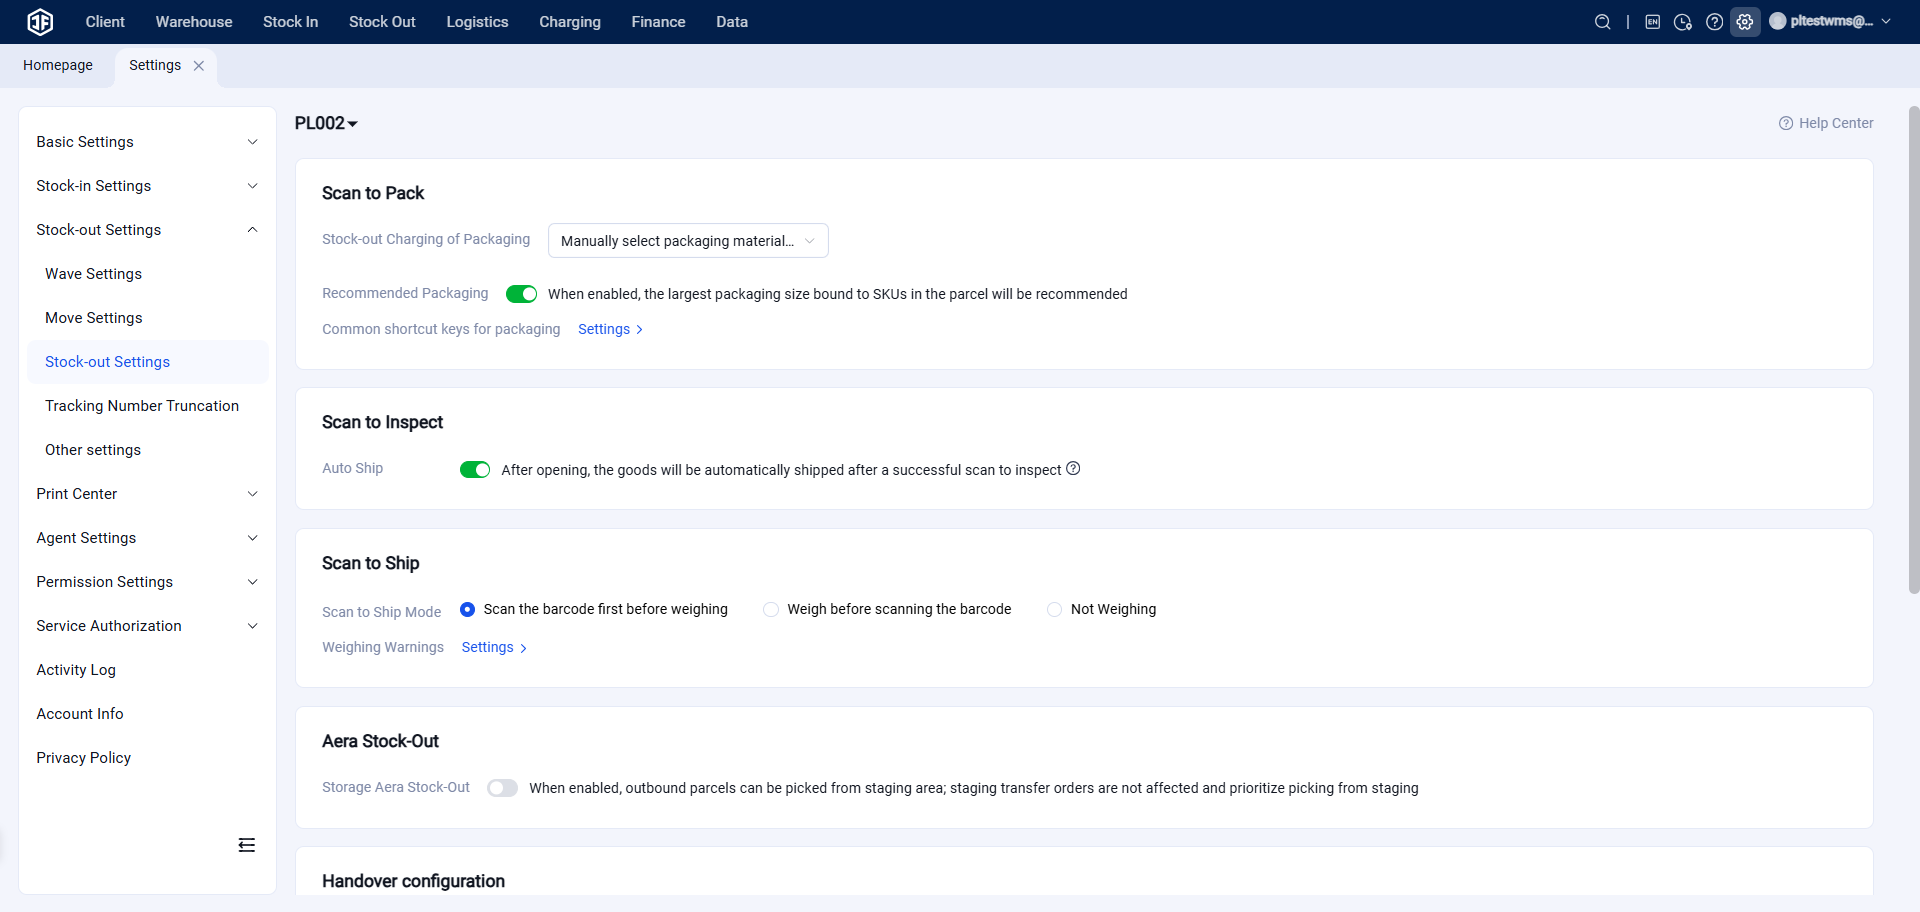
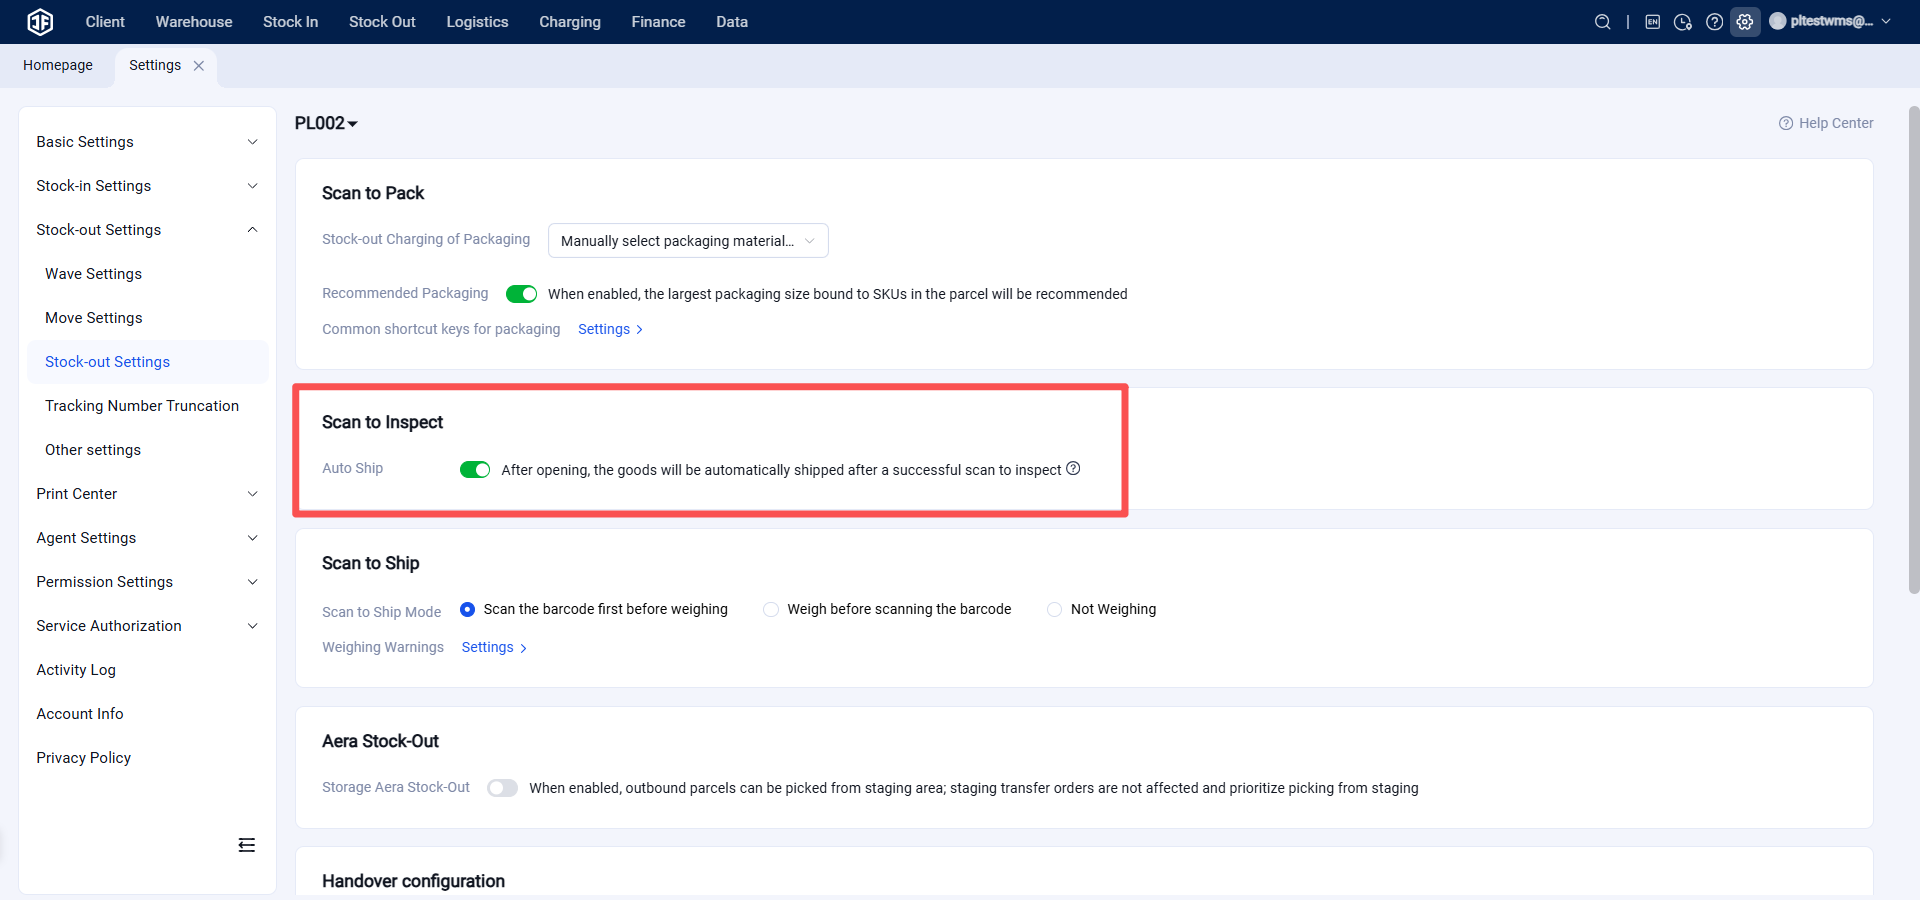
② Scan‑to‑Verify: After the overseas warehouse prints shipping labels, it is necessary to confirm that the items in the package are correct by using scan‑to‑verify.
If Auto‑Ship is enabled, once scan‑to‑verify is successful, the system will automatically mark the order as shipped.
If Packing Material Outbound Billing is enabled, you can set shortcut keys for commonly used packing materials to quickly select them during scan‑to‑pack. Currently, up to 5 shortcut keys can be set for commonly used packing materials.
③ Scan‑to‑Ship Settings
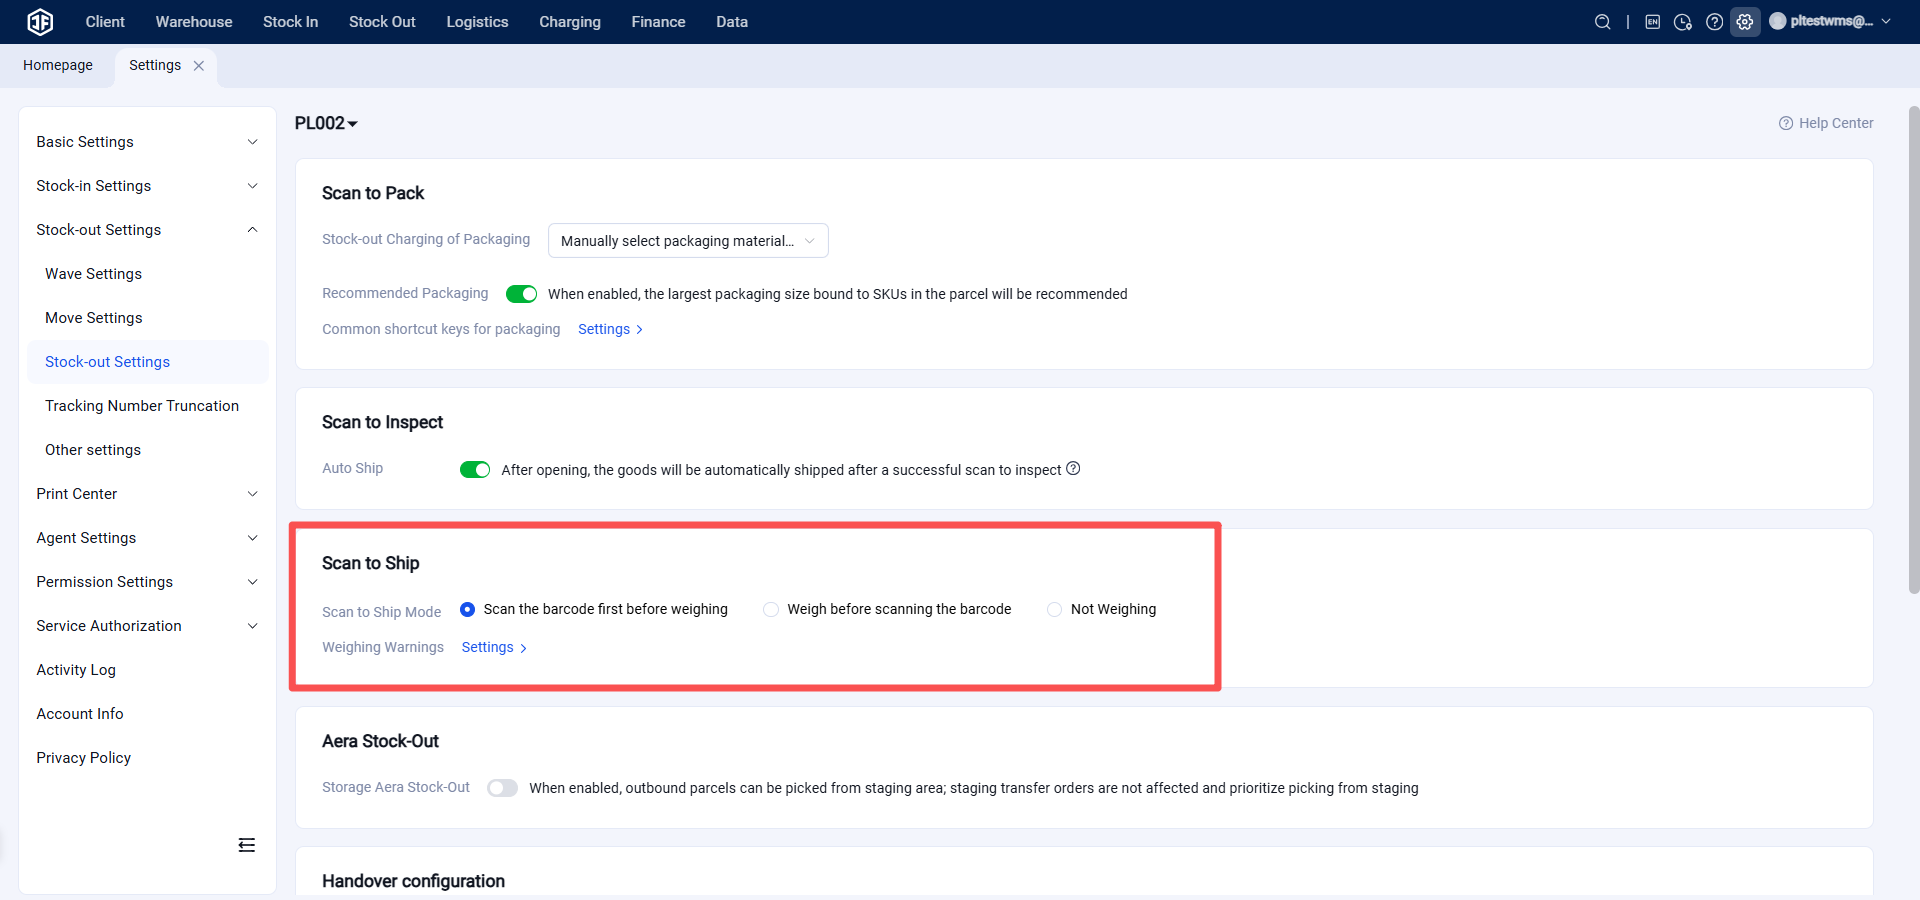
Scan‑to‑Ship Mode Setting: Based on the warehouse's actual needs, configure whether weighing is required during scan‑to‑ship and whether weighing occurs before or after scanning. The following three modes are available:
(1) Scan Tracking Number First, Then Weigh:
During scan‑to‑ship, first scan the tracking number, then weigh the package, and finally complete the outbound process.
(2) Weigh First, Then Scan Tracking Number:
During scan‑to‑ship, first weigh the package, then scan the tracking number, and finally complete the outbound process.
(3) No Weighing Required:
During scan‑to‑ship, weighing is not required. Simply scan the tracking number and complete the shipment.
Weight Alert Settings:
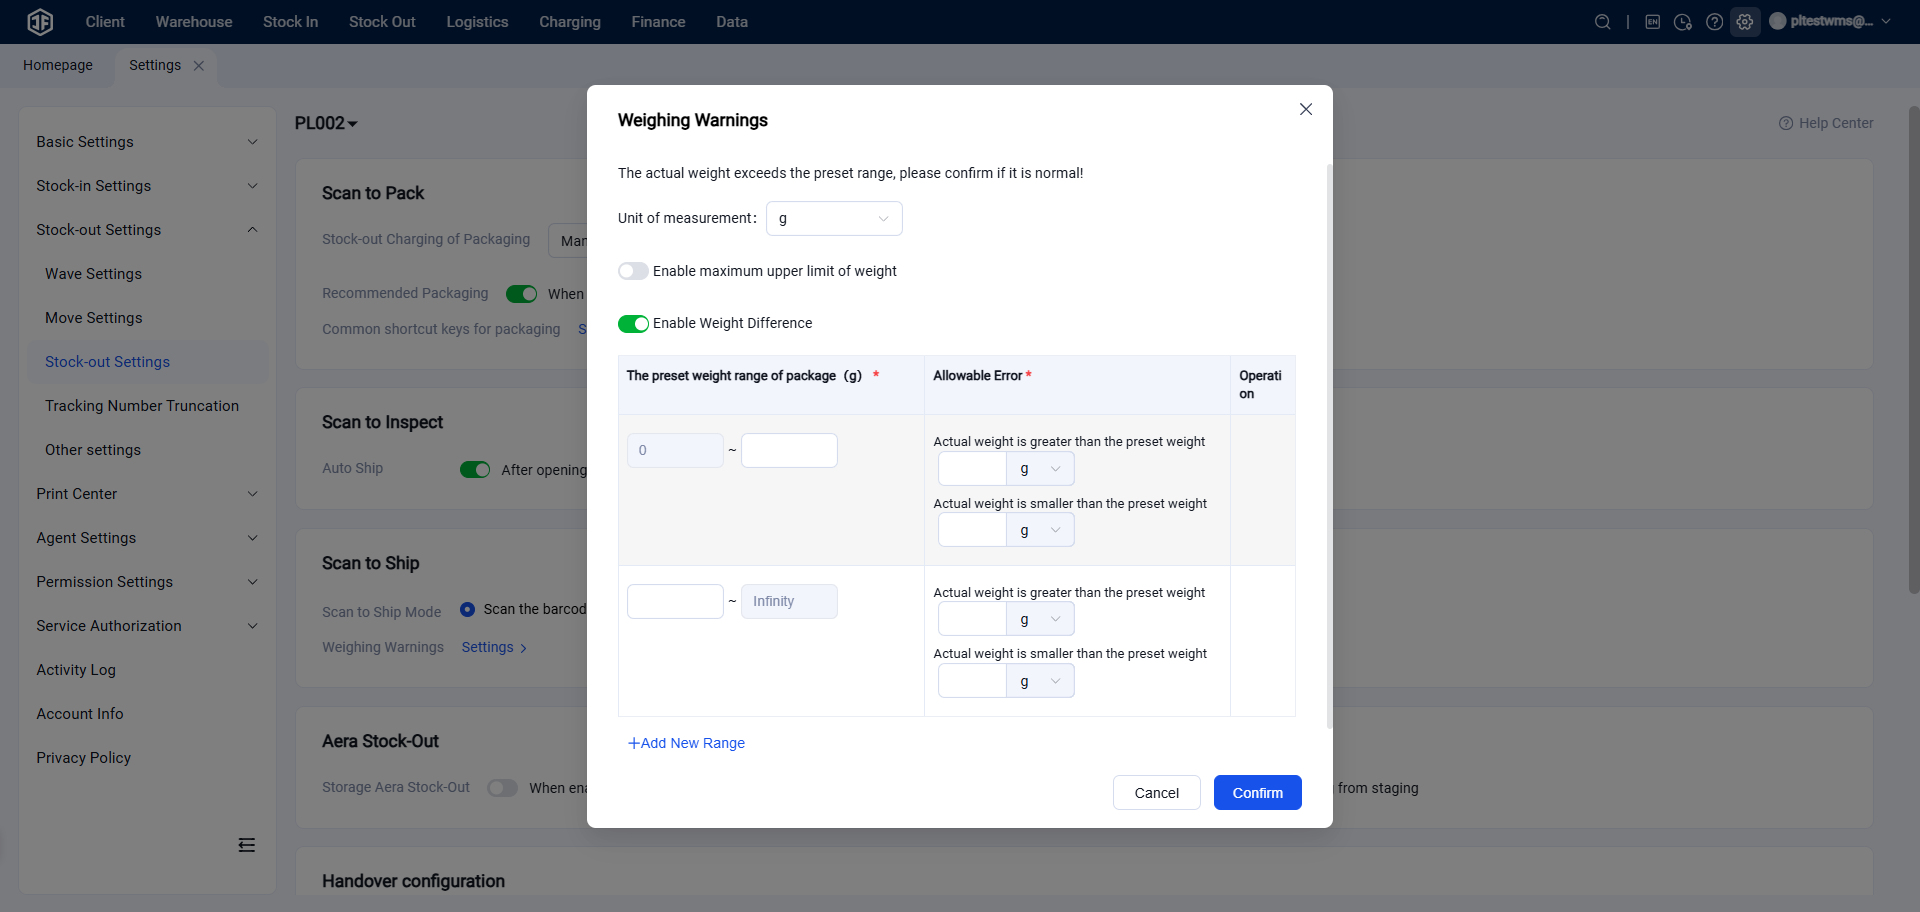
When the scan‑to‑ship mode is set to "Scan Tracking Number First, Then Weigh" or "Weigh First, Then Scan Tracking Number," weight alerts can be configured.
Enable Maximum Weight Limit:
When enabled, set a maximum weight limit. If the actual weighed package exceeds this value, the system will pop up a prompt to confirm the actual condition of the package.
Enable Weight Deviation Allowance:
When enabled, set a preset weight range for products and define the allowable deviation between the actual weight and the preset weight.
This includes:
Setting a product preset weight within a certain range.
Specifying the maximum allowable positive deviation (how much heavier the actual weight can be compared to the preset weight).
Specifying the maximum allowable negative deviation (how much lighter the actual weight can be compared to the preset weight).
④ Storage Zone Outbound:
When enabled, allows picking and shipping from the storage zone. If disabled, picking must be performed only from the picking zone.
⑤ Dropshipping Order Cut‑Off Settings
Allow Order Cancellation (Cut‑Off): After a customer order is pushed to the overseas warehouse, the warehouse needs to impose restrictions on order cancellations. Options include allowing order cancellation (cut‑off) or prohibiting customers from canceling orders arbitrarily.
Allowed Cancellation Status: If order cancellation is permitted, specify at which stage of warehouse order processing the cancellation is allowed.
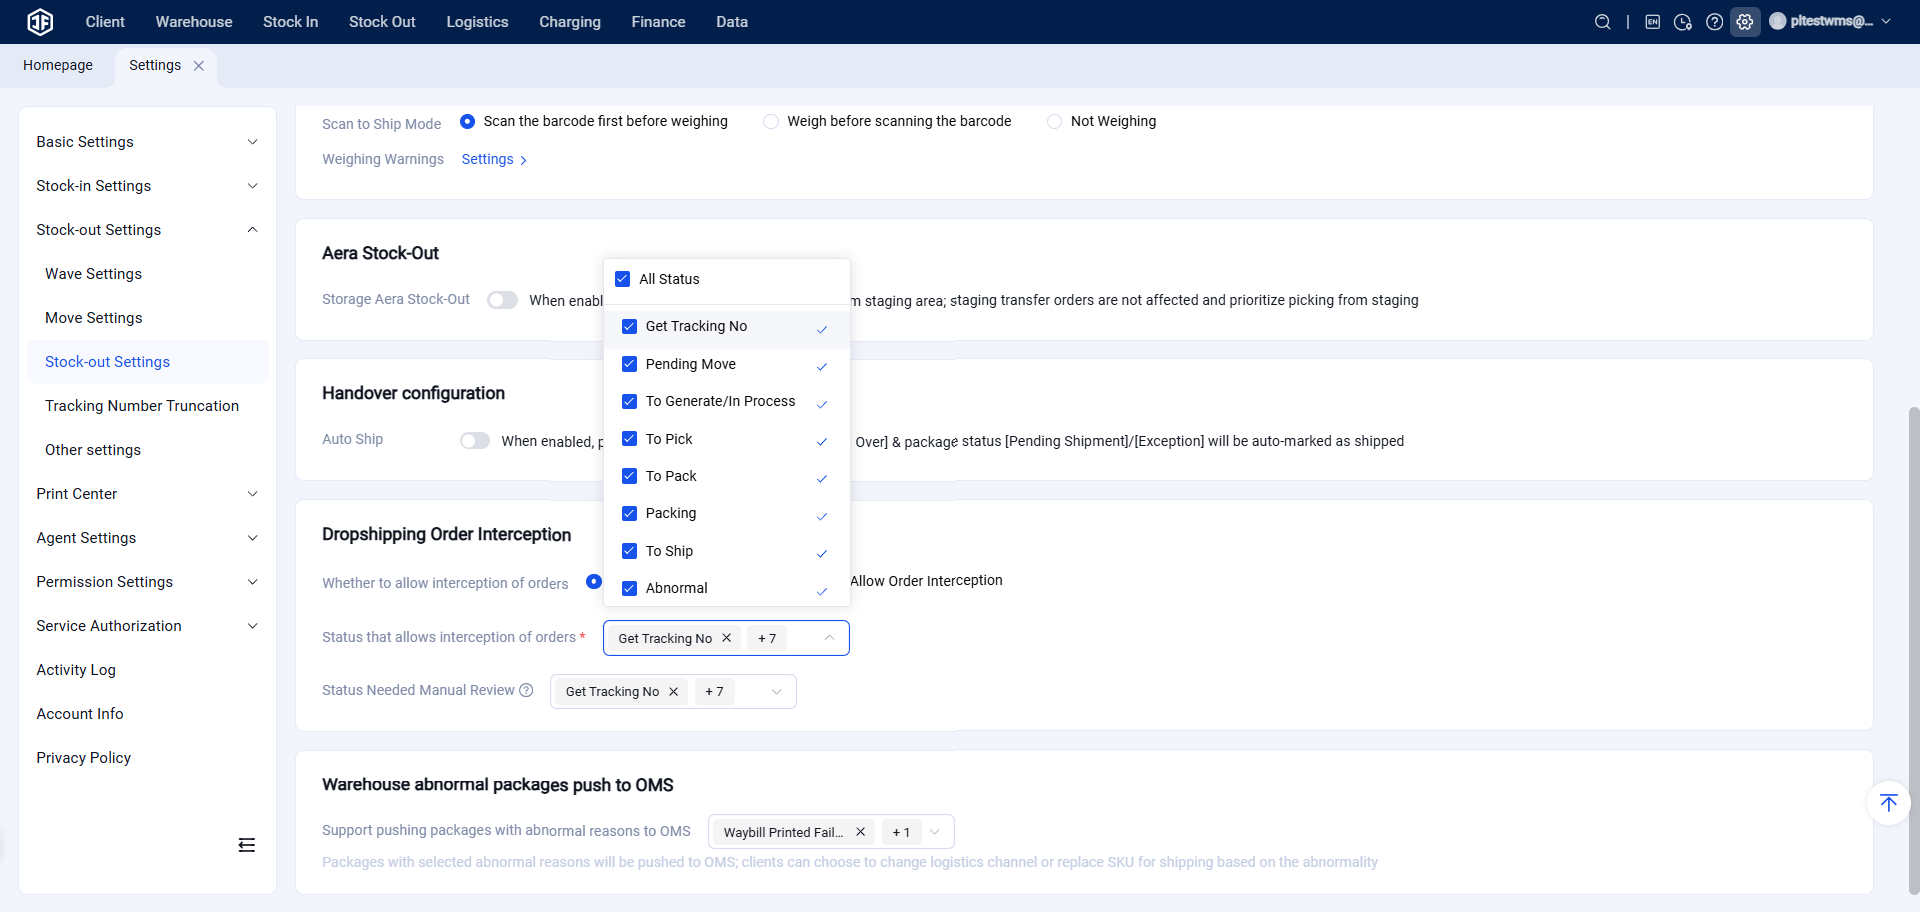
Status Requiring Manual Review:
When a customer submits an order cancellation request, determine whether the warehouse order is automatically canceled or requires manual review. Orders requiring manual review are processed in the Cancellation List; orders not needing manual review are automatically canceled by the system.
(9) Printing Settings
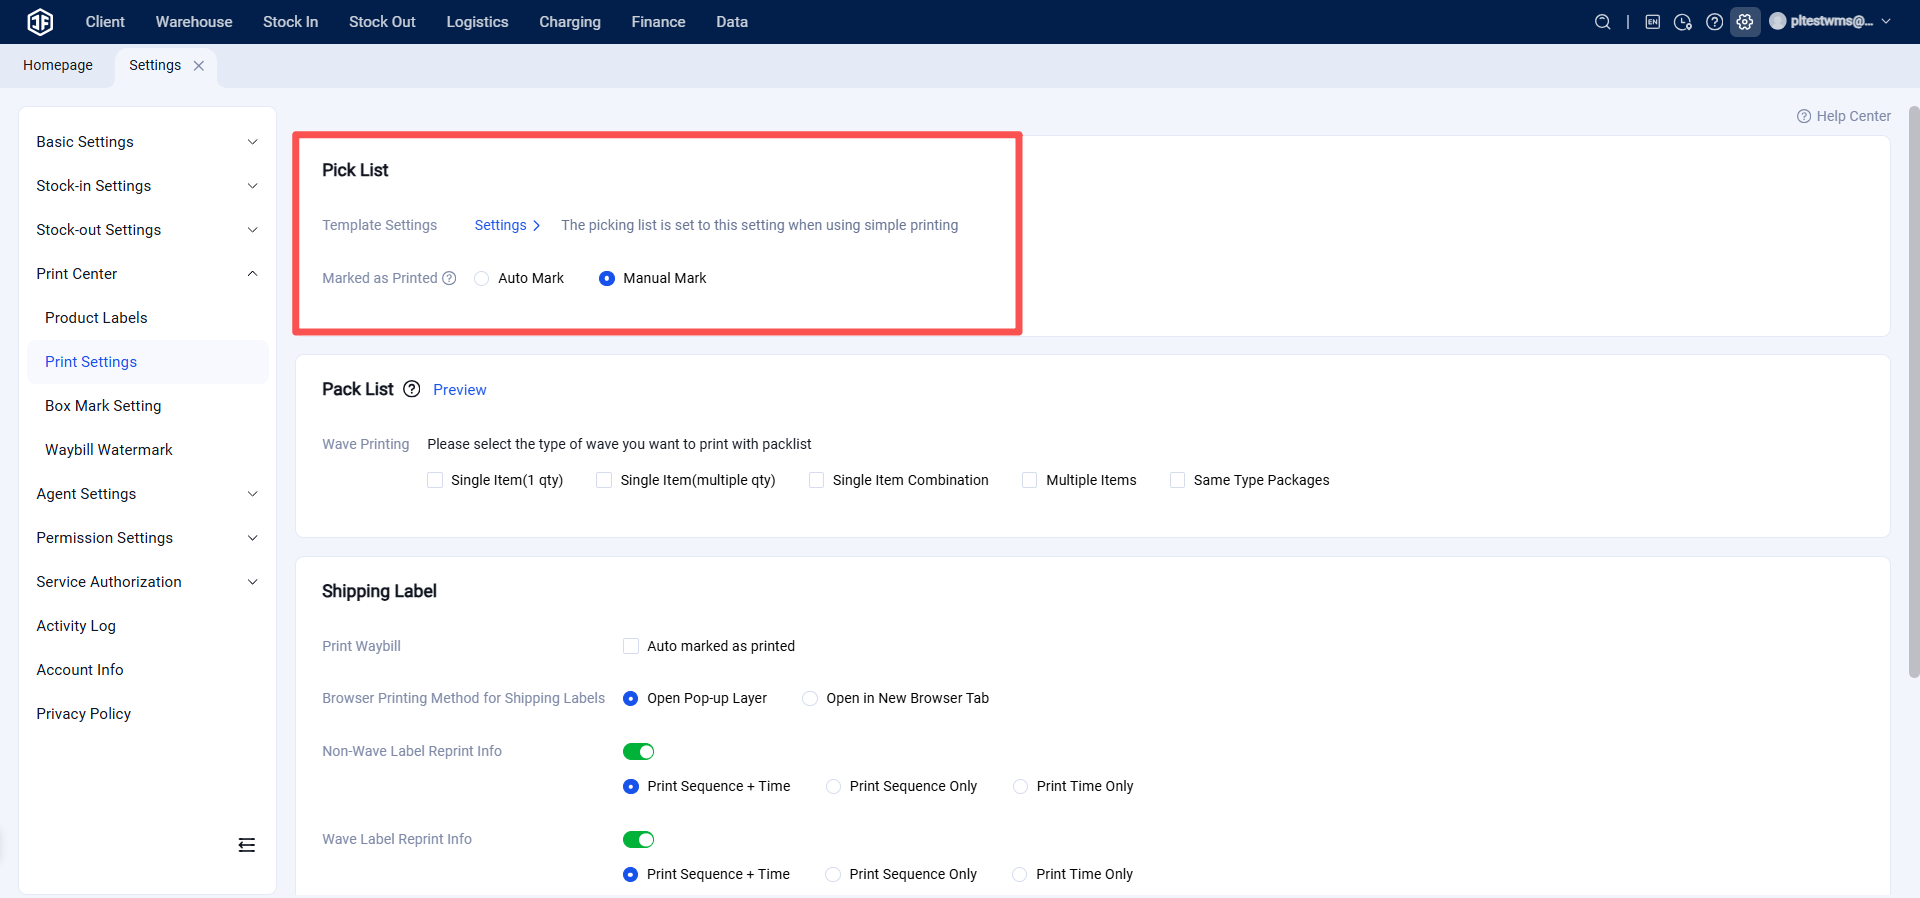
① Picking List Template Settings
For picking lists in simple order printing, you can customize the picking list format, including paper size and product information displayed.
Mark as Printed:
Choose whether the picking list is automatically marked as printed after printing, or if it needs to be manually marked as printed.
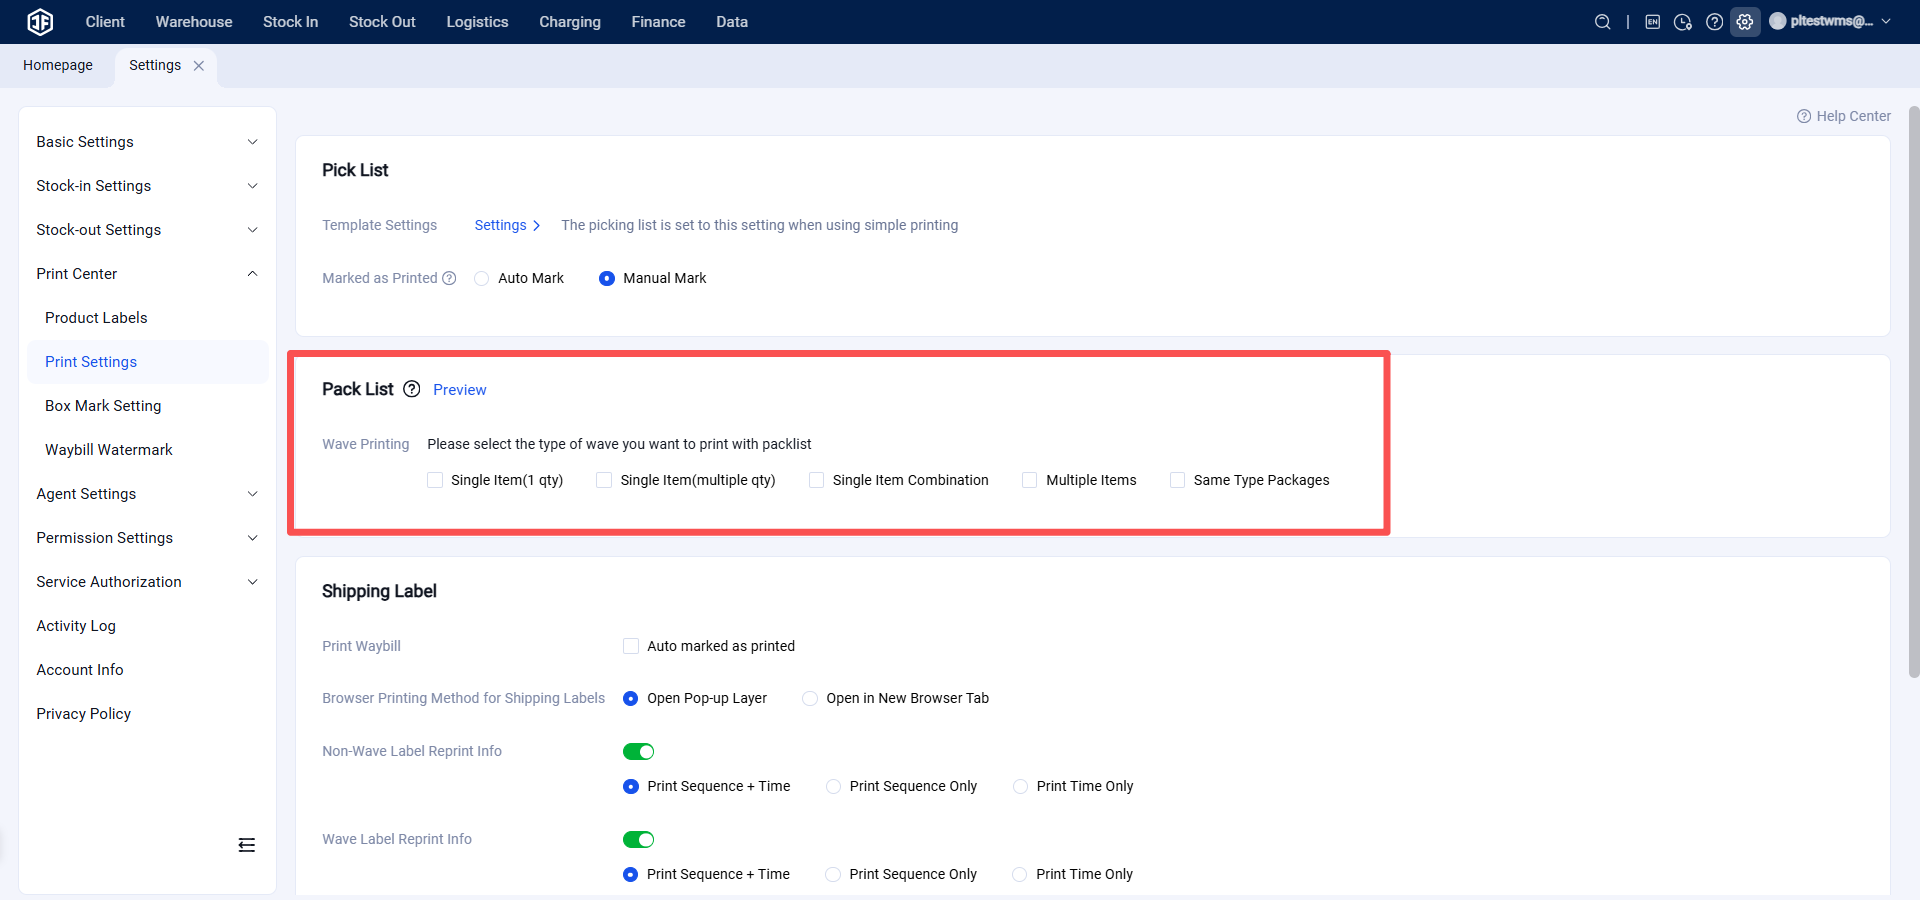
② Packing List
When "Include Packing List" is checked, a packing list containing product and rack location information will be printed along with the shipping label when labels are printed.
You can select which wave types require a packing list, such as:
Single‑item, single‑quantity
Single‑item, multi‑quantity
Merged single‑item orders
Multi‑item mixed packages
Hot‑selling packages, etc.
③ Shipping Label
Label Printing: If "Auto‑Mark as Printed" is checked, shipping labels will be automatically marked as printed after printing. If unchecked, they will not be marked.
Browser Printing Method: Choose whether to open a new browser page for printing, or to open a pop‑up window on the current page to print the shipping label.
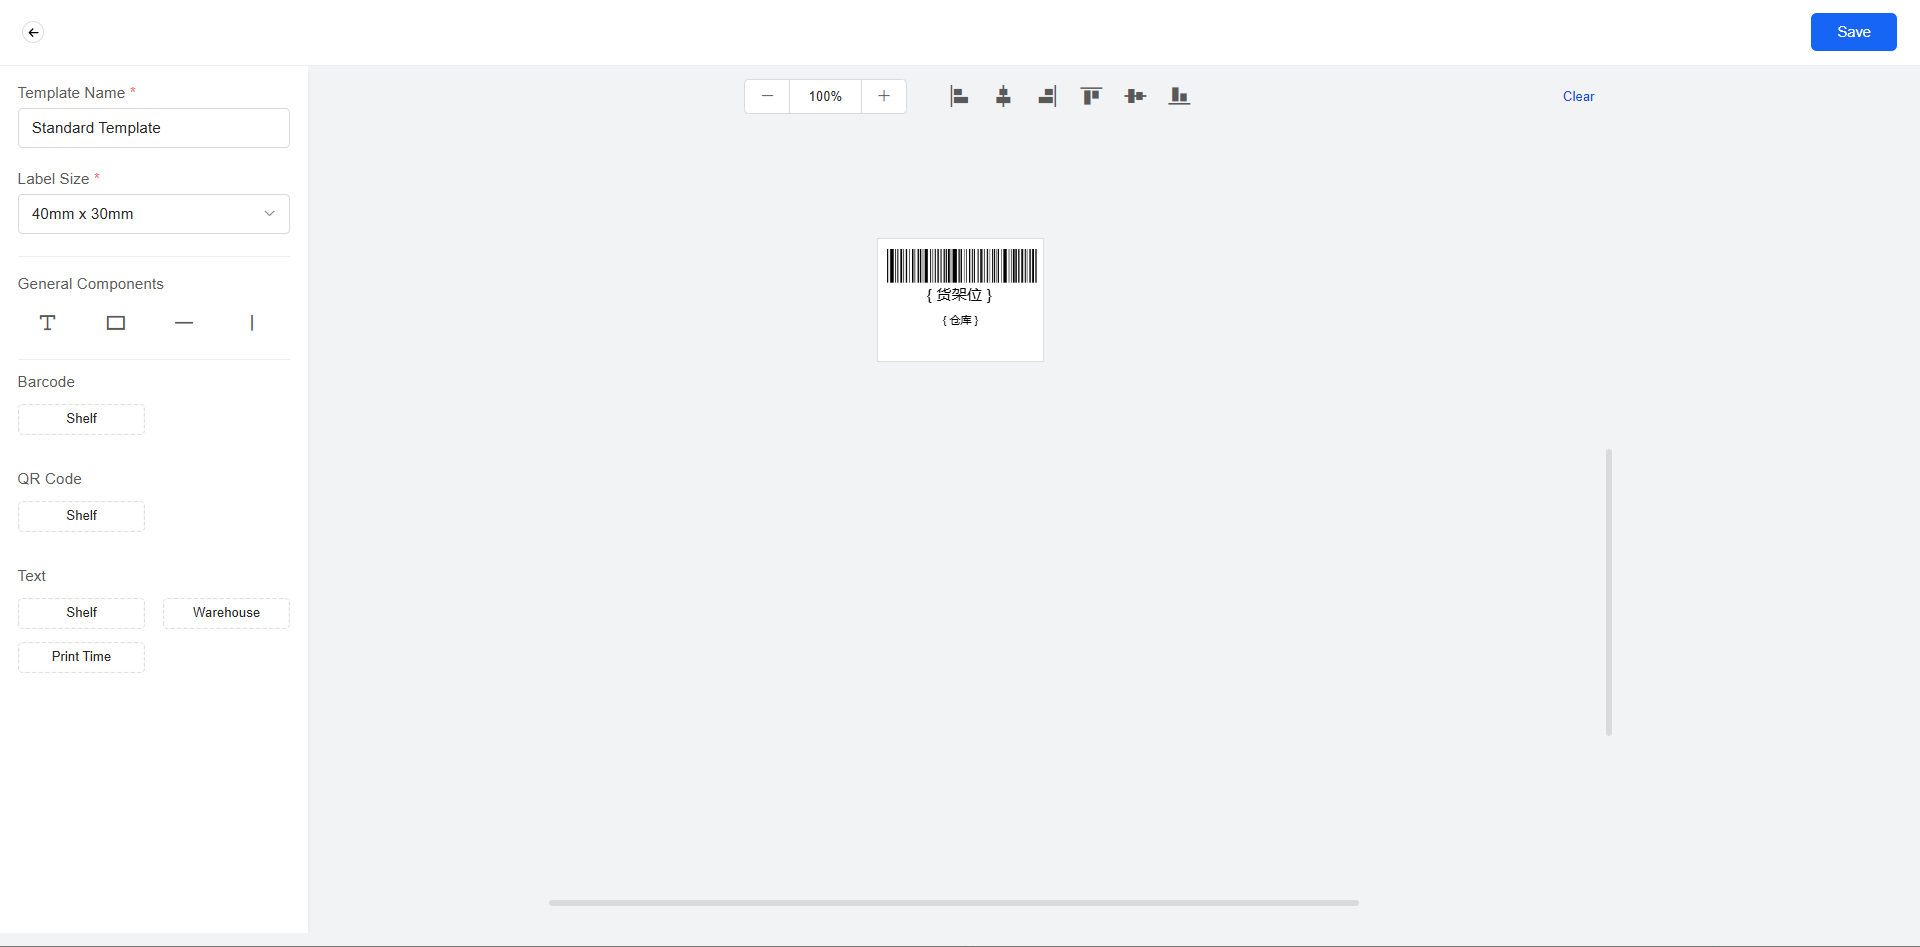
④ Rack Location Labels: You can set and print rack location label templates.
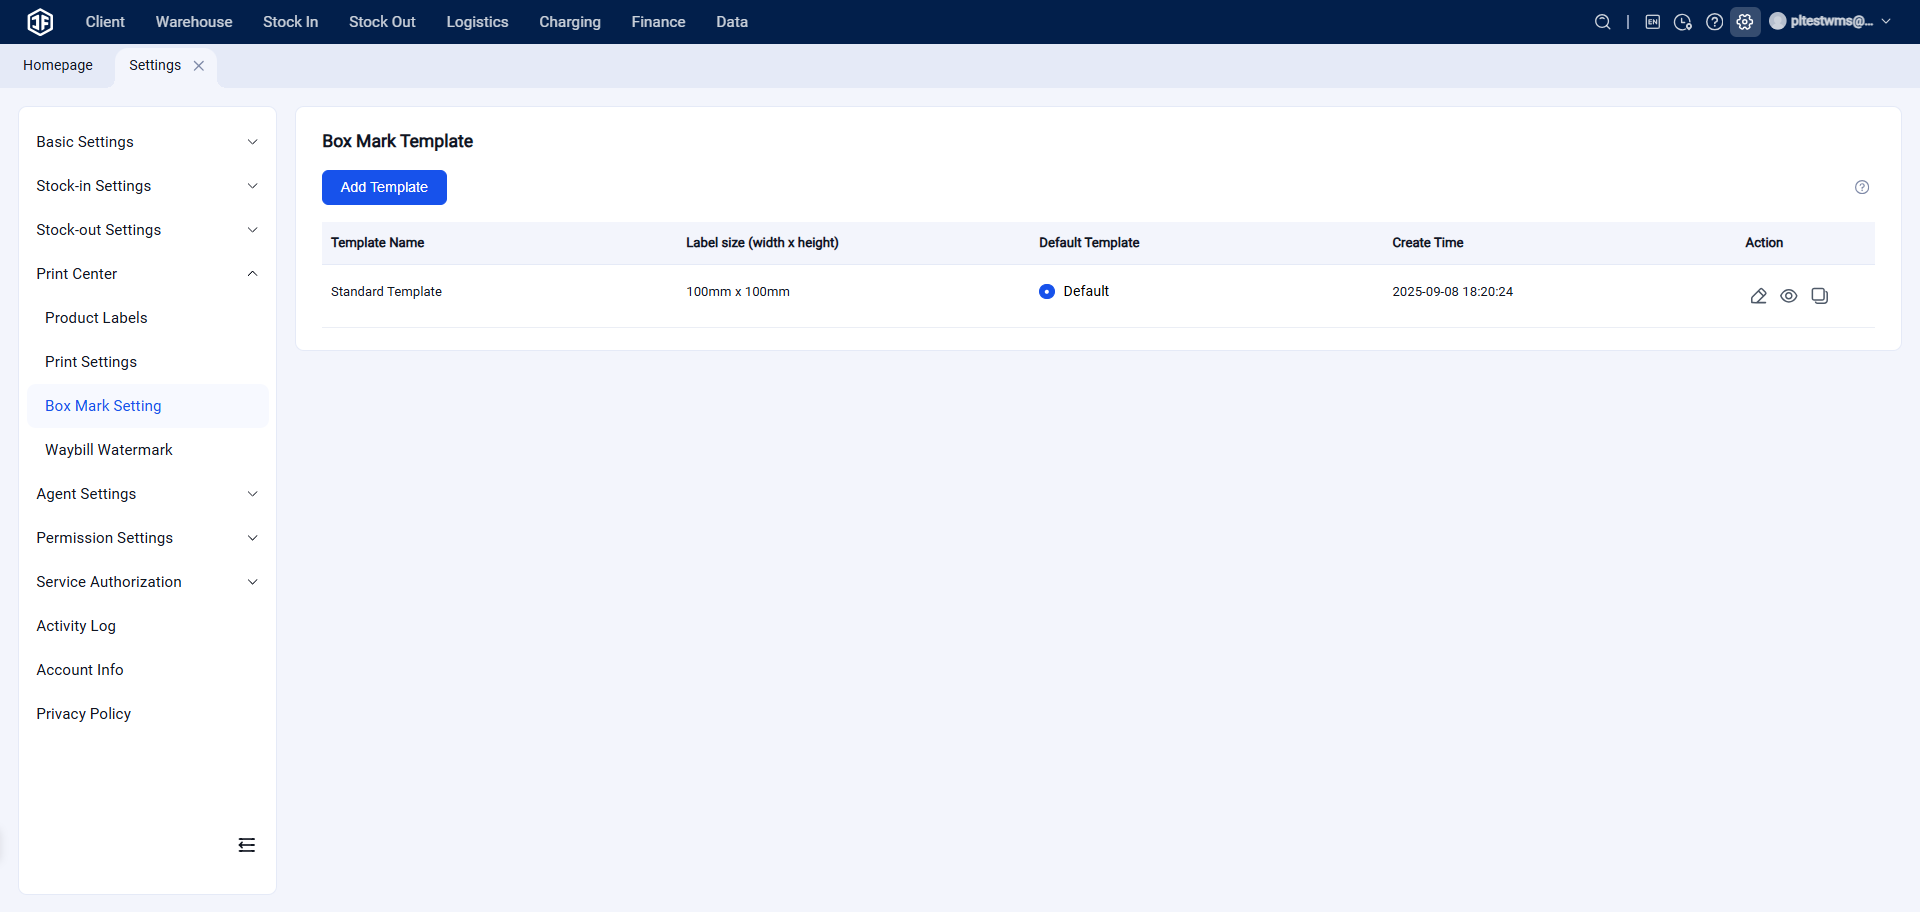
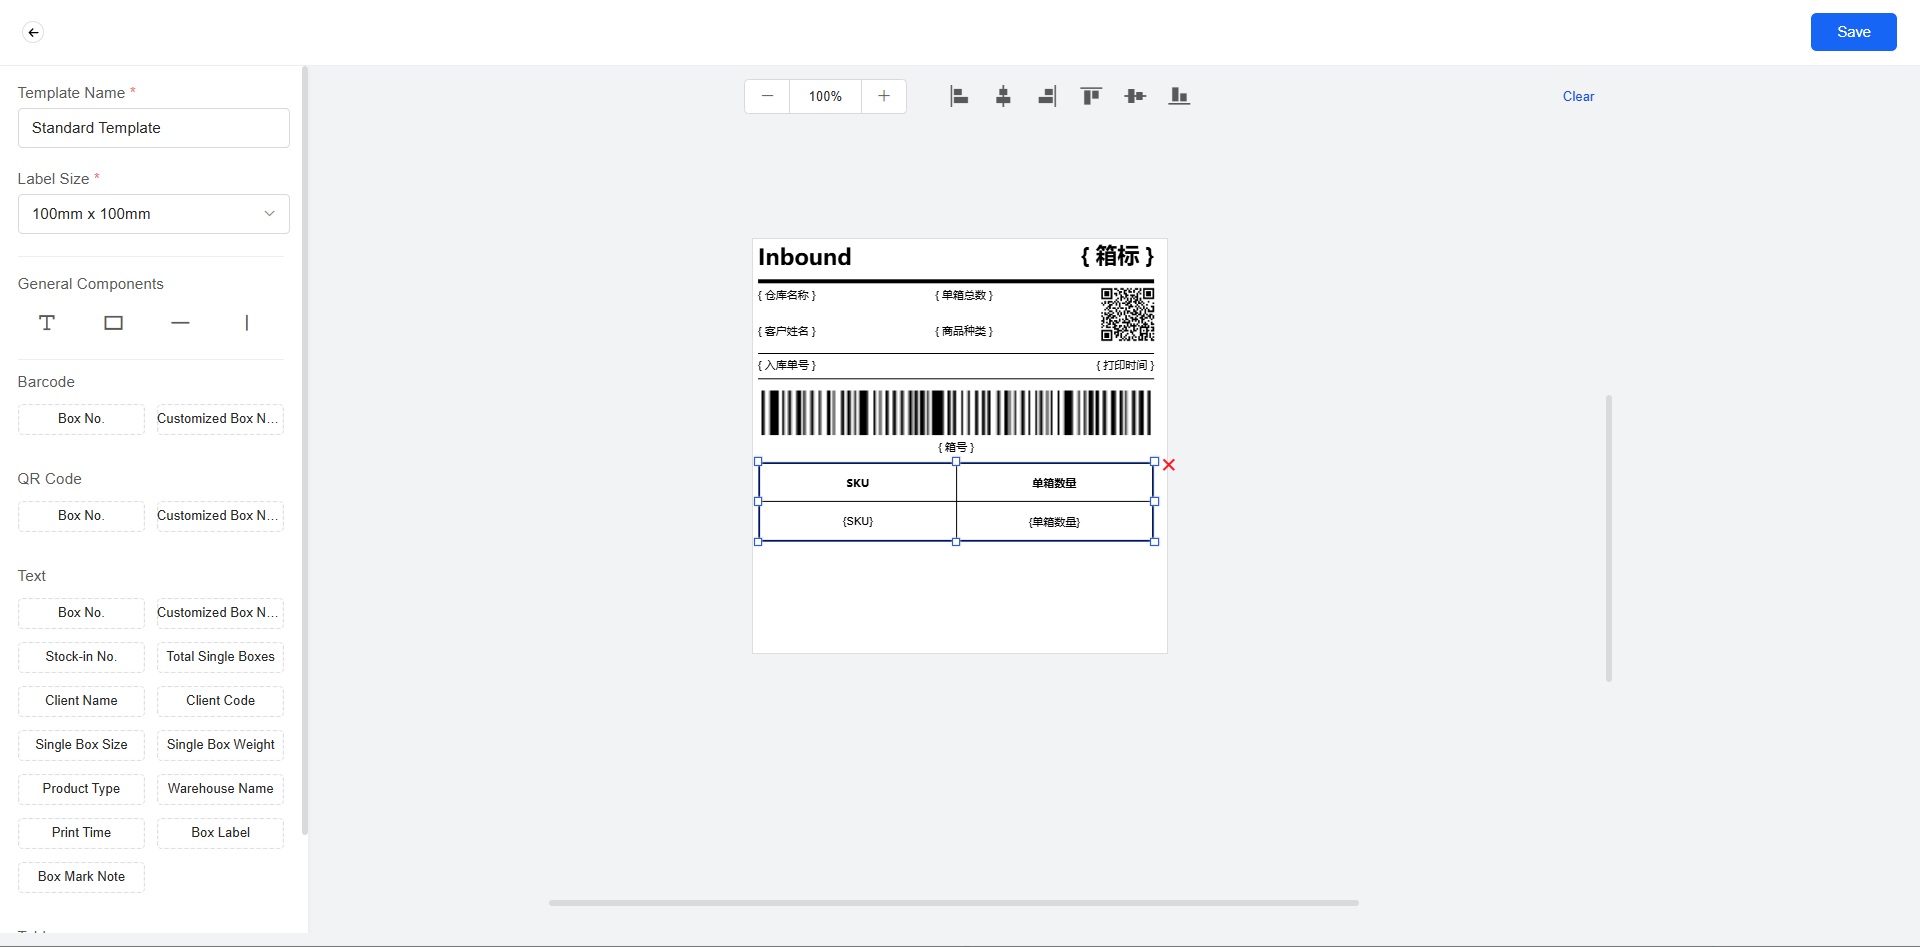
(10) Carton Mark (Shipping Mark) Settings
When sellers create inbound orders in the OMS, the carton mark labels for packed boxes can be configured with a template. After the template is set, sellers can print the labels and attach them to the boxes, enabling the overseas warehouse to quickly identify which customer and which products are inside, facilitating rapid inbound processing.
3. Agent Settings
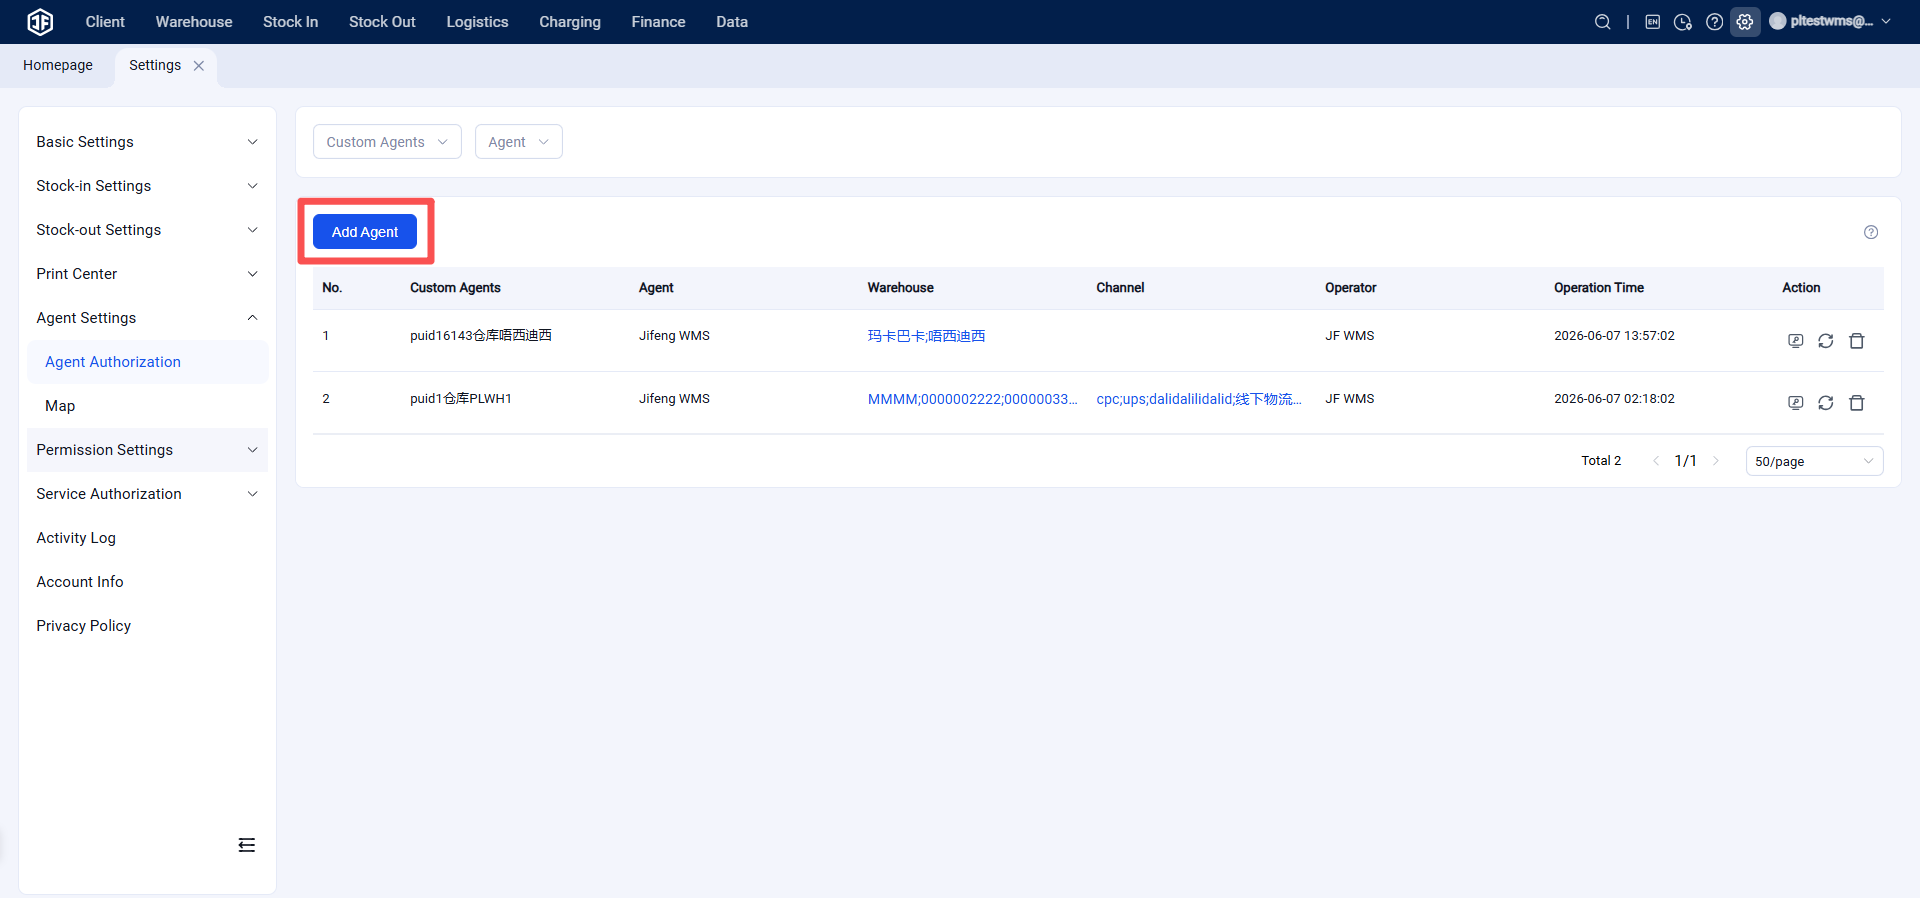
(1) Agent Authorization
Agent warehouses can add the information of their primary warehouses here.
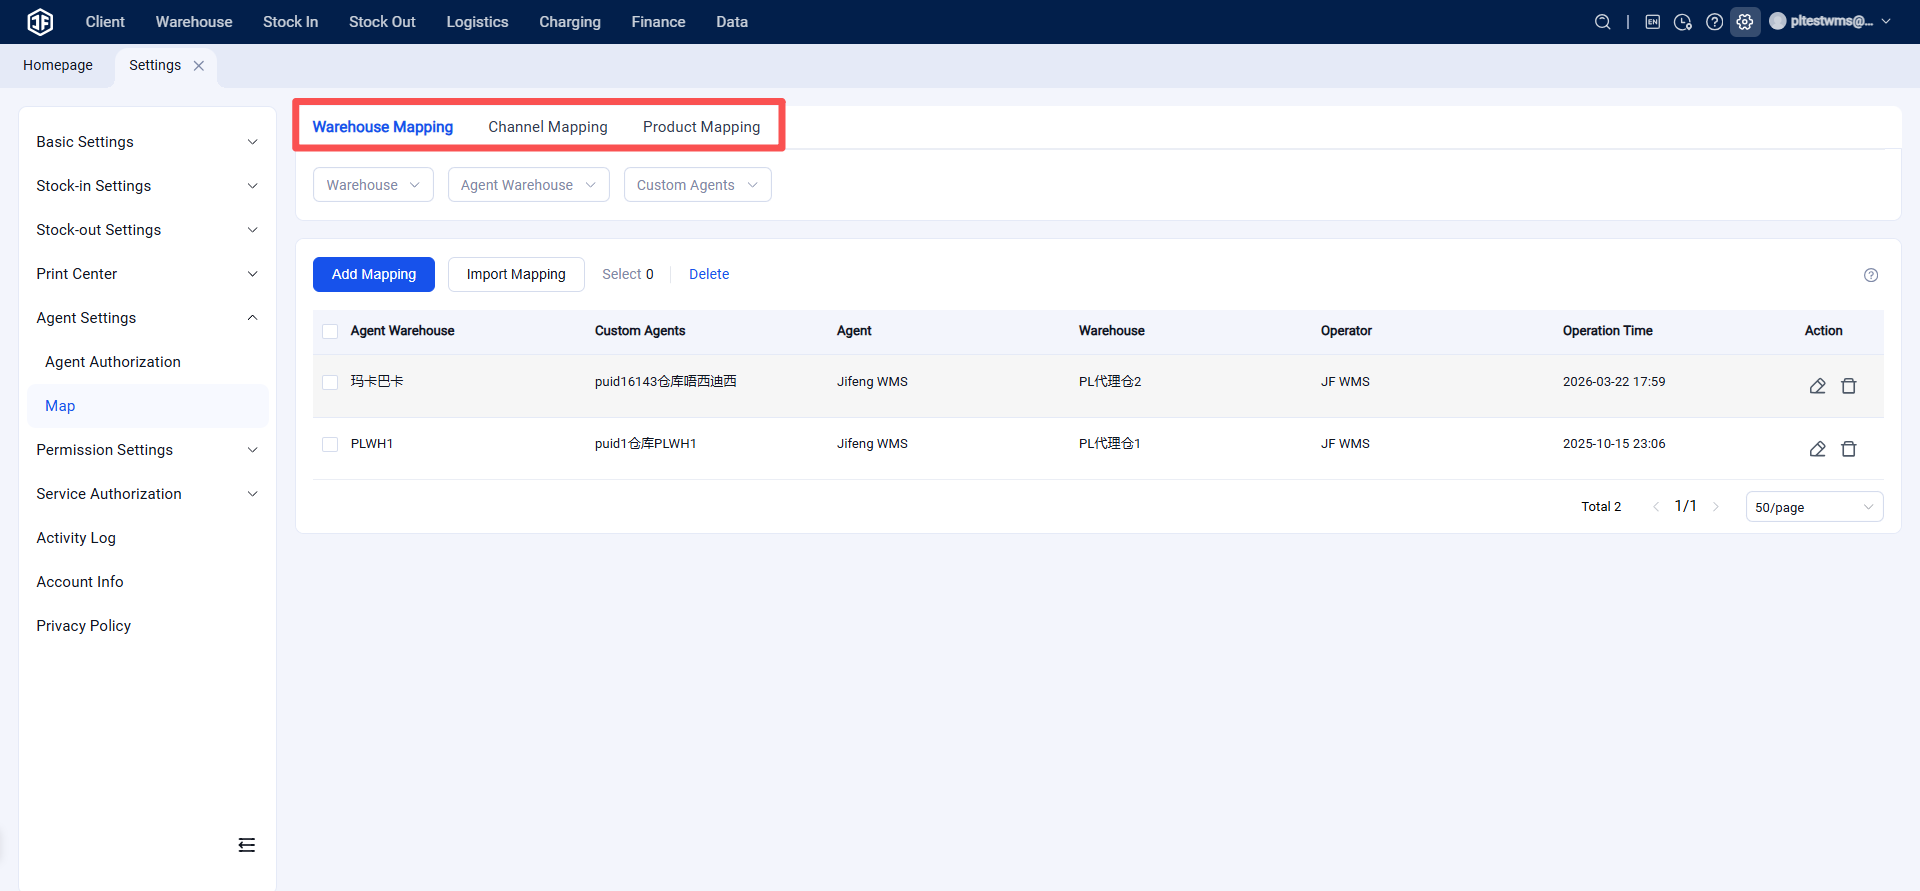
(2) Pairing
Agents establish corresponding relationships with the primary warehouse for warehouses, logistics channels, and products.
4. Permission Settings
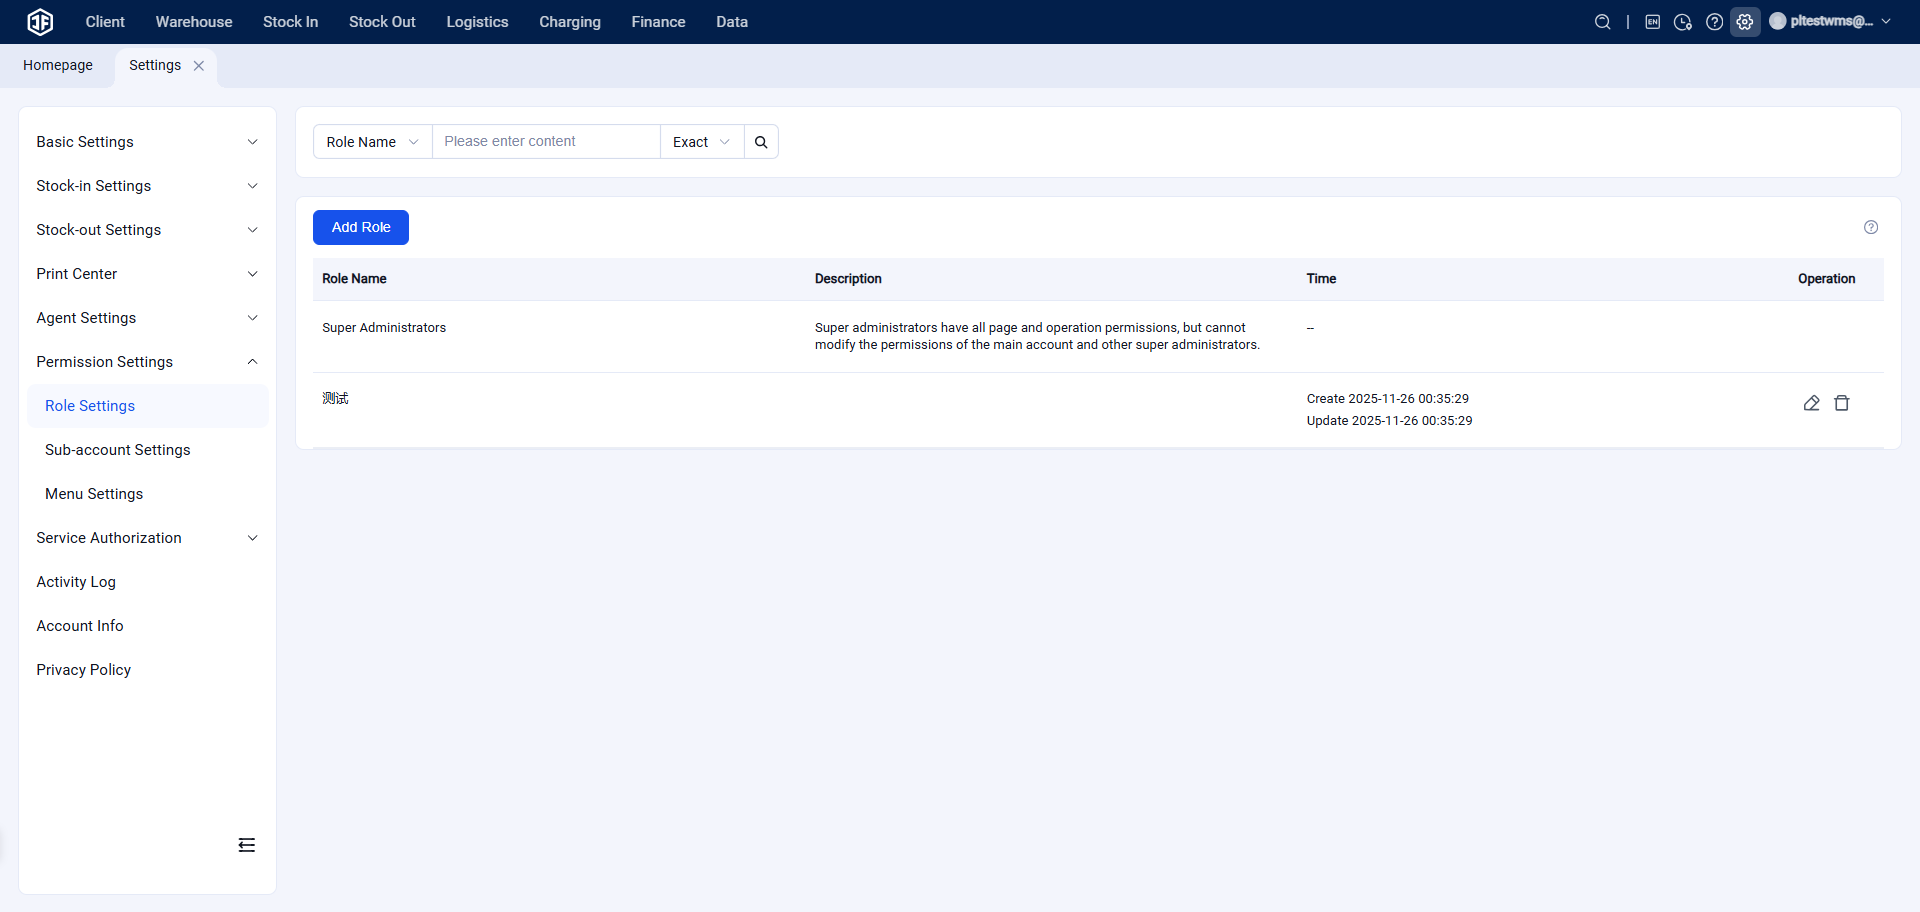
(1) Role Settings
Assign roles based on different positions within the company, such as inbound, picking, packaging, shipping, operations, etc.
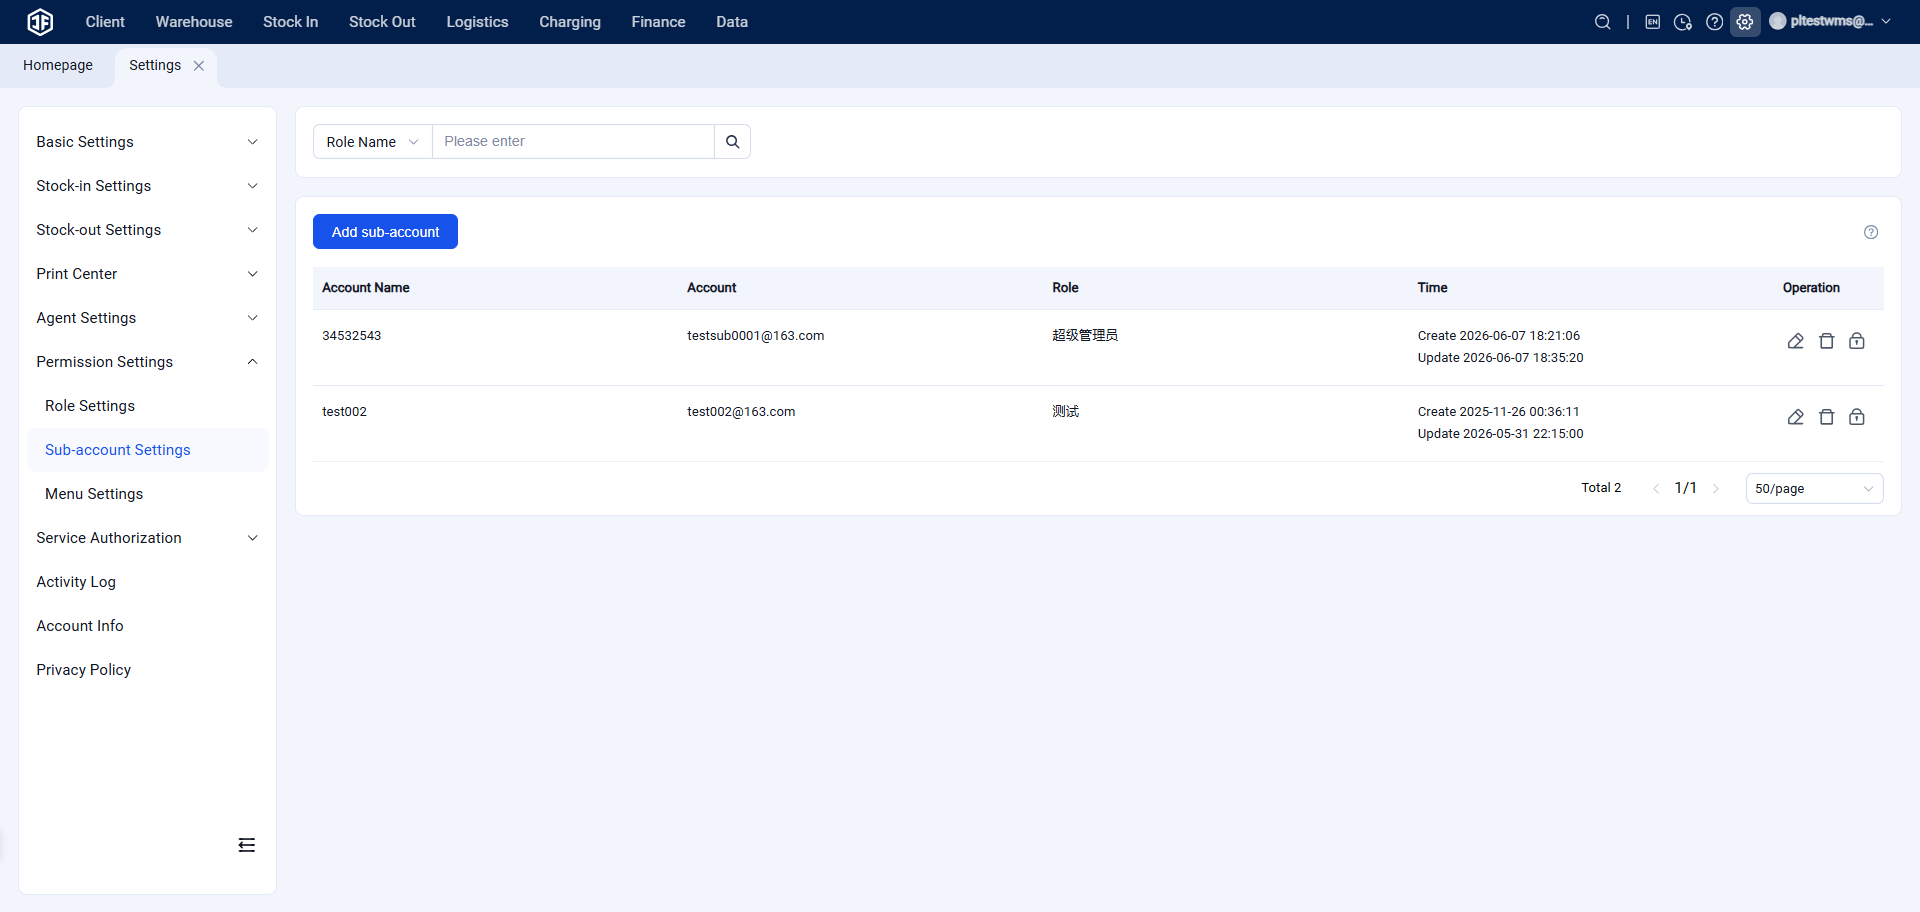
(2) Sub‑Account Settings
Create corresponding sub‑accounts for employees with different roles within the company, and set operation permissions for each sub‑account to ensure data security.
Additionally, when employees perform tasks through their sub‑accounts, the main account can track operations via the activity log, ensuring accountability.
(3) Menu Settings: Administrators can customize the menu configuration.
4. Operation Log
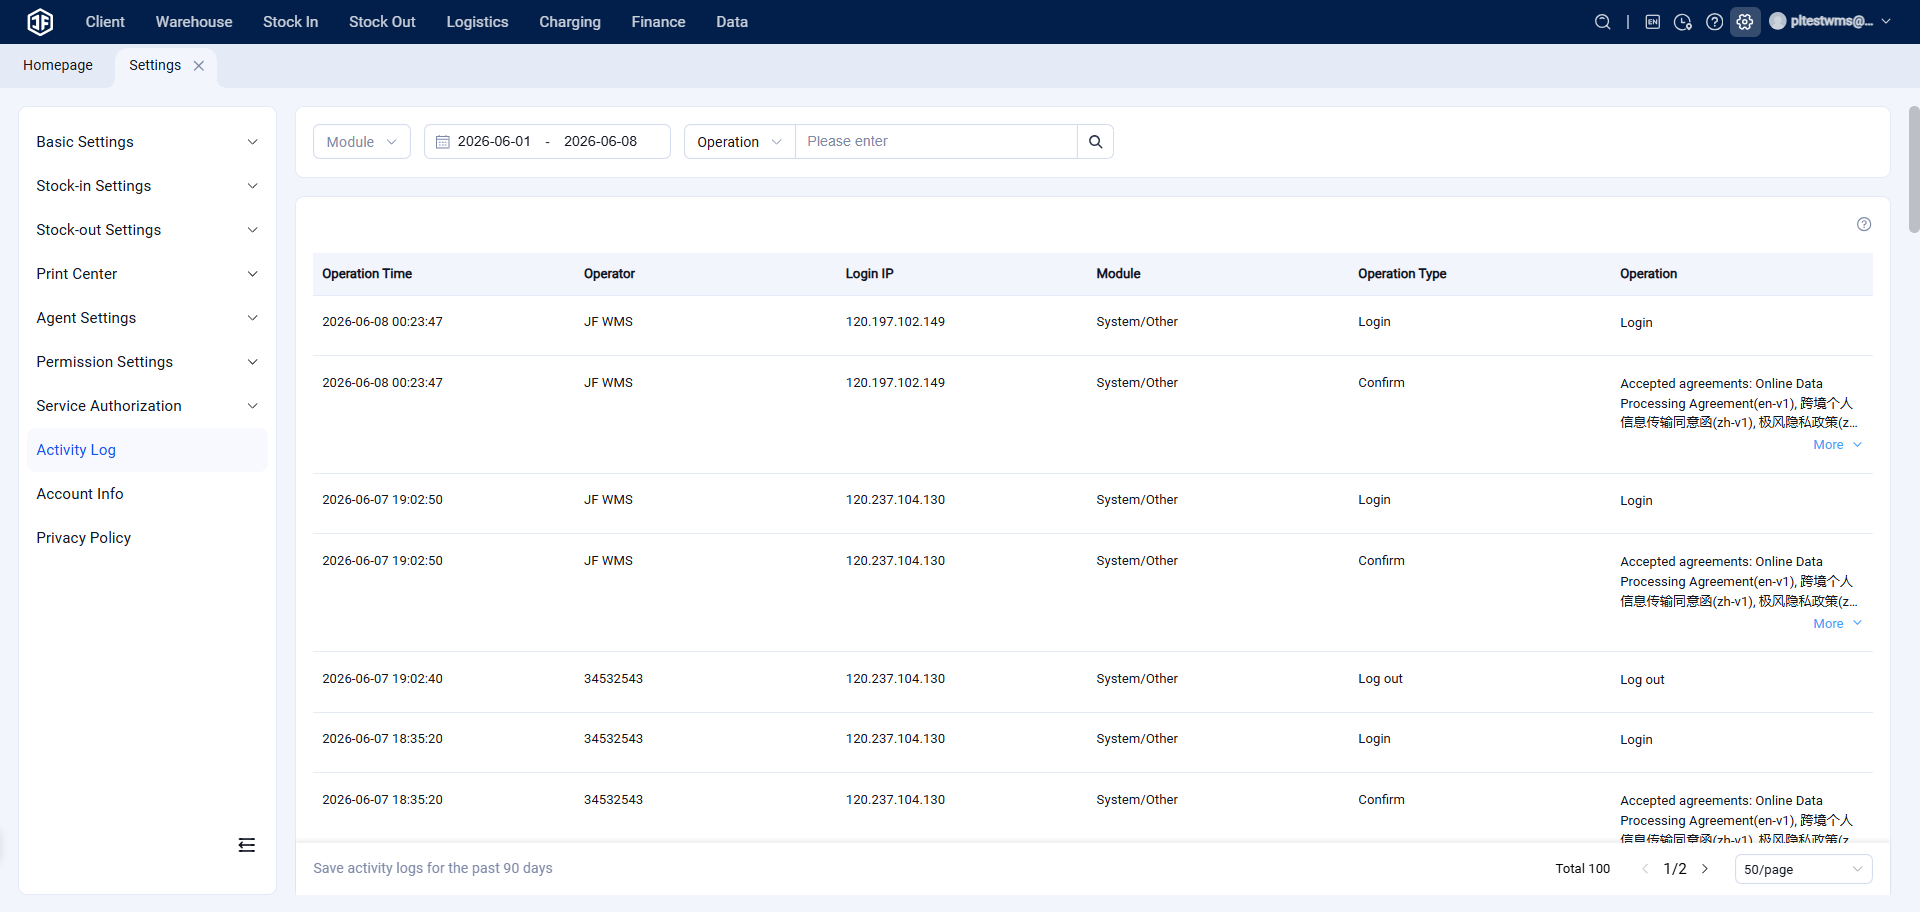
① Records relevant information about operations performed by corresponding accounts on the Jifeng Overseas Warehouse System pages.
② Operation logs are view‑only and cannot be exported.
③ The operation log displays details such as operation time, operator, login IP, module operated, operation type, and related document numbers.
④ Filters: You can filter by operation module, time range, operator, ID, etc.
Frequently Asked Questions:
Q1: Why can the main account view logs that sub‑accounts cannot see?
A1: The main account can view operation logs of all accounts (main + sub‑accounts) by default. Sub‑accounts, however, require specific permissions to view logs; otherwise, they can only see logs from their own account.
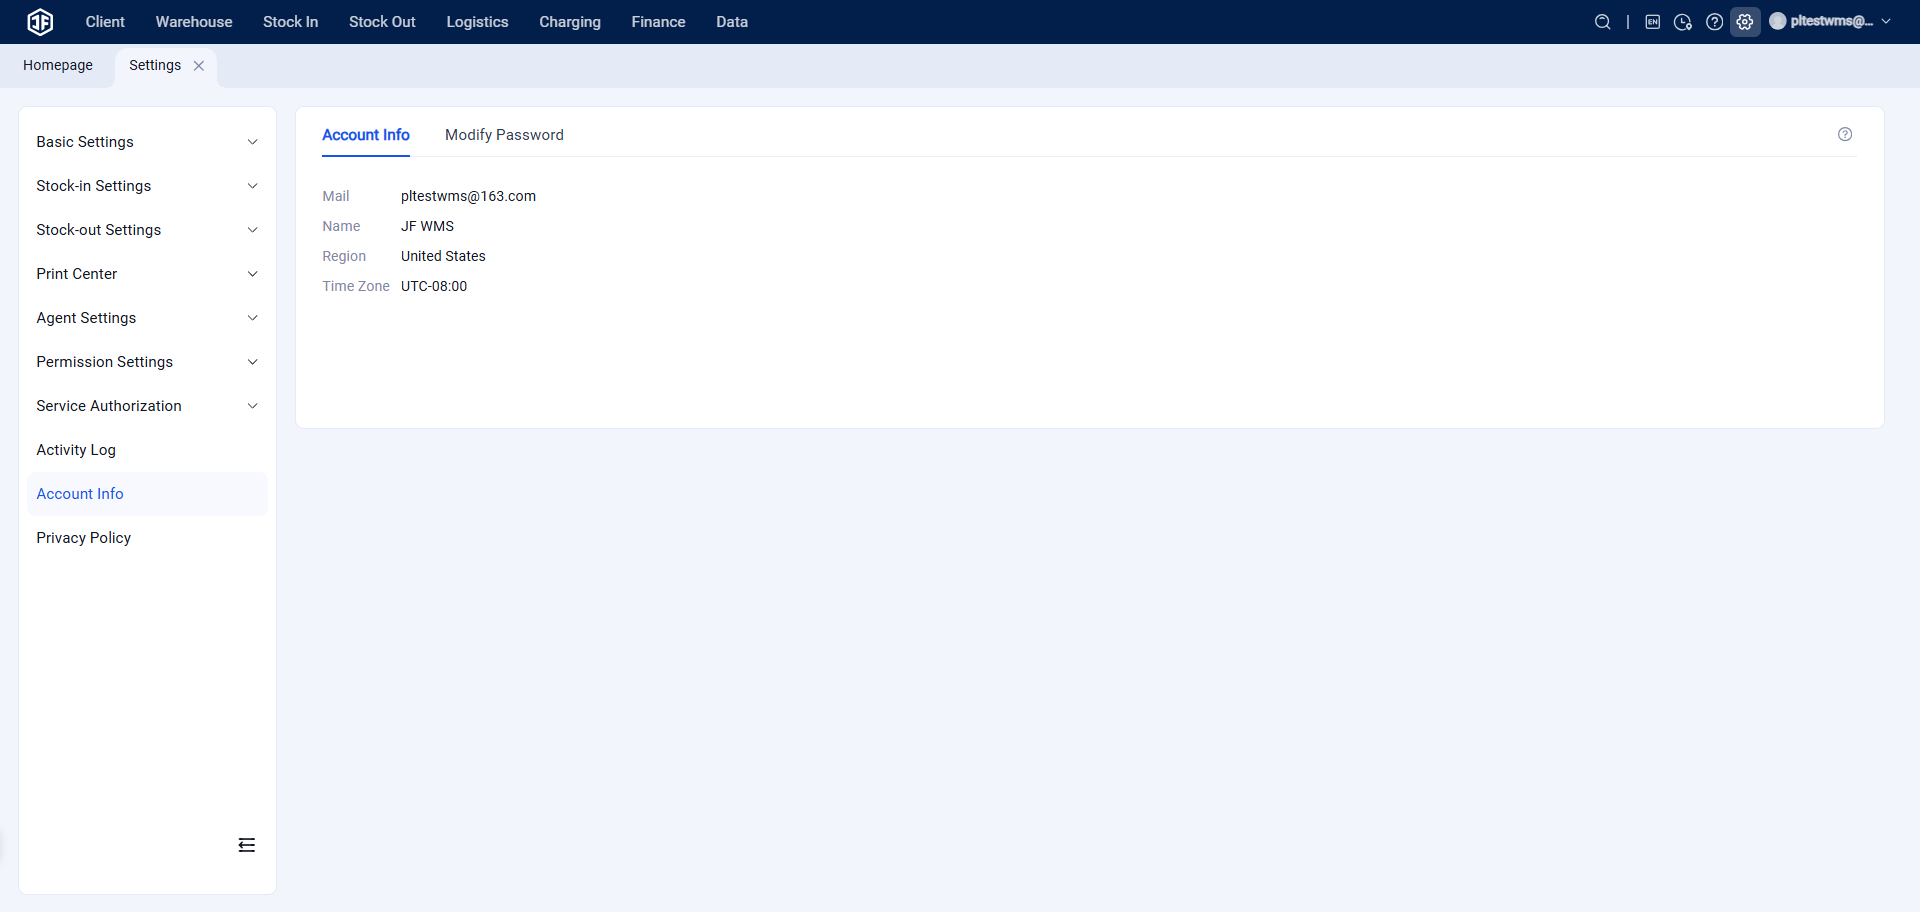
5. Account Information
① Account Information: Displays the registered email, name, region, and time zone in the overseas warehouse system.
② Change Password: Allows the overseas warehouse to enter the current password and update/confirm a new login password.