Order Processing Workflow (Simplified Drop-Shipping Outbound Process)
I. Definition
The warehouse-side order fulfillment process begins when a seller client, using an ERP system or the seller platform (OMS account), processes an order, creates a manual order, or authorizes the seller platform (OMS account) directly through a marketplace. This action automatically pushes the order to the warehouse WMS. Upon receiving the instruction, the warehouse proceeds with picking and packing. Each overseas warehouse can select the picking and packing methods that best suit its operational scenarios to enhance efficiency.
Below are three simplified order fulfillment workflows:
Method One: Print Picking List + Shipping Label
Method Two: Print Shipping Label with SKUs
Method Three: Print Picking List
Advantages of Simplified Picking, Label Printing, and Shipping Compared to Batch Picking:
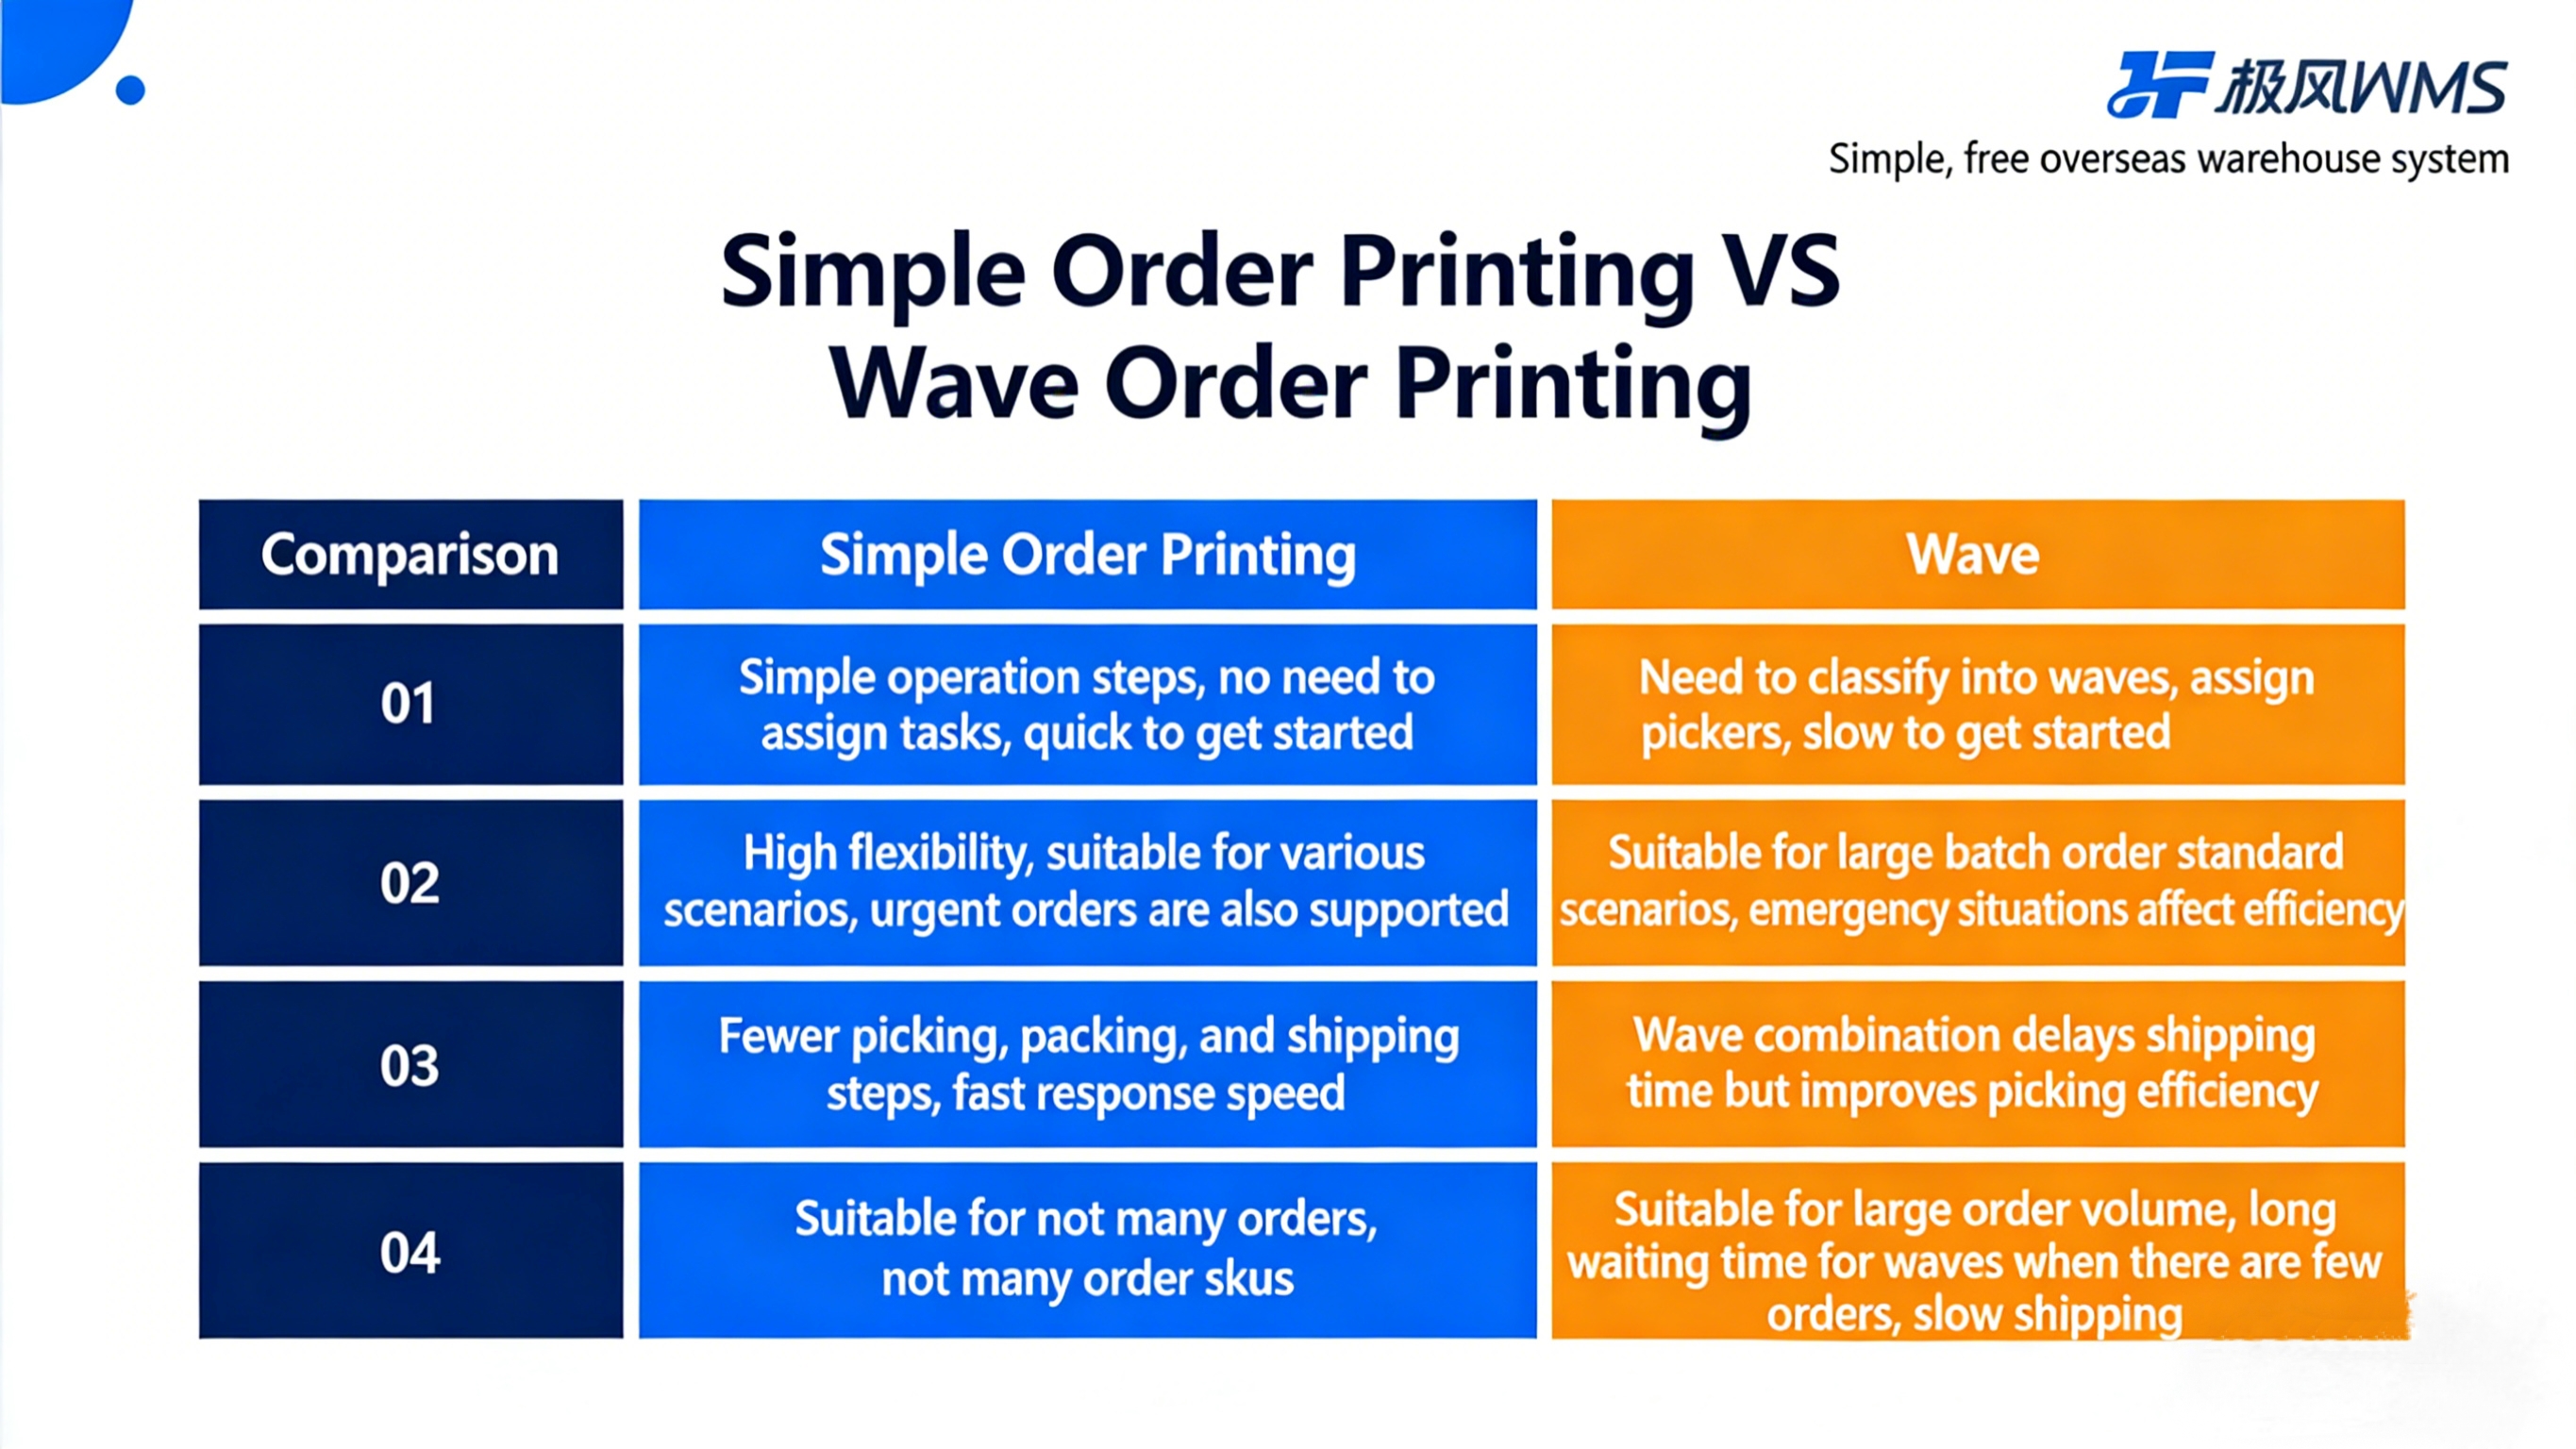
Note: This guide introduces a simplified order processing workflow suitable for sellers with a daily order volume of up to 3,000 orders. If you need to categorize different types of parcels—such as single-item orders, multi-item mixed packages, or batches of similar items—into separate picking tasks and assign them to different pickers, then batch picking should be utilized.
II. Operational Guide
Method One: Print Picking List + Shipping Label
Configure the order picking template to print both a picking list and a shipping label. Warehouse staff pick items according to the picking list, and packers directly package the picked items and attach the shipping label.
This method is suitable for scenarios with complex SKUs (e.g., customized products, phone cases, apparel) or when there are many items per package, lengthy SKU names, etc.
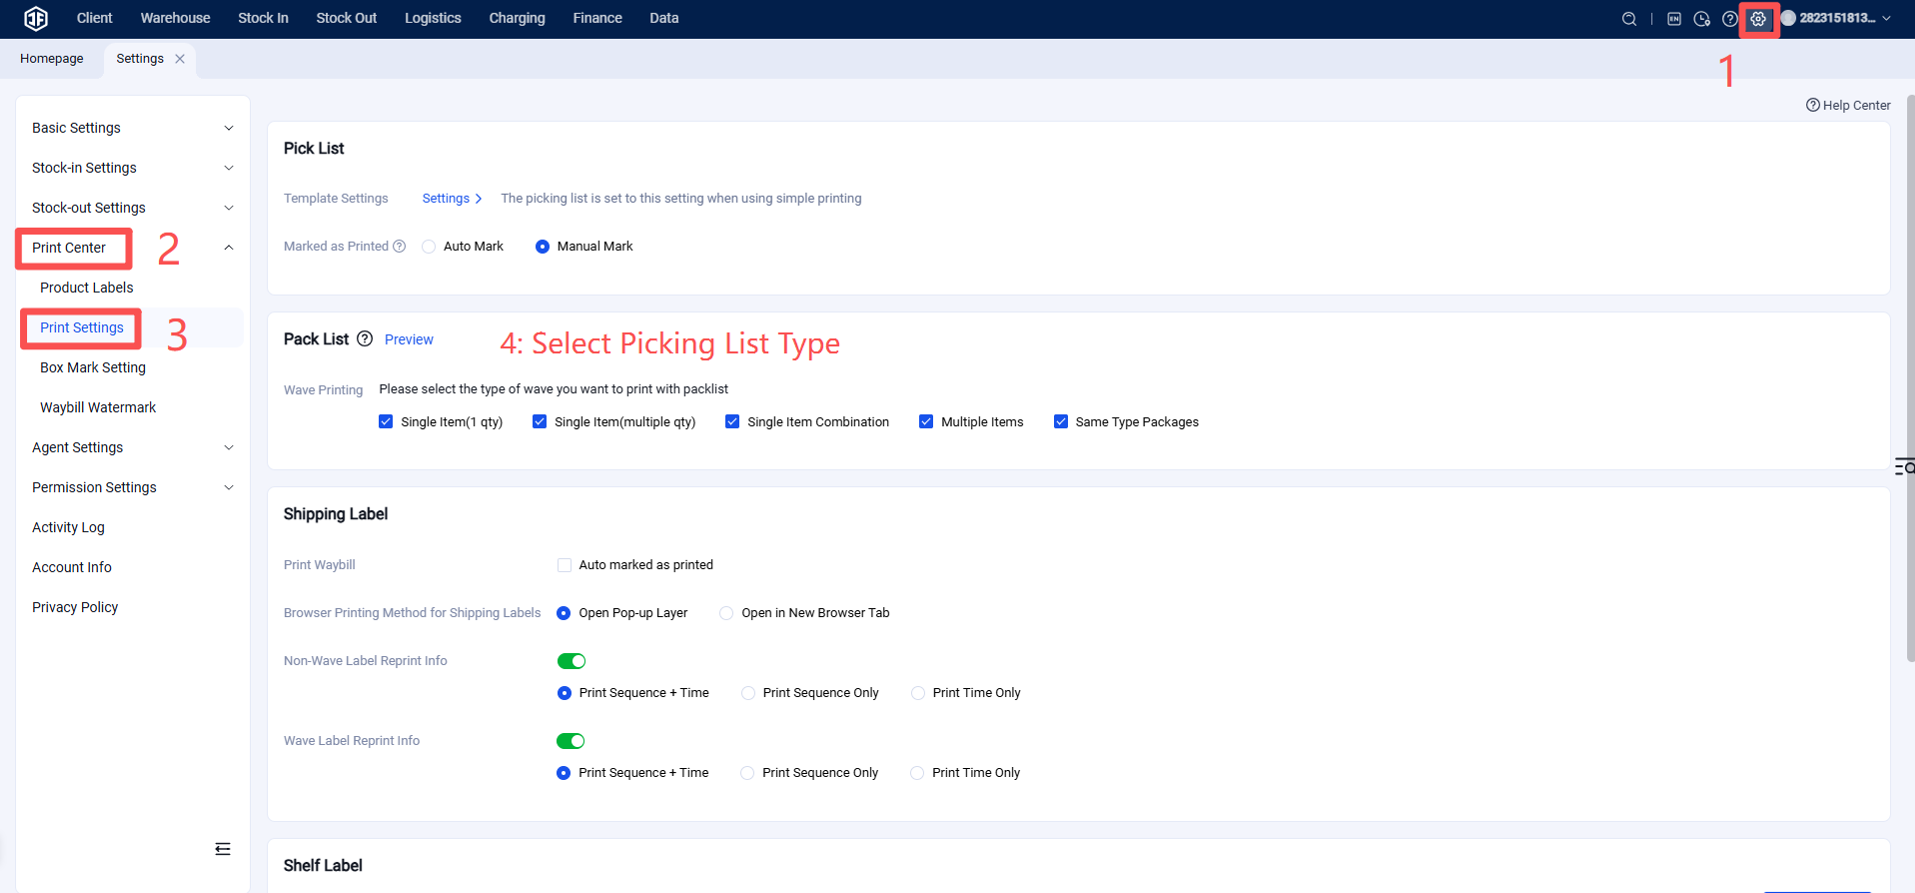
Step 1: Configure Picking List Type
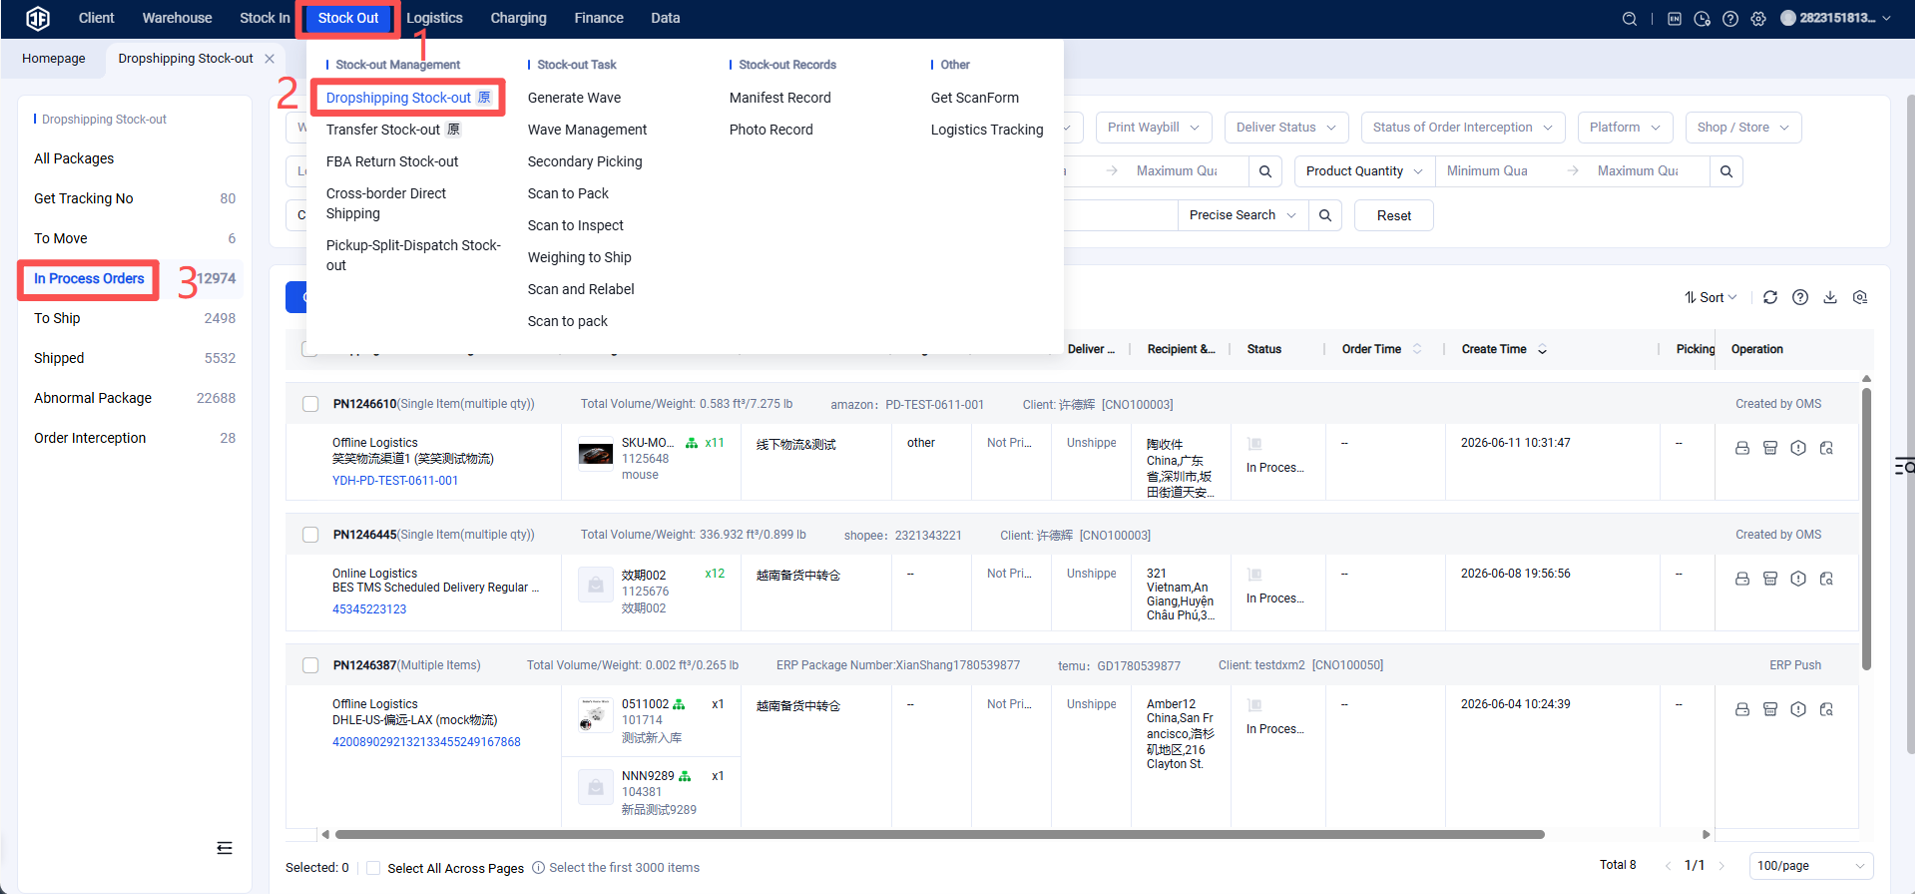
Step 2: Print Shipping Label + Picking List
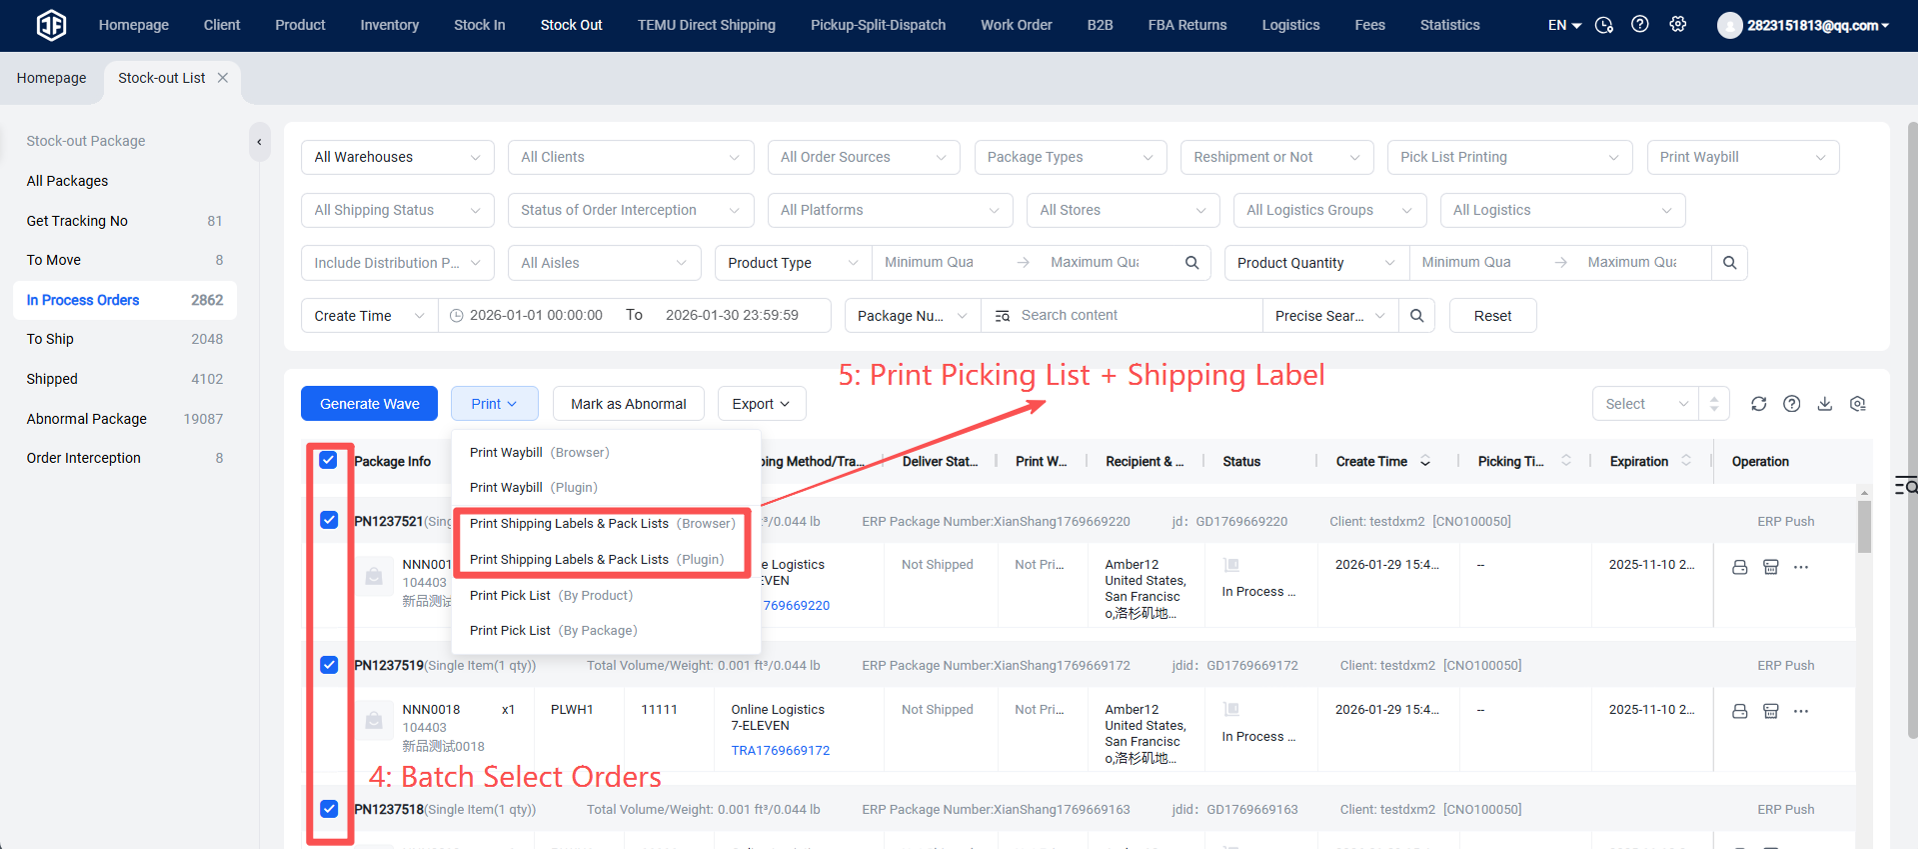
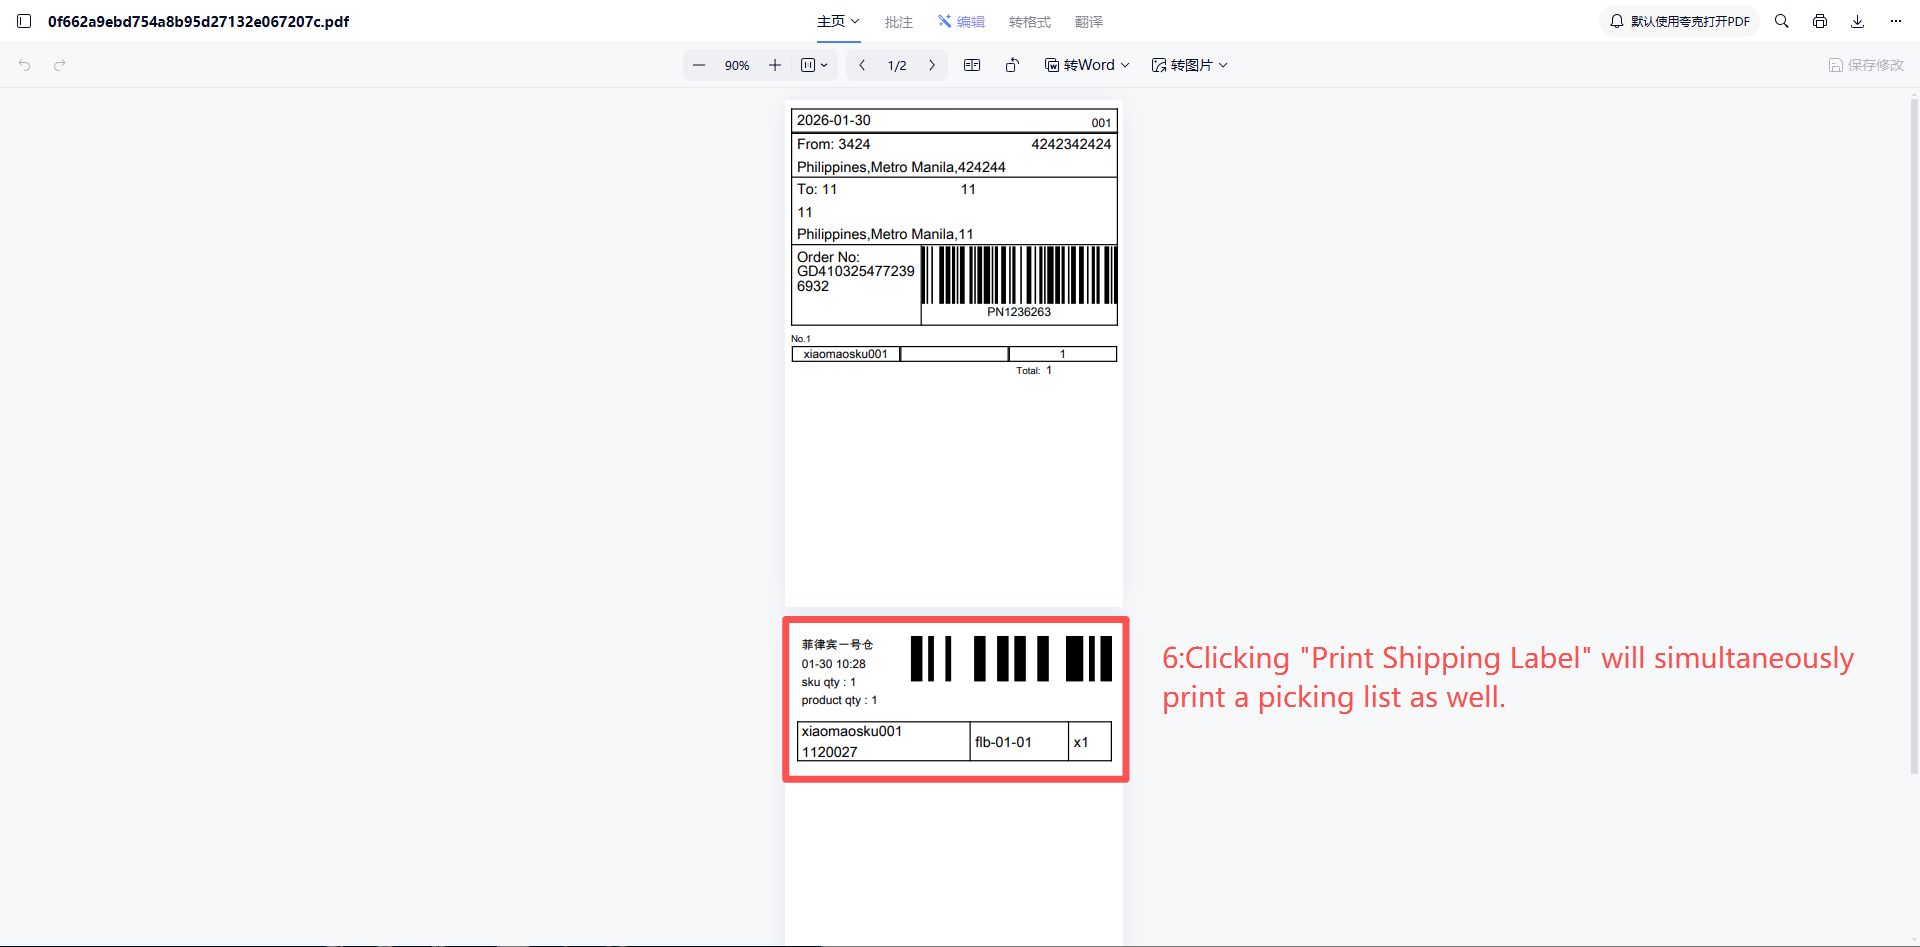
After printing is completed, the shipping label printing status will be marked as "Printed".
Step 3: Scan and Verify Items (This step can be performed if there is a concern about picking errors by warehouse staff.)
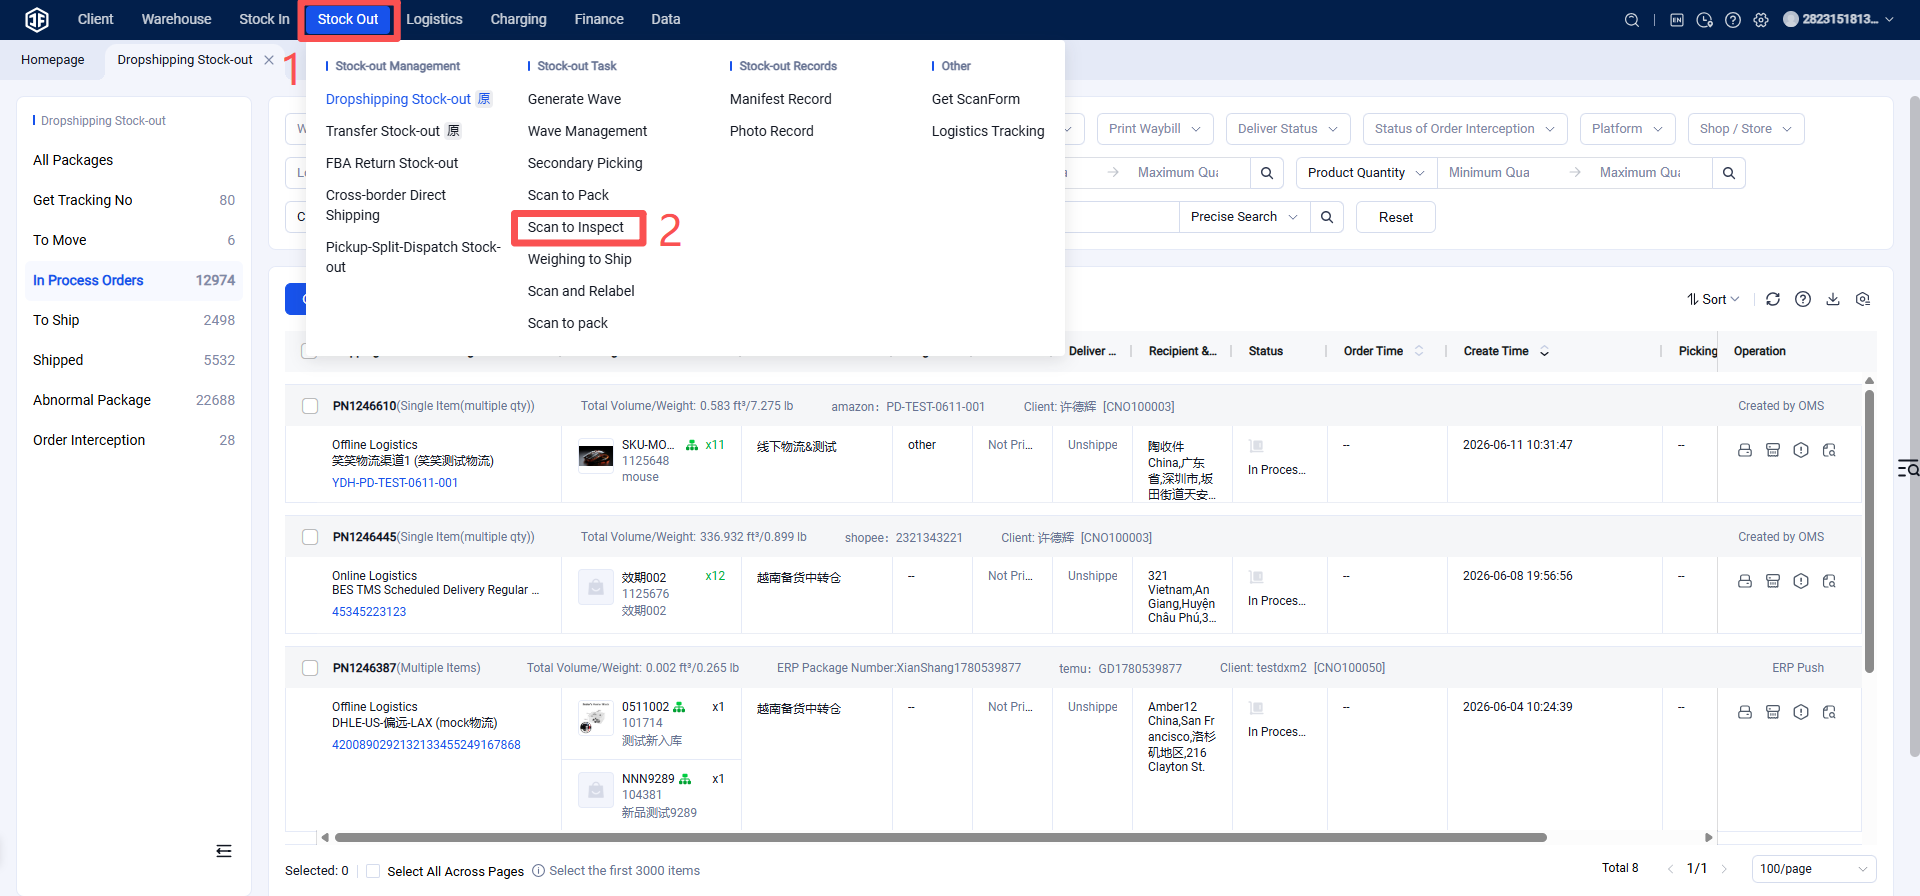
Scan the shipping label (tracking number) to verify the items.
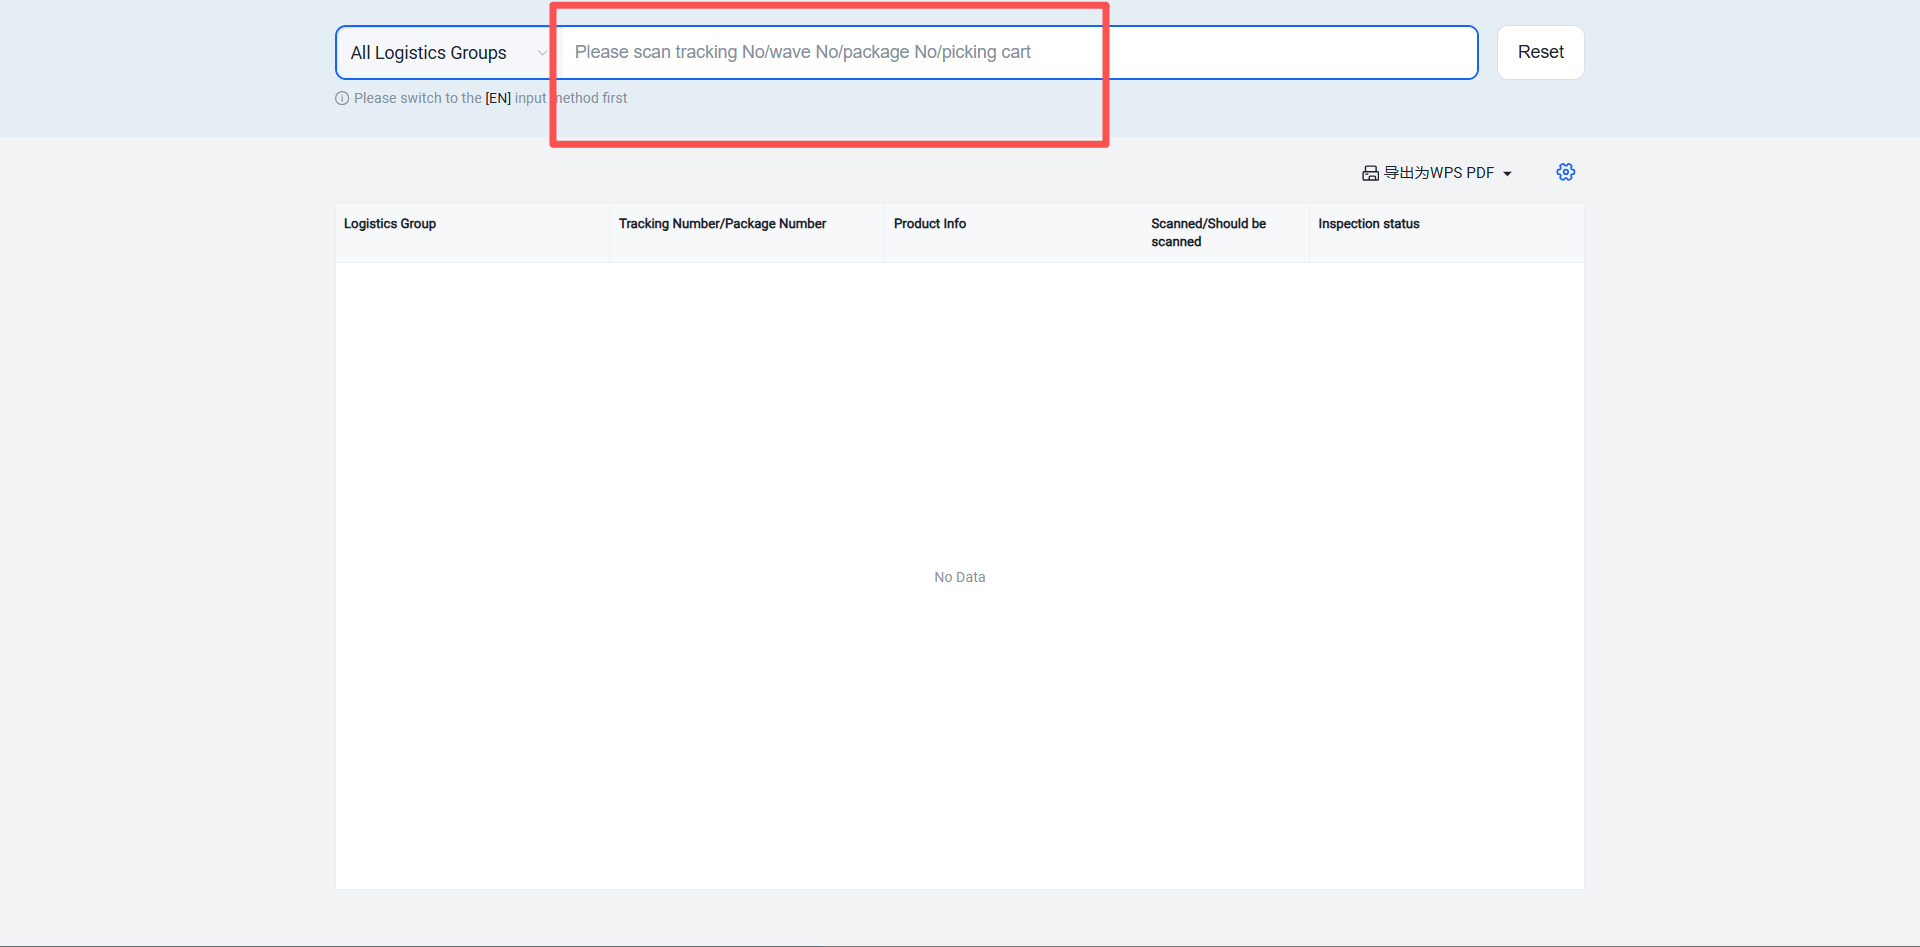
【Scanning Settings】
Automatically complete verification upon scanning the parcel: If the parcel number or tracking number is scanned successfully, the verification for this parcel is automatically completed. This mode does not require scanning individual product labels.
Automatically complete verification upon scanning the product: When a product is scanned successfully, the verification for the currently scanned SKU is automatically completed.
Standard verification: First scan the document (e.g., picking list), then scan the products to complete verification.
【Shipping Label Printing Settings】 Since the shipping label has already been printed, no label needs to be printed during scanning and verification. Enable this option to prevent label reprinting.
Note: Before entering the scanning and verification page, ensure the Jifeng Print Plugin is installed and active. If it is not installed or not open, a pop-up prompt will appear to guide you through the installation.
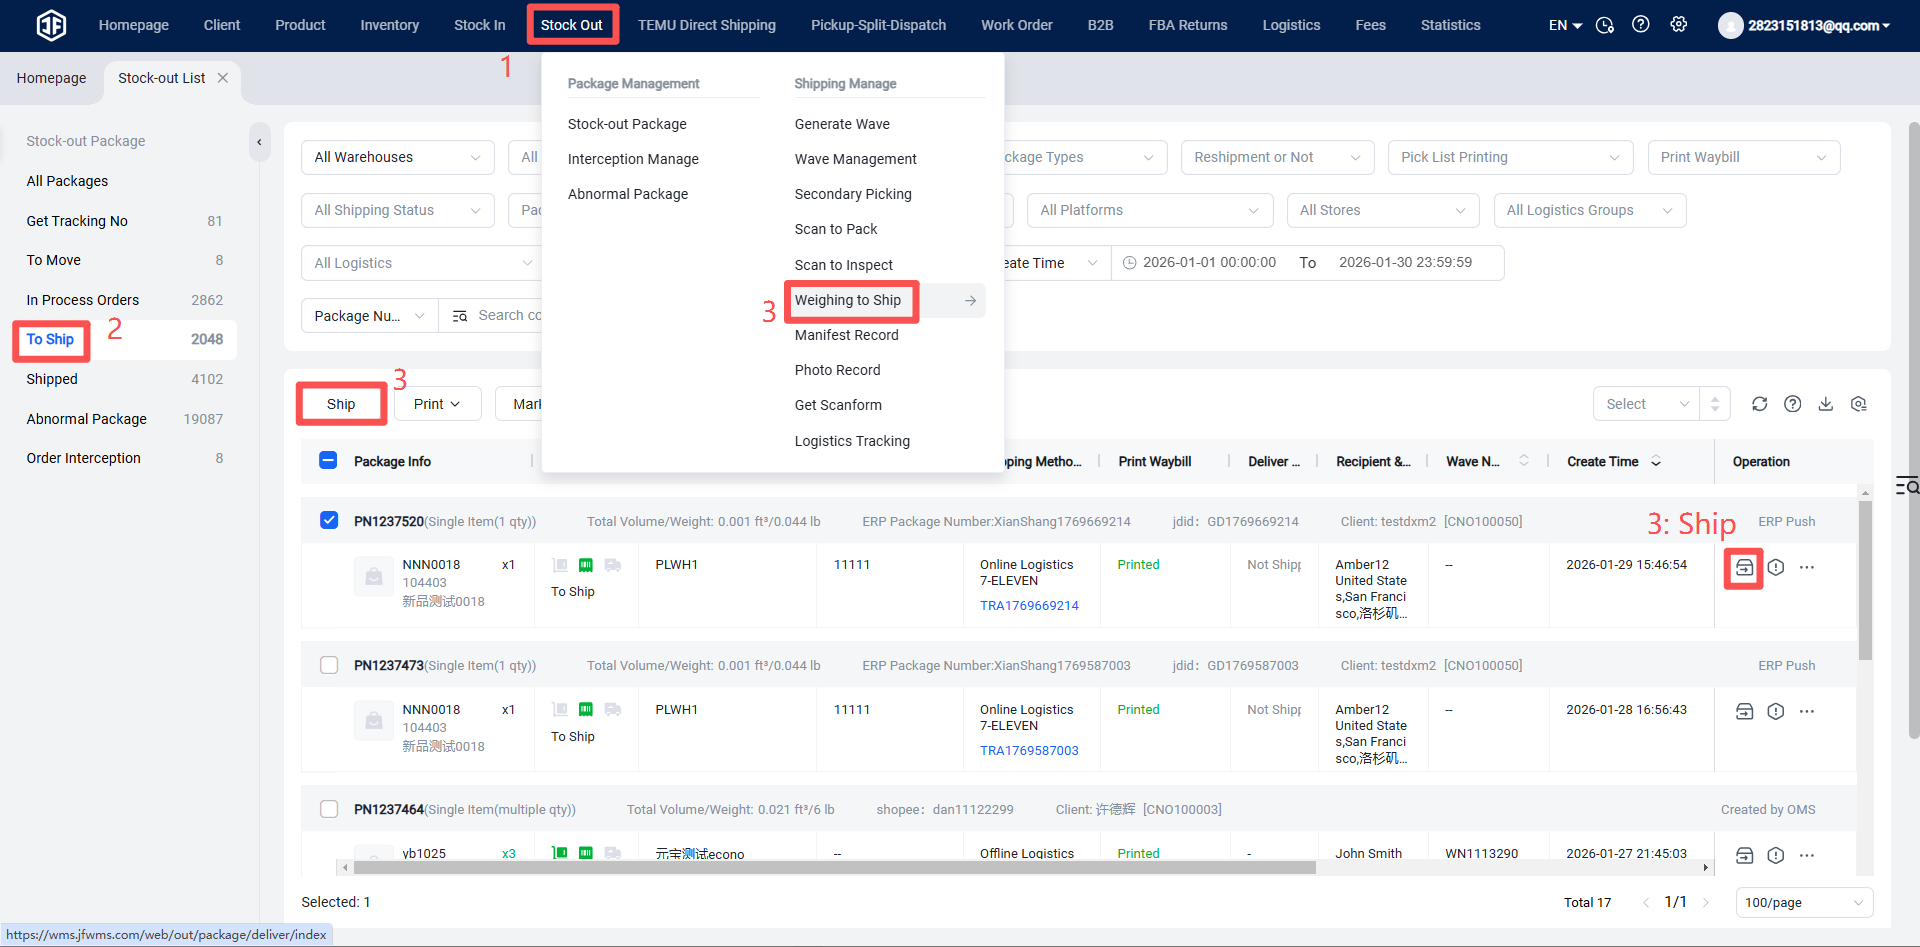
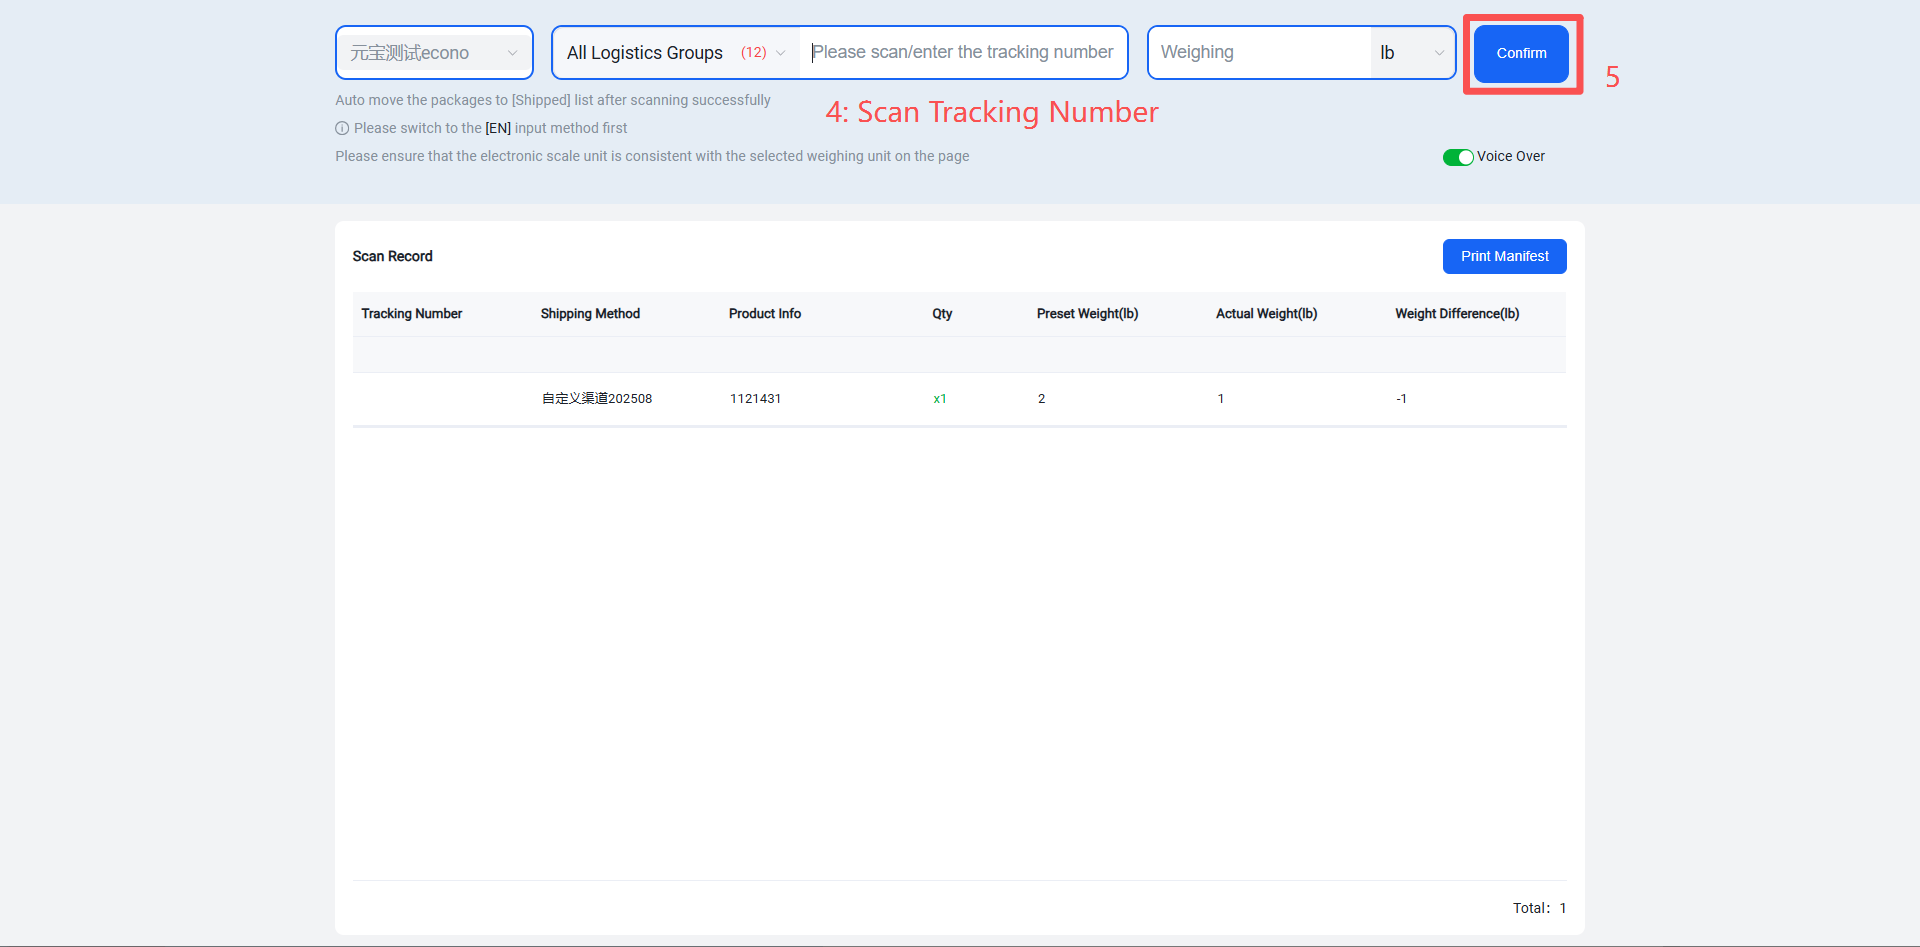
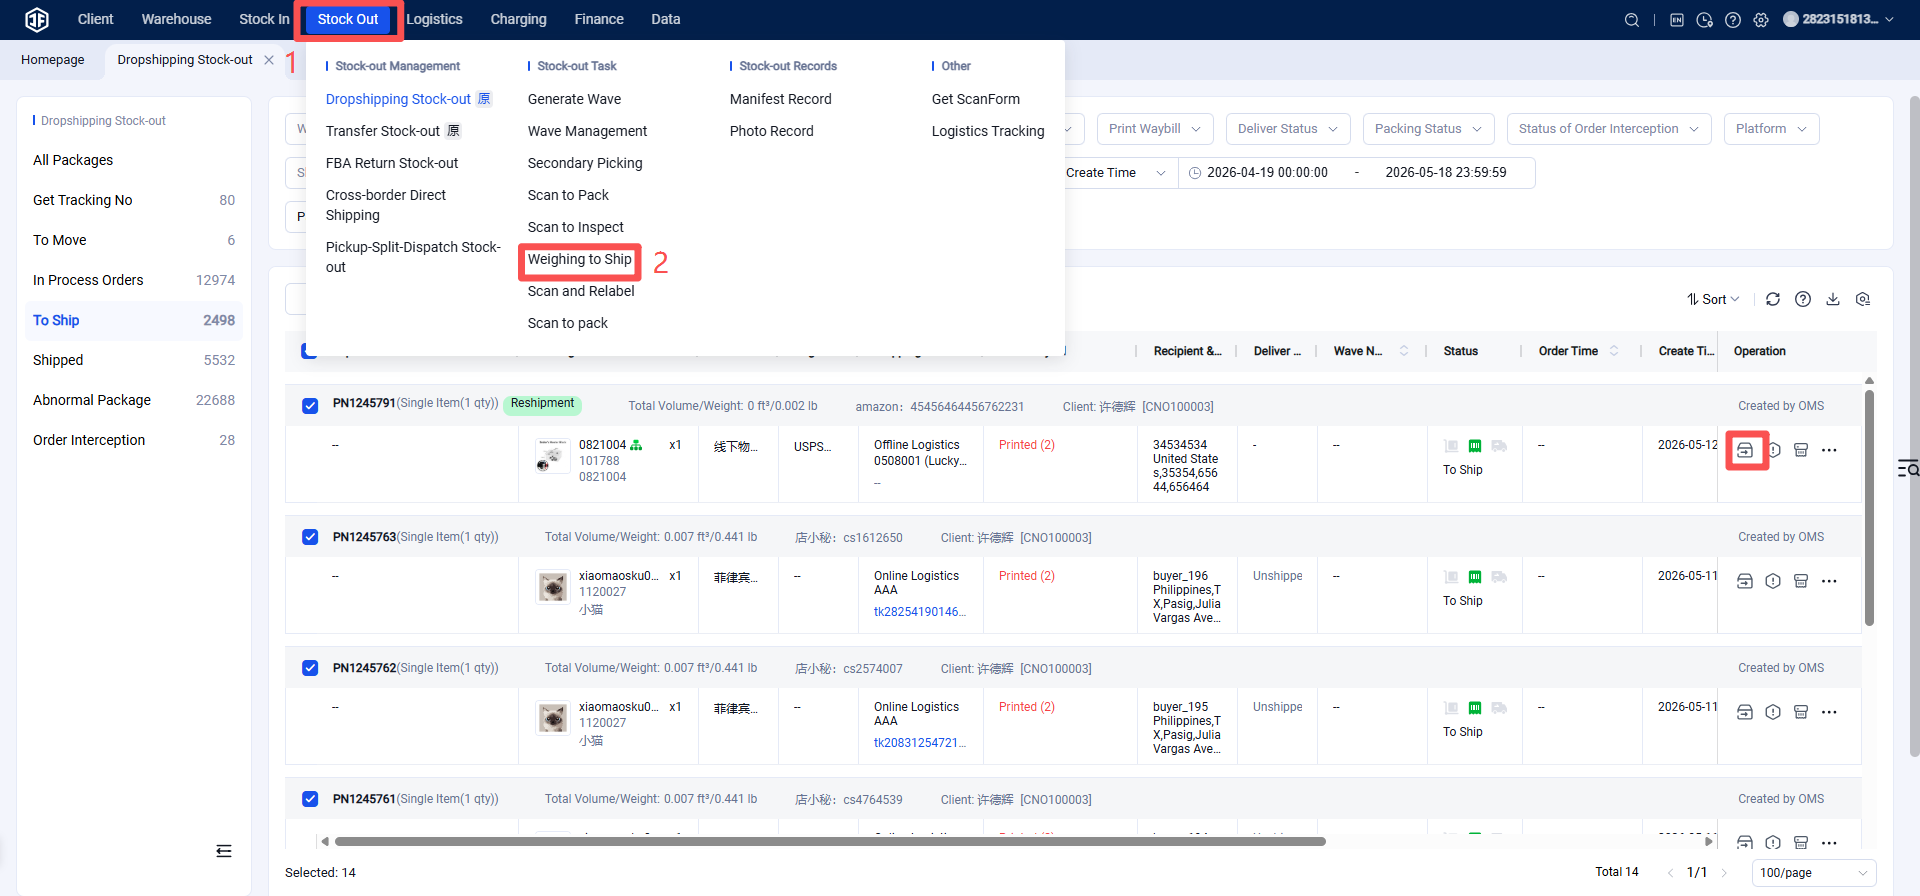
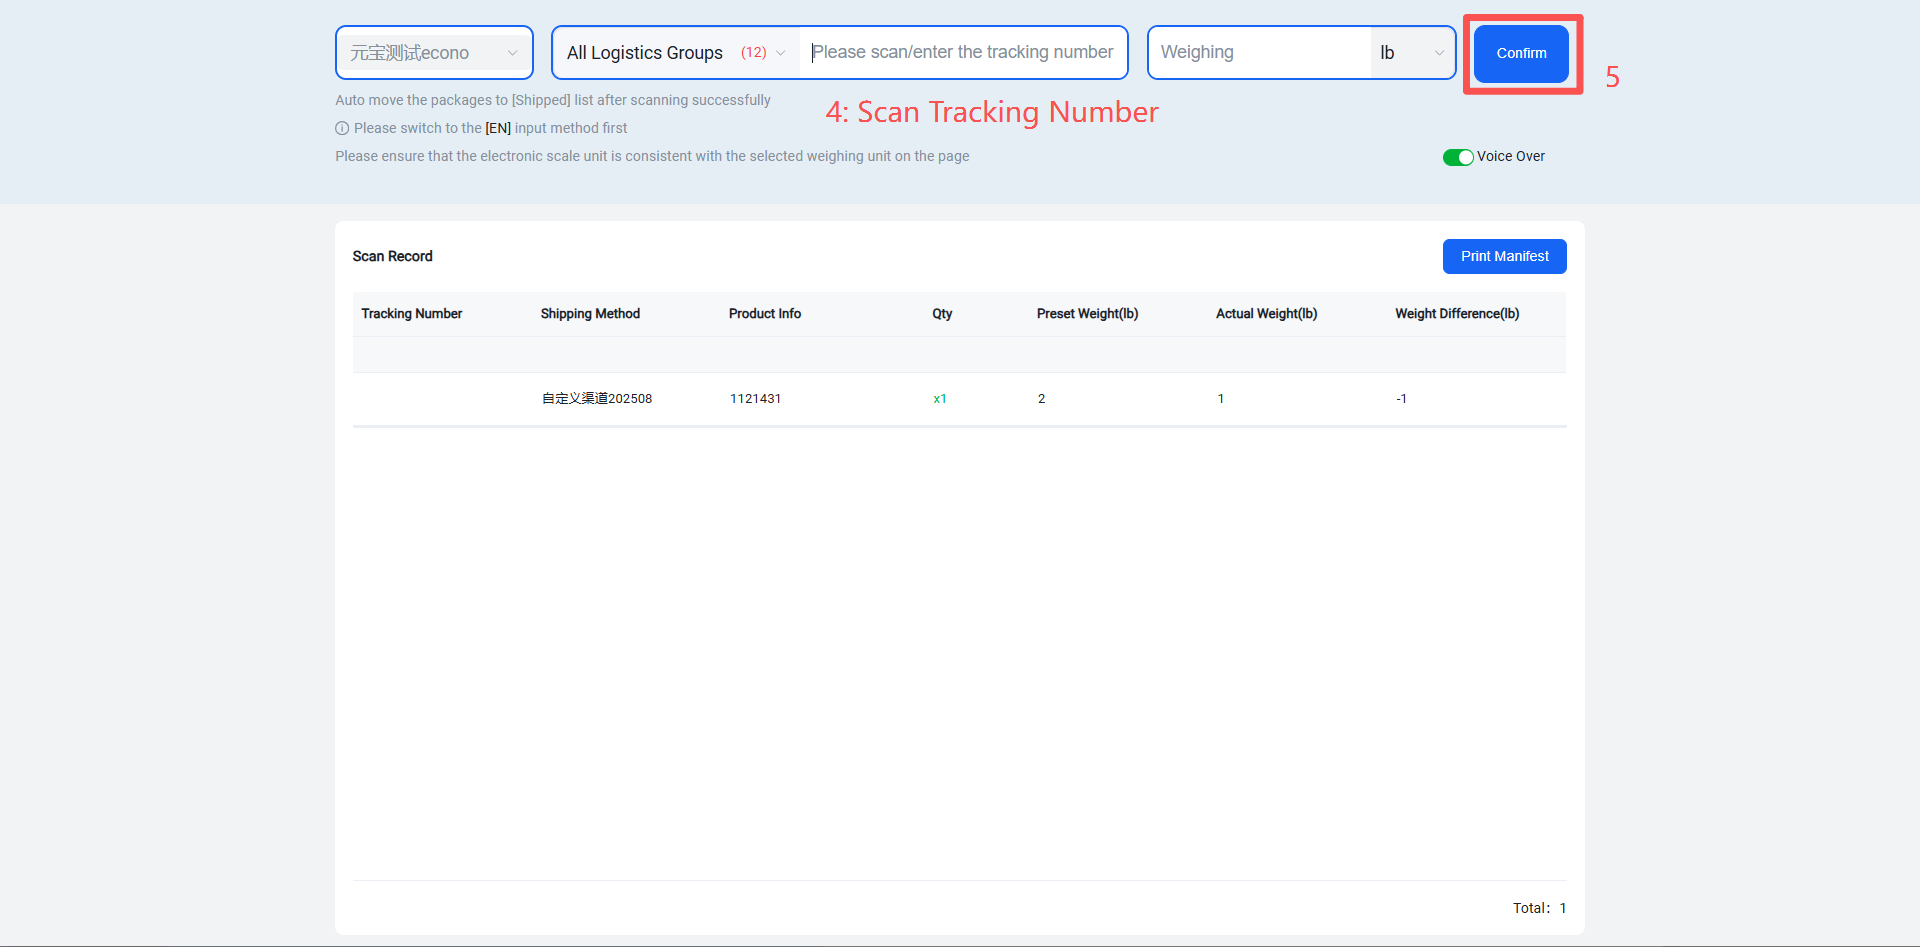
Step 4: Ship or Scan to Ship (Shipment can be triggered automatically in the previous scanning and verification step, initiated manually, or by scanning after weighing.)
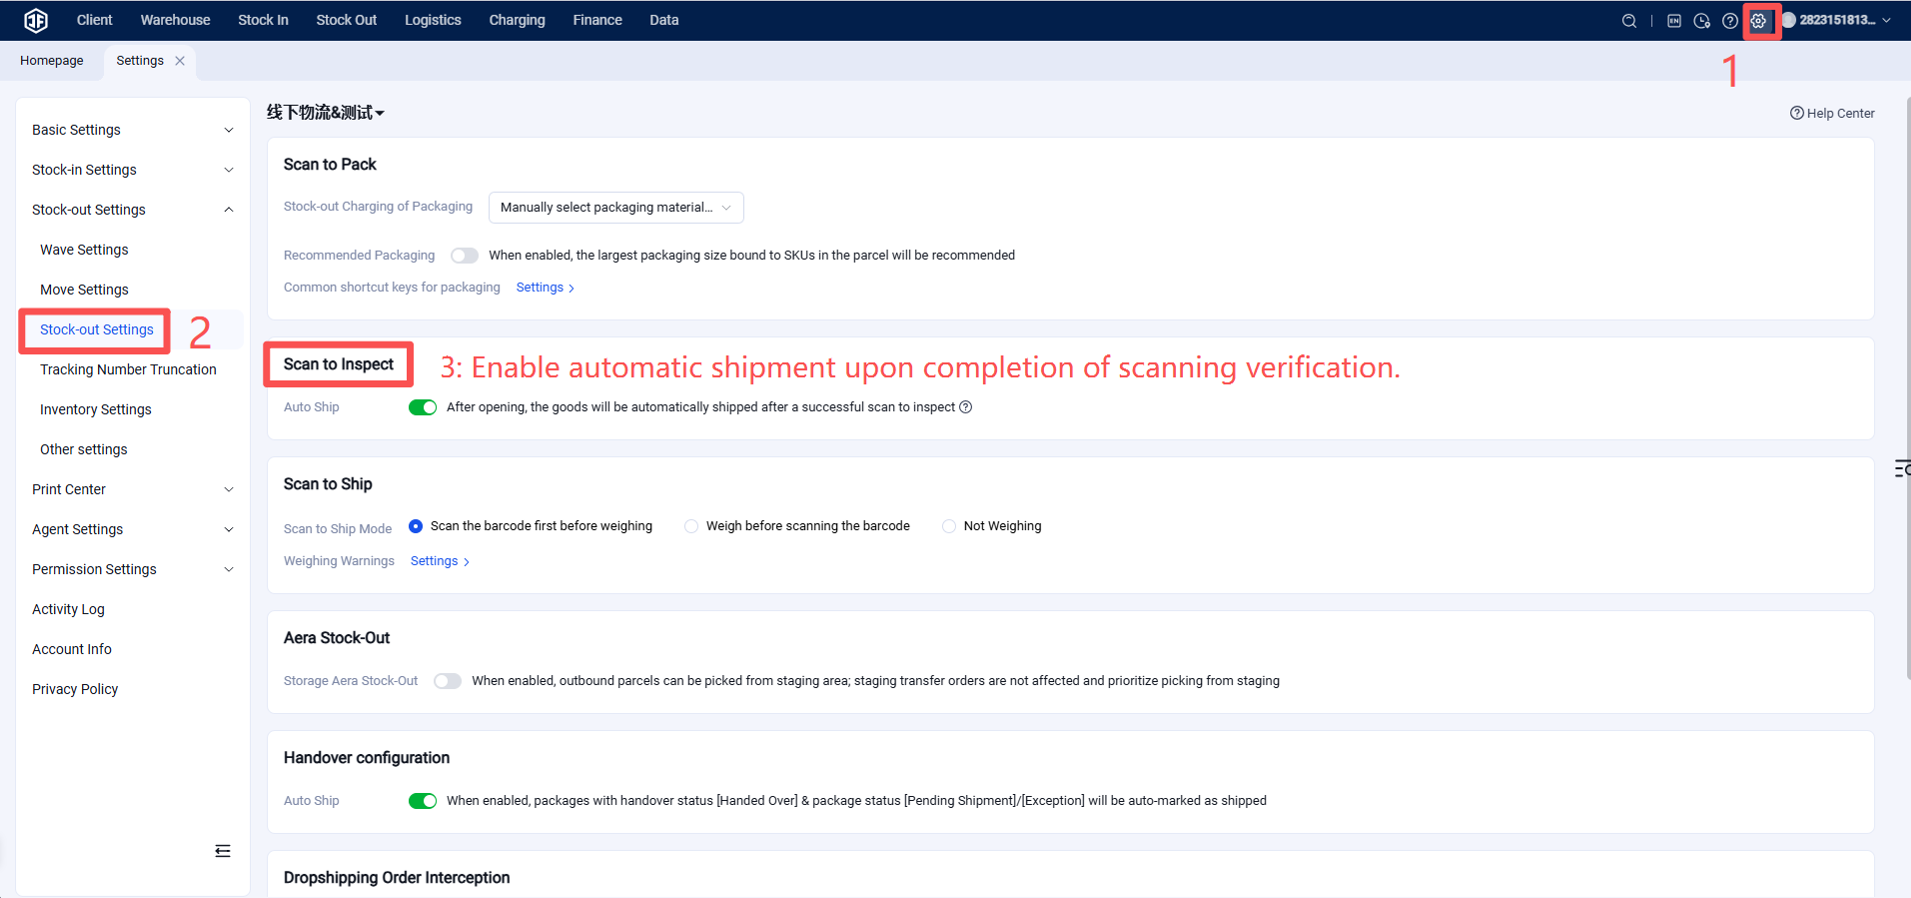
To enable shipment upon scanning verification, configure the following:
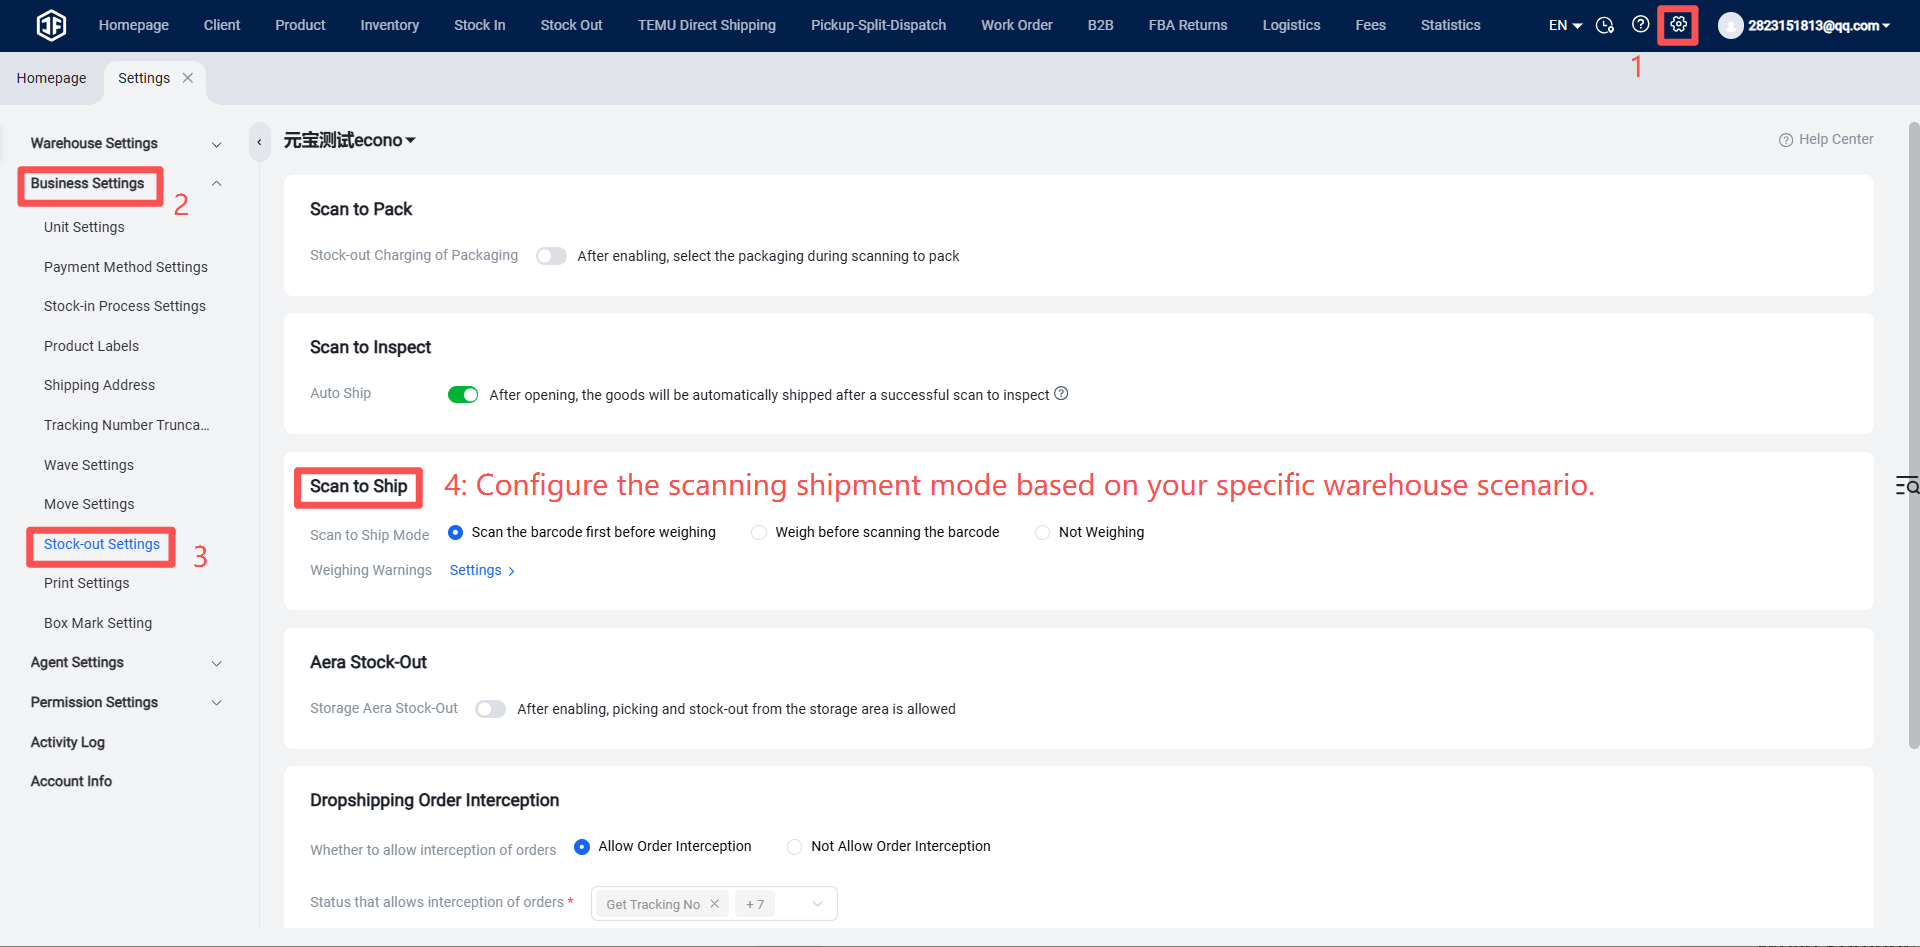
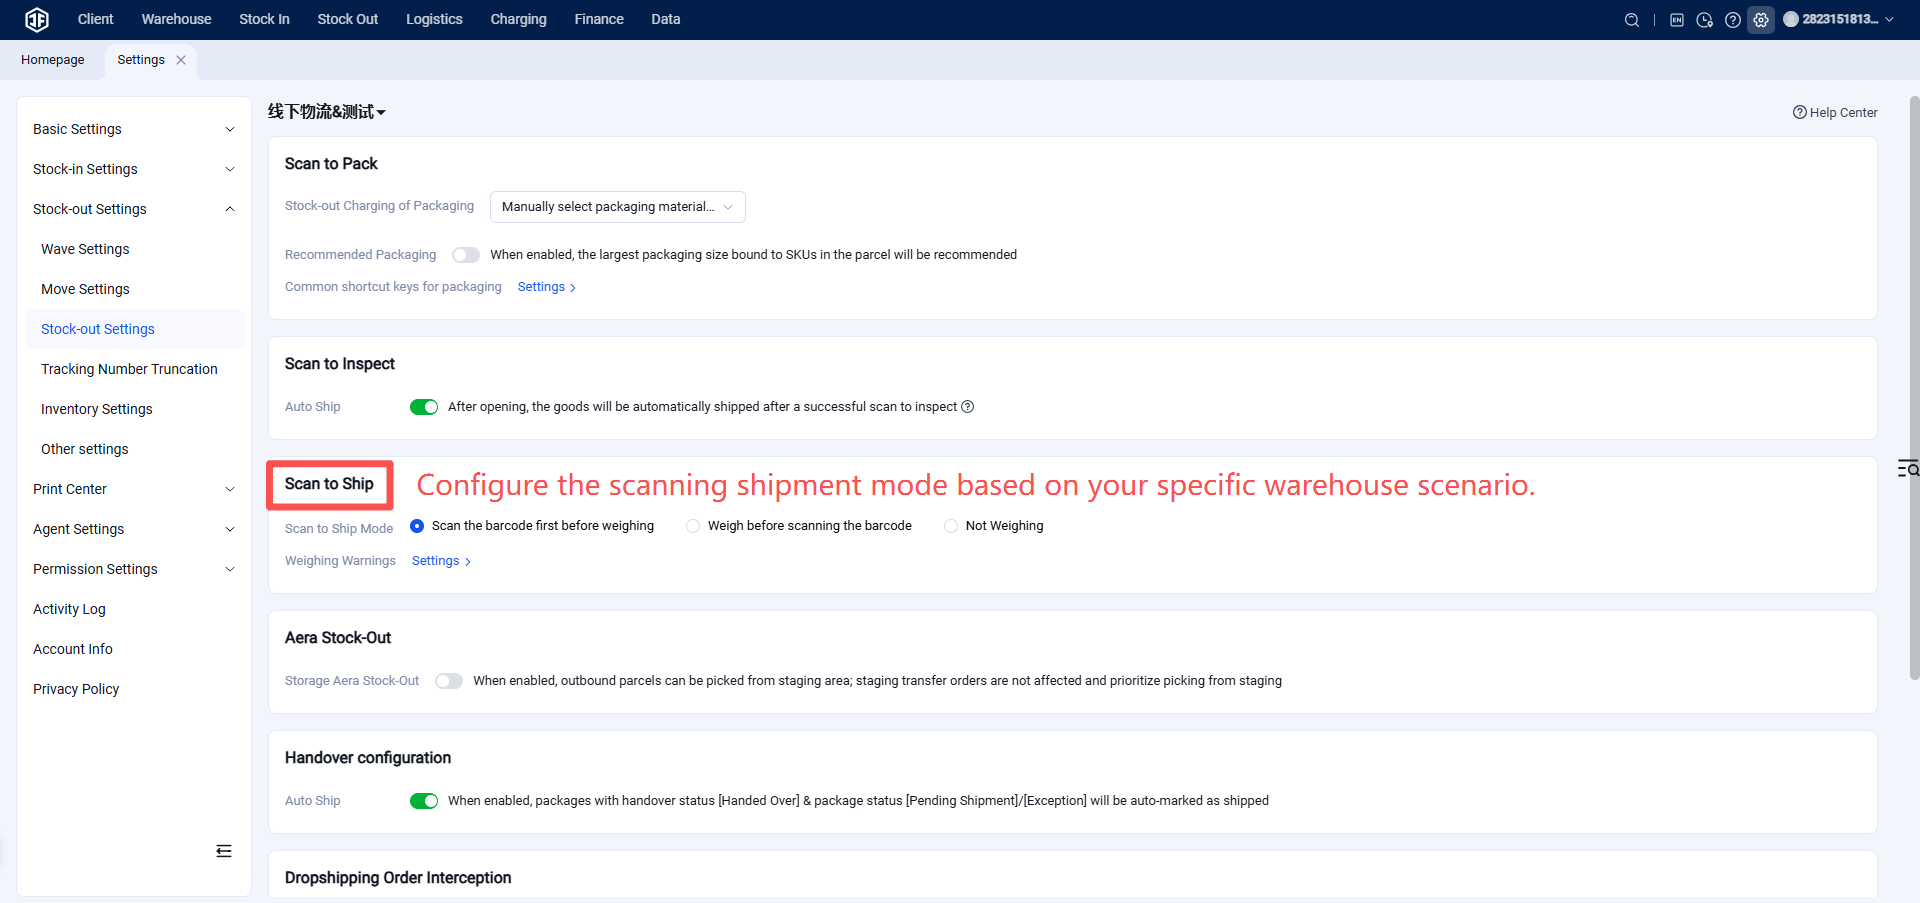
Overseas warehouses that require weighing and scanning for shipment need to configure the following settings:
Method Two: Print Shipping Label with SKU Watermark
Configure the template under Logistics - Shipping Label Watermark Settings. When printing the shipping label based on the logistics channel, the label will include SKUs and shelf locations. Use this information for picking and packing.
This method is suitable for overseas warehouses aiming to save paper by avoiding the printing of separate picking or packing lists. However, a potential issue is that the SKU or shelf location watermark on the label may reveal the package contents to delivery personnel, increasing the risk of item loss during transit.
Step 1: Configure Fast Order Fulfillment with Shipping Labels and SKU Printing Reference link: https://help.jfwms.com/zh_CN/doc-article/1002120425-
This method is also not ideal for orders with numerous SKUs or long SKU names, as the watermark may exceed the label area. (Solution: When printing labels, if the watermark exceeds the printable area, also print a picking list.) Reference link: https://help.jfwms.com/zh_CN/doc-article/1002910526-
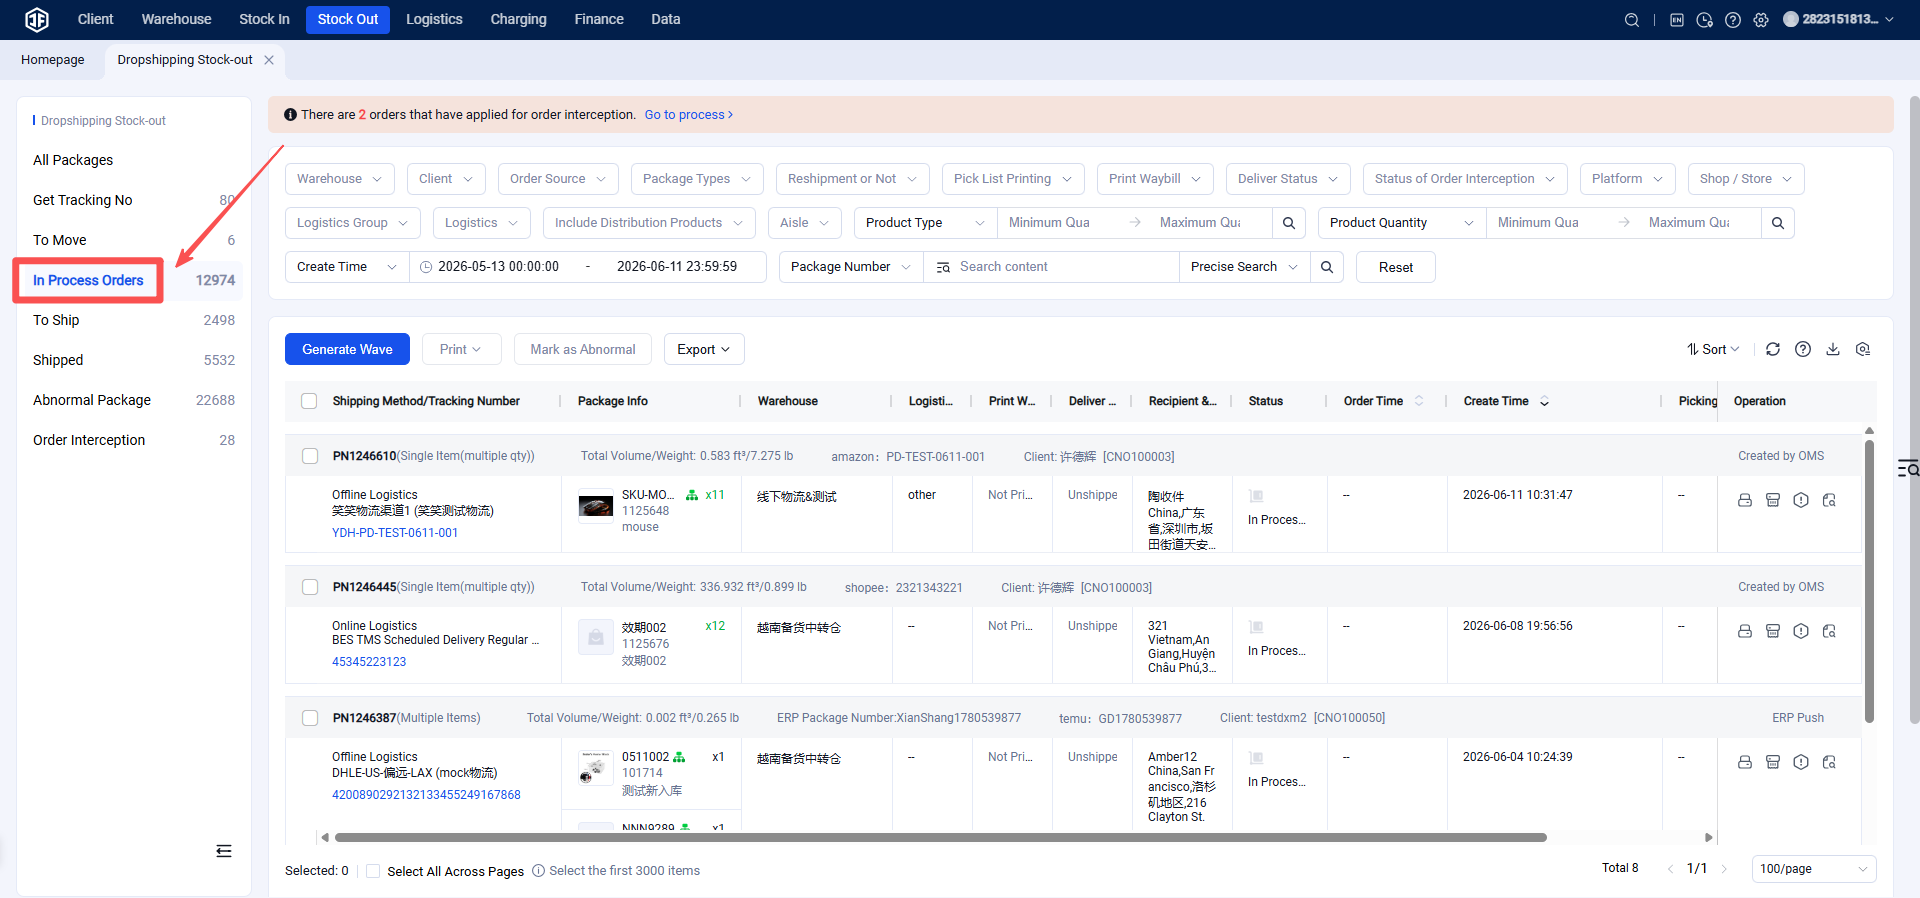
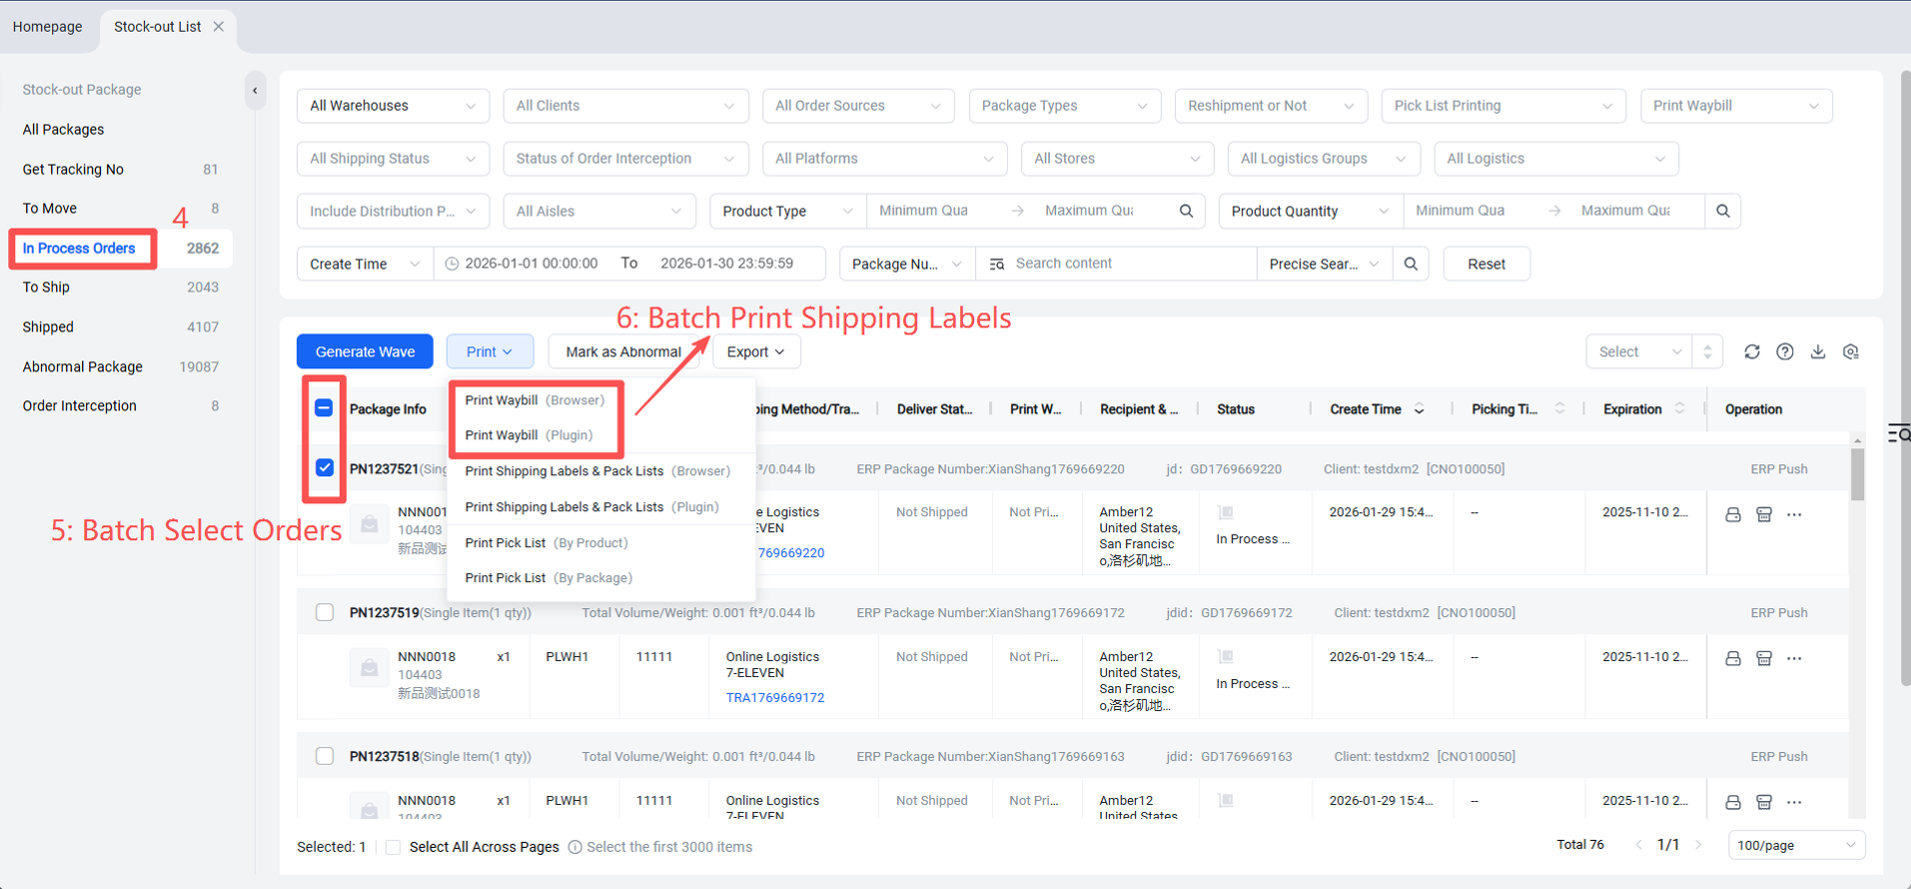
Step 2: Print Shipping Label (with watermark)
Step 3: Scan and Verify Items (This step is optional and can be performed to prevent picking errors by warehouse staff.)
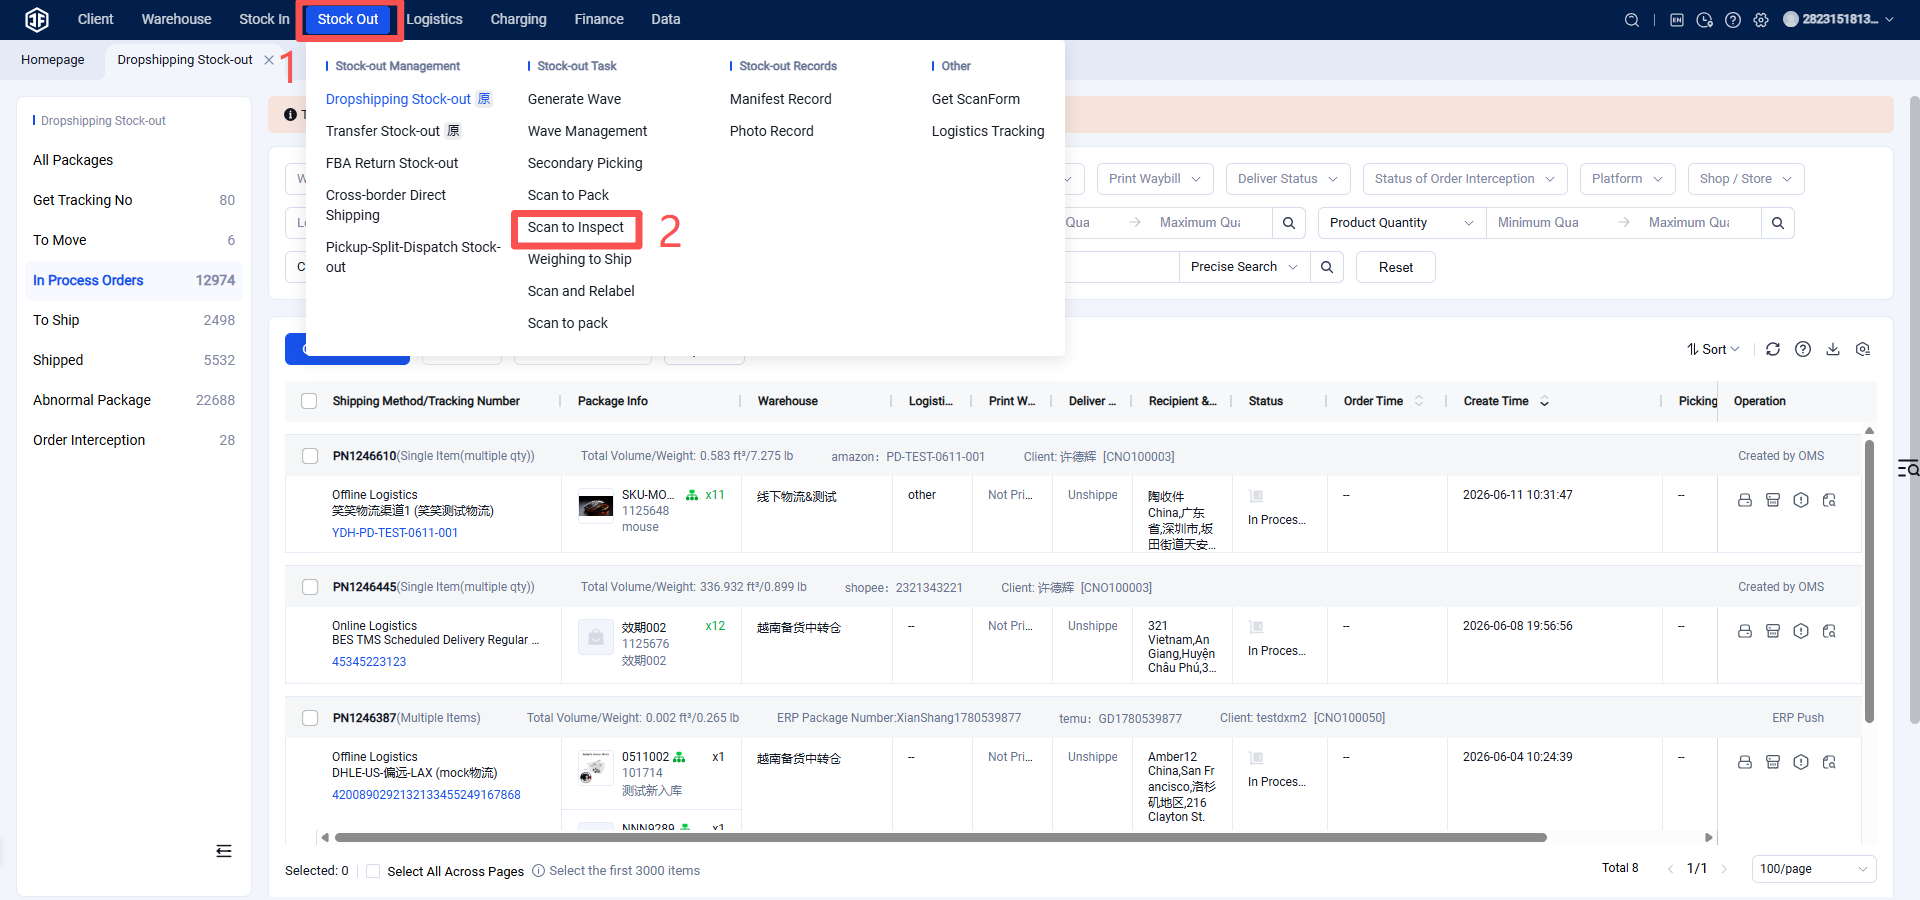
Scan the shipping label (tracking number) to verify the items.
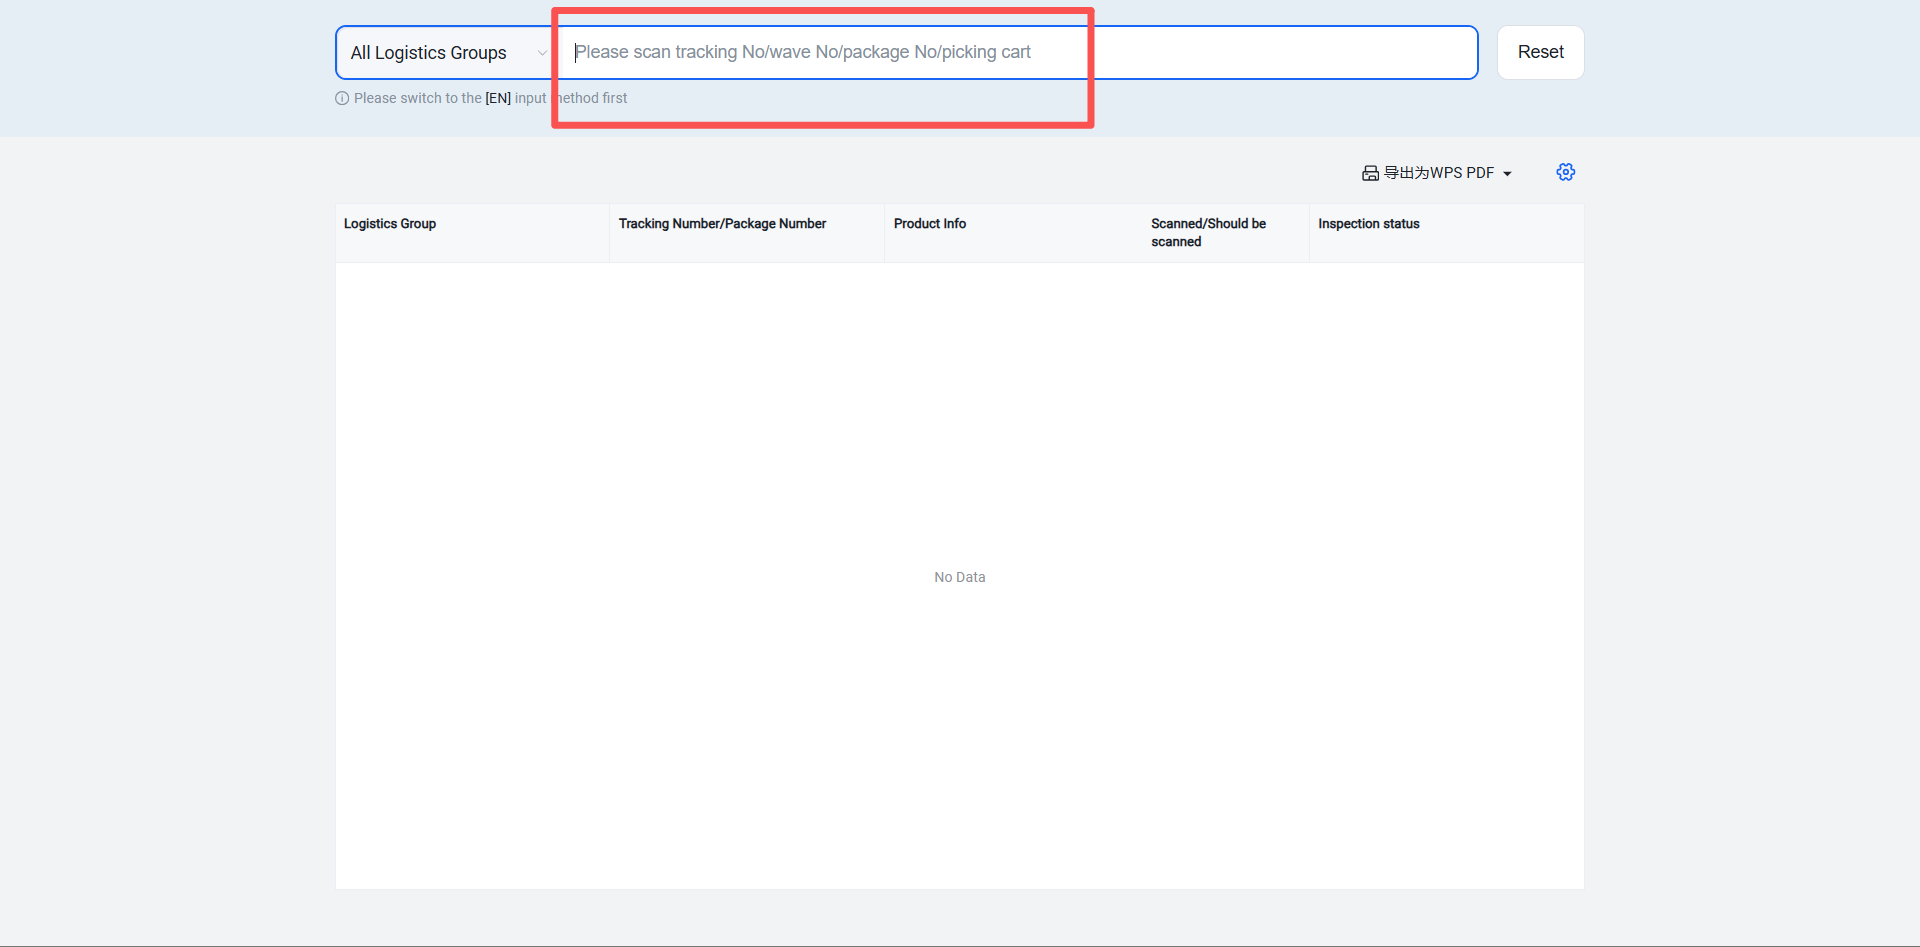
【Scanning Settings】
Auto-complete verification upon scanning the package: Scanning the package number or tracking number successfully will automatically complete the verification for this package. This mode does not require scanning individual product labels.
Auto-complete verification upon scanning the product: When a product is scanned successfully, verification for the currently scanned SKU is automatically completed.
Standard verification: First scan the document (e.g., picking list), then scan the products to complete verification.
【Shipping Label Printing Settings】 Since the shipping label has already been printed, no label needs to be printed during the scan verification process. Enable this setting to disable label reprinting.
Note: Before entering the scanning and verification page, ensure the Jifeng Print Plugin is installed and active. If it is not installed or not open, a pop-up prompt will appear to guide you through the installation.
Step 4: Ship or Scan to Ship (Shipment can be triggered automatically during the previous scanning and verification step, initiated manually, or by scanning after weighing.)
To enable shipment upon scanning verification, configure the following:
Overseas warehouses that require weighing and scanning for shipment need to configure the following settings:
Method Three: Print Picking List + Print Shipping Label (Picking list defaults to A4 paper)
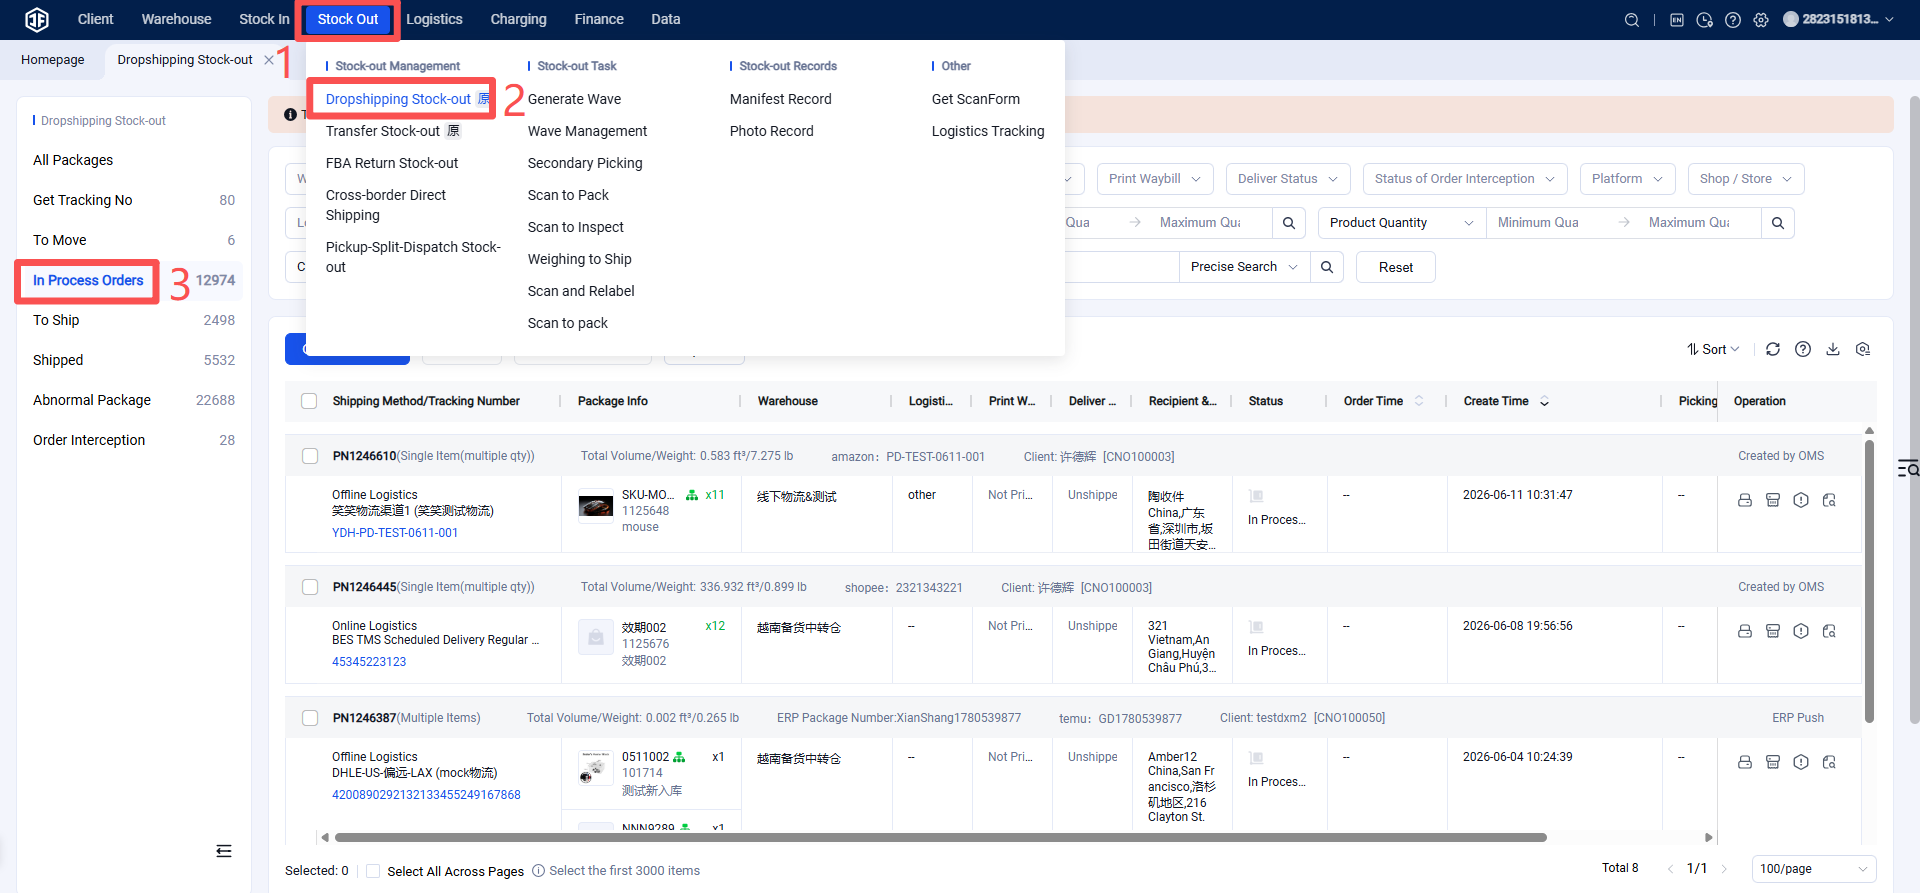
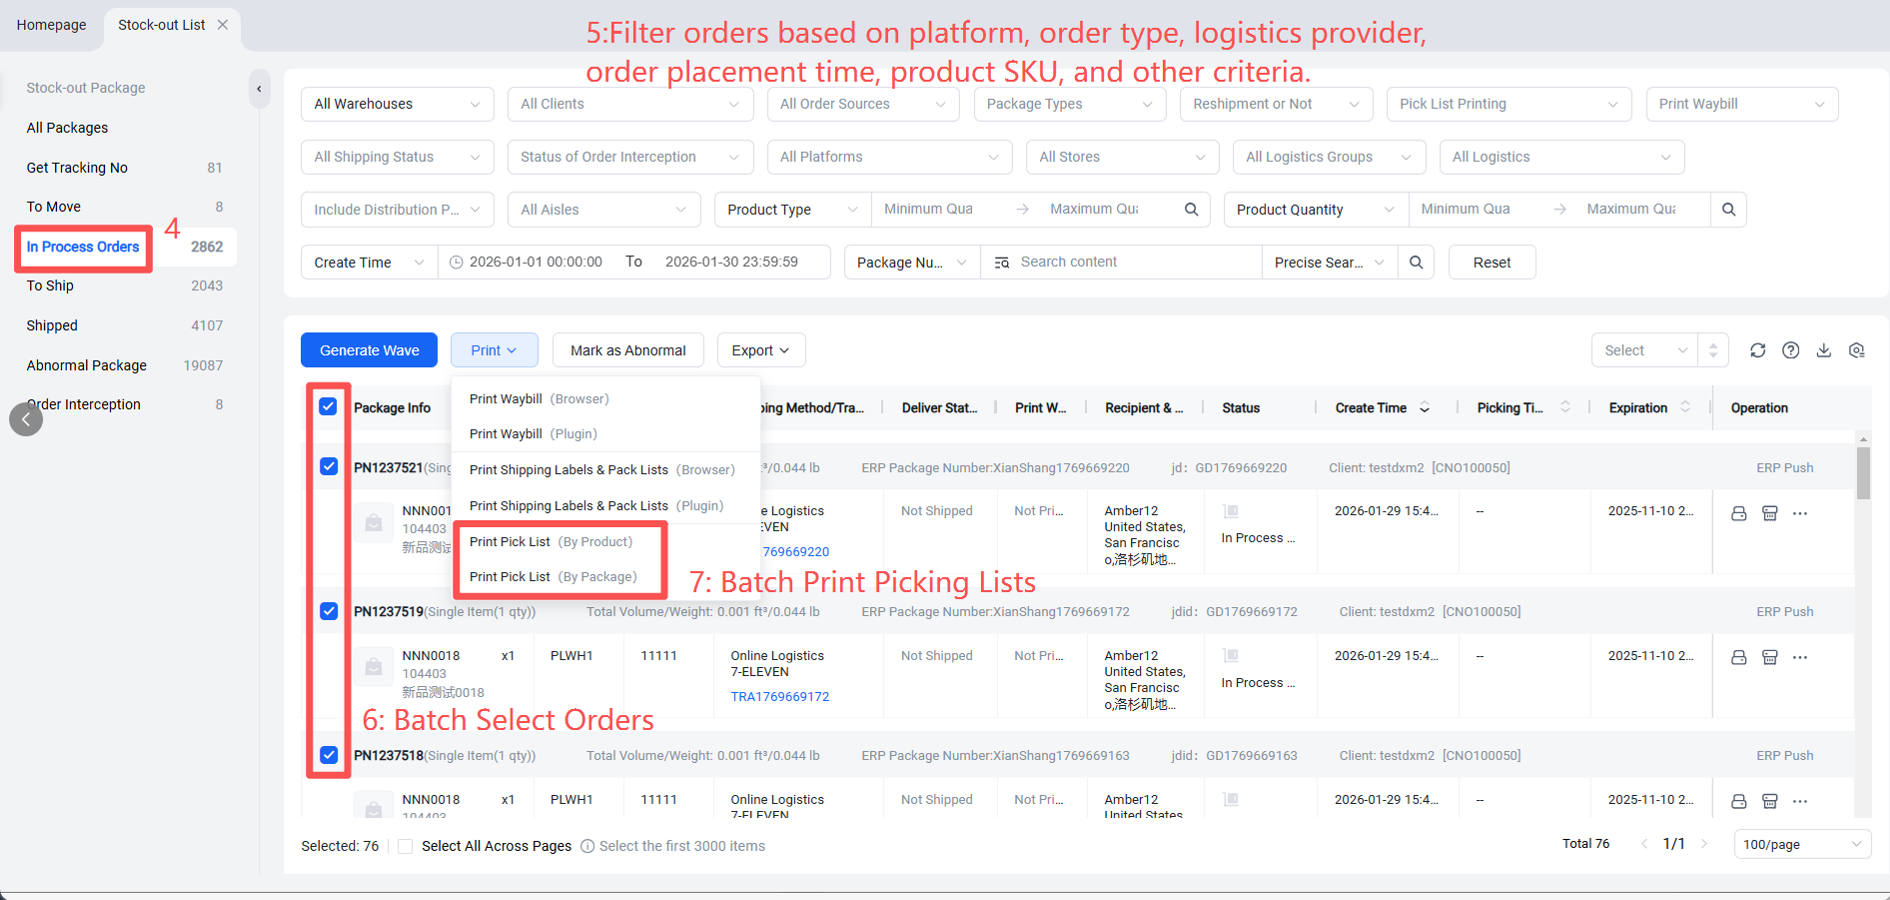
Configure the picking list template. The warehouse then filters orders based on criteria such as platform, order time, SKU, logistics provider, etc. Select the orders, print the picking list, pick items according to the list, and then proceed to scan and verify items or scan products directly to generate shipping labels.
Step 1: Configure Picking List Template
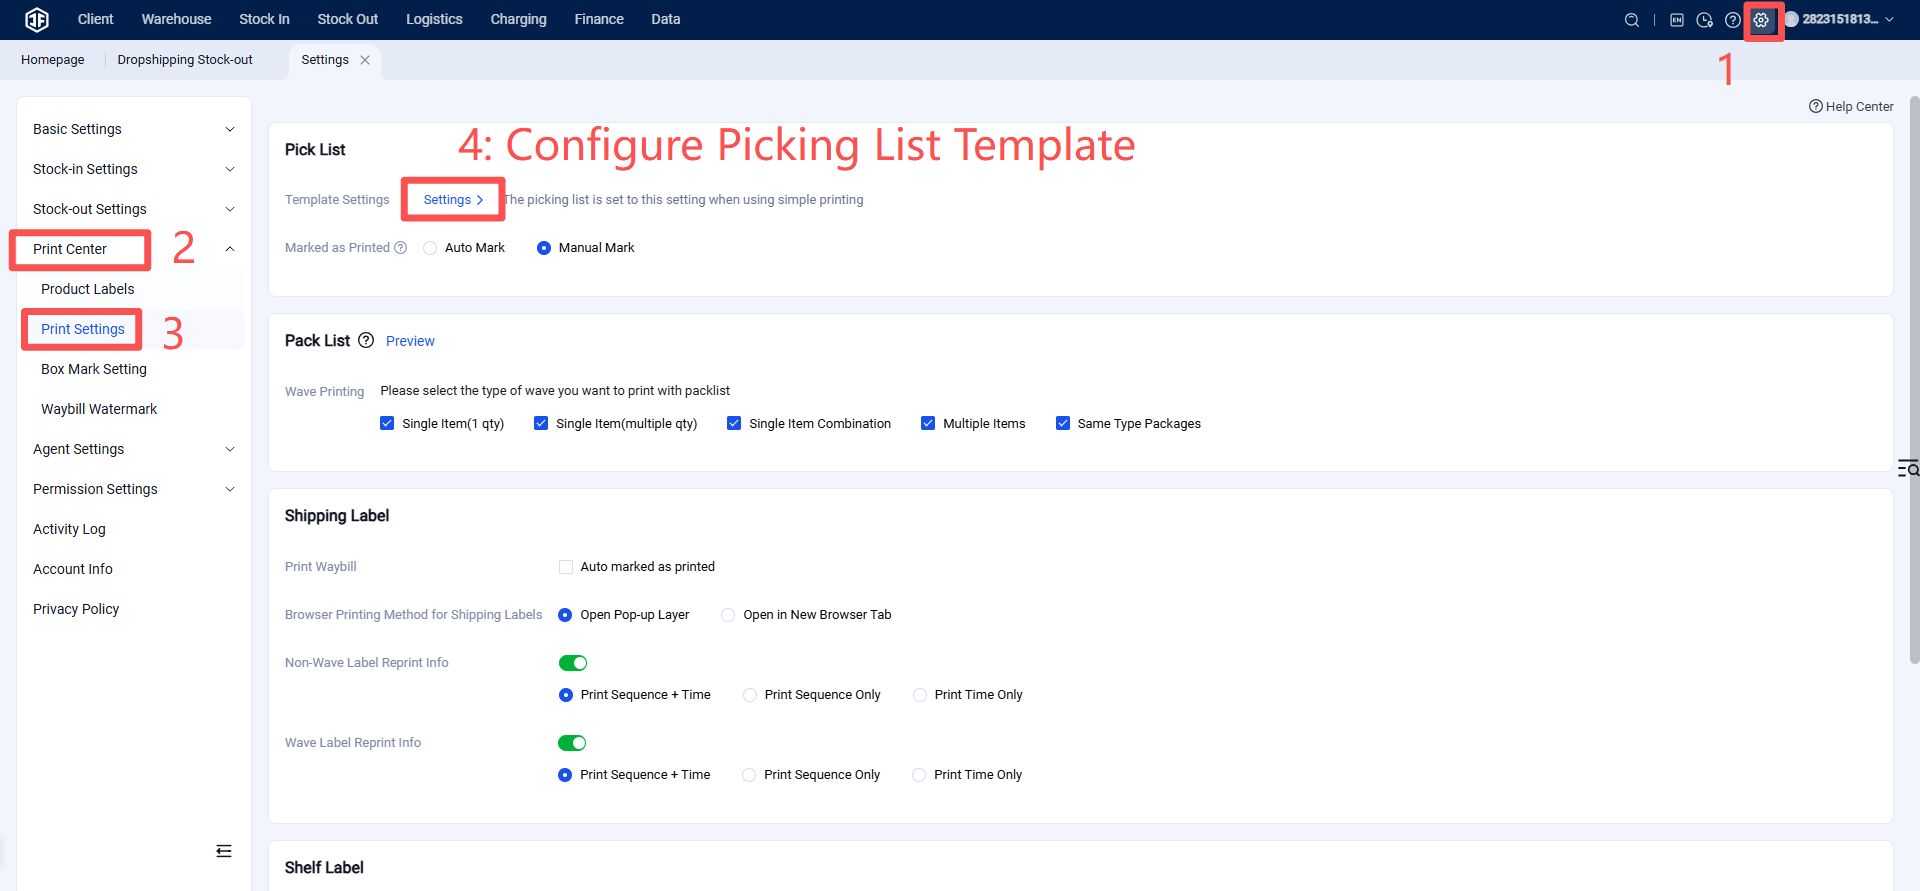
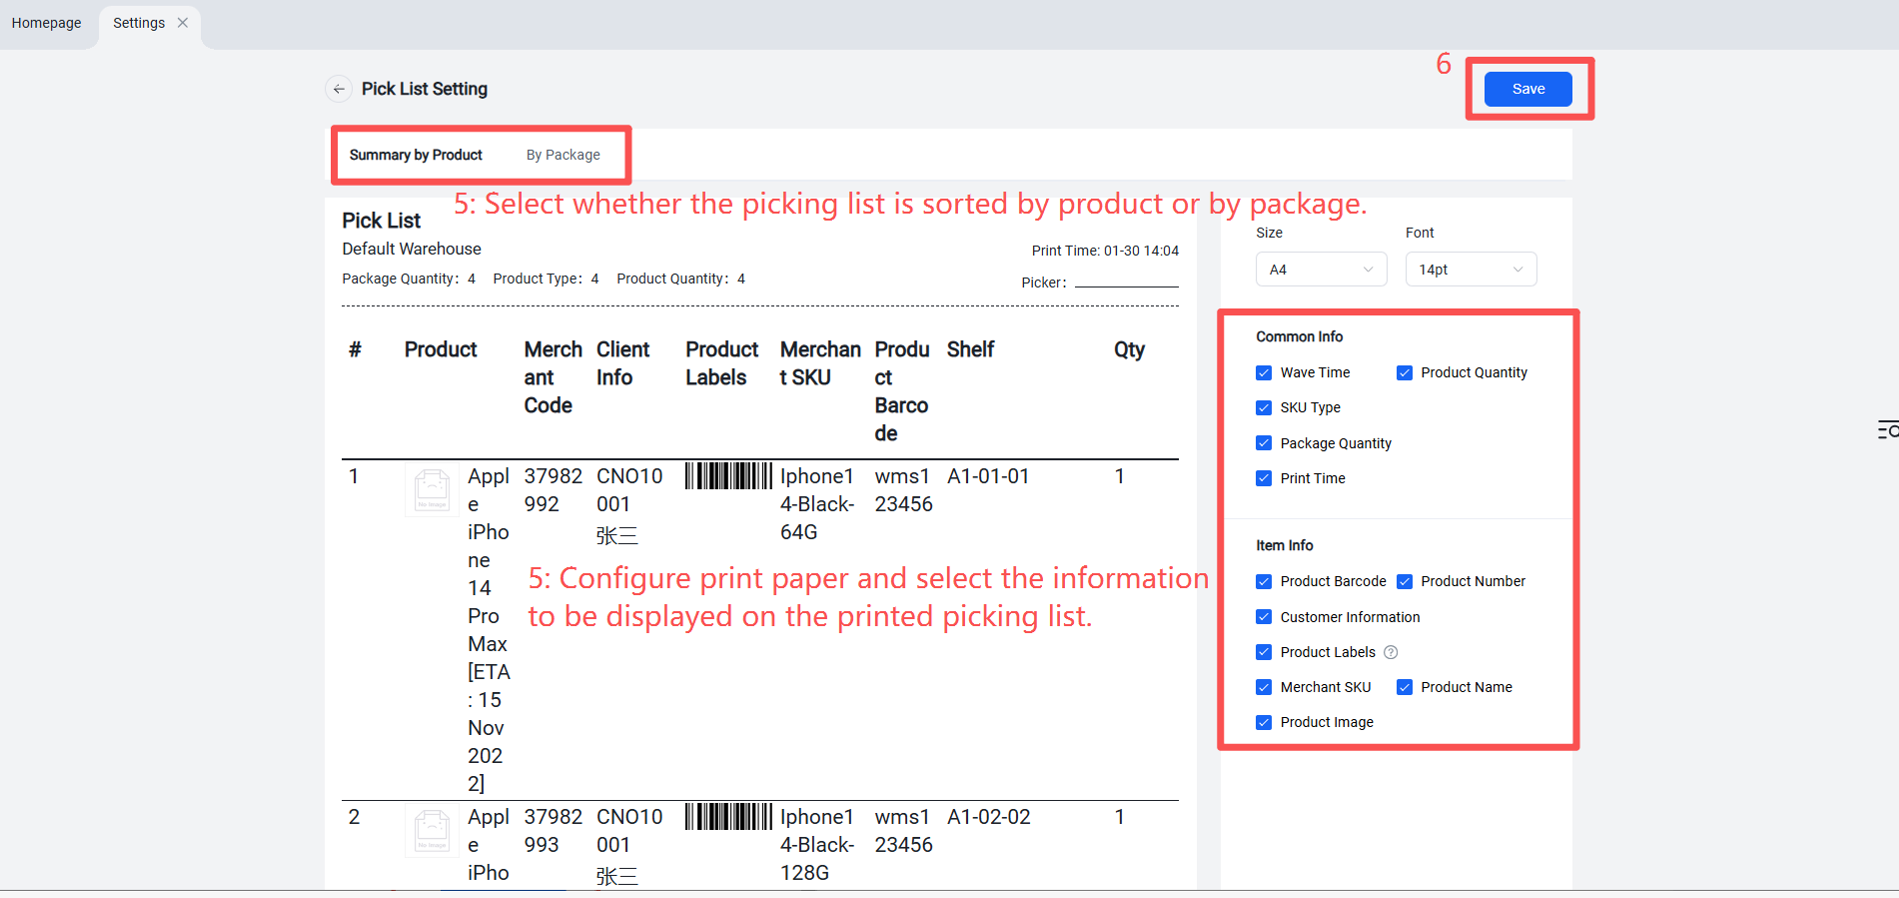
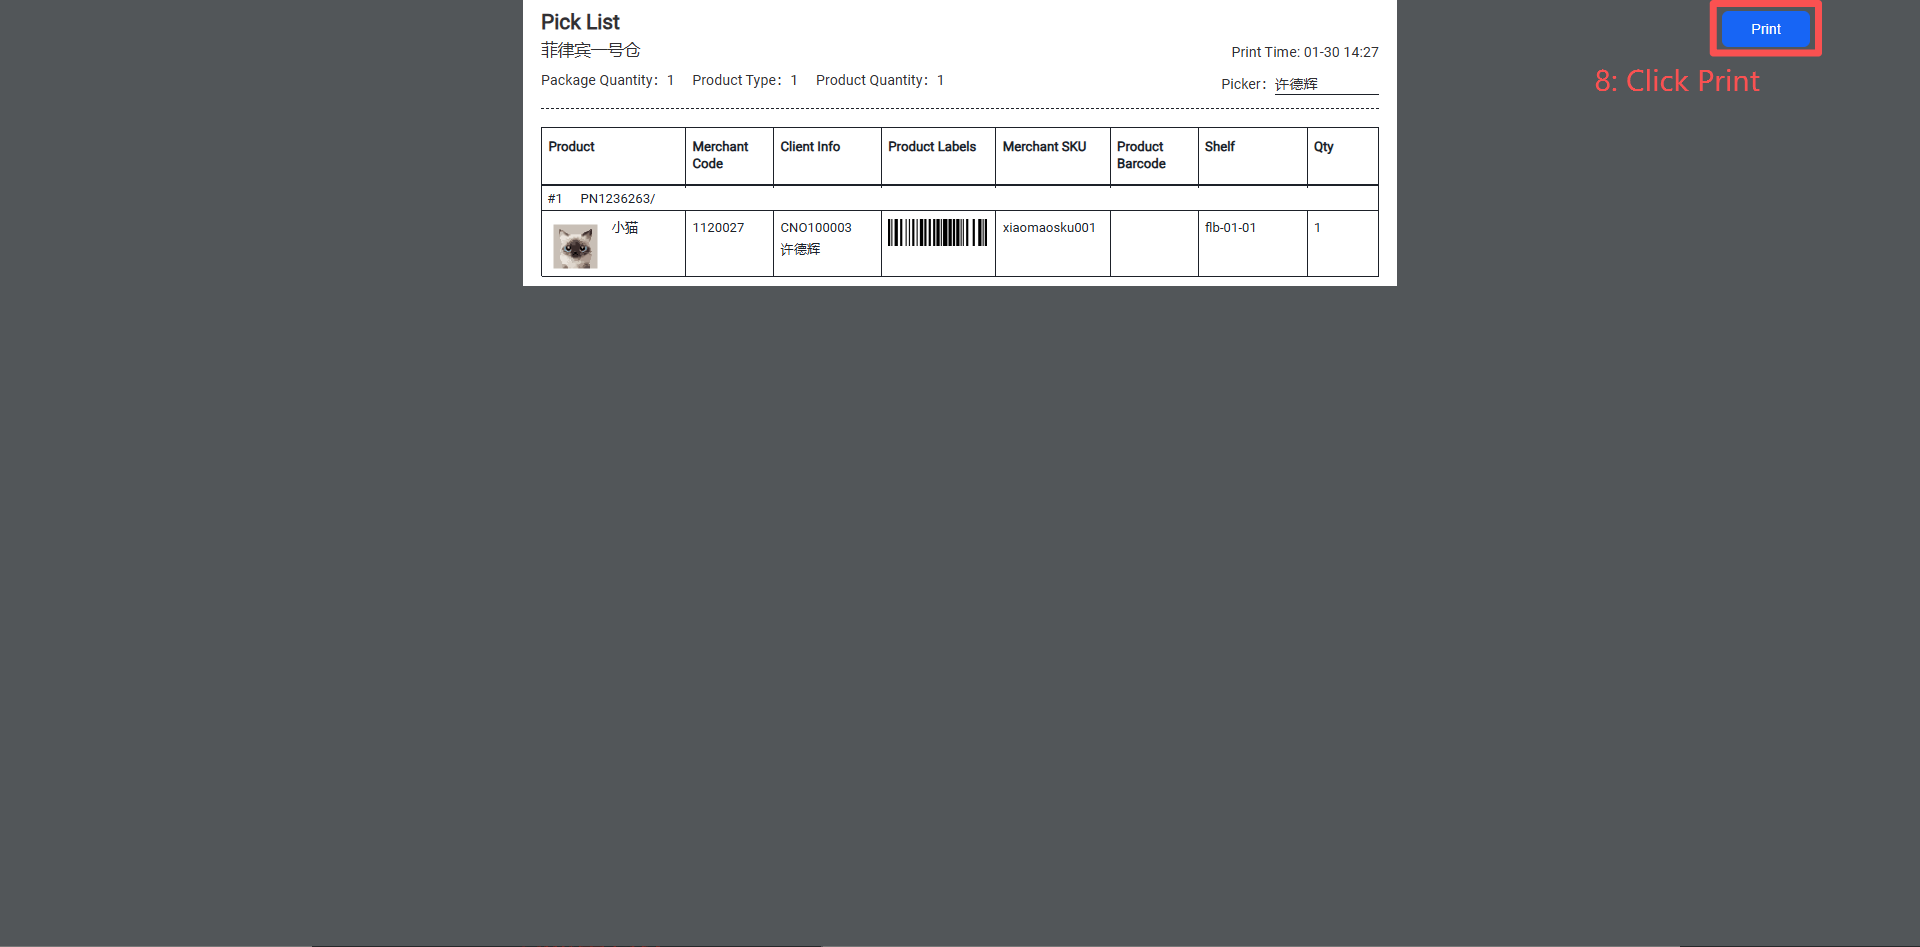
Step 2: Print Picking List (Pick items by package)
Step 3: Scan and Verify Items (This step is optional and can be performed to prevent picking errors by warehouse staff.)
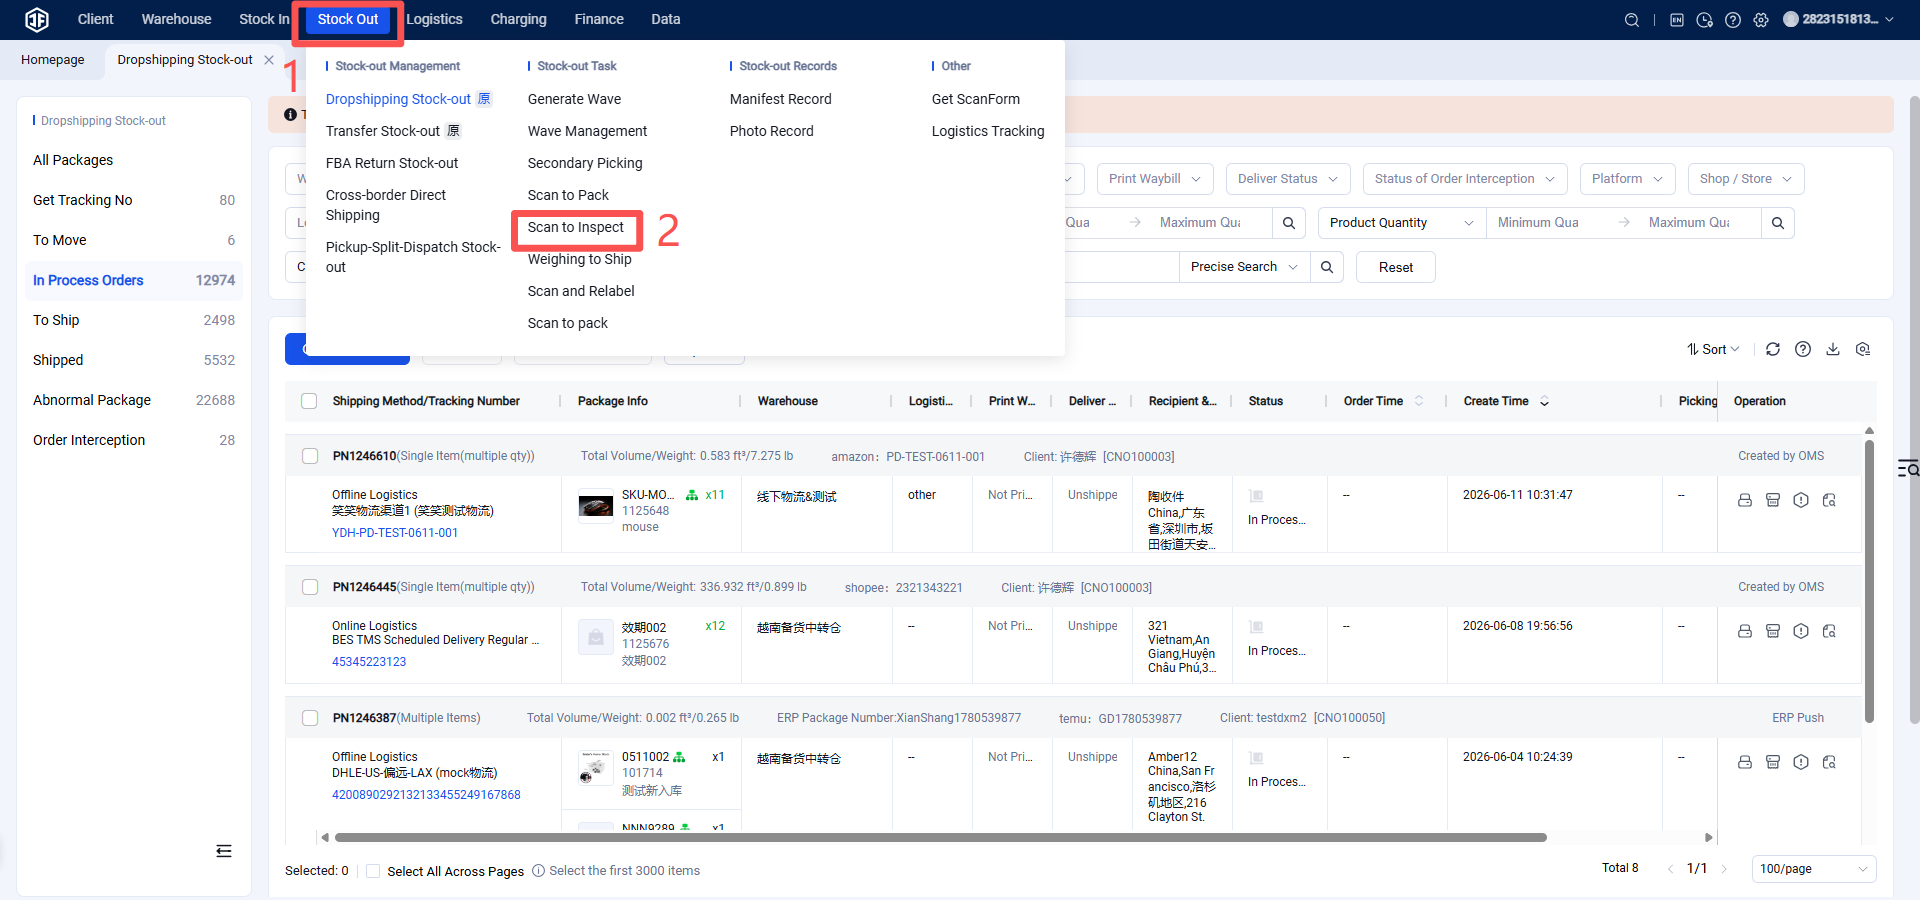
Scan the shipping label (tracking number) to verify the items.
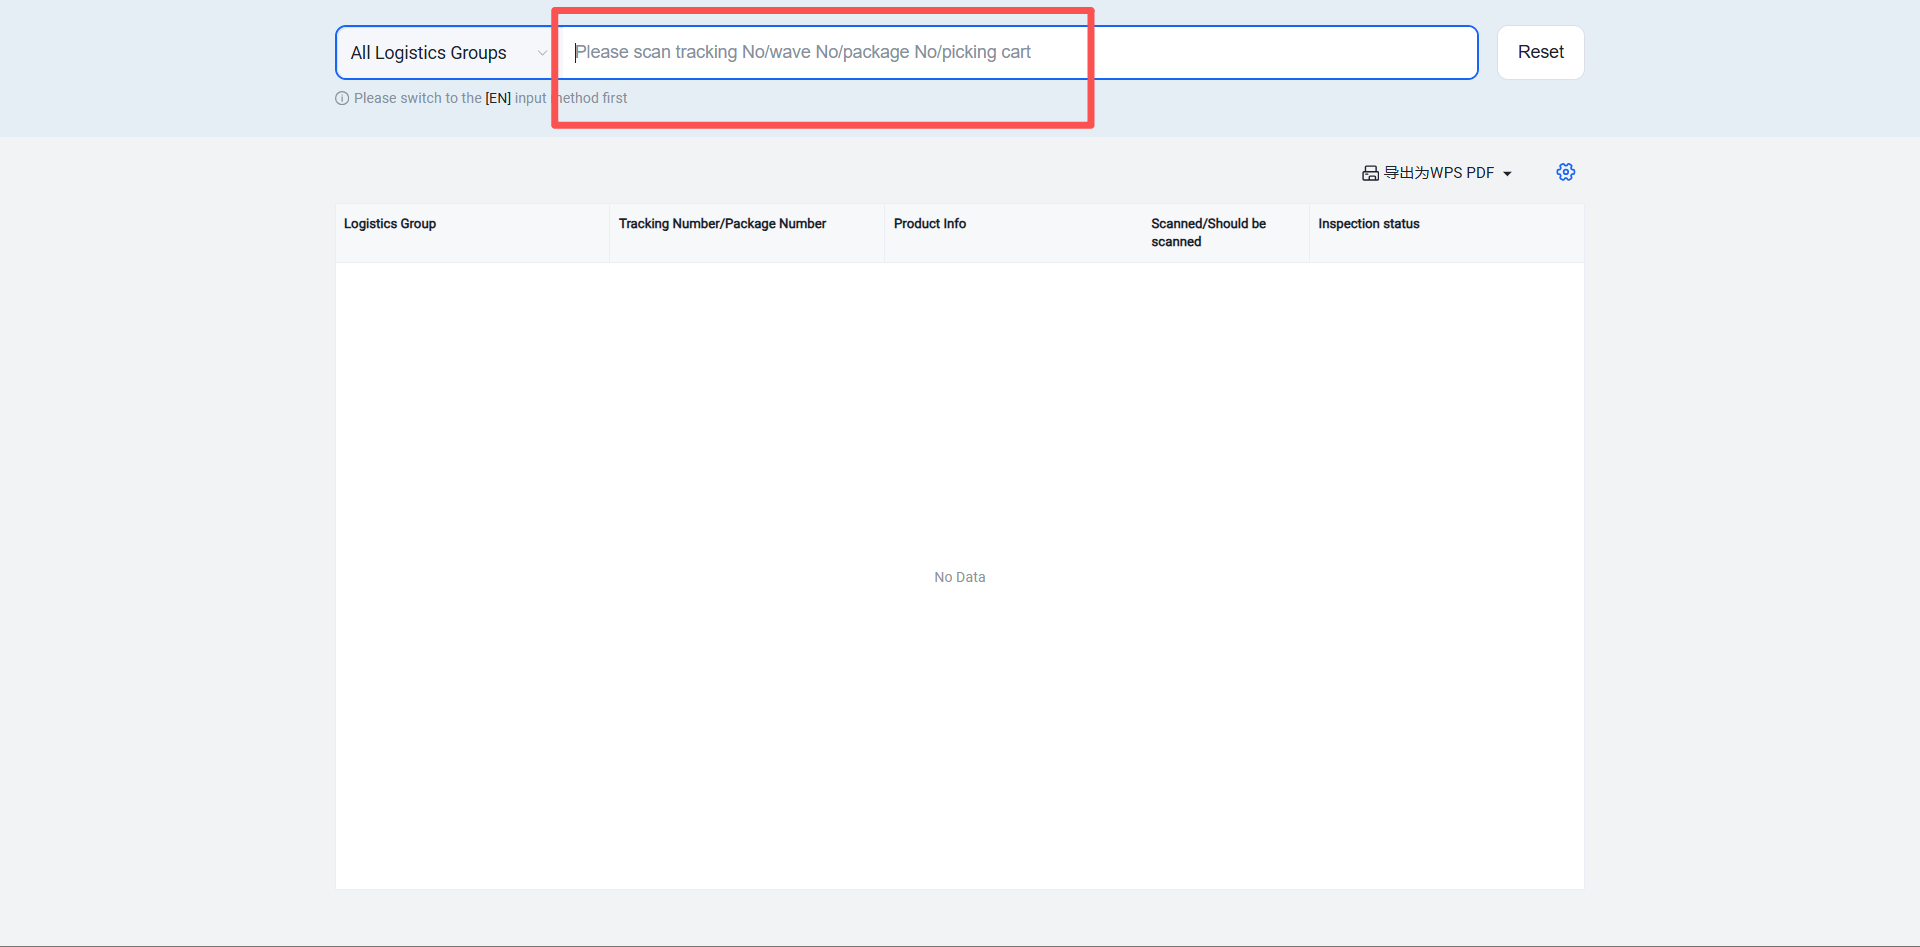
【Scanning Settings】
Auto-complete verification upon scanning the package: Scanning the package number or tracking number successfully will automatically complete the verification for this package. This mode does not require scanning individual product labels.
Auto-complete verification upon scanning the product: When a product is scanned successfully, verification for the currently scanned SKU is automatically completed.
Standard verification: First scan the document (e.g., picking list), then scan the products to complete verification.
【Shipping Label Printing Settings】 Since the shipping label has already been printed, no label needs to be printed during the scan verification process. Enable this setting to disable label reprinting.
Note: Before entering the scanning and verification page, ensure the Jifeng Print Plugin is installed and active. If it is not installed or not open, a pop-up prompt will appear to guide you through the installation.
Step 4: Ship or Scan to Ship (Shipment can be triggered automatically during the previous scanning and verification step, initiated manually, or by scanning after weighing.)
To enable shipment upon scanning verification, configure the following:
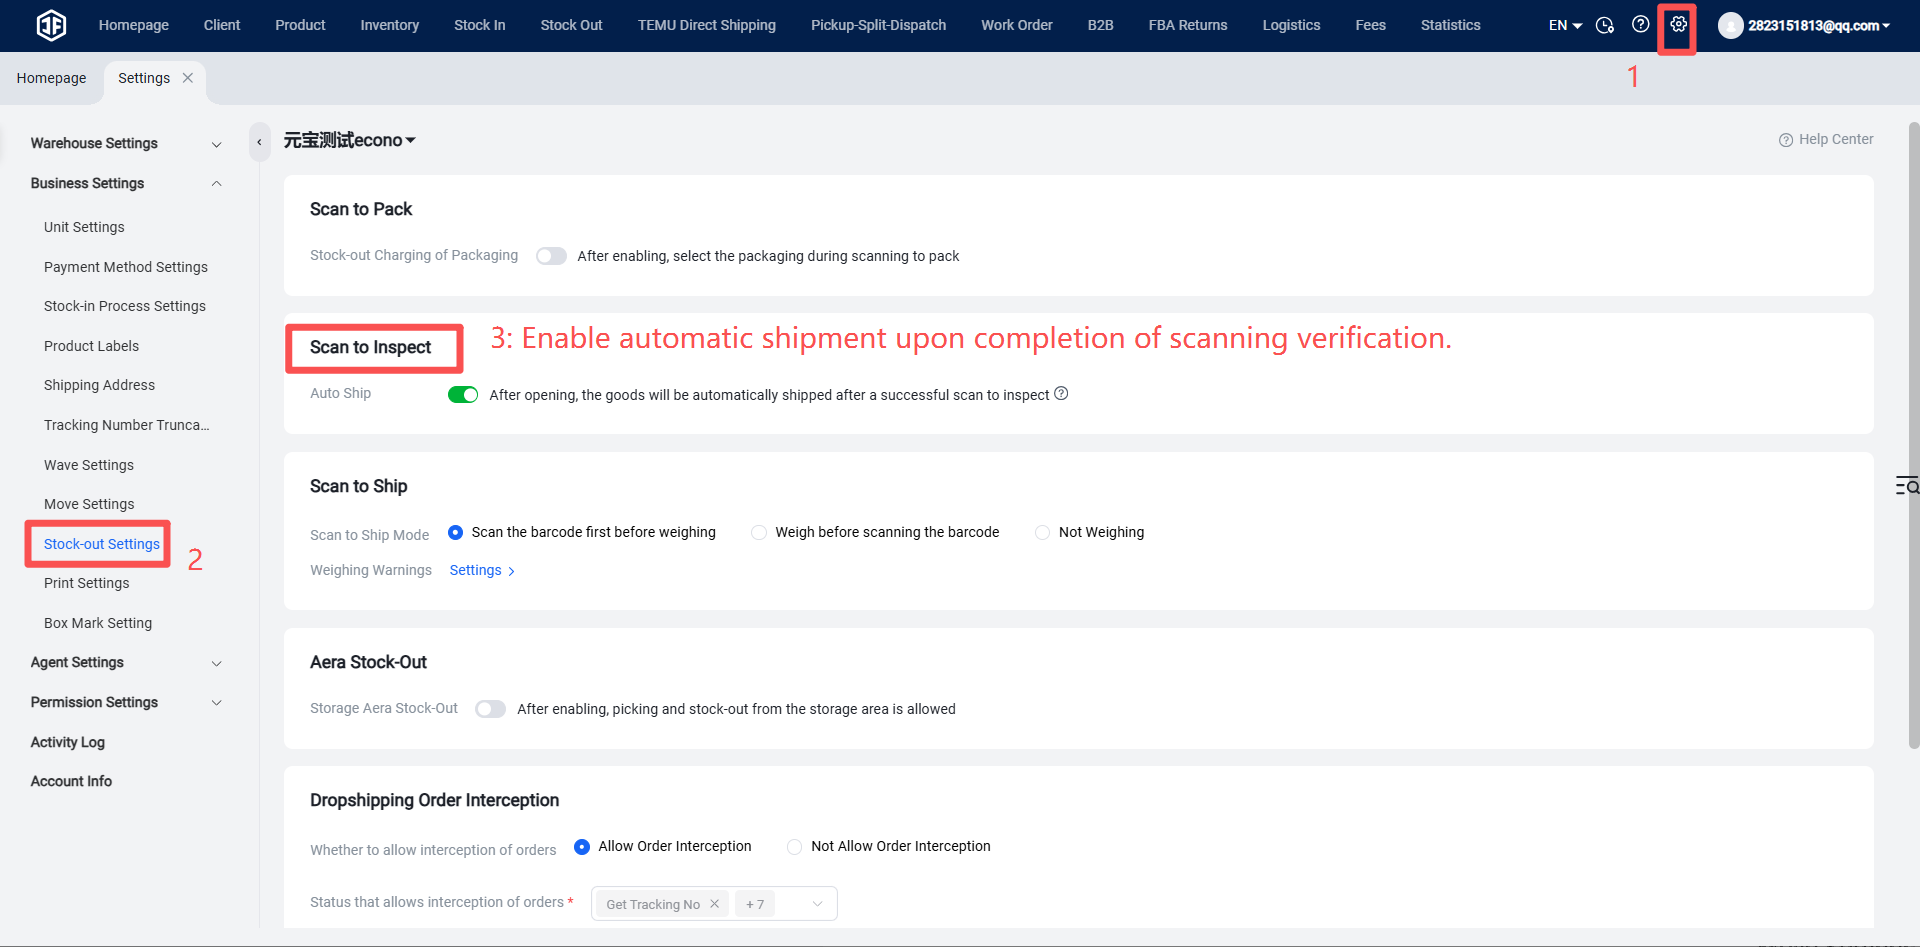
Overseas warehouses that require weighing and scanning for shipment need to configure the following settings: